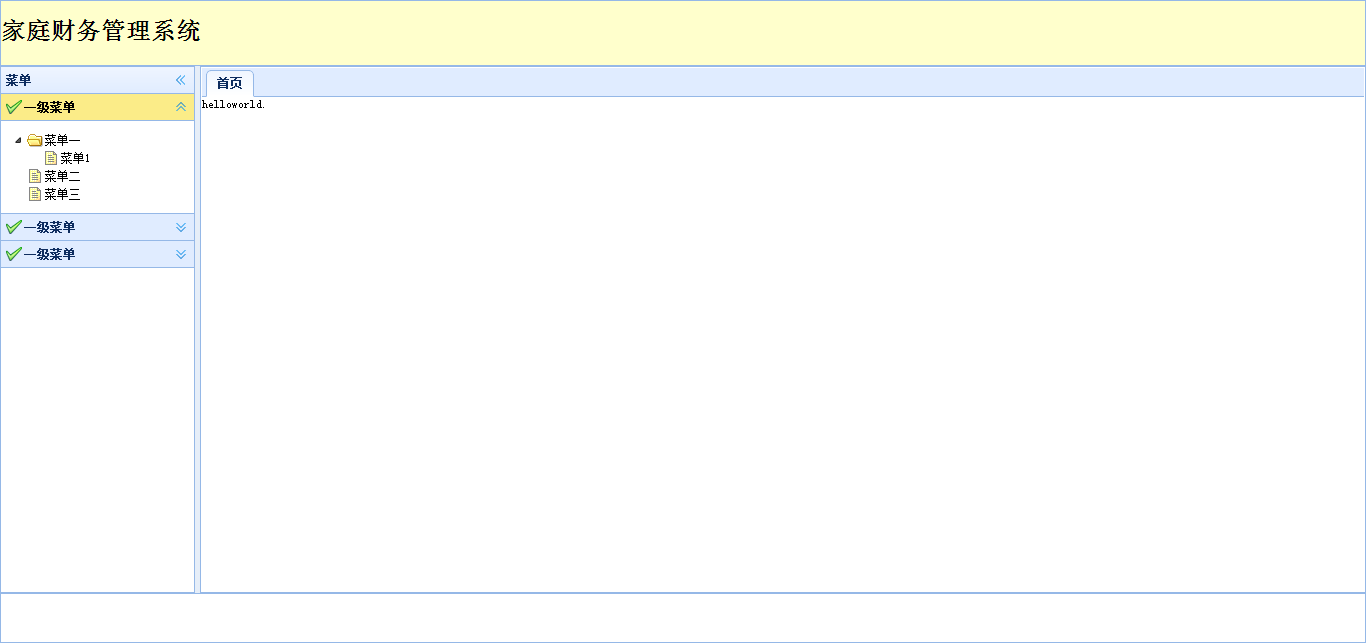
先贴个效果图:
用easyui-layout布局主框架,index.jsp内容如下:
<%@ page language="java" contentType="text/html; charset=utf-8"
    pageEncoding="UTF-8"%>
<!DOCTYPE html PUBLIC "-//W3C//DTD HTML 4.01 Transitional//EN" "http://www.w3.org/TR/html4/loose.dtd">
<%
    String path = request.getContextPath();
    String basePath = request.getScheme() + "://"
            + request.getServerName() + ":" + request.getServerPort()
            + path ;
%>
<html>
<head>
<meta http-equiv="Content-Type" content="text/html; charset=utf-8">
<title>家庭财务管理系统</title>
<link rel="stylesheet" type="text/css"
    href="<%=basePath%>/res/css/easyui/default/easyui.css">
<link rel="stylesheet" type="text/css" href="<%=basePath%>/res/css/easyui/icon.css">

<script type="text/javascript" src="<%=basePath%>/res/js/jquery.min.js"></script>
<script type="text/javascript" src="<%=basePath%>/res/js/jquery.easyui.min.js"></script>
<script type="text/javascript" src="<%=basePath%>/res/js/easyui-lang-zh_CN.js"></script>
<script>
$(function(){
	$('#tabs').tabs('add',{
		title:'首页',
        href:'main.jsp',
        closable:false
	});
	$('.easyui-tree').tree({
        onClick:function(node){

        }
    });
});
</script>
</head>
<body class="easyui-layout">
    <div data-options="region:'north',noheader:true,split:false" style="height:66px;background:#FFFFCC">
        <h1>家庭财务管理系统</h1>
    </div>
    <div data-options="region:'south',noheader:true,split:false" style="height:50px;"></div>
    <div data-options="region:'west',title:'菜单',split:true" style="width:200px;">
        <div class="easyui-accordion"  border="false" id='menu'>
            ${menus}
         </div>
    </div>
    <div data-options="region:'center'," style="padding:1px;">
        <div id='tabs' class="easyui-tabs" data-options="fit:true,border:false">
        </div>
    </div>
</body>
</html>
布局是经典式布局,北南西中,北以后可以换成一个logo图片,西边放操作菜单,南边是copyright等,主内容区对应菜单点击后的各个页面,以tab来实现。
下面来看左菜单的实现。
package system.homebank.controller;

import java.util.List;

import javax.annotation.Resource;

import org.springframework.stereotype.Controller;
import org.springframework.ui.Model;
import org.springframework.web.bind.annotation.RequestMapping;

import system.homebank.entity.Menu;
import system.homebank.service.MenuService;
import system.homebank.utils.MenuUtils;

@Controller
public class HomePageController
{
  @Resource
  private MenuService service;

  @RequestMapping("/home.do")
  public String forward(Model model)
  {
    List<Menu> list = this.service.getAllMenu();
    String menus = MenuUtils.buildMenus(list);
    model.addAttribute("menus", menus);
    return "/index";
  }
}
上面forward控制主页转向的,里面的代码主要是准备主页数据,暂时只准备左侧菜单数据,以后会有其他数据。
MenuService接口中主要提供菜单数据的读取。
MenuUtils.buildMenus(list)将菜单数据解析成html串。
package system.homebank.utils;

import java.util.ArrayList;
import java.util.HashMap;
import java.util.List;
import java.util.Map;

import system.homebank.entity.Menu;
import system.homebank.model.TreeNode;

public class MenuUtils
{
  public static String buildMenus(List<Menu> menuList)
  {

    if (menuList == null)
    {
      return null;
    }
    List<TreeNode> nodeList = new ArrayList<TreeNode>();
    for (Menu m : menuList)
    {
      TreeNode treeNode = new TreeNode(m.getId(), m.getMenuname(),m.getUrl(), m.getParentid());
      nodeList.add(treeNode);
    }
    Map<String,TreeNode> map = new HashMap<String,TreeNode>();
    for (TreeNode node : nodeList)
    {
      map.put(node.getId(), node);
    }
    List<TreeNode> ret = new ArrayList<TreeNode>();
    for (TreeNode node : nodeList)
    {
      String id = node.getId();
      String parentid = node.getParentid();
      if (parentid.compareTo(id) == 0 )
      {
        ret.add(node);
      }
      else
      {
        TreeNode parentNode = (TreeNode)map.get(parentid);
        if (parentNode == null)
        {
          throw new RuntimeException(String.format("节点%s的父节点%s没找到", node.getId(),parentid));
        }
        parentNode.addChild(node);
      }
    }

    return createHtml(ret);
  }
  private static String createHtml(List<TreeNode> list)
  {
    String result = "";
    String menu = "<div title=\"%s\" iconCls=\"icon-ok\"  style=\"padding:10px;\"><ul class=\"easyui-tree\" data-options='data:%s'></ul></div>";
    for (TreeNode o : list)
    {
      result = result + String.format(menu, new Object[] { o.getText(), JSONBinder.buildNormalBinder().toJson(o.getChildren()) });
    }
    return result;
  }
}
上面用到了TreeNode结构,TreeNode.java内容如下:
package system.homebank.model;

import java.io.Serializable;
import java.util.ArrayList;
import java.util.List;

public class TreeNode implements Serializable
{
  private static final long serialVersionUID = 2235783844919124916L;
  private String id;
  private String text;
  private Attributes attributes;
  private String parentid;
  private List<TreeNode> children;

  public TreeNode()
  {
  }
  public TreeNode(Integer id, String text,String url, Integer parentid)
  {
    this.id = id.toString();
    this.text = text;
    this.attributes = new Attributes();
    this.attributes.setUrl(url);
    this.parentid = parentid.toString();
  }
  public void addChild(TreeNode child)
  {
    if (this.children == null)
    {
      this.children = new ArrayList<TreeNode>();
    }
    this.children.add(child);
  }
  public String getId()
  {
    return id;
  }
  public void setId(String id)
  {
    this.id = id;
  }
  public String getText()
  {
    return text;
  }
  public void setText(String text)
  {
    this.text = text;
  }

  public Attributes getAttributes()
  {
    return attributes;
  }
  public void setAttributes(Attributes attributes)
  {
    this.attributes = attributes;
  }
  public String getParentid()
  {
    return parentid;
  }
  public void setParentid(String parentid)
  {
    this.parentid = parentid;
  }
  public List<TreeNode> getChildren()
  {
    return children;
  }
  public void setChildren(List<TreeNode> children)
  {
    this.children = children;
  }

}
TreeNode表示一个树的节点,节点的附加信息放到Attribultes中, Attribultes中我暂时只放了url信息,当点击菜单时,根据url去向后台发送相应的请求。
以上为实现左菜单的主要代码。
菜单表的设计如下:
CREATE TABLE `menu` (
  `id` decimal(4,0) NOT NULL,
  `menuname` varchar(50) NOT NULL,
  `url` varchar(100) DEFAULT NULL,
  `parentid` decimal(4,0) DEFAULT NULL,
  PRIMARY KEY (`id`)
)
以上为本次全部内容,系统功能全部实现后,再放上源码上来。