conda使用教程
1.安装miniconda
wget https://repo.anaconda.com/miniconda/Miniconda3-latest-Linux-x86_64.sh ;bash ./Miniconda3-latest-Linux-x86_64.sh;
2.配置configure
~/.condarc
conda config --add channels https://mirrors.tuna.tsinghua.edu.cn/anaconda/pkgs/free/
conda config --add channels https://mirrors.tuna.tsinghua.edu.cn/anaconda/cloud/conda-forge
conda config --add channels https://mirrors.tuna.tsinghua.edu.cn/anaconda/cloud/msys2/
conda config --set show_channel_urls yes
conda config --remove-key channels #恢复默认镜像
3.查看已配置的channels
conda config --get channels
4.创建环境和安装包
conda create -n env_name package_name  # 创建env_name环境以及在该环境下安装package_name包
source activate env_name, source deactivate env_name  # 激活或者禁用当前环境
conda info --env,conda env list  # 查看所有的环境,带*的为激活的环境
conda create -n env_name python=3.5  # 在env_name 环境中指定暗转python3.5版本
conda list  # 列出当前环境下所有安装包
conda list -n my_env  # 列出 my_env环境中所有的安装包
conda list --export > package-list.txt  # 把当前环境中的所有包导出list,以备后续使用
conda create -n my_env --file package-list.txt  # 对导出的包list重新安装到my_env 环境中
conda search package_name  # 搜索是否有这个安装包,没有的话无法使用conda install 安装
source activate env_name;  # conda install package_name,在env_name环境中安装包
conda info -e #显示环境信息
conda env remove -n env_name #删除环境
例如: 创建外显子测序流程中测序分析环境wes,并在wes中安装外显子分析相关软件,安装完毕后activate环境即可在该环境下分析wes,以避免软件冲突
conda create -n wes bcftools vcftools python=2 bwa
source activate wes
5. 删除环境
conda env remove -n env_name
6.conda安装/卸载当前channels中不存在的包
anaconda search -t conda xxx #首先搜索包和对应的channel,注意这里是anaconda,而不是conda
anaconda show rpetit3/aspera-connect #查看包详情
conda install -c rpetit3 aspera-connect  #安装rpetit3 channel中的aspera-connect包
7.更新和卸载包
conda update package_name
conda uninstall package_name, conda remove package_name
conda uninstall -n env package_name # 删除env环境中的xxx包 uninstall可以用remove代替
conda update --all #更新所有包
8.conda 更新
1 conda update conda
conda配置文件
~/.condarc
channels:
  - "'https://mirrors.tuna.tsinghua.edu.cn/anaconda/pkgs/main'"
  - "'https://mirrors.tuna.tsinghua.edu.cn/anaconda/pkgs/free'"
  - "'https://mirrors.tuna.tsinghua.edu.cn/anaconda/pkgs/pro'"
  - defaults
show_channel_urls: true
envs_dirs:
  - /conda_envs
pkgs_dirs:
  - /conda_pkgs
conda安装Jupyterlab
安装juperlab
1、在开始菜单中打开Anaconda Prompt
2、执行jupyter lab安装命令:conda install nodejs jupyterlab
3、升级jupyter内核和客户端:conda update jupyter_core jupyter_client
4、启动jupyter lab:jupyter lab
   启动jupyter notebook:jupyter notebook
配置
配置密码
1.进入python命令行模式
from notebook.auth import passwd
passwd()
输入方便你记的密码,连续输;两次..输完密码后,会输出一个字符串,形如: ’sha1:9e7a5c5e0a29:8cbdvsv2344d141c92beab1c5bc6e9avsdvdsvsv’将其保存下来, 完成以上操作后,通过exit()退出ipython环境
2.进入安装目录 .../jupyter执行
jupyter lab --generate-config
#命令会产生配置文件:/home/xxx/.jupyter/jupyter_notebook_config.py
3.编辑配置文件
 c.NotebookApp.ip = '*' # 允许访问此服务器的 IP,星号表示任意 IP
 c.NotebookApp.password = u'sha1:xxx:xxx' # 之前生成的密码 hash 字串
 c.NotebookApp.open_browser = False # 运行时不打开本机浏览器
 c.NotebookApp.port = 8888 # 使用的端口,随意设置
 c.NotebookApp.enable_mathjax = True # 启用 MathJax
 c.NotebookApp.allow_remote_access = True #允许远程访问
 c.NotebookApp.notebook_dir = '/home/xxxx/notebook'  #默认打开的工作目录
4.打开防火墙
   firewall-cmd --zone=public --add-port=8888/tcp --permanent
   firewall-cmd --query-port=8888/tcp
   firewall-cmd --reload
5.启动服务
#前台运行模式(命令行窗口不能关闭)
jupyter lab
#后台运行模式
nohup jupyter lab &
6.安装插件
-
安装nodejs
conda install -c conda-forge nodejs -
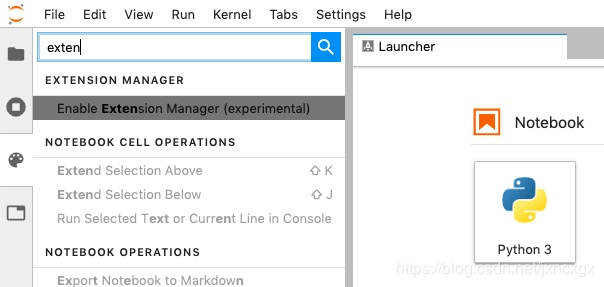
打开ExtensionManager
给Jupyterlab安装C++ kernel
https://blog.csdn.net/weixin_37543731/article/details/99254107
https://blog.csdn.net/jxncxgx/article/details/104576319
Jupyterlab 插件
https://zhuanlan.zhihu.com/p/101070029
- 显示系统信息https://www.ctolib.com/mip/jtpio-jupyterlab-system-monitor.html X
- go_to_definition插件
- toc插件https://github.com/jupyterlab/jupyterlab-toc
- autoversion插件 X
- drawio插件
- githubhttps://github.com/jupyterlab/jupyterlab-github
- LaTeXhttps://github.com/jupyterlab/jupyterlab-latex
- HTMLhttps://github.com/mflevine/jupyterlab_htmlX
- plotlyhttps://link.zhihu.com/?target=https%3A//github.com/jupyterlab/jupyter-renderers
- bokehhttps://link.zhihu.com/?target=https%3A//github.com/bokeh/jupyter_bokeh
- matplotlibhttps://github.com/matplotlib/ipympl X
- sqlhttps://github.com/pbugnion/jupyterlab-sql
- variableinspectorhttps://github.com/lckr/jupyterlab-variableInspector X
- gatherhttps://github.com/microsoft/gather
- lsphttps://github.com/krassowski/jupyterlab-lsp
- spreadsheethttps://github.com/quigleyj97/jupyterlab-spreadsheet
Jupyter notebook插件
插件安装
#pip
pip install jupyter_contrib_nbextensions
jupyter contrib nbextension install --user
pip install jupyter_nbextensions_configurator
jupyter nbextensions_configurator enable --user
#conda
conda install -c conda-forge jupyter_contrib_nbextensions
conda install -c conda-forge jupyter_nbextensions_configurator
Jupyter notebook 常用快捷键
命令行模式
f //查找并替换
x //剪切代码块
c //复制代码块
v //粘贴到下面
shift-v //粘贴到上面
d //删除代码块
z //撤销删除
shift-up/down //扩展选择单元格
shift-m //合并单元格
y //变成代码块
m //变成markdown
r //清楚代码块格式
shift-enter //运行并选择下面代码块
alt-enter //运行并插入下面代码块
ctrl-enter //运行选中的代码块
shift-space //向上滚动
space //向下滚动
编辑模式
CTRL+shift+'-' //切割换行
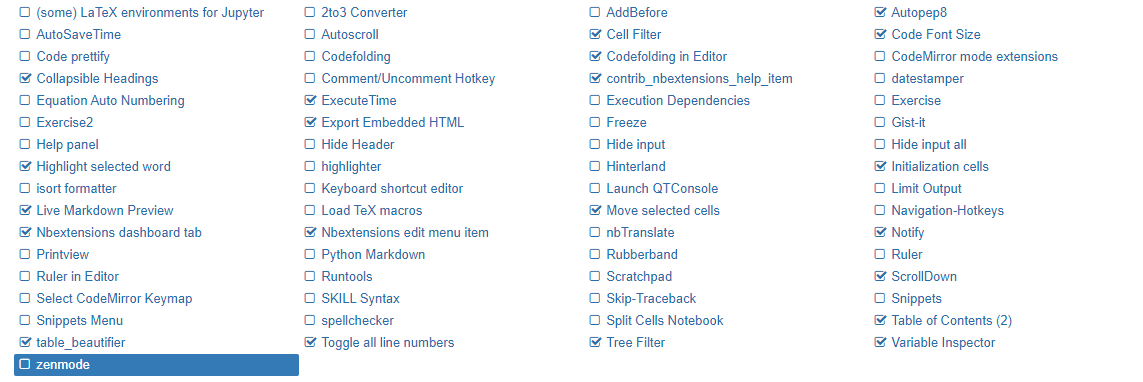
常用插件
-
autopep8:代码规范化
-
codefolding:代码带折叠效果
-
latexenvironments...:latex支持
-
hinterland:代码提示
exclude_regexp: /[%0-9a-z._/\\:~-]/i //避免自动上屏 -
highlight select word: 选高亮下文相同单词
-
table of contenes:toc目录生成
-
variable inspector:检查变量
-
autoscroll:自动折叠过长输出
-
execute time:显示执行时间
-
notify:长期任务后台通知插件
-
highlighter:markdown高亮
-
jupyterthemes:主题色彩
// https://github.com/dunovank/jupyter-themes
jt -t onedork -fs 95 -altp -tfs 11 -nfs 115 -cellw 88% -T