SpringBoot学习历程(八):集成Swagger2(2.9.2版本)构建RESTful API
前言
现在的架构基本都由原来的后端渲染,变成了:前端渲染、前后端分离的形态,前端和后端唯一联系,变成了API接口;swagger就是一款让你更好的维护API文档的框架。
- Swagger官网:https://swagger.io/
- github仓库地址:https://github.com/RabbitsInTheGrass/springBoot-Learning
- 本人所用springboot版本为2.1.9
1. 引入依赖
<!-- 引入swagger2依赖 -->
<dependency>
	<groupId>io.springfox</groupId>
	<artifactId>springfox-swagger2</artifactId>
	<version>2.9.2</version>
</dependency>
<dependency>
	<groupId>io.springfox</groupId>
	<artifactId>springfox-swagger-ui</artifactId>
	<version>2.9.2</version>
</dependency>
2. 开启配置
2.1 开关设置
在application.yml 中加入
spring:
  swagger:
    enable: true
true表示启用,false表示关闭
2.2 config配置
package com.rabbits.learn.config;

import org.springframework.boot.autoconfigure.condition.ConditionalOnProperty;
import org.springframework.context.annotation.Bean;
import org.springframework.context.annotation.Configuration;
import springfox.documentation.builders.ApiInfoBuilder;
import springfox.documentation.builders.PathSelectors;
import springfox.documentation.builders.RequestHandlerSelectors;
import springfox.documentation.service.ApiInfo;
import springfox.documentation.service.Contact;
import springfox.documentation.spi.DocumentationType;
import springfox.documentation.spring.web.plugins.Docket;
import springfox.documentation.swagger2.annotations.EnableSwagger2;

/**
 * @Description: Swagger2配置信息
 * @Author: RabbitsInTheGrass_xj
 * @Date: 2019/10/4 10:36
 */
@EnableSwagger2
@Configuration
@ConditionalOnProperty(name = "spring.swagger.enable", havingValue = "true")
public class SwaggerConfig {

    @Bean
    public Docket createRestApi() {
        return new Docket(DocumentationType.SWAGGER_2)
                .apiInfo(buildApiInf())
                .select()
                //扫描的swagger接口包路径
                .apis(RequestHandlerSelectors.basePackage("com.xj.demo.controller"))
                .paths(PathSelectors.any())
                .build();
    }

    private ApiInfo buildApiInf() {
        return new ApiInfoBuilder()
                //标题
                .title("RabbitsInTheGrass的用Swagger2构建RESTful API文档")
                .description("更多SpringBoot相关文章请关注:https://blog.csdn.net/RabbitInTheGrass")
                .termsOfServiceUrl("https://blog.csdn.net/RabbitInTheGrass/article/details/102026732")
                //作者
                .contact(new Contact("RabbitInTheGrass", "https://blog.csdn.net/RabbitInTheGrass", "[email protected]"))
                //版本
                .version("1.0")
                .build();
    }
}
@ConditionalOnProperty(name = “spring.swagger.enable”, havingValue = “true”)该注解标识@Configuration注解开启的条件。
name对应application.yml中的参数;
havingValue表示条件值。
2.3 在main方法中开启对Swagger的支持
启动类增加@EnableSwagger2的注释。
2.4 Swagger2常用注解
- @Api: 修饰整个类,描述Controller的作用;
- @ApiIgnore: 忽略该Controller,指不对当前类做扫描
- @ApiOperation: 描述Controller类中的method接口
- @ApiParam: 单个参数描述,与@ApiImplicitParam不同的是,他是写在参数左侧的。如(@ApiParam(name = “username”,value = “用户名”) String username)
- @ApiModel: 描述POJO对象
- @ApiProperty: 描述POJO对象中的属性值
- @ApiImplicitParam: 描述单个请求入参信息
- @ApiImplicitParams: 描述多个请求入参信息
- @ApiResponse: 描述单个出参信息
- @ApiResponses: 描述多个出参信息
- @ApiError: 接口错误所返回的信息
对应于HTTP协议中的方法注解:
- @GetMapping对应HTTP中的GET方法;
- @PostMapping对应HTTP中的POST方法;
- @PutMapping对应HTTP中的PUT方法;
- @DeleteMapping对应HTTP中的DELETE方法;
- @PatchMapping对应HTTP中的PATCH方法。
2.5 在controller类增加相关注解
package com.rabbits.learn.controller;

import io.swagger.annotations.Api;
import io.swagger.annotations.ApiOperation;
import org.springframework.web.bind.annotation.GetMapping;
import org.springframework.web.bind.annotation.RequestMapping;
import org.springframework.web.bind.annotation.RestController;

/**
 * @Description: 测试一下
 * @Author: RabbitsInTheGrass_xj
 * @Date: 2019/10/1 09:31
 */
@RestController
@RequestMapping("/home")
@Api(value = "我的hello层")
public class HomeController {

    @ApiOperation(value = "打招呼", notes = "开始的一个hello")
    @GetMapping("hello")
    public String sayHello() {
        return "Hello RabbitsInTheGrass, welcome!!!";
    }
}
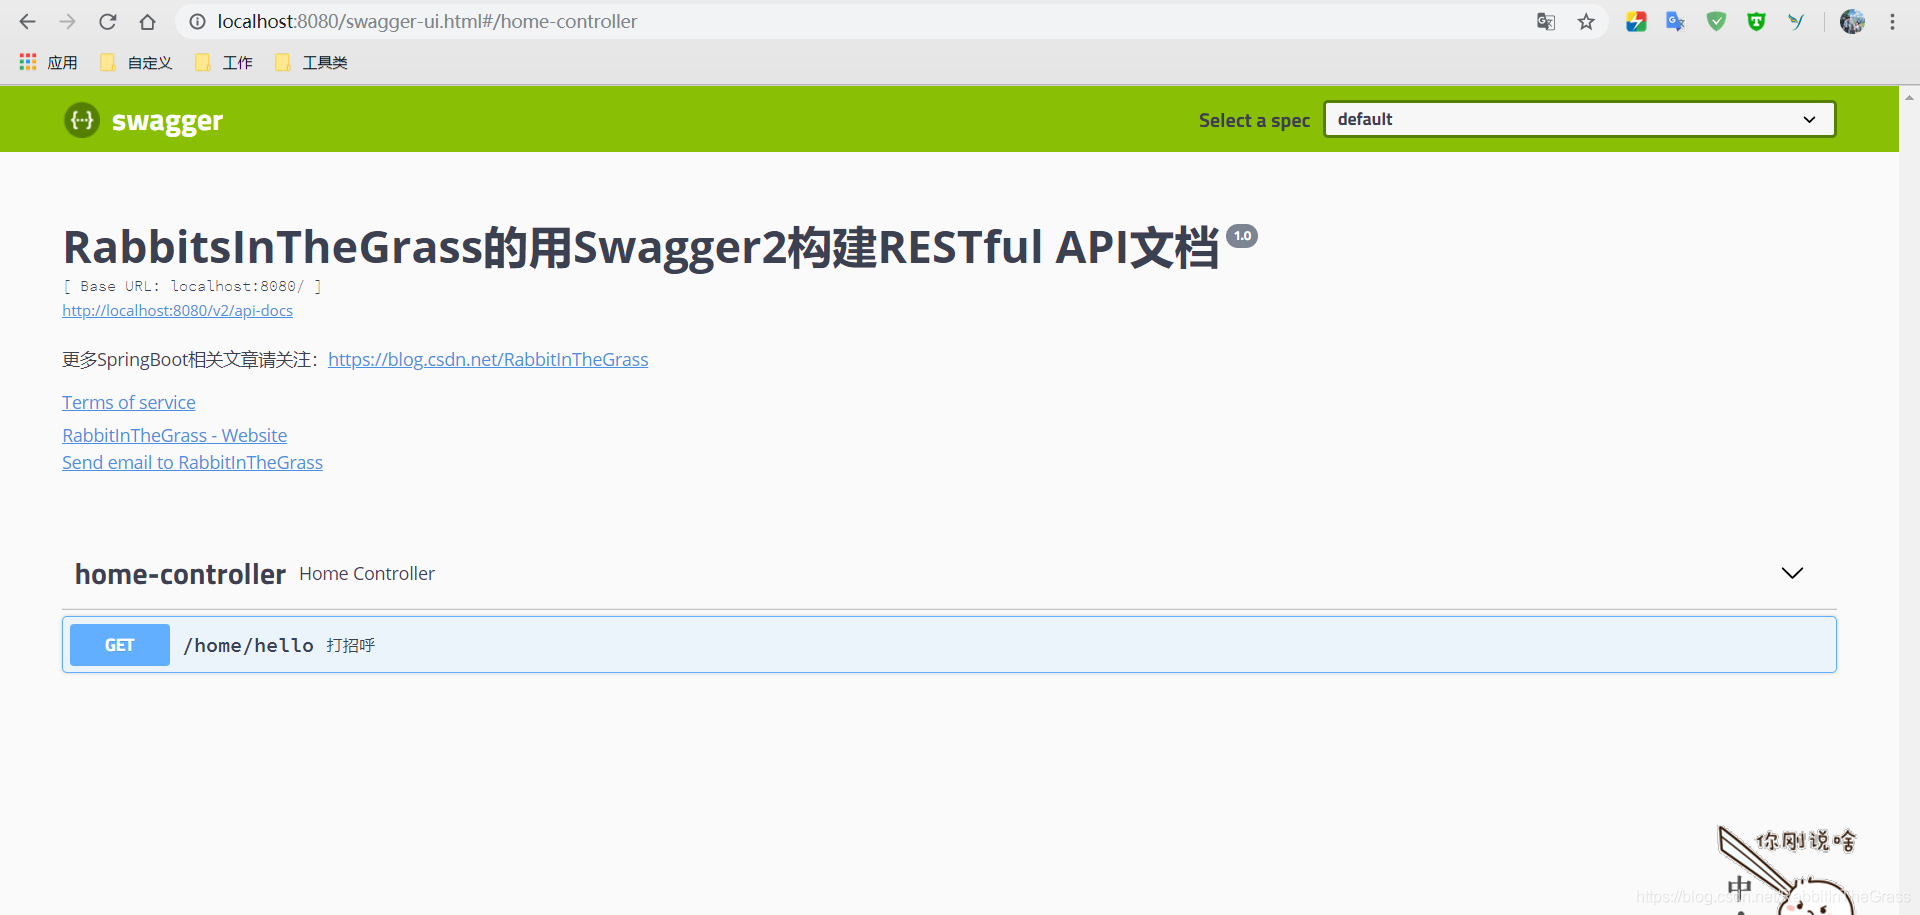
2.6 测试
启动项目后访问 http://localhost:8080/swagger-ui.html ,效果图如下: