
python管理包管理工具pip使用,及使用pip创建虚拟环境
文章目录:
- 1 pip的使用
- 1.1 pip的基础使用
- 1.1.1 pip安装库包(pip install)
- 1.1.2 pip卸载库包(pip uninstall)
- 1.1.3 pip升级库包(pip install --U)
- 1.1.4 pip查看已经安装的库包(pip list)
- 1.1.5 pip 显示库包的相关信息(pip show)
- 1.1.6 pip搜索库包(pip search)
- 1.2 pip其他常用命令
- 1.3 pip使用镜像下载、更新库包
- 2 pip创建虚拟环境
- 3 pip使用中出现的问题
- 3 conda的基础使用
- 3.1 conda的基础使用
- 3.1.1 conda安装库包(conda install)
- 3.1.2 conda卸载库包(conda uninstall)
- 3.1.3 conda升级库包(conda update)
- 3.1.4 conda查看已经安装的库包(conda list)
- 3.1.5 conda搜索库包有哪些版本(conda search)
- 3.2 conda的其他常用命令
- 4 conda创建虚拟环境
- 5 用conda创建cuda和cudnn
1 pip的使用
pip是python自带的一个库包管理工具,可以通过pip进行python包的安装、更新、卸载、新建虚拟环境等操作
在命令行下,我们可以查看pip的常用命令如下:
C:\Users\93176>pip -h

Usage:
  pip <command> [options]

Commands:
  install                     Install packages.
  download                    Download packages.
  uninstall                   Uninstall packages.
  freeze                      Output installed packages in requirements format.
  list                        List installed packages.
  show                        Show information about installed packages.
  check                       Verify installed packages have compatible dependencies.
  config                      Manage local and global configuration.
  search                      Search PyPI for packages.
  wheel                       Build wheels from your requirements.
  hash                        Compute hashes of package archives.
  completion                  A helper command used for command completion.
  debug                       Show information useful for debugging.
  help                        Show help for commands.

General Options:
  -h, --help                  Show help.
  --isolated                  Run pip in an isolated mode, ignoring environment variables and user configuration.
  -v, --verbose               Give more output. Option is additive, and can be used up to 3 times.
  -V, --version               Show version and exit.
  -q, --quiet                 Give less output. Option is additive, and can be used up to 3 times (corresponding to
                              WARNING, ERROR, and CRITICAL logging levels).
  --log <path>                Path to a verbose appending log.
  --proxy <proxy>             Specify a proxy in the form [user:passwd@]proxy.server:port.
  --retries <retries>         Maximum number of retries each connection should attempt (default 5 times).
  --timeout <sec>             Set the socket timeout (default 500.0 seconds).
  --exists-action <action>    Default action when a path already exists: (s)witch, (i)gnore, (w)ipe, (b)ackup,
                              (a)bort.
  --trusted-host <hostname>   Mark this host or host:port pair as trusted, even though it does not have valid or any
                              HTTPS.
  --cert <path>               Path to alternate CA bundle.
  --client-cert <path>        Path to SSL client certificate, a single file containing the private key and the
                              certificate in PEM format.
  --cache-dir <dir>           Store the cache data in <dir>.
  --no-cache-dir              Disable the cache.
  --disable-pip-version-check
                              Don't periodically check PyPI to determine whether a new version of pip is available for
                              download. Implied with --no-index.
  --no-color                  Suppress colored output
  --no-python-version-warning
                              Silence deprecation warnings for upcoming unsupported Pythons.

C:\Users\93176>
1.1 pip的基础使用
基础使用:
- 安装库包
- 更新库包
- 卸载库包
1.1.1 pip安装库包(pip install)
一、pip安装库包
1、pip安装库包
pip install package_name
2、pip安装多个库包,只要库包的名字用空格隔开即可
pip install package_name1 package_name2 package_name3
3、pip安装指定版本的库包(注意使用==)
pip install package_name==版本号
4、pip安装一系列库包
当要安装的库包特别多的时候,如果写成命令可能也会很多,此时可以把要安装的库包名及版本号,写到一个requirements.txt文件下。
例如:requirements.txt中的内容如下:
alembic==0.8.6
bleach==1.4.3
click==6.6
dominate==2.2.1
Flask==0.11.1
Flask-Bootstrap==3.3.6.0
Flask-Login==0.3.2
Flask-Migrate==1.8.1
Flask-Moment==0.5.1
Flask-PageDown==0.2.1
Flask-Script==2.0.5
然后在使用-r参数安装requirements.txt下的库包即可。
pip install -r requirements.txt
二、pip install相关的其他参数
在使用pip install的时候,还可以在后面添加其他的参数,使用如下命令查看:
pip install -h
C:\Users\93176>pip install -h

Usage:
  pip install [options] <requirement specifier> [package-index-options] ...
  pip install [options] -r <requirements file> [package-index-options] ...
  pip install [options] [-e] <vcs project url> ...
  pip install [options] [-e] <local project path> ...
  pip install [options] <archive url/path> ...

Description:
  Install packages from:

  - PyPI (and other indexes) using requirement specifiers.
  - VCS project urls.
  - Local project directories.
  - Local or remote source archives.

  pip also supports installing from "requirements files", which provide
  an easy way to specify a whole environment to be installed.

Install Options:
  -r, --requirement <file>    Install from the given requirements file. This option can be used multiple times.
  -c, --constraint <file>     Constrain versions using the given constraints file. This option can be used multiple
                              times.
  --no-deps                   Don't install package dependencies.
  --pre                       Include pre-release and development versions. By default, pip only finds stable
                              versions.
  -e, --editable <path/url>   Install a project in editable mode (i.e. setuptools "develop mode") from a local project
                              path or a VCS url.
  -t, --target <dir>          Install packages into <dir>. By default this will not replace existing files/folders in
                              <dir>. Use --upgrade to replace existing packages in <dir> with new versions.
  --platform <platform>       Only use wheels compatible with <platform>. Defaults to the platform of the running
                              system.
  --python-version <python_version>
                              The Python interpreter version to use for wheel and "Requires-Python" compatibility
                              checks. Defaults to a version derived from the running interpreter. The version can be
                              specified using up to three dot-separated integers (e.g. "3" for 3.0.0, "3.7" for 3.7.0,
                              or "3.7.3"). A major-minor version can also be given as a string without dots (e.g. "37"
                              for 3.7.0).
  --implementation <implementation>
                              Only use wheels compatible with Python implementation <implementation>, e.g. 'pp', 'jy',
                              'cp',  or 'ip'. If not specified, then the current interpreter implementation is used.
                              Use 'py' to force implementation-agnostic wheels.
  --abi <abi>                 Only use wheels compatible with Python abi <abi>, e.g. 'pypy_41'.  If not specified,
                              then the current interpreter abi tag is used.  Generally you will need to specify
                              --implementation, --platform, and --python-version when using this option.
  --user                      Install to the Python user install directory for your platform. Typically ~/.local/, or
                              %APPDATA%\Python on Windows. (See the Python documentation for site.USER_BASE for full
                              details.)
  --root <dir>                Install everything relative to this alternate root directory.
  --prefix <dir>              Installation prefix where lib, bin and other top-level folders are placed
  -b, --build <dir>           Directory to unpack packages into and build in. Note that an initial build still takes
                              place in a temporary directory. The location of temporary directories can be controlled
                              by setting the TMPDIR environment variable (TEMP on Windows) appropriately. When passed,
                              build directories are not cleaned in case of failures.
  --src <dir>                 Directory to check out editable projects into. The default in a virtualenv is "<venv
                              path>/src". The default for global installs is "<current dir>/src".
  -U, --upgrade               Upgrade all specified packages to the newest available version. The handling of
                              dependencies depends on the upgrade-strategy used.
  --upgrade-strategy <upgrade_strategy>
                              Determines how dependency upgrading should be handled [default: only-if-needed]. "eager"
                              - dependencies are upgraded regardless of whether the currently installed version
                              satisfies the requirements of the upgraded package(s). "only-if-needed" -  are upgraded
                              only when they do not satisfy the requirements of the upgraded package(s).
  --force-reinstall           Reinstall all packages even if they are already up-to-date.
  -I, --ignore-installed      Ignore the installed packages, overwriting them. This can break your system if the
                              existing package is of a different version or was installed with a different package
                              manager!
  --ignore-requires-python    Ignore the Requires-Python information.
  --no-build-isolation        Disable isolation when building a modern source distribution. Build dependencies
                              specified by PEP 518 must be already installed if this option is used.
  --use-pep517                Use PEP 517 for building source distributions (use --no-use-pep517 to force legacy
                              behaviour).
  --install-option <options>  Extra arguments to be supplied to the setup.py install command (use like --install-
                              option="--install-scripts=/usr/local/bin"). Use multiple --install-option options to
                              pass multiple options to setup.py install. If you are using an option with a directory
                              path, be sure to use absolute path.
  --global-option <options>   Extra global options to be supplied to the setup.py call before the install command.
  --compile                   Compile Python source files to bytecode
  --no-compile                Do not compile Python source files to bytecode
  --no-warn-script-location   Do not warn when installing scripts outside PATH
  --no-warn-conflicts         Do not warn about broken dependencies
  --no-binary <format_control>
                              Do not use binary packages. Can be supplied multiple times, and each time adds to the
                              existing value. Accepts either :all: to disable all binary packages, :none: to empty the
                              set, or one or more package names with commas between them (no colons). Note that some
                              packages are tricky to compile and may fail to install when this option is used on them.
  --only-binary <format_control>
                              Do not use source packages. Can be supplied multiple times, and each time adds to the
                              existing value. Accepts either :all: to disable all source packages, :none: to empty the
                              set, or one or more package names with commas between them. Packages without binary
                              distributions will fail to install when this option is used on them.
  --prefer-binary             Prefer older binary packages over newer source packages.
  --no-clean                  Don't clean up build directories.
  --require-hashes            Require a hash to check each requirement against, for repeatable installs. This option
                              is implied when any package in a requirements file has a --hash option.
  --progress-bar <progress_bar>
                              Specify type of progress to be displayed [off|on|ascii|pretty|emoji] (default: on)

Package Index Options:
  -i, --index-url <url>       Base URL of the Python Package Index (default https://pypi.tuna.tsinghua.edu.cn/simple).
                              This should point to a repository compliant with PEP 503 (the simple repository API) or
                              a local directory laid out in the same format.
  --extra-index-url <url>     Extra URLs of package indexes to use in addition to --index-url. Should follow the same
                              rules as --index-url.
  --no-index                  Ignore package index (only looking at --find-links URLs instead).
  -f, --find-links <url>      If a url or path to an html file, then parse for links to archives. If a local path or
                              file:// url that's a directory, then look for archives in the directory listing.

General Options:
  -h, --help                  Show help.
  --isolated                  Run pip in an isolated mode, ignoring environment variables and user configuration.
  -v, --verbose               Give more output. Option is additive, and can be used up to 3 times.
  -V, --version               Show version and exit.
  -q, --quiet                 Give less output. Option is additive, and can be used up to 3 times (corresponding to
                              WARNING, ERROR, and CRITICAL logging levels).
  --log <path>                Path to a verbose appending log.
  --proxy <proxy>             Specify a proxy in the form [user:passwd@]proxy.server:port.
  --retries <retries>         Maximum number of retries each connection should attempt (default 5 times).
  --timeout <sec>             Set the socket timeout (default 500.0 seconds).
  --exists-action <action>    Default action when a path already exists: (s)witch, (i)gnore, (w)ipe, (b)ackup,
                              (a)bort.
  --trusted-host <hostname>   Mark this host or host:port pair as trusted, even though it does not have valid or any
                              HTTPS.
  --cert <path>               Path to alternate CA bundle.
  --client-cert <path>        Path to SSL client certificate, a single file containing the private key and the
                              certificate in PEM format.
  --cache-dir <dir>           Store the cache data in <dir>.
  --no-cache-dir              Disable the cache.
  --disable-pip-version-check
                              Don't periodically check PyPI to determine whether a new version of pip is available for
                              download. Implied with --no-index.
  --no-color                  Suppress colored output
  --no-python-version-warning
                              Silence deprecation warnings for upcoming unsupported Pythons.

C:\Users\93176>
1.1.2 pip卸载库包(pip uninstall)
1、直接卸载库包
pip uninstall package_name
2、直接卸载多个库包
pip uninstall package_name1 package_name2 package_name3
3、卸载一些列的包
pip uninstall -r requirements.txt
1.1.3 pip升级库包(pip install --U)
pip升级库包有两种方式:
pip install -U package_namepip install --upgrade package_name
1.1.4 pip查看已经安装的库包(pip list)
1、pip列出所有已经安装的库包
pip list
会列出所有已经安装python库包的:
- 库包的名字
- 库包的版本号
2、pip 查询可升级的库包
pip list -o
3、pip list的更多参数使用
pip list -h
1.1.5 pip 显示库包的相关信息(pip show)
1、pip显示库包的相关信息
pip show package_name
C:\Users\93176>pip show pillow
Name: Pillow
Version: 6.2.1
Summary: Python Imaging Library (Fork)
Home-page: http://python-pillow.org
Author: Alex Clark (PIL Fork Author)
Author-email: aclark@python-pillow.org
License: HPND
Location: c:\programdata\anaconda3\lib\site-packages
Requires:
Required-by: visdom, torchvision, streamlit, scikit-image, pytesseract
或列出库包的如下相关信息:
- 库包的名字
- 库包的版本
- 库包的主页
- 库包的下载位置
- 库包的依赖库等信息
1.1.6 pip搜索库包(pip search)
查找和某个库包关键字,查找和该关键字相关的所有库包
pip search 待搜索的关键字
eg: pip install opencv
1.2 pip其他常用命令
1.2.1 pip虚拟环境中的库包迁移
1、进入虚拟环境中:
cd virualenv_name
activate
2、把虚拟环境中库包版本写到requirements.txt文件中
(venv)$pip freeze >requirements.txt
3、当要创建一个虚拟相同的副本,可以创建一个虚拟环境,然后运行如下命令:
(venv)$pip install -r requirements
1.3 pip使用镜像下载、更新库包
1.3.1 临时使用:
pip install -i https://pypi.tuna.tsinghua.edu.cn/simple torch
常用的国内镜像源:
清华镜像源:http://pypi.douban.com/simple/
豆瓣镜像源:http://pypi.douban.com/simple/
阿里云镜像源:http://mirrors.aliyun.com/pypi/simple/
中国科学技术大学镜像源: http://pypi.mirrors.ustc.edu.cn/simple/
华中理工大学镜像源:http://pypi.hustunique.com/
山东理工大学镜像源:http://pypi.sdutlinux.org/
1.3.2 一劳永逸的做法:
一、windows下添加镜像源配置
在用户目录下修改pip\pip.ini文件(我的用户目录:C:\Users\93176\pip\pip.ini)更改下载源地址,在pip.ini文件中添加如下两行代码即可:
 [global]
 index-url = https://pypi.tuna.tsinghua.edu.cn/simple
也可以在pip.ini文件中加入timeout = 500在网络不好的时候,防止下载等待时间过短而中断,可以设置超时时间。
参考
二、linux下添加镜像源配置
linux下,修改 ~/.pip/pip.conf (没有就创建一个), 修改 index-url至tuna,内容如下:
 [global]
 index-url = https://pypi.tuna.tsinghua.edu.cn/simple
2 pip创建虚拟环境
2.1 pip在windows上创建虚拟环境
2.1.1 安装virtualenv
打开windows的命令行,安装virtualenv,virtualenv是创建python虚拟环境的一个工具
pip installl virtualenv
pip install virtualenvwrapper# 这是对virtualenv的封装版本,一定要在virtualenv后安装
安装完之后,输入pip list可以查看到安装的上面两个库包
2.1.2 使用virtualenv创建虚拟 环境
1、创建一个虚拟环境
virtualenv envname
如果安装了多个python版本,如py2和py3,需要指定使用哪个创建虚拟环境
virtualenv -p python2 envname
此时会创建一个虚拟环境名字为:envname(也是envname文件夹),然后在envname文件夹下有四个文件夹:
IncludeLib:之后虚拟环境中安装的库包都会安装到这里Scriptstcl
2、启动虚拟环境
cd envname# 进入虚拟环境文件夹
cd Scripts# 进入相关启动文件夹
activate# 启动虚拟环境
3、退出虚拟环境
deactivate
具体操作实例:
E:\pip_env>virtualenv opencv3
E:\pip_env>cd opencv3

E:\pip_env\opencv3>dir
2019/10/13  21:08    <DIR>          Include
2020/04/11  11:52    <DIR>          Lib
2020/04/11  12:16    <DIR>          Scripts
2020/04/11  11:52    <DIR>          tcl

E:\pip_env\opencv3>cd Scripts
E:\pip_env\opencv3\Scripts>dir
2020/04/11  12:16             2,301 activate
2020/04/11  12:16               871 activate.bat
2020/04/11  12:16             1,755 activate.ps1
2020/04/11  12:16             1,152 activate.xsh
2020/04/11  12:16             1,517 activate_this.py
2020/04/11  12:16               510 deactivate.bat
2020/04/11  11:53           102,776 easy_install-3.6.exe
2020/04/11  11:53           102,776 easy_install.exe
2020/04/11  11:53           102,767 pip.exe
2020/04/11  11:53           102,767 pip3.6.exe
2020/04/11  11:53           102,767 pip3.exe
2020/04/11  11:52            93,696 python.exe
2020/04/11  11:52            51,200 python3.dll
2020/04/11  11:52         3,603,456 python36.dll
2020/04/11  11:52            92,160 pythonw.exe
2020/04/11  11:53           102,754 wheel.exe

E:\pip_env\opencv3\Scripts>activate
# 进入虚拟环境
(opencv3) E:\pip_env\opencv3\Scripts>
# 退出虚拟环境
(opencv3) E:\pip_env\opencv3\Scripts>deactivate
E:\pip_env\opencv3\Scripts>
参考:https://www.cnblogs.com/cwp-bg/p/python.html
2.2 pip在linux上创建虚拟环境
linux中使用virtualenv安装虚拟环境和windows中一样
3 pip使用中出现的问题
3.1 pip安装出现问题
3.1.1 pip安装超时
pip安装超时,一般是由于网络的不好,导致长时间请求未能下载安装包,解决方法时添加--timeout,默认值为500 seconds,你可以试着更大一些。
1、临时设置超时参数
pip install --timeout 600 package_name
2、永久配置超时参数
在上面的提到下载时,在配置文件中添加镜像源,我们只要在配置文件再添加一行代码即可:
timeout 700
超时时间可以自己设置,这样就可以实现永久配置
3 conda的基础使用
3.1 conda的基础使用
1.2 conda常用的命令。
1)conda list 查看安装了哪些包。
2)conda env list 或 conda info -e 查看当前存在哪些虚拟环境
3)conda update conda 检查更新当前conda
3.1.1 conda安装库包(conda install)
conda install package_name
3.1.2 conda卸载库包(conda uninstall)
conda uninstall package_name
3.1.3 conda升级库包(conda update)
conda update package_name
3.1.4 conda查看已经安装的库包(conda list)
conda list
查看指定的某一个库包的版本信息
conda list package_name
3.1.5 conda搜索库包有哪些版本(conda search)
conda search package_name
3.2 conda的其他常用命令
3.2.1 conda批量导出导出依赖包并批量安装
1、conda批量导出依赖包
conda list -e > requirements.txt
比如如果有一个虚拟环境,就可以直接把虚拟环境中所有库包的版本信息导出到requirements.txt文件中(记住:要先切换到虚拟环境中),然后在使用下面的命令进行批量安装,就可以快速复刻一个一模一样的虚拟环境。
2、conda批量安装依赖包
conda install --yes --file requirements.txt
3.2.2 更新conda的版本
conda update -n base conda
3.2.3 conda查看、添加、删除镜像源
1、conda查看镜像源
conda config --show-source
2、conda添加镜像源
如下我们添加清华的镜像源:
conda config --add channels https://mirrors.tuna.tsinghua.edu.cn/anaconda/pkgs/free/
conda config --add channels https://mirrors.tuna.tsinghua.edu.cn/anaconda/pkgs/main/
添加第三方的库([参考],例如添加Pytorch(https://blog.csdn.net/qq_29007291/article/details/81103603)):
conda config --add channels https://mirrors.tuna.tsinghua.edu.cn/anaconda/cloud/pytorch/
添加中科大镜像源
conda config --add channels https://mirrors.ustc.edu.cn/anaconda/pkgs/main/
conda config --add channels https://mirrors.ustc.edu.cn/anaconda/pkgs/free/
conda config --add channels https://mirrors.ustc.edu.cn/anaconda/cloud/conda-forge/
conda config --add channels https://mirrors.ustc.edu.cn/anaconda/cloud/msys2/
conda config --add channels https://mirrors.ustc.edu.cn/anaconda/cloud/bioconda/
conda config --add channels https://mirrors.ustc.edu.cn/anaconda/cloud/menpo/
conda config --set show_channel_urls yes
也可以在配置文件中修改镜像源,将以上配置文件写在~/.condarc中
vim ~/.condarc# LInux环境下
channels:
  - https://mirrors.ustc.edu.cn/anaconda/pkgs/main/
  - https://mirrors.ustc.edu.cn/anaconda/cloud/conda-forge/
  - https://mirrors.tuna.tsinghua.edu.cn/anaconda/pkgs/free/
  - defaults
show_channel_urls: true
让添加的镜像生效:
conda config --set show_channel_urls yes
3、删除镜像源
conda config --remove-key channels
删除指定的镜像源:
conda config --remove channels 'https://mirrors.tuna.tsinghua.edu.cn/anaconda/pkgs/free/'
4 conda创建虚拟环境
4.1 conda在linux、windows上创建虚拟环境
首先在所在系统中安装Anaconda。可以打开命令行输入
conda -V检验是否安装以及当前conda的版本。
1、创建python虚拟环境
conda create -n your_env_name python=X.X(2.7、3.6等)
- 创建python版本为X.X
- 虚拟环境的名字为:your_env_name
- your_env_name文件可以在Anaconda安装目录envs文件下找到。
2、使用激活(或切换不同python版本)的虚拟环境
打开命令行输入
python --version可以检查当前python的版本。
激活虚拟环境:
使用如下命令即可 激活你的虚拟环境(即将python的版本改变)。
Linux:source activate your_env_name(虚拟环境名称)
Windows:activate your_env_name(虚拟环境名称)
使用python --version 或 python -V可以检查当前python版本是否为想要的。
也可以用pip -V 查看当前python的版本和python安装包的路径,如下:

3、退出虚拟环境
Linux: source deactivate
Windows: deactivate
注意:
当你退出虚拟环境可能出现如下错误:
(base) zpp@estar-cvip:~$ source activate mmlab
(mmlab) zpp@estar-cvip:~$ source deactivate
-bash: deactivate: 没有那个文件或目录
此时你可以选择使用conda退出虚拟环境:
conda deactivate# 一般要求conda的版本在4.0以上
当然也可以使用conda activate env_name激活虚拟环境
4、删除虚拟环境
使用命令
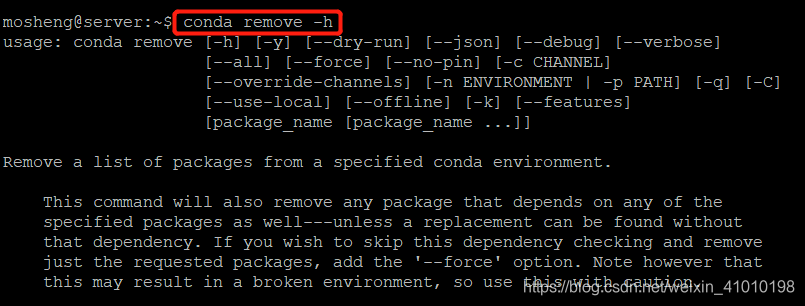
conda remove -n your_env_name(虚拟环境名称) --all, 即可删除。
更多和移除命令相关参数可以通过:conda remove -h 查看
删除环境中的某个包
使用命令
conda remove --name your_env_name package_name即可。
4.2 对虚拟环境中安装额外的包。
使用命令
conda install -n your_env_name [package]即可安装package到your_env_name中
4.3 conda删除虚拟环境
conda remove -n env_name --all
5 用conda创建cuda和cudnn
-
cd到安装包所在目录,安装:bash Anaconda3-5.1.0-Linux-x86_64.sh
-
创建虚拟环境:conda create -n your_env_name python=3.6
-
激活虚拟环境:source activate your_env_name
-
添加conda国内镜像:
conda config --add channels https://mirrors.tuna.tsinghua.edu.cn/anaconda/pkgs/free/
conda config --add channels https://mirrors.tuna.tsinghua.edu.cn/anaconda/pkgs/main/
conda config --add channels https://mirrors.tuna.tsinghua.edu.cn/anaconda/cloud/pytorch/
conda config --set show_channel_urls yes
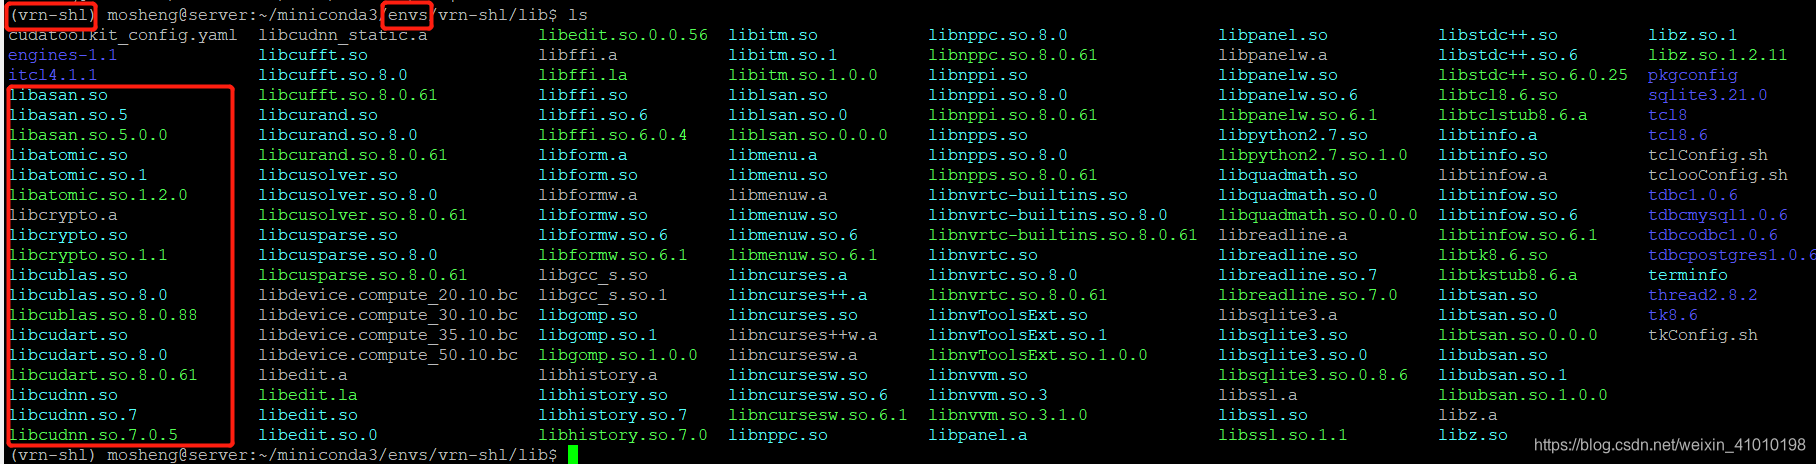
- 安装cuda和cudnn
安装cuda:conda install cudatoolkit=8.0 -c https://mirrors.tuna.tsinghua.edu.cn/anaconda/pkgs/free/linux-64/
安装cudnn:conda install cudnn=7.0.5 -c https://mirrors.tuna.tsinghua.edu.cn/anaconda/pkgs/main/linux-64/
注:
安装conda完成后,输入conda list,若出现未找到命令,则需修改环境变量:export PATH=~/anaconda3/bin:$PATH(此法每次开机后都要修改,也可修改配置文件永久生效)
每个不同镜像网站里面包含各种不同的下载包,可根据自己的需求打开查找对应的安装包,
如cudatoolkit 8.0.3 在https://mirrors.tuna.tsinghua.edu.cn/anaconda/pkgs/free/linux-64/内,
则安装命令如:conda install cudatoolkit=8.0 -c https://mirrors.tuna.tsinghua.edu.cn/anaconda/pkgs/free/linux-64/ 即可。


♠ ⊕ ♠ ⊕ ♠ ⊕ ♠ ⊕ ♠ ⊕ ♠ ⊕ ♠ ⊕ ♠ ⊕ ♠ ⊕ ♠ ⊕ ♠ ⊕ ♠ ⊕ ♠ ⊕ ♠ ⊕ ♠ ⊕ ♠ ⊕ ♠ ⊕ ♠ ⊕ ♠ ⊕ ♠ ⊕ ♠ ⊕ ♠ ⊕ ♠ ⊕ ♠ ⊕ ♠ ⊕ ♠ ⊕ ♠ ⊕ ♠ ⊕ ♠ ⊕ ♠ ⊕ ♠