Spring Boot 20天入门(day4)
SpingbootWeb开发
使用原生Spring和SpringMVC整合:
1)书写Spring的配置文件
2)配置SpringMVC(静态资源路径,过滤器,servlet)
使用Spirngboot:
1)创建Springboot应用(Spring Initializer),选择我们需要的模块
2)Springboot已经启用自动配置为我们配置好了,只需要在配置文件中指定少量配置就可以跑起来
3)专注于编写业务代码,减少代码量
SpringMVC自动配置
所有关于SpringMVC的自动配置都在WebMvcAutoConfiguration这个类中
@Configuration(proxyBeanMethods = false)
// 判断是否是web应用
@ConditionalOnWebApplication(type = Type.SERVLET)
// 判断三大组件是否存在
@ConditionalOnClass({ Servlet.class, DispatcherServlet.class, WebMvcConfigurer.class })
// 判断使用者是否接管了SpringMVC
@ConditionalOnMissingBean(WebMvcConfigurationSupport.class)
@AutoConfigureOrder(Ordered.HIGHEST_PRECEDENCE + 10)
@AutoConfigureAfter({ DispatcherServletAutoConfiguration.class, TaskExecutionAutoConfiguration.class,
		ValidationAutoConfiguration.class })
public class WebMvcAutoConfiguration {}
自动配置在Spring的默认值上添加了以下功能:
包含ContentNegotiatingViewResolver和BeanNameViewResolver
自动配置了ViewResolver(视图解析器,根据方法返回的视图对象(VIew)对象决定是重定向还是请求转发)
ContentNegotiatingViewResolver
作用:组合所有视图解析器
@Bean
// 如果容器中存在视图解析器
@ConditionalOnBean(ViewResolver.class)
// 如果容器中没有配置过视图解析器
@ConditionalOnMissingBean(name = "viewResolver", value = ContentNegotiatingViewResolver.class)
		public ContentNegotiatingViewResolver viewResolver(BeanFactory beanFactory) {
			ContentNegotiatingViewResolver resolver = new ContentNegotiatingViewResolver();
			resolver.setContentNegotiationManager(beanFactory.getBean(ContentNegotiationManager.class));
			// ContentNegotiatingViewResolver uses all the other view resolvers to locate
			// a view so it should have a high precedence
			resolver.setOrder(Ordered.HIGHEST_PRECEDENCE);
			return resolver;
}
点进ContentNegotiatingViewResolver中,找到initServletContext方法,可以看到,SpringMVC允许注册多个视图解析器
//此方法会在自动配置类时先执行,通过一个BeanFactoryUtils工具类从容器中那到所有的视图解析器,如果视图中不存在视图解析器,才进行添加
@Override
	protected void initServletContext(ServletContext servletContext) {
		Collection<ViewResolver> matchingBeans =
				BeanFactoryUtils.beansOfTypeIncludingAncestors(obtainApplicationContext(), ViewResolver.class).values();
		if (this.viewResolvers == null) {
			this.viewResolvers = new ArrayList<>(matchingBeans.size());
			for (ViewResolver viewResolver : matchingBeans) {
				if (this != viewResolver) {
					this.viewResolvers.add(viewResolver);
				}
			}
		}
		else {
			for (int i = 0; i < this.viewResolvers.size(); i++) {
				ViewResolver vr = this.viewResolvers.get(i);
				if (matchingBeans.contains(vr)) {
					continue;
				}
				String name = vr.getClass().getName() + i;
// 逐个添加视图解析器				obtainApplicationContext().getAutowireCapableBeanFactory().initializeBean(vr, name);
			}
		}
		AnnotationAwareOrderComparator.sort(this.viewResolvers);
		this.cnmFactoryBean.setServletContext(servletContext);
	}
添加完视图解析器后,SpringMVC需要对视图对象进行处理,点进resolveViewName方法
// 该方法是用来匹配对应的视图对象
@Override
	@Nullable
	public View resolveViewName(String viewName, Locale locale) throws Exception {
		RequestAttributes attrs = RequestContextHolder.getRequestAttributes();
		Assert.state(attrs instanceof ServletRequestAttributes, "No current ServletRequestAttributes");
		List<MediaType> requestedMediaTypes = getMediaTypes(((ServletRequestAttributes) attrs).getRequest());
		if (requestedMediaTypes != null) {
            // 获取所有候选的视图对象
			List<View> candidateViews = getCandidateViews(viewName, locale, requestedMediaTypes);
             // 寻找最合适的视图对象
			View bestView = getBestView(candidateViews, requestedMediaTypes, attrs);
			if (bestView != null) {
				return bestView;
			}
		}

		String mediaTypeInfo = logger.isDebugEnabled() && requestedMediaTypes != null ?
				" given " + requestedMediaTypes.toString() : "";

		if (this.useNotAcceptableStatusCode) {
			if (logger.isDebugEnabled()) {
				logger.debug("Using 406 NOT_ACCEPTABLE" + mediaTypeInfo);
			}
			return NOT_ACCEPTABLE_VIEW;
		}
		else {
			logger.debug("View remains unresolved" + mediaTypeInfo);
			return null;
		}
	}
那么这些候选的视图对象是哪里的呢,点进getCandidateViews
// 该方法用于获取所有的视图对象
															  //所有的content-type类型
private List<View> getCandidateViews(String viewName, Locale locale, List<MediaType> requestedMediaTypes)
			throws Exception {

		List<View> candidateViews = new ArrayList<>();
		if (this.viewResolvers != null) {
			Assert.state(this.contentNegotiationManager != null, "No ContentNegotiationManager set");
			for (ViewResolver viewResolver : this.viewResolvers) {
                // 先匹配视图对象名称
				View view = viewResolver.resolveViewName(viewName, locale);
				if (view != null) {
					candidateViews.add(view);
				}
				for (MediaType requestedMediaType : requestedMediaTypes) {
					List<String> extensions = this.contentNegotiationManager.resolveFileExtensions(requestedMediaType);
					for (String extension : extensions) {
                        // 给视图添加扩展名
						String viewNameWithExtension = viewName + '.' + extension;
                        // 匹配添加扩展名后的视图
						view = viewResolver.resolveViewName(viewNameWithExtension, locale);
						if (view != null) {
							candidateViews.add(view);
						}
					}
				}
			}
		}
		if (!CollectionUtils.isEmpty(this.defaultViews)) {
			candidateViews.addAll(this.defaultViews);
		}
		return candidateViews;
	}
WebJars与静态资源
查看addResourceHandlers方法
这个方法想必学过SpringMVC的同学都很熟悉,这是配置静态的资源访问路径的方法
@Override
public void addResourceHandlers(ResourceHandlerRegistry registry) {
	if (!this.resourceProperties.isAddMappings()) {
		logger.debug("Default resource handling disabled");
		return;
	}
	Duration cachePeriod = this.resourceProperties.getCache().getPeriod();
	CacheControl cacheControl = this.resourceProperties.getCache().getCachecontrol().toHttpCacheControl();
    // 添加访问Web jars的支持
			if (!registry.hasMappingForPattern("/webjars/**")) {
				customizeResourceHandlerRegistration(registry.addResourceHandler("/webjars/**")
						.addResourceLocations("classpath:/META-INF/resources/webjars/")
						.setCachePeriod(getSeconds(cachePeriod)).setCacheControl(cacheControl));
			}
    // 从配置文件中获取静态资源方法路径,默认是 根目录(“/”)
			String staticPathPattern = this.mvcProperties.getStaticPathPattern();
			if (!registry.hasMappingForPattern(staticPathPattern)) {
				customizeResourceHandlerRegistration(registry.addResourceHandler(staticPathPattern)
						.addResourceLocations(getResourceLocations(this.resourceProperties.getStaticLocations()))
						.setCachePeriod(getSeconds(cachePeriod)).setCacheControl(cacheControl));
			}
		}
Converter,GenericConverter和Formatter
SpringBoot为我们自动注册了Converter,GenericConverter,Formatter
Converter : 转换器,将一个类型转换成另一个类型,比如 18,从前端传过来的是一个文本,我们需要将它转换成对应的Integer类型,就需要用到转换器,Converter 接口只支持从一个原类型转换为一个目标类型
GenericConverter: 转换器,GenericConverter 接口支持在多个不同的原类型和目标类型之间进行转换
Formatter :格式化器,比如Springboot为我们注册了一个时间格式化器:DateFormatter:
这个时间转换器会自动获取时区,转换成对应的事件格式,也可以在配置文件中修改配置
public class DateFormatter implements Formatter<Date> {

	private static final TimeZone UTC = TimeZone.getTimeZone("UTC");

	private static final Map<ISO, String> ISO_PATTERNS;

	static {
		Map<ISO, String> formats = new EnumMap<>(ISO.class);
		formats.put(ISO.DATE, "yyyy-MM-dd");
		formats.put(ISO.TIME, "HH:mm:ss.SSSXXX");
		formats.put(ISO.DATE_TIME, "yyyy-MM-dd'T'HH:mm:ss.SSSXXX");
		ISO_PATTERNS = Collections.unmodifiableMap(formats);
	}
spring.mvc.format.date=dd/MM/yyyy
自定义(拓展)SpringMVC
 public static class MvcConfig extends WebMvcConfigurerAdapter {
        @Override
        public void addViewControllers(ViewControllerRegistry registry) {
            registry.addViewController("/success").setViewName("hello");
        }

        @Override
        public void addFormatters(FormatterRegistry registry) {

        }

        @Override
        public void addInterceptors(InterceptorRegistry registry) {

        }

        @Override
        public void addResourceHandlers(ResourceHandlerRegistry registry) {

        }
    }
原理:
在做其他自动配置时会导入 : @Import(EnableWebMvcConfiguration.class)
@Configuration(proxyBeanMethods = false)
	public static class EnableWebMvcConfiguration extends DelegatingWebMvcConfiguration implements ResourceLoaderAware {}
这个类又继承了一个父类DelegatingWebMvcConfiguration:
这个父类中有一个方法,能将所有WebMvcConfigurer接口的实现类都添加进容器中,也就是说所有的WebMvcConfigurer都会起作用。
	@Autowired(required = false)
	public void setConfigurers(List<WebMvcConfigurer> configurers) {
		if (!CollectionUtils.isEmpty(configurers)) {
			this.configurers.addWebMvcConfigurers(configurers);
		}
	}
而WebMvcConfigurerAdapter就是WebMvcConfigurer的实现类:
@Deprecated
public abstract class WebMvcConfigurerAdapter implements WebMvcConfigurer {}
自定义视图解析器
上面说到SpringMVC支持多个视图解析器,所以我们可以自己定义一个视图解析器
选择一个配置类,添加进容器中。
@SpringBootApplication
public class SpringBootWebRestfulApplication {

    public static void main(String[] args) {
        SpringApplication.run(SpringBootWebRestfulApplication.class, args);
    }

    @Bean
    public ViewResolver AViewResolver(){
        return new MyViewResolver();
    }
    private static class MyViewResolver implements ViewResolver{
        @Override
        public View resolveViewName(String viewName, Locale locale) throws Exception {
            return resolveViewName("success",locale);
        }
    }
}
自定义转换器
配置转换器
 @Bean
    public Converter<String,Date> myConverter(){
        return new DateConverter();
    }
    public static class  DateConverter implements Converter<String, Date> {
        @Override
        public Date convert(String source) {
            return null;
        }
    }
添加转换器
@Configuration
public class CustomConverterConfig implements WebMvcConfigurer {

    @Autowired
    private DateConverter dateConverter;

    @Override
    public void addFormatters(FormatterRegistry registry) {
        registry.addConverter(dateConverter);
    }
}
完全接管SpringMVC
核心注解:@EnaleWebMVC
如果不想要Springboot对SpringMVC的默认配置,我们只需要在Springboot的配置类上标注
@EnaleWebMVC注解既可
@SpringBootApplication
@EnableWebMvc //全面接管SpringMVC,所有的SpringMVC的自动配置都失效了
public class SpringBootWebRestfulApplication {

    public static void main(String[] args) {
        SpringApplication.run(SpringBootWebRestfulApplication.class, args);
    }

    // 重新实现WebMvcConfigurer接口方法
    public static class MvcConfig implements WebMvcConfigurer {
        @Override
        public void addViewControllers(ViewControllerRegistry registry) {
            registry.addViewController("/success").setViewName("hello");
        }

        @Override
        public void addFormatters(FormatterRegistry registry) {

        }

        @Override
        public void addInterceptors(InterceptorRegistry registry) {

        }

        @Override
        public void addResourceHandlers(ResourceHandlerRegistry registry) {

        }
    }
}
原理:
Springboot在配置SpringMVC的时候,会使用@Conditional的派生注解进行判断,其中有这么一个注解:
@ConditionalOnMissingBean(WebMvcConfigurationSupport.class)
意思是,只有容器中不存在这个类的Bean,自动配置才会生效。
而当我们标注了@EnableWebMvc这个注解时,会为我们导入一个组件:DelegatingWebMvcConfiguration.class:
@Retention(RetentionPolicy.RUNTIME)
@Target(ElementType.TYPE)
@Documented
@Import(DelegatingWebMvcConfiguration.class)
public @interface EnableWebMvc {
}
点进去看一下这个配置类:
这个配置类是一个WebMvcConfigurationSupport的实现类,所以当我们标注上了@EnableWebMvc这个注解时,自动配置失效。
@Configuration(proxyBeanMethods = false)
public class DelegatingWebMvcConfiguration extends WebMvcConfigurationSupport {}
国际化
这个不做过多赘述,有兴趣的同学可以看看这篇:
错误定制
Springboot的默认错误处理策略
我们先自定义一个错误:
@Controller
public class HelloController {
    @ResponseBody
    @RequestMapping("/hello")
    public String hello(){
        int a = 10/0;
        return  "hello";
    }
}
Springboot会自动跳到默认的错误页面

当我们尝试访问一个不存在的接口时:
http://localhost:9527/hello/aa
Springboot也会自动跳到默认的错误页面
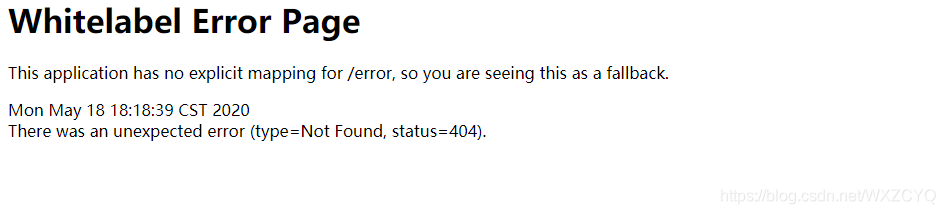
由上面两个例子我们可以看到,当我们的程序出现错误,或者访问不存在的接口时,Springboot会默认跳转到一个/error的接口地址。
这就是Springboot默认的错误处理策略,在这个错误页面我们能获取的信息有:
timestamp: 时间戳.
status: 状态码.
error: 错误提示.
exception: 异常对象.
message: 异常消息.
errors: 数据效验相关的信息.
Springboot 错误处理机制原理
通过之前的学习,我们了解到了Springboot的自动配置原理,会导入很多的xxxxAutoConfiguration,不了解的同学,可以查看我之前的笔记:
Springboot对错误信息的处理也有一个自动配置类:ErrorMvcAutoConfiguration,这个类在配置的过程中,会帮我们注册以下组件:
1、DefaultErrorAttributes    -- 默认的错误信息,能在页面上共享
2、BasicErrorController      -- 处理默认的 '/error' 请求,分为两种处理请求方式:一种是html方式,一种是json方式
3、ErrorPageCustomizer       -- 项目中发生错误后,该对象就会生效,用来定义请求规则
4、DefaultErrorViewResolver  -- 默认的错误视图解析器,将错误信息解析到对应的视图
总的流程就是:
1)、程序发生错误,例如(4xx、5xx)之类的错误,触发ErrorPageCustomizer,帮我们定义相应错误的规则

2)、接着,内部的过滤器会将请求映射到**’/error’**接口,该请求会被BasicErrorController处理

会分为两种处理方式:errorHtml()和 error()
// 如何区分使用哪个方法?
// 根据发送过来的请求的请求头(Accept),判断是由浏览器发送的请求还是其他的客户端(postMan等)
@RequestMapping(produces = MediaType.TEXT_HTML_VALUE)
	public ModelAndView errorHtml(HttpServletRequest request, HttpServletResponse response) {
		HttpStatus status = getStatus(request);
		Map<String, Object> model = Collections
				.unmodifiableMap(getErrorAttributes(request, getErrorAttributeOptions(request, MediaType.TEXT_HTML)));
		response.setStatus(status.value());
		ModelAndView modelAndView = resolveErrorView(request, response, status, model);
         //  如果为null,显示默认的springboot错误页面,否则返回用户已定制的错误页面
		return (modelAndView != null) ? modelAndView : new ModelAndView("error", model);
	}

	@RequestMapping
	public ResponseEntity<Map<String, Object>> error(HttpServletRequest request) {
		HttpStatus status = getStatus(request);
		if (status == HttpStatus.NO_CONTENT) {
			return new ResponseEntity<>(status);
		}
		Map<String, Object> body = getErrorAttributes(request, getErrorAttributeOptions(request, MediaType.ALL));
		return new ResponseEntity<>(body, status);
	}
resolveErrorView方法源码:
protected ModelAndView resolveErrorView(HttpServletRequest request, HttpServletResponse response, HttpStatus status,
			Map<String, Object> model) {
    // 这里的ErrorViewResolver其实就是 DefaultErrorViewResolver
		for (ErrorViewResolver resolver : this.errorViewResolvers) {
			ModelAndView modelAndView = resolver.resolveErrorView(request, status, model);
			if (modelAndView != null) {
				return modelAndView;
			}
		}
		return null;
	}
错误内容视图解析
那么Springboot是如何收集到这些 ErrorViewResolver对象的呢,我们来看一下DefaultErrorViewResolver源码:
主要的是以下的几个方法
1)、DefaultErrorViewResolver一开始被注册到容器中时,会在一开始在一个视图map中添加错误码类型,然后匹配项目中发生的错误。
2)、进入到resolve方法,这里的viewName其实就是错误码,最终errorViewName会被拼接为**’/error/404’**
3)、产生一个模板引擎对象,如果项目使用了模板引擎,那么错误页面会先在**/template/error**下面精确匹配错误页面,比如404.模板引擎后缀
4)、如果精确匹配失败,会模糊匹配譬如4xx,5xx这样的页面
5)、如果项目没有使用模板引擎,那么项目会获得配置文件中配置的静态资源路径(默认是static),并匹配譬如404.html这样的页面
6)、如果上述视图对象都不存在,则直接在页面中返回一串HTML代码
public class DefaultErrorViewResolver implements ErrorViewResolver, Ordered {

	private static final Map<Series, String> SERIES_VIEWS;

	static {
		Map<Series, String> views = new EnumMap<>(Series.class);
		views.put(Series.CLIENT_ERROR, "4xx");
		views.put(Series.SERVER_ERROR, "5xx");
		SERIES_VIEWS = Collections.unmodifiableMap(views);
	}

	private ModelAndView resolve(String viewName, Map<String, Object> model) {
		String errorViewName = "error/" + viewName;
		TemplateAvailabilityProvider provider = this.templateAvailabilityProviders.getProvider(errorViewName,
				this.applicationContext);
		if (provider != null) {
			return new ModelAndView(errorViewName, model);
		}
		return resolveResource(errorViewName, model);
	}

	private ModelAndView resolveResource(String viewName, Map<String, Object> model) {
		for (String location : this.resourceProperties.getStaticLocations()) {
			try {
				Resource resource = this.applicationContext.getResource(location);
				resource = resource.createRelative(viewName + ".html");
				if (resource.exists()) {
					return new ModelAndView(new HtmlResourceView(resource), model);
				}
			}
			catch (Exception ex) {
			}
		}
		return null;
	}
}
3)、在视图解析之前,Springboot会获得一个model对象,这个对象里面存储了错误信息
@RequestMapping(produces = MediaType.TEXT_HTML_VALUE)
	public ModelAndView errorHtml(HttpServletRequest request, HttpServletResponse response) {
		HttpStatus status = getStatus(request);
		Map<String, Object> model = Collections
				.unmodifiableMap(getErrorAttributes(request, getErrorAttributeOptions(request, MediaType.TEXT_HTML)));
		response.setStatus(status.value());
		ModelAndView modelAndView = resolveErrorView(request, response, status, model);
		return (modelAndView != null) ? modelAndView : new ModelAndView("error", model);
	}

	@RequestMapping
	public ResponseEntity<Map<String, Object>> error(HttpServletRequest request) {
		HttpStatus status = getStatus(request);
		if (status == HttpStatus.NO_CONTENT) {
			return new ResponseEntity<>(status);
		}
		Map<String, Object> body = getErrorAttributes(request, getErrorAttributeOptions(request, MediaType.ALL));
		return new ResponseEntity<>(body, status);
	}
这些错误信息来自于getErrorAttributes这个方法,我们跟进去看一下:
这个方法调用了一个ErrorAttributes的接口方法getErrorAttributes,然而这个接口的实现类就是DefaultErrorAttributes
private final ErrorAttributes errorAttributes;
protected Map<String, Object> getErrorAttributes(HttpServletRequest request, ErrorAttributeOptions options) {
		WebRequest webRequest = new ServletWebRequest(request);
		return this.errorAttributes.getErrorAttributes(webRequest, options);
}

public class DefaultErrorAttributes implements ErrorAttributes, HandlerExceptionResolver, Ordered {}
以上…