spring boot day(2)
一、与前端交互存在的问题
1.1 关闭spring boot项目中的spring secyrity
- exclude = {SecurityAutoConfiguration.class
@SpringBootApplication(exclude = {

    SecurityAutoConfiguration.class})
//@SpringBootApplication(exclude= {DataSourceAutoConfiguration.class})
public class HelloworldApplication {


    public static void main(String[] args) {


        SpringApplication.run(HelloworldApplication.class, args);
    }

}
1.2 在后端解决跨域
- controller类上加入@CrossOrigin(value = “http://localhost:8081”)
@CrossOrigin(value = "http://localhost:8081")
public class DogController {


......
}
1.3 读取文件
参考:读取文件方法大全
二、前后端交互
2.1 传递普通变量
- 后端代码
 @RequestMapping("/getName")
    public String getName(){


        return "jack";
    }
- 前端代码:
  axios({


         method:"get",
         url:'http://localhost:8080/getName',
         data:{

    },
         Headers:{


           " Access-Control-Allow-Origin":"*"
         }
      }).then(res=>{


         console.log(res.data)
      })
2.2 传递多种类型数据
- 后端代码
   @RequestMapping("/getName")
    public ArrayList getName(){


      Dog wo = new Dog("kk","12",3);
      ArrayList list = new ArrayList();
      list.add("jack");
      list.add(12);
      list.add(wo);
      return list;
    }
2.3 传递结构体类型数据
- 后端代码
 @RequestMapping("/getDogEntity")
    public Dog getDogEntity(){


        Dog dog1 = new Dog("kkk","23",3);
        return dog1;
    }
- 前端代码
 axios({


         method:"get",
         url:'http://localhost:8080/getDogEntity',
         data:{

    },
         Headers:{


           " Access-Control-Allow-Origin":"*"
         }
      }).then(res=>{


         console.log(res.data)
      })
2.4 返回file类型数据
 @RequestMapping("/getFile")
    public File getFile(HttpServletResponse response) {


        //当前路径是项目下的路径
        File file = new File("./src/main/resources/static/貂蝉.jpg");
        System.out.println(file.getAbsolutePath());
        System.out.println(file.exists());
        //response.setHeader("contentType", "image/jpeg");
        return file;
    }
- 前端得到的data
2.5 前端发送文件数据
   upload() {


      var formdate = new FormData();
      for (var i = 0; i < this.images.length; i++) {


        formdate.append("file", this.images[i]);
      }
      formdate.append("pid", "fileUpload");
      var instance = axios.create({


        baseURL: "http://localhost:8080",
        timeout: 1000,
        headers: {

     "Content-Type": "multipart/form-data" },
      });
      instance.post("/receiveData", formdate).then((res) => {


        console.log("发送成功");
        console.log(res)
      });
    },
2.6 后端接收前端传来的文件
- 后端用的是:@RequestParam(“file”)
@RequestMapping("/receiveData")
public void getImage(@RequestParam("file") MultipartFile[] file,@RequestParam("pid") String value,HttpServletResponse response) throws IOException {
for(int i=0;i < file.length;i++){
System.out.println(file[i].getOriginalFilename());
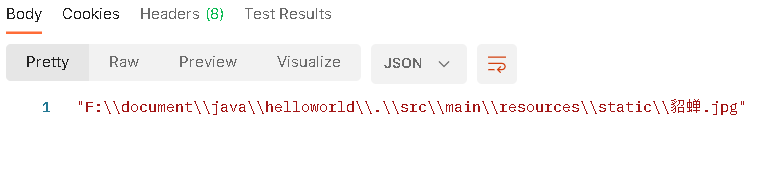
String path = "F:\\document\\java\\helloworld\\src\\main\\resources\\static\\";
File newFile = new File(path + file[i].getOriginalFilename());
System.out.println(newFile.getAbsolutePath());
file[i].transferTo(newFile);
}
System.out.println(value);
}
三、上传文件的细节
3.1 标签
- type是file,即文件类型
- multiple表示可以选择多个文件
<input type="file" @change="change($event)" multiple="multiple">
3.2 change函数,$event参数
- change函数表示选择文件时会产生相对应的事件
- 文件对象就会在event.target.files;
- @进行事件的绑定
change="change($event)
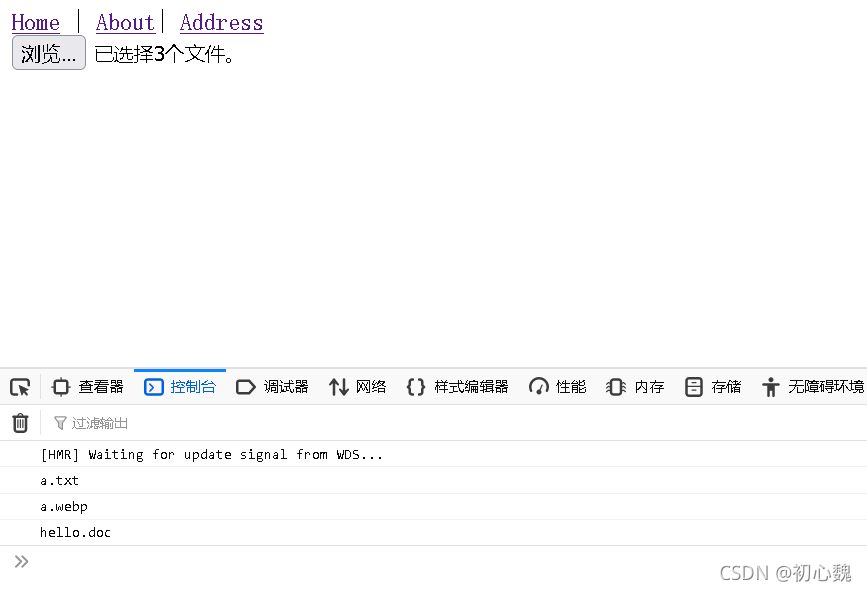
3.3 获取文件并打印在控制台
 change(event){


       this.images = event.target.files;
       for(var i =0;i <this.images.length;i++){


         console.log(this.images[i].name)
       }
    },
3.4 获取input中value
3.5 上传文件
- 将文件数据添加到FormData实例对象中
- “pid”,"fileUpload"以键值对的形式向后端发送数据,后端获取根据key获取。
- 设置请求头: ‘Content-Type’: ‘multipart/form-data’
var formdate = new FormData()
      for(var i=0; i < this.images.length;i++){


          formdate.append(this.images[i])
      }
      formdate.append("pid","fileUpload");
3.6 前端在Data:{}(body)中传入数据,后端通过RequestBody 进行接受
- 前端在data中添加数据
    axios({


        method:"post",
        url:"http://127.0.0.1:8080/receiveData1",
        data:{


          file:"test",
        },
      }).then(res=>{


        console.log("上传成功");
        console.log(res)
      })
- 后端通过RequestBody接受
@RequestMapping("/receiveData1")
    public void getImage(@RequestBody Map<String, String> paras){


        System.out.println(paras.get("file"));
    }
四、前端常用功能
4.1前端页面的跳转加传参数
-页面跳转传参
    turnToSecond() {


      console.log("准备跳转到第二个页面");
      this.$router.push({


        path: "/second",
        query: {


          name: "jack",
          age: 12,
        },
      });
    },
4.2 页面跳转参数的查询
- 页面跳转接收参数
- 跳转页面添加的参数会展示在被跳转的页面上

- 注意:接收是this. r o u t e . q u e r y . k e y 不 是 t h i s . route.query.key不是this. route.query.key不是this.router.query.key
  getParams(){


           console.log("输出")
           console.log(this.$route.query.name);
           console.log(this.$route.query.age);
       }
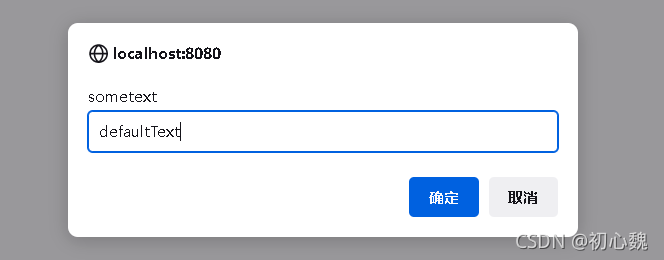
4.3 js的三种弹出框
alert("hahaha")
window.confirm("请按按钮");
window.prompt("sometext","defaultText");
4.4 返回上一页面
this.$router.go(-1)
4.5 vue中一个方法调用另一个方法
this.$options.methods.showTime();
五、vue的细节
5.1 proxy对象
- 比如这里得到的是代理对象,就把他看成后面代理的Array类型就行。

5.2 vue生命周期create(){}
- 在create执行方法,给变量赋初值
   created(){


        this.getTxtContent()
    }
5.3 接受后端的数据,前端进行打印
<template>
    <ul v-for="item in txtContent" :key="item.id">
        <li>{

    {

    item.content}}</li>
    </ul>
</template>
<script>
import axios from 'axios'
export default {


   data(){


       return{


         txtContent:[],
         name:"jack"
       }
   },
    methods:{


        getTxtContent(){


            axios(({


                method:"get",
                url:"http://127.0.0.1:8080/getTxtContent",
            })).then(res=>{


                this.txtContent = res.data;
               // console.log(this.txtContent);
            })
        }

    },
    created(){


        this.getTxtContent()
    }
}
</script>
5.4 v-html
- 前端代码
<template>
    <p v-html="find"></p>
</template>
<script>
import axios from 'axios'
export default {


   data(){


       return{


         txtContent:[],
         name:"jack",
         find:"",
       }
   },
    methods:{


        getTxtContent(){


            axios(({


                method:"get",
                url:"http://127.0.0.1:8080/find",
            })).then(res=>{


                this.find = res.data;
               // console.log(this.txtContent);
            })
        }

    },
    created(){


        this.getTxtContent()
    }
}
</script>
- 后端代码
   @RequestMapping("/find")
    public String getFind(){


        return "<span style=\"color:red;\">查找</span>";
    }
六、vuex的简单使用
6.1 安装vuex
- es6-promise也是必须的
npm install vuex --save
npm install es6-promise --sav
6.2 什么是vuex
- 简单的说,可以把他看成所有vue组件之间的全局变量,全局方法调用点
- Vuex 是一个专为 Vue.js 应用程序开发的状态管理模式。它采用集中式存储管理应用的所有组件的状态,并以相应的规则保证状态以一种可预测的方式发生变化。
6.3 vue3.0中有个store目录下的index.js
- index.js
import {

     createStore } from "vuex";

export default createStore({


  state(){


    return{


      Number:20
    }
  },
  mutations: {


    changeNumber(state){


       state.Number ++;
    }
  },
  actions: {

    },
  modules: {

    },
});
6.4 其他vue组件对store中变量,方法的调用
  useStore(){


      this.$store.commit("changeNumber");
      console.log(this.$store.state.Number);
    }