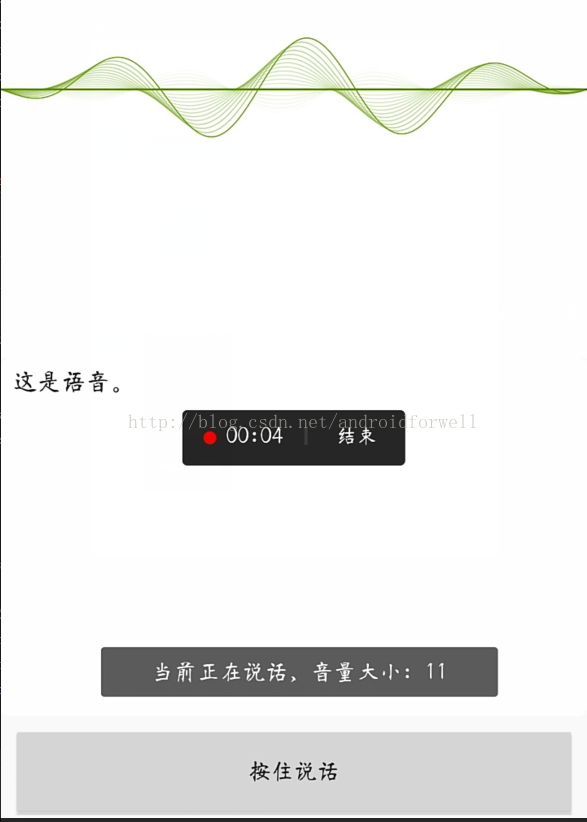
项目中集成科大讯飞语音识别以及随着语音分贝的大小,声纹波动动画的效果,整个效果图如下:
以下为项目中加入语音识别模块的流程及需要注意的问题:
1.根据科大讯飞平台的文档介绍,将科大讯飞语音接入项目,文档链接如下:
http://www.xfyun.cn/doccenter/awd
2.项目中只需要用到语音识别,这部分有两个类:
RecognizerDialog:识别语音功能,该类启动之后具有科大讯飞提供的UI,RecognizerDialogListener为其监听类
- recognizerDialog.setListener(mRecognizerDialogListener);
- recognizerDialog.show();
recognizerDialog.setListener(mRecognizerDialogListener);
recognizerDialog.show();
上段代码用于设置其监听类,返回语音识别结果
SpeechRecognizer:识别语音,该类与RecognizerDialog区别在于,不提供UI界面,RecognizerListener为其监听类
- int ret=speechRecognizer.startListening(mRecognizerListener);
- if (ret!=ErrorCode.SUCCESS){//此时听写失败
- showTip(”听写失败,错误码:”+ret);
- }
 int ret=speechRecognizer.startListening(mRecognizerListener);
                        if (ret!=ErrorCode.SUCCESS){//此时听写失败
                            showTip("听写失败,错误码:"+ret);
                        }
ret为返回码,判断监听状态
两个类中,只需要用到其中一个即可,若两个同时用到,则SpeechRecognizer会被覆盖,在其监听类中回调接口中,结果不完全。
3.使用语音识别时,点击按钮启动相关类之后,直接说话即可,不需要长按按钮;但是用到的一般都是类似微信语音的模式,长按发送语音,因此Demo中仿照微信语音的模式,具体代码如下:
- //按住说话
- btn_start_voice.setOnTouchListener(new View.OnTouchListener() {
- @Override
- public boolean onTouch(View view, MotionEvent motionEvent) {
- switch (motionEvent.getAction()) {
- case MotionEvent.ACTION_DOWN:
- Log.i(TAG,”ACTION_DOWN”);
- mIatResults.clear();
- setSpeechParam();
- int ret=speechRecognizer.startListening(mRecognizerListener);
- if (ret!=ErrorCode.SUCCESS){//此时听写失败
- showTip(”听写失败,错误码:”+ret);
- }
- break;
- case MotionEvent.ACTION_UP:
- Log.i(TAG,”ACTION_UP”);
- speechRecognizer.stopListening();
- break;
- }
- return true;
- }
- });
  //按住说话
        btn_start_voice.setOnTouchListener(new View.OnTouchListener() {
            @Override
            public boolean onTouch(View view, MotionEvent motionEvent) {
                switch (motionEvent.getAction()) {
                    case MotionEvent.ACTION_DOWN:
                        Log.i(TAG,"ACTION_DOWN");

                        mIatResults.clear();
                        setSpeechParam();

                        int ret=speechRecognizer.startListening(mRecognizerListener);
                        if (ret!=ErrorCode.SUCCESS){//此时听写失败
                            showTip("听写失败,错误码:"+ret);
                        }

                        break;
                    case MotionEvent.ACTION_UP:
                        Log.i(TAG,"ACTION_UP");
                        speechRecognizer.stopListening();
                        break;
                }
                return true;
            }
        });
上述代码即可实现长按识别语音,在松开按钮时,调用speechRecognizer.stopListening();即可,若调用speechRecognizer.cancel();则在其监听类中无回调结果;
4.声纹波动动画,在Android Studio项目中的buidle.gradle文件中,配置compile ‘com.carlos.voiceline:mylibrary:1.0.6’即可使用该控件,xml文件如下:
- <com.carlos.voiceline.mylibrary.VoiceLineView
- android:id=“@+id/voicLine”
- android:layout_width=“match_parent”
- android:layout_height=“0dp”
- android:layout_weight=“1.5”
- android:background=“@android:color/white”
- voiceView:maxVolume=“60”
- voiceView:middleLine=“@android:color/black”
- voiceView:middleLineHeight=“1dp”
- voiceView:fineness=“three”
- voiceView:rectSpace=“2dp”
- voiceView:rectWidth=“5dp”
- voiceView:sensibility=“four”
- voiceView:viewMode=“line”
- voiceView:lineSpeed=“90”
- voiceView:voiceLine=“@android:color/holo_green_dark” />
 <com.carlos.voiceline.mylibrary.VoiceLineView
        android:id="@+id/voicLine"
        android:layout_width="match_parent"
        android:layout_height="0dp"
        android:layout_weight="1.5"
        android:background="@android:color/white"
        voiceView:maxVolume="60"
        voiceView:middleLine="@android:color/black"
        voiceView:middleLineHeight="1dp"
        voiceView:fineness="three"
        voiceView:rectSpace="2dp"
        voiceView:rectWidth="5dp"
        voiceView:sensibility="four"
        voiceView:viewMode="line"
        voiceView:lineSpeed="90"
        voiceView:voiceLine="@android:color/holo_green_dark" />
maxVolume为最大波动值,源码中根据该值与输入的语音分贝大小计算波动幅度;sensibility为声音敏感度的检测,“five”为最高,(1-5 设置时均为对应的英文设置)
5.声纹波动设置:voicLine.setVolume();此句设置声纹波动;开始使用MediaRecorder类来获取录入语音的分贝值大小,但是在部分手机上会由于MediaRecorder占用了录音资源而导致科大讯飞启动录音失败。
具体Demo代码在已上传到资源,下载后将在科大讯飞平台申请的APPID,在Application里面替代即可。
转自:https://blog.csdn.net/androidforwell/article/details/70739261