前面几期整理,详见博客
现在来续写第五期—进一步了解Vue.js的组件
一、组件名
在注册一个组件的时候,我们始终需要给它一个名字。比如在全局注册的时候我们已经看到了:
Vue.component('my-component-name', { /* ... */ })该组件名就是 Vue.component 的第一个参数。
组件的命名规范:
1、kebab-case (短横线隔开式)
Vue.component('my-component-name', { /* ... */ })当使用 kebab-case (短横线分隔命名) 定义一个组件时,你也必须在引用这个自定义元素时使用 kebab-case,例如 <my-component-name>。
2、使用 PascalCase(驼峰式)
Vue.component('MyComponentName', { /* ... */ })当使用 PascalCase (首字母大写命名) 定义一个组件时,你在引用这个自定义元素时两种命名法都可以使用。也就是说 <my-component-name> 和 <MyComponentName> 都是可接受的。注意,尽管如此,直接在 DOM (即非字符串的模板) 中使用时只有 kebab-case 是有效的。
二、组件的注册
1、全局注册
到目前为止,我们只用过 Vue.component 来创建组件:
Vue.component('my-component-name', {
  // ... 选项 ...
})这些组件是全局注册的。也就是说它们在注册之后可以用在任何新创建的 Vue 根实例 (new Vue) 的模板中。比如:
Vue.component('component-a', { /* ... */ })
Vue.component('component-b', { /* ... */ })
Vue.component('component-c', { /* ... */ })

new Vue({ el: '#app' })
<div id="app">
<component-a></component-a>
<component-b></component-b>
<component-c></component-c>
</div>在所有子组件中也是如此,也就是说这三个组件在各自内部也都可以相互使用。
2、局部注册
你可以通过一个普通的 JavaScript 对象来定义组件:
var ComponentA = { /* ... */ }
var ComponentB = { /* ... */ }
var ComponentC = { /* ... */ }
然后在 components 选项中定义你想要使用的组件:
new Vue({
  el: '#app',
  components: {
    'component-a': ComponentA,
    'component-b': ComponentB
  }
})
对于 components 对象中的每个 property 来说,其 property 名就是自定义元素的名字,其 property 值就是这个组件的选项对象。
3、在模块系统中局部注册
如果你还在阅读,说明你使用了诸如 Babel 和 webpack 的模块系统。在这些情况下,我们推荐创建一个 components 目录,并将每个组件放置在其各自的文件中。
然后你需要在局部注册之前导入每个你想使用的组件。例如,在一个假设的 ComponentB.js 或 ComponentB.vue 文件中:
import ComponentA from './ComponentA'
import ComponentC from './ComponentC'

export default {
  components: {
    ComponentA,
    ComponentC
  },
  // ...
}
现在 ComponentA 和 ComponentC 都可以在 ComponentB 的模板中使用了。
4、基础组件的自动化全局注册
可能你的许多组件只是包裹了一个输入框或按钮之类的元素,是相对通用的。我们有时候会把它们称为基础组件,它们会在各个组件中被频繁的用到。
所以会导致很多组件里都会有一个包含基础组件的长列表:
import BaseButton from './BaseButton.vue'
import BaseIcon from './BaseIcon.vue'
import BaseInput from './BaseInput.vue'

export default {
  components: {
    BaseButton,
    BaseIcon,
    BaseInput
  }
}
三、单文件组件
在实际开发项目中,我们常常是用到的是单文件组件
- 全局定义 (Global definitions) 强制要求每个 component 中的命名不得重复
- 字符串模板 (String templates) 缺乏语法高亮,在 HTML 有多行的时候,需要用到丑陋的
\ - 不支持 CSS (No CSS support) 意味着当 HTML 和 JavaScript 组件化时,CSS 明显被遗漏
- 没有构建步骤 (No build step) 限制只能使用 HTML 和 ES5 JavaScript,而不能使用预处理器,如 Pug (formerly Jade) 和 Babel
文件扩展名为 .vue 的 single-file components (单文件组件) 为以上所有问题提供了解决方法,并且还可以使用 webpack 或 Browserify 等构建工具。
利用Vue CLI创建vue.js项目的方法,在上期博客里面已经提到过,点击详情查看方法
创建好的目录如下:
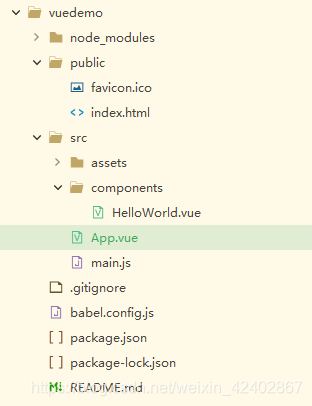
其中src目录为vue.js源代码目录,可以看到components目录下的HelloWorld.vue文件,这就是单文件组件
<!-- 单文件组件HelloWorld.vue -->
<template>
  <div class="hello">
    <h1>{{ msg }}</h1>
    <p>
      For a guide and recipes on how to configure / customize this project,<br>
      check out the
      <a href="https://cli.vuejs.org" target="_blank" rel="noopener">vue-cli documentation</a>.
    </p>
    <h3>Installed CLI Plugins</h3>
    <ul>
      <li><a href="https://github.com/vuejs/vue-cli/tree/dev/packages/%40vue/cli-plugin-babel" target="_blank" rel="noopener">babel</a></li>
      <li><a href="https://github.com/vuejs/vue-cli/tree/dev/packages/%40vue/cli-plugin-eslint" target="_blank" rel="noopener">eslint</a></li>
    </ul>
    <h3>Essential Links</h3>
    <ul>
      <li><a href="https://vuejs.org" target="_blank" rel="noopener">Core Docs</a></li>
      <li><a href="https://forum.vuejs.org" target="_blank" rel="noopener">Forum</a></li>
      <li><a href="https://chat.vuejs.org" target="_blank" rel="noopener">Community Chat</a></li>
      <li><a href="https://twitter.com/vuejs" target="_blank" rel="noopener">Twitter</a></li>
      <li><a href="https://news.vuejs.org" target="_blank" rel="noopener">News</a></li>
    </ul>
    <h3>Ecosystem</h3>
    <ul>
      <li><a href="https://router.vuejs.org" target="_blank" rel="noopener">vue-router</a></li>
      <li><a href="https://vuex.vuejs.org" target="_blank" rel="noopener">vuex</a></li>
      <li><a href="https://github.com/vuejs/vue-devtools#vue-devtools" target="_blank" rel="noopener">vue-devtools</a></li>
      <li><a href="https://vue-loader.vuejs.org" target="_blank" rel="noopener">vue-loader</a></li>
      <li><a href="https://github.com/vuejs/awesome-vue" target="_blank" rel="noopener">awesome-vue</a></li>
    </ul>
  </div>
</template>

<script>
export default {
  name: 'HelloWorld',
  props: {
    msg: String
  }
}
</script>

<!-- Add "scoped" attribute to limit CSS to this component only -->
<style scoped>
h3 {
  margin: 40px 0 0;
}
ul {
  list-style-type: none;
  padding: 0;
}
li {
  display: inline-block;
  margin: 0 10px;
}
a {
  color: #42b983;
}
</style>
此时页面的入口文件App.vue里面代码是这样的
<template>
  <div id="app">
    <img alt="Vue logo" src="./assets/logo.png">
    <HelloWorld msg="Welcome to Your Vue.js App"/>
  </div>
</template>

<script>
import HelloWorld from './components/HelloWorld.vue'  /* 通过import引入HelloWorld组件 */

export default {
  name: 'App',
  components: {
    HelloWorld   /* 通过components属性局部注册HelloWorld组件 */
  }
}
</script>

<style>
#app {
  font-family: Avenir, Helvetica, Arial, sans-serif;
  -webkit-font-smoothing: antialiased;
  -moz-osx-font-smoothing: grayscale;
  text-align: center;
  color: #2c3e50;
  margin-top: 60px;
}
</style>
import HelloWorld from './components/HelloWorld.vue' /* 通过import引入HelloWorld组件 */
components: {
HelloWorld /* 通过components属性局部注册HelloWorld组件 */
}
可以运行项目预览一下页面

新建单文件组件
代码演练
新建单文件组件zujian.vue
//zujian.vue
<template>
	<!-- 模板区 -->
	<h2 class="red">{{ msg }}</h2>
</template>

<!-- 脚本区 -->
<script>
// 编写默认的属性、数据、方法
export default {
	name: 'zujian',
	props: {
		msg: String,
	},

	methods: {

	},
};
</script>

<!-- 样式区 -->
<style>
.red {
	color: red;
}
</style>
在App.vue里面注册组件
//App.vue
<template>
  <div id="app">
    <img alt="Vue logo" src="./assets/logo.png">
    <HelloWorld msg="Welcome to Your Vue.js App"/>
	<zujian msg="新建组件"></zujian>  /*实例化组件,并传入字符串“新建组件” */
  </div>
</template>

<script>
/* 通过import引入HelloWorld组件 */
import HelloWorld from './components/HelloWorld.vue'
/* 通过import引入zujian组件 */
import zujian from './components/zujian.vue'

export default {
  name: 'App',
/* 通过components属性局部注册HelloWorld组件 */
/* 通过components属性局部注册zujian组件 */
  components: {
    HelloWorld,
	zujian
  }
}
</script>

<style>
#app {
  font-family: Avenir, Helvetica, Arial, sans-serif;
  -webkit-font-smoothing: antialiased;
  -moz-osx-font-smoothing: grayscale;
  text-align: center;
  color: #2c3e50;
  margin-top: 60px;
}
</style>
编译通过

查看效果
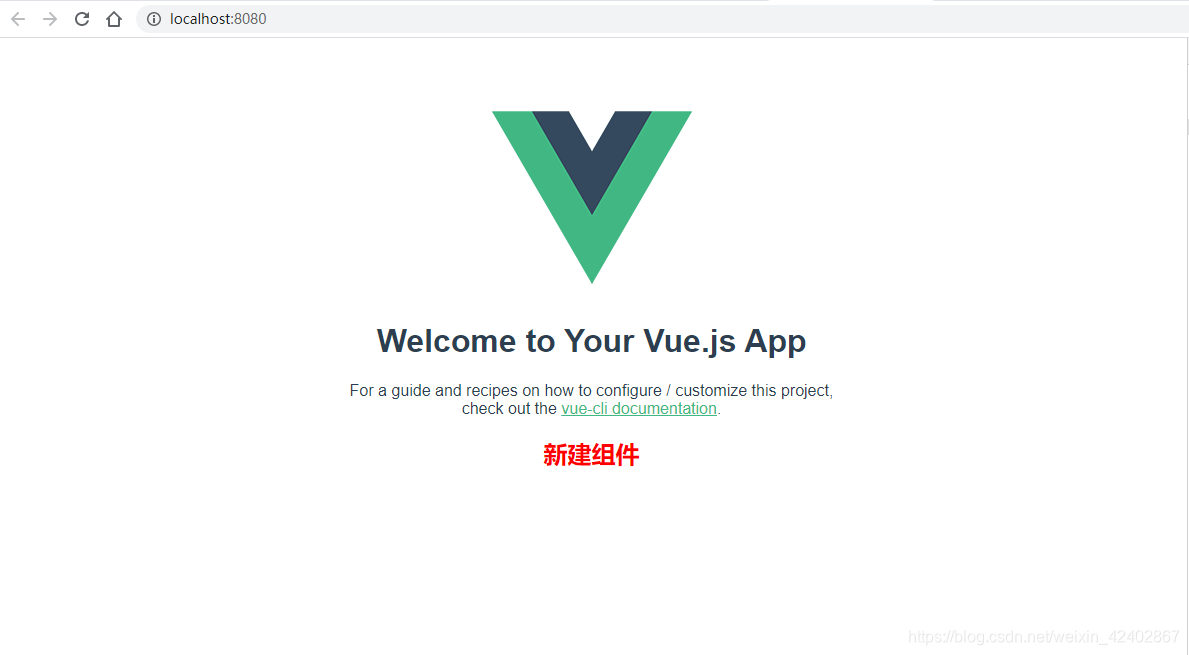
到这里我们就完成了组件的创建、注册、调试、使用 过程
