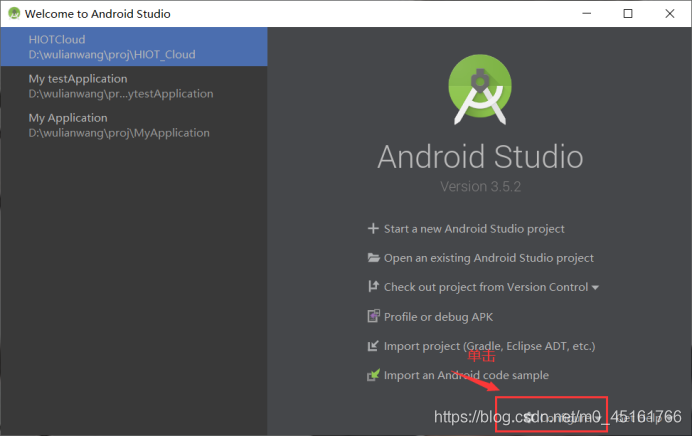
大家好,本文讲述Android studio开发的第一步——合理化工程结构和项目配置
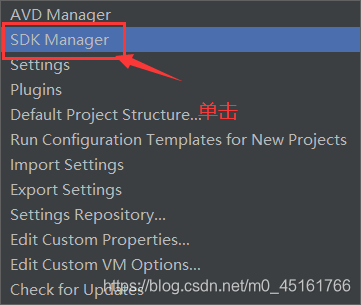
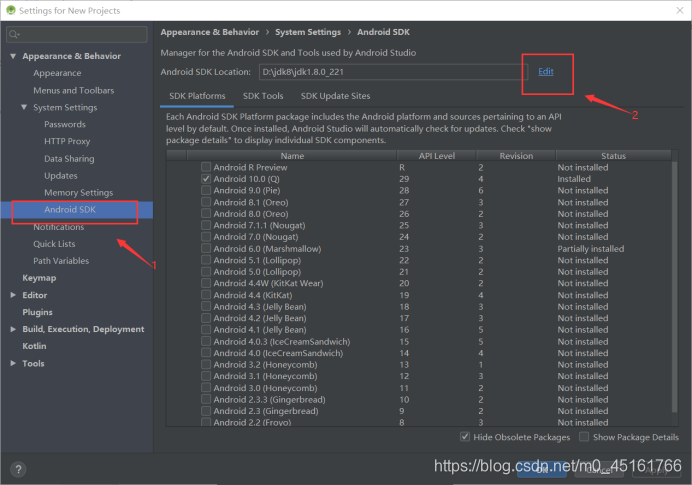
1.首先是配置jdk
注意:一定要勾选上Api29,:Android 10.0……这个选项,会自动下载API29
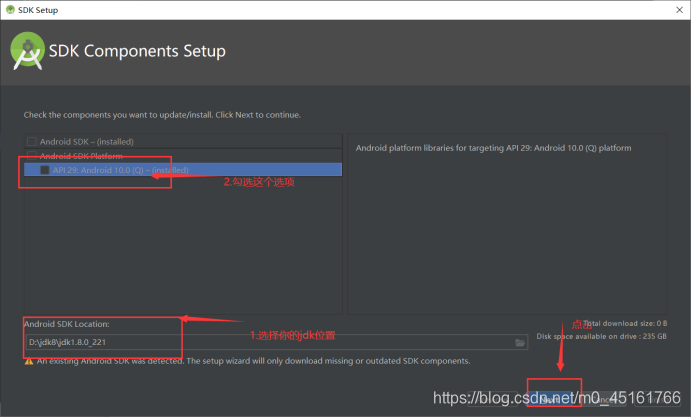
然后一直点击next,最后点击finish,出现
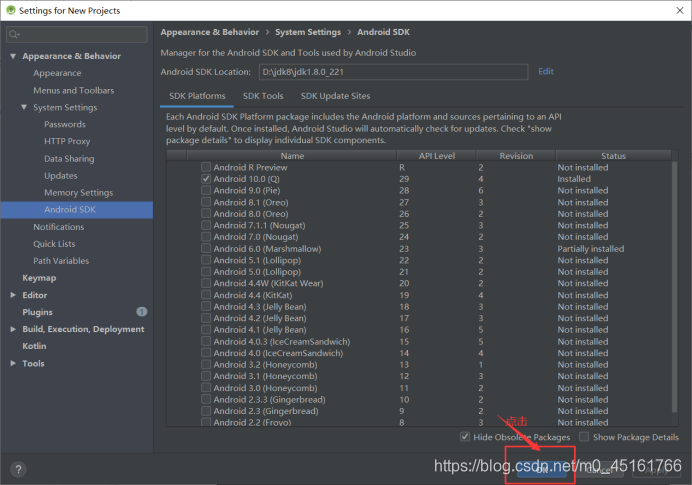
到这里jdk就配置好了
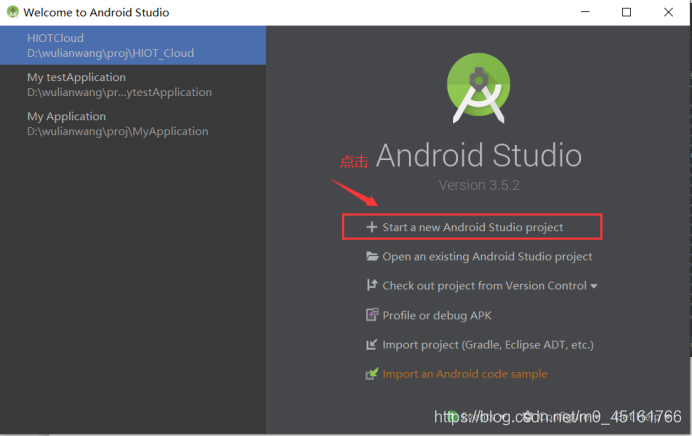
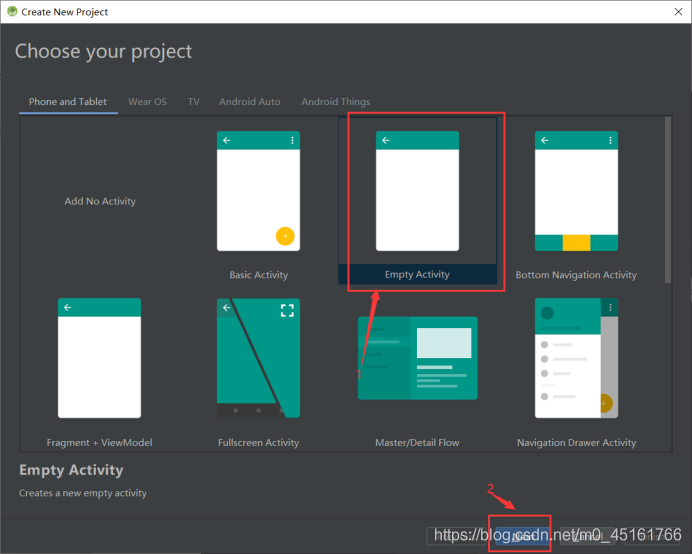
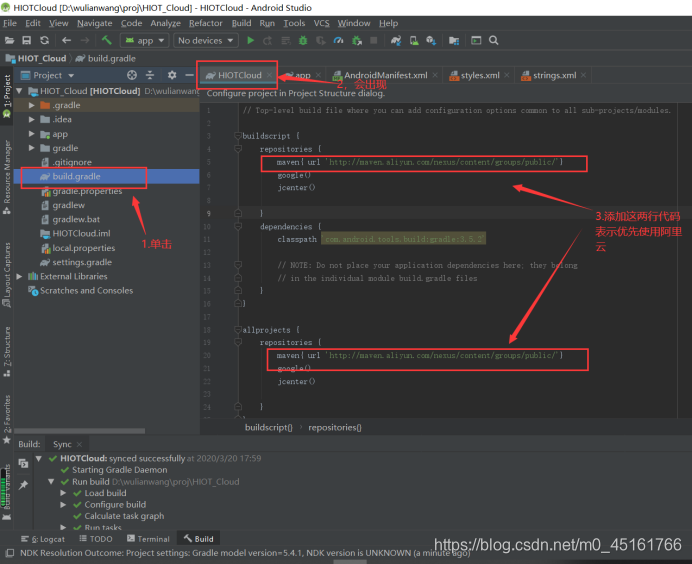
2.创建工程和合理化工程结构以及项目配置
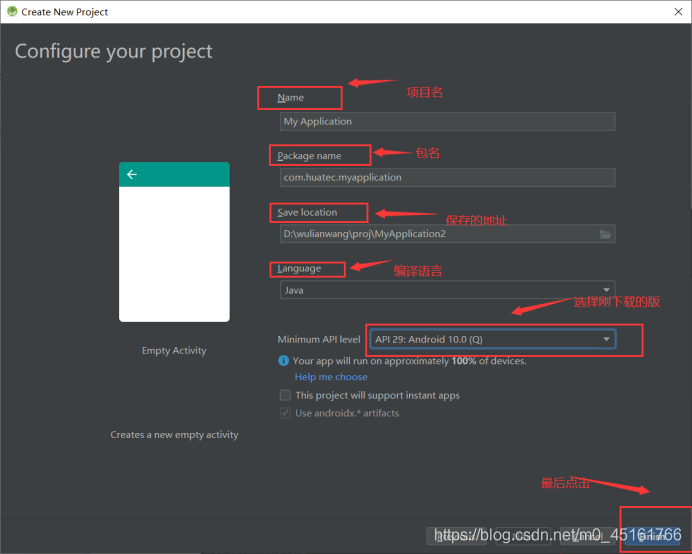
注意:因为刚才下载的是API29:Android 10.0,所以这里也是这样选
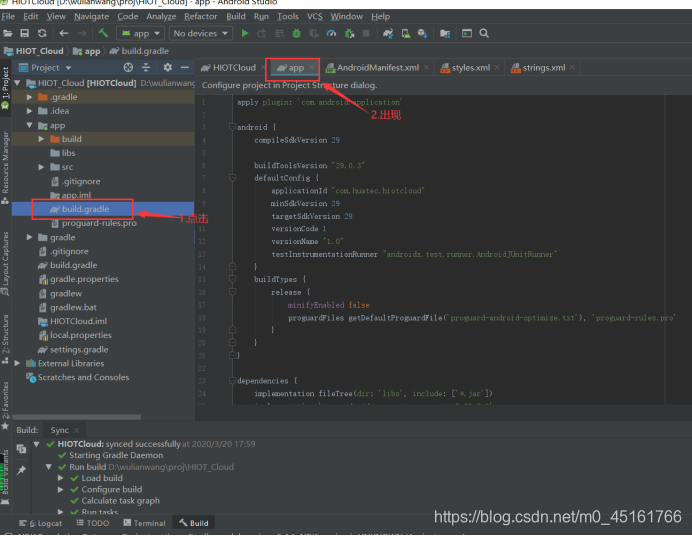
App文件中具体代码:
apply plugin: 'com.android.application'

android {
    compileSdkVersion 29

    buildToolsVersion "29.0.3"
    defaultConfig {
        applicationId "com.huatec.hiotcloud"
        minSdkVersion 29
        targetSdkVersion 29
        versionCode 1
        versionName "1.0"
        testInstrumentationRunner "androidx.test.runner.AndroidJUnitRunner"
    }
    buildTypes {
        release {
            minifyEnabled false
            proguardFiles getDefaultProguardFile('proguard-android-optimize.txt'), 'proguard-rules.pro'
        }
    }
}

dependencies {
    implementation fileTree(dir: 'libs', include: ['*.jar'])
    implementation 'com.android.support:appcompat-v7:29.2.0'
    implementation 'androidx.appcompat:appcompat:1.0.2'
    implementation 'androidx.constraintlayout:constraintlayout:1.1.3'
    testImplementation 'junit:junit:4.12'
    androidTestImplementation 'androidx.test.ext:junit:1.1.0'
    androidTestImplementation 'androidx.test.espresso:espresso-core:3.1.1'
    androidTestImplementation 'com.android.support.test:runner'
    implementation 'com.google.dagger:dagger-compiler:2.5'
    annotationProcessor 'com.google.dagger:dagger-compiler:2.5'
    implementation 'com.jakewharton:butterknife:8.2.1'
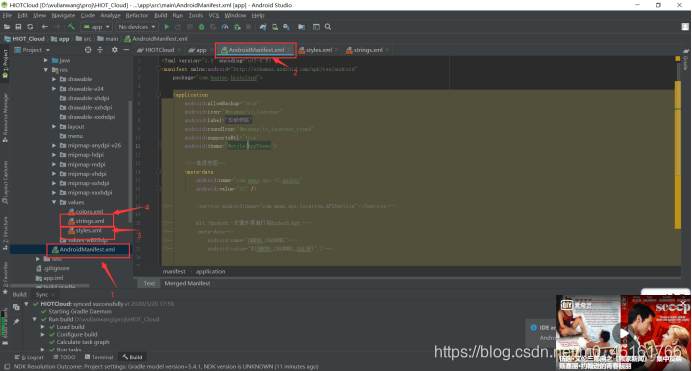
AndroidManifest.xml中的代码:
<?xml version="1.0" encoding="utf-8"?>
<manifest xmlns:android="http://schemas.android.com/apk/res/android"
package="com.huatec.hiotcloud">
<application
android:allowBackup="true"
android:icon="@mipmap/ic_launcher"
android:label="@string/app_name"
android:roundIcon="@mipmap/ic_launcher_round"
android:supportsRtl="true"
android:theme="@style/AppTheme">
<!--高德地图-->
<meta-data
android:name="com.amap.api.v2.apikey"
android:value="32" />
<!-- <service android:name="com.amap.api.location.APSService"></service>-->
<!-- <!–-友盟多渠道打包–>-->
<!-- <meta-data-->
<!-- android:name="UMENG_CHANNEL"-->
<!-- android:value="${UMENG_CHANNEL_UALUE}" />-->
<activity
android:name=".MainActivity"
android:configChanges="orientation|keyboardHidden|screenSize"
android:screenOrientation="portrait"
android:theme="@style/welcom">
<intent-filter>
<action android:name="android.intent.action.MAIN" />
<category android:name="android.intent.category.LAUNCHER" />
</intent-filter>
</activity>
</application>
</manifest>
Styles中的代码:
<resources>
    <string name="app_name">华硕物联</string>
    <string name="amap_apikey">32</string>
</resources>
到此所有的合理化结构和配置文件就都弄好了
