一、下载
地址:http://www.android-studio.org
二、安装配置:
温馨提示:在安装Android Studio之前,建议先提前准备好单独的Android SDK,这个可以在AndroidDevTools网站下载。以前用Eclipse做过Android开发的人,就可以用现成的Android SDK。
Android Studio安装完成后,第一次启动AS前,为了避免重新下载新版本的SDK,需要做如下操作:
AS启动前,打开安装目录,请先将bin目录的idea.properties文件中增加一行:disable.android.first.run=true就行了,避免第一次打开AS时自动重新下载SDK。mac平台的右键安装包->Show Package Contents 就找到bin目录了。
第一次打开Android Studio时,需要配置JDK和SDK:

上图中,选择“Project Structure”,弹出如下界面:(选择JDK和Android SDK的路径)

注:不要问我JDK和Android SDK怎么来的吧?JDK需要提前安装好,Android SDK需要提前准备好,这种帖子一搜一大把,大家自行查找。
当然,以后我们在使用Android Studio 的时候,也可以随时修改JDK和Android SDK的路径。选择「File-->Other Settings-->Default Sructure」,即可进行同样的修改。
在打开的项目中进行设置,一般都是针对打开的这个项目的特定设置。想要对所有项目生效,需要打开:
File——Other Setting进行设置。
于是我选择了“Default Project Structure”,设置默认的东东。于是发现,NDK路径居然不能设置。点击了没有反应。擦。要不要这么怪异:
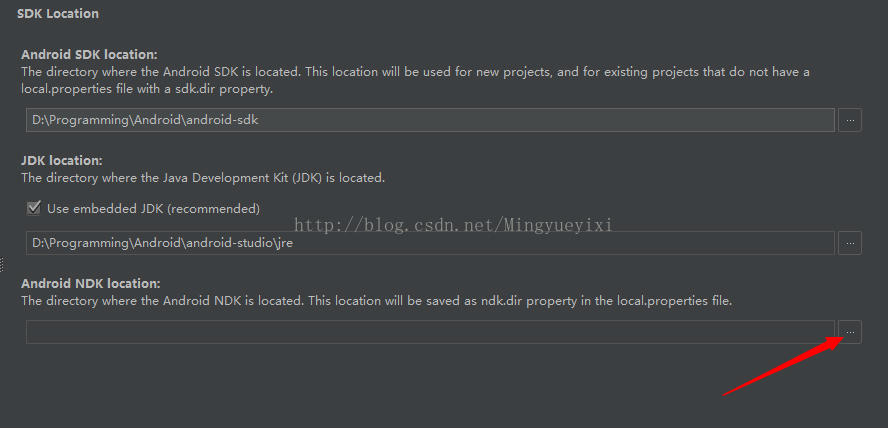
点击无法反应,直接写路径也不行。于是看提示文字:
The directory where Android NDK is loaded. This location will be saved ndk.dir property in the local.properties file.
意思是说,这是加载Android NDK 的目录。这个位置的设置将会在local.properties文件中保存形如“ndk.dir”的属性。
嚓。没什么用啊。于是看看,针对具体项目的设置会不会生效。先在project视图中选中打开的项目,再打开:File——Project Structure。发现居然能够设置,可以用。于是设置:
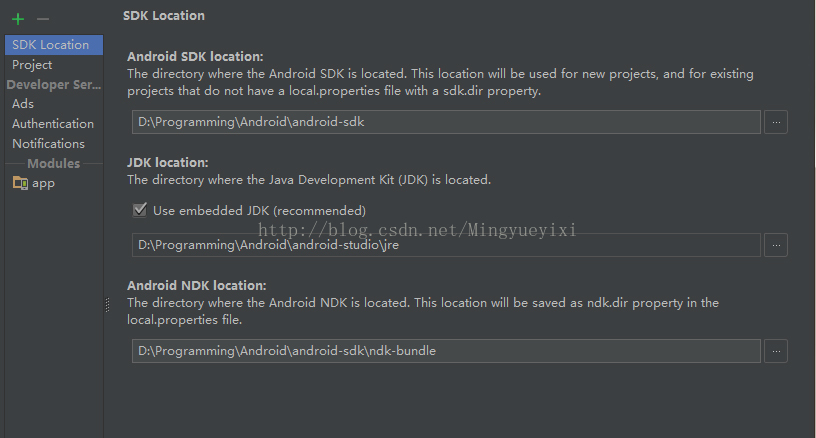
接着查看项目文件,发现项目下有:local.properties文件,内容是:
- ## This file is automatically generated by Android Studio.
- # Do not modify this file -- YOUR CHANGES WILL BE ERASED!
- #
- # This file must *NOT* be checked into Version Control Systems,
- # as it contains information specific to your local configuration.
- #
- # Location of the SDK. This is only used by Gradle.
- # For customization when using a Version Control System, please read the
- # header note.
- #Wed Mar 22 00:09:09 CST 2017
- ndk.dir=D\:\\Programming\\Android\\android-sdk\\ndk-bundle
- sdk.dir=D\:\\Programming\\Android\\android-sdk