在Android布局文件中,某些时候使用include标签会很多的好处
1,对于稍微有点复杂的布局界面,将所有布局代码都写在一个xml文件中,界面会显得很冗余,可读性很差,这时可以分开使用include标签来处理
2,当Activity需要用到同样的布局效果,也可以使用include标签处理,而不用把一样的布局代码重复拷贝几遍,不用以后修改起来每个地方都要修改,提高了代码的重用性
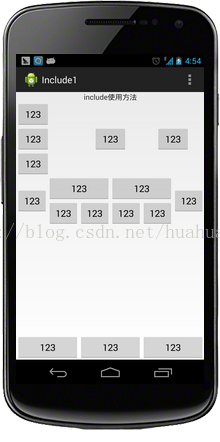
我们先用include标签实现下面的效果
activity_main.xml
<RelativeLayout xmlns:android="http://schemas.android.com/apk/res/android"
    xmlns:tools="http://schemas.android.com/tools"
    android:layout_width="match_parent"
    android:layout_height="match_parent"
    android:orientation="vertical"
    tools:context=".MainActivity" >

    	<TextView
    	android:id="@+id/text1"
        android:layout_width="match_parent"
        android:layout_height="wrap_content"
        android:text="include使用方法"
        android:gravity="center"
        />

   	<include
   	    layout="@layout/layout_sec1"
   	    android:id="@+id/layout_sec1"
   	    android:layout_width="match_parent"
	    android:layout_height="wrap_content"
	    android:layout_below="@id/text1"
	   />

	<include
	    layout="@layout/layout_sec2"
	    android:id="@+id/layout_sec2"
	    android:layout_width="match_parent"
	    android:layout_height="wrap_content"
	    android:layout_below="@id/layout_sec1"
	    />

	<include
	    layout="@layout/layout_sec3"
	    android:layout_width="match_parent"
	    android:layout_height="wrap_content"
	    android:layout_alignParentBottom="true"
	    />
</RelativeLayout>
可以看到在这个布局文件中使用了3个include标签对应3个layout,调用了Include之后,对应的细分布局文件内容就被完全嵌入到了include所指定的位置.这3个layout的代码就不贴出来了.
此程序只有布局代码,没有java代码,比较简单,可以自己实现或者下载源码看下
这里主要要注意的是,经常有人在RelativeLayout中使用include标签
但是却发现include进来的控件无法用layout_alignParentBottom="true"之类的标签来调整。其实解决方法非常简单,只要你在include的时候同时重载下layout_width和layout_height这两个标签就可以了。如果不重载,任何针对include的layout调整都是无效的.这个最好亲自试验下就更能体会重载的重要性!
下面看看第二个例子
btn.xml
<?xml version="1.0" encoding="utf-8"?>
<LinearLayout xmlns:android="http://schemas.android.com/apk/res/android"
    android:layout_width="fill_parent"
    android:layout_height="wrap_content"
    android:orientation="vertical" >
    <Button
        android:id="@+id/btn"
        android:layout_width="wrap_content"
        android:layout_height="wrap_content"
        android:text="Button">
    </Button>
</LinearLayout>
<!--
<FrameLayout xmlns:android="http://schemas.android.com/apk/res/android"
    android:layout_width="match_parent"
    android:layout_height="match_parent">
-->

    <merge xmlns:android="http://schemas.android.com/apk/res/android">

    <ImageView
        android:layout_width="match_parent"
        android:layout_height="match_parent"
        android:background="#FF0000" />

</merge>
<LinearLayout xmlns:android="http://schemas.android.com/apk/res/android"
    xmlns:tools="http://schemas.android.com/tools"
    android:layout_width="match_parent"
    android:layout_height="match_parent"
    android:orientation="vertical"
    tools:context=".MainActivity" >

    <include android:id="@+id/layout1" layout="@layout/btn"/>
    <include android:id="@+id/layout2" layout="@layout/btn"/>
    <include layout="@layout/view"/>


</LinearLayout>
接着看java代码
package huahua.include2;

import android.os.Bundle;
import android.app.Activity;
import android.view.Menu;
import android.view.View;
import android.widget.Button;
import android.widget.LinearLayout;

public class MainActivity extends Activity {

    private LinearLayout layout1 = null;
    private LinearLayout layout2 = null;
    private Button btn1;
    private Button btn2;

	@Override
	protected void onCreate(Bundle savedInstanceState) {
		super.onCreate(savedInstanceState);
		setContentView(R.layout.activity_main);

		layout1 = (LinearLayout)findViewById(R.id.layout1);
		layout2 = (LinearLayout)findViewById(R.id.layout2);

		btn1 = (Button)layout1.findViewById(R.id.btn);
		btn1.setOnClickListener(new BtnClick());
		btn2 = (Button)layout2.findViewById(R.id.btn);
		btn2.setOnClickListener(new BtnClick());
	}

	private class BtnClick implements View.OnClickListener{

		@Override
		public void onClick(View v) {
			if(v.equals(btn1))
			{
				btn1.setText("点击是第一个按钮");
			}
			else if(v.equals(btn2))
			{
				btn2.setText("点击是第二个按钮");
			}

		}

	}

	@Override
	public boolean onCreateOptionsMenu(Menu menu) {
		// Inflate the menu; this adds items to the action bar if it is present.
		getMenuInflater().inflate(R.menu.main, menu);
		return true;
	}

}
