一、数据集的获取
TensorFLow 对 MNIST 数据集做了封装,让我们更加方便的使用。
from tensorflow.examples.tutorials.mnist import input_data

# 读取数据集,第一次TensorFlow会自动下载数据集到下面的路径中, label 采用 one_hot 形式
# label 默认采用 0~9 来表示,等价于 one_hot=False, read_data_sets 时会默认把图像 reshape(展平)
# 若想保留图像的二维结构,可以传入 reshape=False
mnist = input_data.read_data_sets('/path/to/MNIST_data', one_hot=True)
- 1
- 2
- 3
- 4
- 5
- 6

二、 数据集的划分
1、 数据集会自动被分成 3 个子集,train、validation 和 test
# 显示默认数据集的大小
print("Training data size: ", mnist.train.num_examples)
>>> Training data size:  55000

print("Validating data size: ", mnist.validation.num_examples)
>>> Validating data size:  5000

print("Testing data size: ", mnist.test.num_examples)
>>> Testing data size:  10000
- 1
- 2
- 3
- 4
- 5
- 6
- 7
- 8
- 9
2、使用 train、validation 和 test 的 images 和 labels 方法获取图像和类标
- 图像和类标的数据类型均为
ndarray
# 显示数据集图像和类标的形状
print("Images shape:", mnist.train.images.shape, "Labels shape:", mnist.train.labels.shape)
>>> Images shape: (55000, 784) Labels shape: (55000, 10)

print("Images shape:", mnist.validation.images.shape, "Labels shape:", mnist.validation.labels.shape)
>>> Images shape: (5000, 784) Labels shape: (5000, 10)

print("Images shape:", mnist.test.images.shape, "Labels shape:", mnist.test.labels.shape)
>>> Images shape: (10000, 784) Labels shape: (10000, 10)
- 1
- 2
- 3
- 4
- 5
- 6
- 7
- 8
- 9

3、查看 train 数据集中一张图片的大小、类标和像素值
# 图片大小(28*28), TensorFlow 默认把它展开了,但这样丢失了图片的二维结构信息!
print("Example training data0: ", mnist.train.images[0].shape)
>>> Example training data0 shape:  (784,)

print("Example training data0 label: ", mnist.train.labels[0])
>>> Example training data0 label:  [ 0.  0.  0.  0.  0.  0.  0.  1.  0.  0.]

print("Example training data0: ", mnist.train.images[0])
- 1
- 2
- 3
- 4
- 5
- 6
- 7
- 8
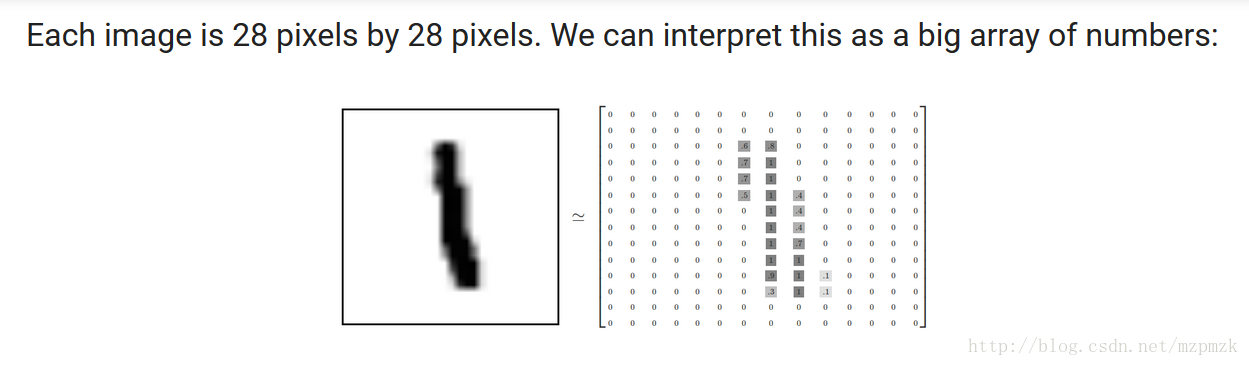
- TensorFLow 对图片像素值做了归一化处理(|x−255|255” role=”presentation” style=”position: relative;” data-evernote-id=”410”>|x−255|255|x−255|255),所以,像素矩阵中元素的取值范围是[0, 1],它代表了颜色的深浅。其中 0 表示白色背景,1 表示黑色前景。
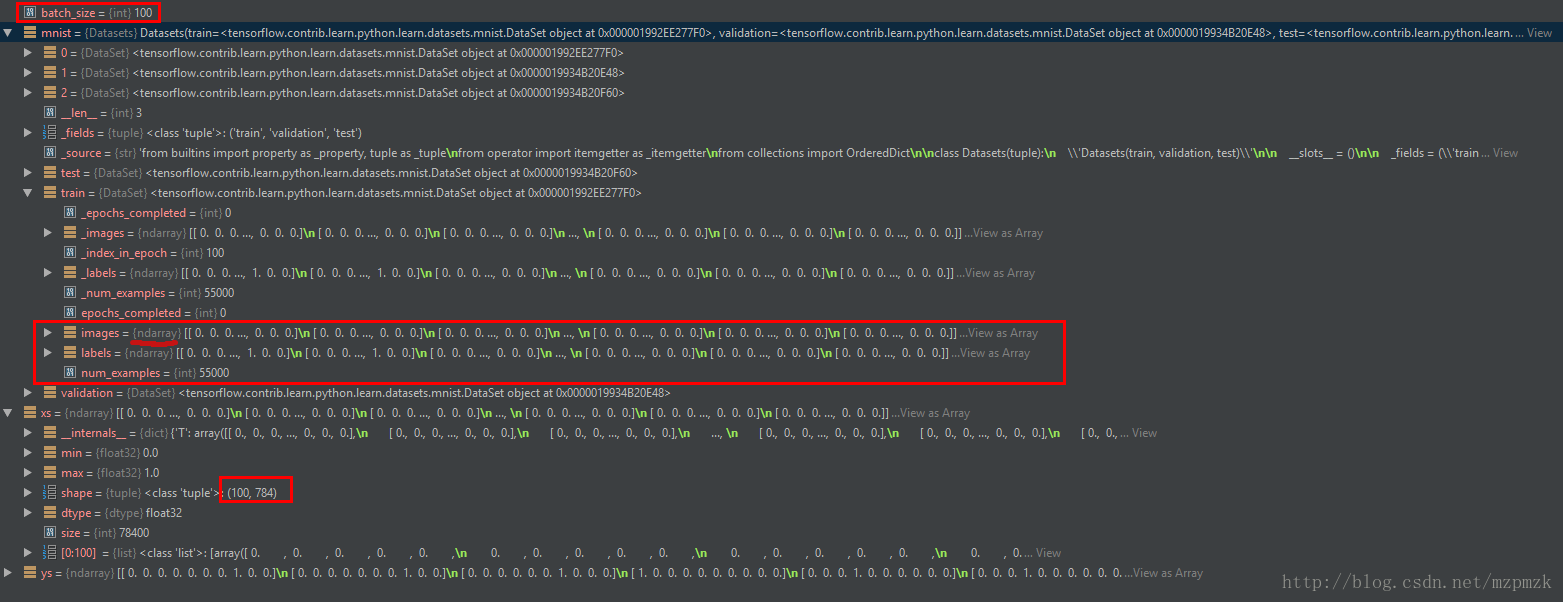
4、使用 mnist.train.next_batch 随机取出 batch_size 个图片及其类标
batch_size = 100
xs, ys = mnist.train.next_batch(batch_size)

print("X shape:", xs.shape)
>>> X shape: (100, 784)

print("Y shape:", ys.shape)
>>> Y shape: (100, 10)
- 1
- 2
- 3
- 4
- 5
- 6
- 7
- 8