现在的APP可谓是不可没有消息推送,这样可以提高用户的粘滞性,结合着大数据算法,推送一些关心的内容
消息推送的第三方SDK有很多 极光/个推/小米/华为等,当然也可以公司开发一套消息推送
下面是极光推送集成指南(之前做过很多次,一直没有分享)
setp1: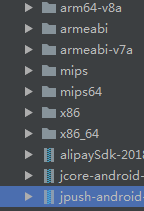 导入SDK并配置引用,然后引入各个平台的so文件
然后在配置清单文件中加入:
<!-- since 3.0.9 Required SDK 核心功能 -->
<provider
    android:name="cn.jpush.android.service.DataProvider"
    android:authorities="包名"
    android:exported="true" />

<!-- since 1.8.0 option 可选项。用于同一设备中不同应用的 JPush 服务相互拉起的功能。 -->
<!-- 若不启用该功能可删除该组件,或把 enabled 设置成 false ;App 不会被其他 App 拉起,但会拉起其他的 App。 -->
<service
    android:name="cn.jpush.android.service.DaemonService"
    android:enabled="true"
    android:exported="true">
    <intent-filter>
        <action android:name="cn.jpush.android.intent.DaemonService" />

        <category android:name="包名" />
    </intent-filter>
</service>

<!-- since 3.1.0 Required SDK 核心功能 -->
<provider
    android:name="cn.jpush.android.service.DownloadProvider"
    android:authorities="包名"
    android:exported="true" />

<!-- Required SDK 核心功能 -->
<receiver
    android:name="cn.jpush.android.service.PushReceiver"
    android:enabled="true">
    <intent-filter android:priority="1000">
        <action android:name="cn.jpush.android.intent.NOTIFICATION_RECEIVED_PROXY" />

        <category android:name="包名" />
    </intent-filter>
    <intent-filter>
        <action android:name="android.intent.action.USER_PRESENT" />
        <action android:name="android.net.conn.CONNECTIVITY_CHANGE" />
    </intent-filter>
    <!-- Optional -->
    <intent-filter>
        <action android:name="android.intent.action.PACKAGE_ADDED" />
        <action android:name="android.intent.action.PACKAGE_REMOVED" />

        <data android:scheme="package" />
    </intent-filter>
</receiver>

<!-- Required SDK 核心功能 -->
<activity
    android:name="cn.jpush.android.ui.PushActivity"
    android:configChanges="orientation|keyboardHidden"
    android:exported="false"
    android:theme="@android:style/Theme.NoTitleBar"
    tools:ignore="DuplicateActivity">
    <intent-filter>
        <action android:name="cn.jpush.android.ui.PushActivity" />

        <category android:name="android.intent.category.DEFAULT" />
        <category android:name="包名" />
    </intent-filter>
</activity>
<!-- SDK 核心功能 -->
<activity
    android:name="cn.jpush.android.ui.PopWinActivity"
    android:configChanges="orientation|keyboardHidden"
    android:exported="false"
    android:theme="@style/MyDialogStyle">
    <intent-filter>
        <category android:name="android.intent.category.DEFAULT" />
        <category android:name="包名" />
    </intent-filter>
</activity>

<!-- Since JCore2.0.0 Required SDK核心功能 -->
<!-- 可配置android:process参数将Service放在其他进程中;android:enabled属性不能是false -->
<!-- 这个是自定义Service,要继承极光JCommonService,可以在更多手机平台上使得推送通道保持的更稳定 -->
<service
    android:name=".service.JpushBackgroudeService"
    android:enabled="true"
    android:exported="false"
    android:process=":pushcore">
    <intent-filter>
        <action android:name="cn.jiguang.user.service.action" />
    </intent-filter>
</service>

<!-- Required SDK 核心功能 -->
<receiver android:name="cn.jpush.android.service.AlarmReceiver" />

<!-- Required since 3.0.7 -->
<!-- 新的 tag/alias 接口结果返回需要开发者配置一个自定的广播 -->
<!-- 3.3.0开始所有事件将通过该类回调 -->
<!-- 该广播需要继承 JPush 提供的 JPushMessageReceiver 类, 并如下新增一个 Intent-Filter -->
<receiver
    android:name=".receiver.PushBackgroudeBrocast"
    android:enabled="true"
    android:exported="false">
    <intent-filter>
        <action android:name="cn.jpush.android.intent.RECEIVE_MESSAGE" />

        <category android:name="包名" />
    </intent-filter>
</receiver>

<!-- User defined. 用户自定义的广播接收器 -->
<!--
这是3.3.0之前版本的接收方式,3.3.0开始是通过继承 JPushMessageReceiver并配置来接收所有事件回调。>
<!- 如果仍然需要在这个Receiver里接收,需要在JPushMessageReceiver 的子类里不重写对应的回调方法,或者重写方法且调用super
-->
 <receiver
 android:name="包名"
 android:enabled="true"
 android:exported="false">
 <intent-filter>
 <!--Required 用户注册 SDK 的 intent-->
 <action android:name="cn.jpush.android.intent.REGISTRATION" />
 <!--Required 用户接收 SDK 消息的 intent-->
 <action android:name="cn.jpush.android.intent.MESSAGE_RECEIVED" />
 <!--Required 用户接收 SDK 通知栏信息的 intent-->
 <action android:name="cn.jpush.android.intent.NOTIFICATION_RECEIVED" />
 <!--Required 用户打开自定义通知栏的 intent-->
 <action android:name="cn.jpush.android.intent.NOTIFICATION_OPENED" />
 <!-- 接收网络变化 连接/断开 since 1.6.3 -->
 <action android:name="cn.jpush.android.intent.CONNECTION" />
 <category android:name="包名" />
 </intent-filter>
 </receiver>


<!-- User defined. 用户自定义 Receiver 接收被拉起回调 -->
<!-- 自定义 Receiver 组件,继承cn.jpush.android.service.WakedResultReceiver类,复写onWake(int wakeType)或 onWake(Context context, int wakeType)方法以监听被拉起 -->
<receiver android:name=".receiver.PushCallbackRegister">
    <intent-filter>
        <action android:name="cn.jpush.android.intent.WakedReceiver" />

        <category android:name="${applicationId}" />
    </intent-filter>
</receiver>

<!-- Required SDK核心功能 since 3.3.0 -->
<activity
    android:name="cn.jpush.android.service.JNotifyActivity"
    android:exported="true"
    android:taskAffinity="jpush.custom"
    android:theme="@android:style/Theme.Translucent.NoTitleBar">
    <intent-filter>
        <action android:name="cn.jpush.android.intent.JNotifyActivity" />

        <category android:name="包名" />
    </intent-filter>
</activity>
在gradle中的
defaultConfig{
ndk {
    abiFilters 'armeabi-v7a', 'x86', 'x86_64', 'armeabi-v7a'//,'arm64-v8a'
}

manifestPlaceholders = [
        JPUSH_PKGNAME: applicationId,
        JPUSH_APPKEY : "你的ID", //JPush 上注册的包名对应的 Appkey.
        JPUSH_CHANNEL: "developer-default", //暂时填写默认值即可.
]
}
这样 配置就算可以了,然后在包下,复制从官网下载的demo,到包里,参考地址:https://docs.jiguang.cn//jpush/client/Android/android_3m/
比如TagAliasOperatorHelper这个工具类 改好以后在全局的Applition中 初始化
JPushInterface.setDebugMode(true);
JPushInterface.init(this);
String registrationID = JPushInterface.getRegistrationID(this);//这个可以传给后台 推送到具体的个人
如上配置好之后:
检查一下有没有通知栏权限
package xxx;

import android.app.AppOpsManager;
import android.content.Context;
import android.content.Intent;
import android.content.pm.ApplicationInfo;
import android.net.Uri;
import android.os.Build;
import android.provider.Settings;

import java.lang.reflect.Field;
import java.lang.reflect.Method;

public class CheckAndStartNitifycationUtils
{
    public static boolean isNotificationEnabled(Context context) {
        String CHECK_OP_NO_THROW = "checkOpNoThrow";
        String OP_POST_NOTIFICATION = "OP_POST_NOTIFICATION";

        AppOpsManager mAppOps = null;
        if (android.os.Build.VERSION.SDK_INT >= android.os.Build.VERSION_CODES.KITKAT) {
            mAppOps = (AppOpsManager) context.getSystemService(Context.APP_OPS_SERVICE);
        }
        ApplicationInfo appInfo = context.getApplicationInfo();
        String pkg = context.getApplicationContext().getPackageName();
        int uid = appInfo.uid;

        Class appOpsClass = null;
        try {
            if (Build.VERSION.SDK_INT >= Build.VERSION_CODES.KITKAT) {
                appOpsClass = Class.forName(AppOpsManager.class.getName());
            }
            Method checkOpNoThrowMethod = appOpsClass.getMethod(CHECK_OP_NO_THROW, Integer.TYPE, Integer.TYPE,
                    String.class);
            Field opPostNotificationValue = appOpsClass.getDeclaredField(OP_POST_NOTIFICATION);

            int value = (Integer) opPostNotificationValue.get(Integer.class);
            return ((Integer) checkOpNoThrowMethod.invoke(mAppOps, value, uid, pkg) == AppOpsManager.MODE_ALLOWED);

        } catch (Exception e) {
            e.printStackTrace();
        }
        return false;
    }

    public static void startNotifyCationAction(Context context)
    {
//        boolean enabled = isNotificationEnabled(context);

//        if (!enabled) {
            /**
             * 跳到通知栏设置界面
             * @param context
             */
            Intent localIntent = new Intent();
            //直接跳转到应用通知设置的代码:
            if (android.os.Build.VERSION.SDK_INT >= Build.VERSION_CODES.LOLLIPOP) {
                localIntent.setAction("android.settings.APP_NOTIFICATION_SETTINGS");
                localIntent.putExtra("app_package", context.getPackageName());
                localIntent.putExtra("app_uid", context.getApplicationInfo().uid);
            } else if (android.os.Build.VERSION.SDK_INT == Build.VERSION_CODES.KITKAT) {
                localIntent.setAction(Settings.ACTION_APPLICATION_DETAILS_SETTINGS);
                localIntent.addCategory(Intent.CATEGORY_DEFAULT);
                localIntent.setData(Uri.parse("package:" + context.getPackageName()));
            } else {
                //4.4以下没有从app跳转到应用通知设置页面的Action,可考虑跳转到应用详情页面,
                localIntent.addFlags(Intent.FLAG_ACTIVITY_NEW_TASK);
                if (Build.VERSION.SDK_INT >= 9) {
                    localIntent.setAction("android.settings.APPLICATION_DETAILS_SETTINGS");
                    localIntent.setData(Uri.fromParts("package", context.getPackageName(), null));
                } else if (Build.VERSION.SDK_INT <= 8) {
                    localIntent.setAction(Intent.ACTION_VIEW);
                    localIntent.setClassName("com.android.settings", "com.android.setting.InstalledAppDetails");
                    localIntent.putExtra("com.android.settings.ApplicationPkgName", context.getPackageName());
                }
            }
            context.startActivity(localIntent);
        }
//    }
}
这样就可以去调试了
