1、openwrt介绍
Cisco/Linksys在2003年发布了WRT54G这款无线路由器,同年有人发现它的IOS是基于Linux的,然而Linux是基于GPL许可证发布的,按照该许可证Cisco应该把WRT54G 的IOS的源代码公开。2003年3月, Cisco迫于公众压力公开了WRT54G的源代码。此后就有了一些基于Cisco源码的第三方路由器固件,OpenWrt就是其中的一个。
OpenWrt的特点:
- 可扩展性好,可以在线安装您所需要的功能,目前有1000多个功能包可选;
- 是一台完整的Linux工作站,文件系统可读可写,便于开发者学习和实践
2、openwrt编译
(也可参考https://wenku.baidu.com/view/11610bdf767f5acfa0c7cd0d.html)
2.1、依赖包安装
应用程序--附件--终端
sudo apt-get update      (更新)
安装编译需要的组件:
sudo apt-get install gcc
sudo apt-get install g++
sudo apt-get install binutils
sudo apt-get install patch
sudo apt-get install bzip2
sudo apt-get install flex
sudo apt-get install bison
sudo apt-get install make
sudo apt-get install autoconf
sudo apt-get install gettext
sudo apt-get install texinfo
sudo apt-get install unzip
sudo apt-get install sharutils
sudo apt-get install subversion
sudo apt-get install libncurses5-dev
sudo apt-get install ncurses-term
sudo apt-get install zlib1g-dev
sudo apt-get install gawk
sudo apt-get install asciidoc
sudo apt-get install libz-dev
2.2、下载openwrt源码
mkdir openwrt
cd openwrt
sudo apt-get install git subversion
git clone https://github.com/openwrt/openwrt
我们使用的是git方式下载,但在编译过程中OpenWRT要求有安装subversion,所以我们先一并安装上。
OpenWRT代码已全部开源在github上,各版本的下载地址可在
https://dev.openwrt.org/wiki/GetSource地址获取,可以选择Chaos Calmer (15.05)正式发行版,也可以选择开发版,我们选择的是主开发版(trunk),可分别在以下地址下载:
正式版输入: git clone -b chaos_calmer https://github.com/openwrt/openwrt
开发版输入: git clone https://github.com/openwrt/openwrt
由于OpenWRT源码包比较大,而且国内连接github速度较慢,须耐心等待git下载完成
2.3、更新openwrt配置列表
在编译之前,我们需要先更新种子列表,输入:./scripts/feeds update -a,然后更新种子在menuconfig中的显示列表,输入:./scripts/feeds install -a,只有install之后才能在make menuconfig里面进行相关的配置。
./scripts/feeds update -a
./scripts/feeds install -a
2.4、配置编译模块
make menuconfig
-
在编译之前,我们还需要配置内核,就像我们一直Linux一样:
Make menuconfig 配置内核,这时会出现一个熟悉的界面。如图:

-
配置过程中,我们还需要配置几个选项。
Target System:选择X86。如图:

-
Target Image:选择ext4和Build VMware image files(VMDK)。如图:

-
Kernel Modules-->Network Devices:选择VMware网卡。官网上写着必须选择e1000,当我们选择X86时,这个网卡就已经被选择了。但是仅仅这个还是不够的,我们在ubuntu下,使用lspci命令,如下图,看看自己的VMware网卡是什么,在配置选项中对应选上。

-
可以看出我的VMware网卡是PCnet32,在网络设备的配置界面中选择上,如图:

-
luci界面部分,这个很重要,他是用户交互的。配置项有以下几个,如图:

-
collections中,选择luci。如图:

-
Application中,选择luci-app-ddns,luci-app-firewall,luci-app-ntpc,luci-app-samba。如图,也可以根据你自己的需要选择。

-
Themes选项中全部选择,如图:

-
若有Translations 选项等,也可以把luci-i18n-chinese选择上,这样可以使用中文显示了。
配置完成,保存之后,开始编译,编译的时候注意,openwrt默认是使用非root用户的
<*> uhttpd........................ uHTTPd - tiny, single threaded HTTP server --->
<*> uhttpd-mod-lua... uHTTPd - tiny, single threaded HTTP server (Lua plugin)
2.5、 开始编译
make V=99
编译时间有点长,输入make V=99即可开始编译,V=99表示输出编译信息。编译过程需要联网,OpenWRT需要在线下载很多文件。
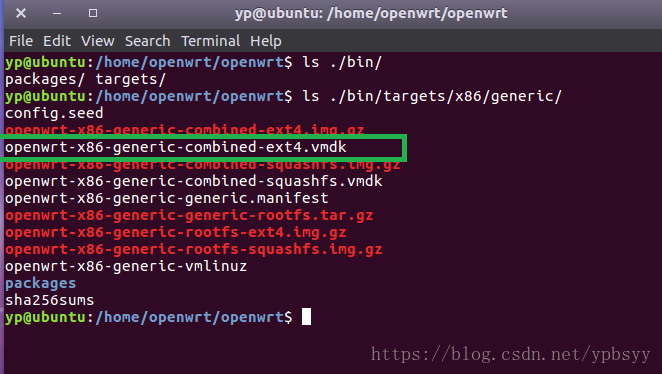
2.6、生成vmdk文件