目录
基于jsp页面
目录结构

1.配置坐标pom.xml文件
<properties>
  ···
    <!--版本锁定-->
    <spring.version>5.0.2.RELEASE</spring.version>
    ···
  </properties>

  <dependencies>
    <dependency>
      <groupId>org.springframework</groupId>
      <artifactId>spring-context</artifactId>
      <version>${spring.version}</version>
    </dependency>
    <dependency>
      <groupId>org.springframework</groupId>
      <artifactId>spring-web</artifactId>
      <version>${spring.version}</version>
    </dependency>
    <dependency>
      <groupId>org.springframework</groupId>
      <artifactId>spring-webmvc</artifactId>
      <version>${spring.version}</version>
    </dependency>
  </dependencies>
2.在resource目录下新建Spring的xml文件

2.1 修改文件头及配置文件
<?xml version="1.0" encoding="UTF-8"?>
<beans xmlns="http://www.springframework.org/schema/beans"
        xmlns:mvc="http://www.springframework.org/schema/mvc"
        xmlns:context="http://www.springframework.org/schema/context"
        xmlns:xsi="http://www.w3.org/2001/XMLSchema-instance"
        xsi:schemaLocation="
            http://www.springframework.org/schema/beans
            http://www.springframework.org/schema/beans/spring-beans.xsd
            http://www.springframework.org/schema/mvc
            http://www.springframework.org/schema/mvc/spring-mvc.xsd
            http://www.springframework.org/schema/context
            http://www.springframework.org/schema/context/spring-context.xsd">
    <!--配置扫描包-->
  <context:component-scan base-package="edu.xiaoying"/>

   <!--视图解析器-->
    <bean id="internalResourceViewResolver" class="org.springframework.web.servlet.view.InternalResourceViewResolver">
        <!--文件所在目录-->
        <property name="prefix" value="/WEB-INF/pages/" />
        <!--文件的后缀名-->
        <property name="suffix" value=".jsp"/>
    </bean>
      <!--开启SpringMVC注解支持-->
        <mvc:annotation-driven/>
</beans>
3.配置web.xml文件
  <!DOCTYPE web-app PUBLIC
   "-//Sun Microsystems, Inc.//DTD Web Application 2.3//EN"
   "http://java.sun.com/dtd/web-app_2_3.dtd" >

  <web-app>
    <display-name>Archetype Created Web Application</display-name>
    <servlet>
      <servlet-name>dispatcherServlet</servlet-name>
      <servlet-class>org.springframework.web.servlet.DispatcherServlet</servlet-class>
      <!--初始化spring配置-->
      <init-param>
        <param-name>contextConfigLocation</param-name>
        <param-value>classpath:springmvc.xml</param-value>
      </init-param>
      <!--设置启动时机,当Tomcat服务器启动时加载,不写默认是负数,当服务器使用是才加载-->
      <load-on-startup>1</load-on-startup>

    </servlet>
    <servlet-mapping>
      <servlet-name>dispatcherServlet</servlet-name>
      <url-pattern>/</url-pattern>
    </servlet-mapping>
  </web-app>
4.配置第一个程序,欢迎页代码
跳转到success.jsp页面
package edu.xiaoying;

import org.springframework.stereotype.Controller;
import org.springframework.web.bind.annotation.RequestMapping;

/*配置器类*/
@Controller
public class HelloController {
    @RequestMapping(path = "/hello")
    public String sayHello(){
        System.out.println("hello,SpringMvc!");
        /*返回字符串的默认是去找这个字符串为名字的文件*/
        return "success";
    }
}
5.其他页面
5.1 success页面
<%--
  Created by IntelliJ IDEA.
  User: dell
  Date: 2020/4/3
  Time: 14:04
  To change this template use File | Settings | File Templates.
--%>
<%@ page contentType="text/html;charset=UTF-8" language="java" %>
<html>
<head>
    <title>Title</title>
</head>
<body>
<h3>你好,SpringMVC</h3>
</body>
</html>
5.2 index页面
<%--
  Created by IntelliJ IDEA.
  User: dell
  Date: 2020/4/3
  Time: 13:30
  To change this template use File | Settings | File Templates.
--%>
<%@ page contentType="text/html;charset=UTF-8" language="java" %>
<html>
<head>
    <title>Title</title>
</head>
<body>
<h3>入门程序</h3>
		<%--注意这里没有/--%>
    <a href="hello">入门程序</a>
</body>
</html>
6.效果
6.1 index页面

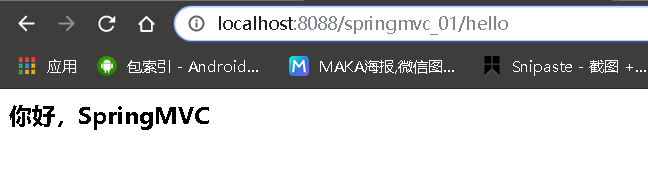
6.2 跳转到success页面
7.分析结构

