文章目录
说明: 这只是部分功能,很基础的,根据个人喜好,如果说追求美观,那么多去找一些方案,网上很多美化小技巧,装饰在自己博客上面,看着也赏心悦目,但是装饰太对,终究会拖加载速度的后腿,这就需要更多的技术来优化,例如SEO优化,但是博客嘛,以简洁为主还是很好的。不要太多了累赘,反而看着很舒服!
更换Next主题
- 在
blog文件夹下,右键打开git bash here,输入:
git clone https://github.com/iissnan/hexo-theme-next themes/next
可以看到themes文件夹下多了一个next文件,这就是next主题文件。
- 启用主题:打开
F: \ blog \ _config.yml,找到theme标签,更改为:
theme: next
- 打开
F:\blog\themes\next\_config.yml,找到scheme,启用pisices
	# Schemes
		#scheme: Muse
		#scheme: Mist
		scheme: Pisces
		#scheme: Gemini
网站基本设置
- 打开
F: \ blog \ _config.yml,找到Site标签
# Site
title: 代澳旗's Blog
subtitle: Welcome to my World!!!
description: 这是我在学习过程中用hexo搭建的一个基于github的个人博客网站,用来存储学习笔记!
keywords: ''
author: 代澳旗
#avatar: 网站头像外部链接
language: zh-Hans
timezone: Asia/Shanghai
添加页面
- 打开站点配置文件,修改如下
menu:
  home: /|| home
  about: /about/|| user
  tags: /tags/|| tags
  categories: /categories/|| th
  archives: /archives/|| archive
  #schedule: /schedule/ || calendar
  #sitemap: /sitemap.xml || sitemap
  #commonweal: /404/ || heartbeat
- 打开命令行,输入:
hexo n page categories其他的页面也是如此。会看到source文件夹下有相应的文件生成。
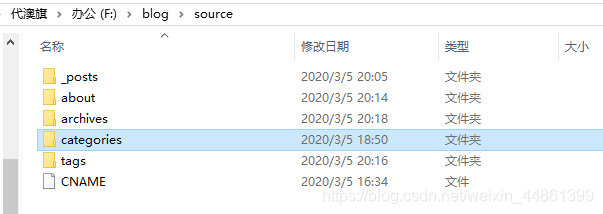
- 打开里面的
index.md,添加一个字段type: categories,其他的也是如此
动态背景
- 找到主题文件
F:\blog\themes\next\_config.yml改为 true
# Canvas-nest
canvas_nest: true
鼠标点击效果图
- 在
F:\blog\themes\next\source\js\src里新建love.js,写入以下内容
!function(e,t,a){function n(){c(".heart{width: 10px;height: 10px;position: fixed;background: #f00;transform: rotate(45deg);-webkit-transform: rotate(45deg);-moz-transform: rotate(45deg);}.heart:after,.heart:before{content: '';width: inherit;height: inherit;background: inherit;border-radius: 50%;-webkit-border-radius: 50%;-moz-border-radius: 50%;position: fixed;}.heart:after{top: -5px;}.heart:before{left: -5px;}"),o(),r()}function r(){for(var e=0;e<d.length;e++)d[e].alpha<=0?(t.body.removeChild(d[e].el),d.splice(e,1)):(d[e].y--,d[e].scale+=.004,d[e].alpha-=.013,d[e].el.style.cssText="left:"+d[e].x+"px;top:"+d[e].y+"px;opacity:"+d[e].alpha+";transform:scale("+d[e].scale+","+d[e].scale+") rotate(45deg);background:"+d[e].color+";z-index:99999");requestAnimationFrame(r)}function o(){var t="function"==typeof e.onclick&&e.onclick;e.οnclick=function(e){t&&t(),i(e)}}function i(e){var a=t.createElement("div");a.className="heart",d.push({el:a,x:e.clientX-5,y:e.clientY-5,scale:1,alpha:1,color:s()}),t.body.appendChild(a)}function c(e){var a=t.createElement("style");a.type="text/css";try{a.appendChild(t.createTextNode(e))}catch(t){a.styleSheet.cssText=e}t.getElementsByTagName("head")[0].appendChild(a)}function s(){return"rgb("+~~(255*Math.random())+","+~~(255*Math.random())+","+~~(255*Math.random())+")"}var d=[];e.requestAnimationFrame=function(){return e.requestAnimationFrame||e.webkitRequestAnimationFrame||e.mozRequestAnimationFrame||e.oRequestAnimationFrame||e.msRequestAnimationFrame||function(e){setTimeout(e,1e3/60)}}(),n()}(window,document);
- 打开
F:\blog\themes\next\layout\_layout.swig,在末尾添加代码。
<!-- 页面点击效果 -->
<script type="text/javascript" src="/js/src/love.js"></script>
设置站点建立时间
- 找到主题文件
F:\blog\themes\next\_config.yml,找到since标签
设置头像
- 将头像图片放到
F:\blog\themes\next\source\images - 打开
F:\blog\themes\next\_config.yml,找到avatar,修改如下代码
# Sidebar Avatar
# in theme directory(source/images): /images/avatar.gif
# in site  directory(source/uploads): /uploads/avatar.gif
avatar: /images/touxiang.jpg
修改网站图标
- 图标素材网站:iconfont
- 下载16x16以及32x32大小的PNG格式图标,置于
/themes/next/source/images/下 - 打开
themes/next/下的_config.yml,查找favicon,修改要更换的图标名字即可。
favicon:
  small: /images/wangzhantubiao-16.png
  medium: /images/wangzhantubiao-32.png
  apple_touch_icon: /images/apple-touch-icon-next.png
  safari_pinned_tab: /images/logo.svg
  #android_manifest: /images/manifest.json
  #ms_browserconfig: /images/browserconfig.xml
添加RSS
- 在
Git bash here中添加插件
cnpm install --save hexo-generator-feed
- 在站点配置文件中添加如下代码
# Extensions
## Plugins: http://hexo.io/plugins/
#RSS订阅
plugin: hexo-generator-feed
- 在主题配置文件下添加
# Set rss to false to disable feed link.
# Leave rss as empty to use site's feed link.
# Set rss to specific value if you have burned your feed already.
rss: /atom.xml
添加fork me Github
- 点击http://tholman.com/github-corners/挑选自己喜欢的样式,并复制代码。
- 找到
themes/next/layout/_layout.swig文件,(放在<div class="headband"></div>的下面),并把href改为你的github地址。
修改文章底部带#号的标签
- 修改模板
/themes/next/layout/_macro/post.swig,搜索rel="tag">#,将#换成
<i class="fa fa-tag"></i>
在每篇文章末尾统一添加“本文结束”标记
- 在
\themes\next\layout\_macro中新建passage-end-tag.swig
文件,添加你想说的内容:
<div>
    {% if not is_index %}
        <div style="text-align:center;color: #ccc;font-size:14px;">-------------结束啦<i class="fa fa-paw"></i>感谢阅读-------------</div>
    {% endif %}
</div>
- 打开
\themes\next\layout\_macro\post.swig文件,在<footer class="post-footer">之后,post-footer之前添加:
 <div>
    {% if not is_index %}
         {% include 'passage-end-tag.swig' %}
    {% endif %}
 </div>
博文压缩
- 安装插件
cnpm install gulp -g
cnpm install gulp-minify-css gulp-htmlmin gulp-htmlclean gulp --save
- 在
blog下面新建gulpfile.js,写入:
var gulp = require('gulp');
var minifycss = require('gulp-minify-css');
var uglify = require('gulp-uglify');
var htmlmin = require('gulp-htmlmin');
var htmlclean = require('gulp-htmlclean');
// 压缩 public 目录 css
gulp.task('minify-css', function() {
    return gulp.src('./public/**/*.css')
        .pipe(minifycss())
        .pipe(gulp.dest('./public'));
});
// 压缩 public 目录 html
gulp.task('minify-html', function() {
  return gulp.src('./public/**/*.html')
    .pipe(htmlclean())
    .pipe(htmlmin({
         removeComments: true,
         minifyJS: true,
         minifyCSS: true,
         minifyURLs: true,
    }))
    .pipe(gulp.dest('./public'))
});
// 压缩 public/js 目录 js
gulp.task('minify-js', function() {
    return gulp.src('./public/**/*.js')
        .pipe(uglify())
        .pipe(gulp.dest('./public'));
});
// 执行 gulp 命令时执行的任务
gulp.task('default', [
    'minify-html','minify-css','minify-js'
]);
- 以后在生成博文是执行
hexo g && gulp就会根据gulpfile.js中的配置,对public目录中的静态资源文件进行压缩。
修改代码块自定义样式
- 打开
\themes\next\source\css\_custom\custom.styl,向里面加入:
//代码块自定义样式
// Custom styles.
code {
    color: #ff7600;
    background: #fbf7f8;
    margin: 2px;
}
// 大代码块的自定义样式
.highlight, pre {
    margin: 5px 0;
    padding: 5px;
    border-radius: 3px;
}
.highlight, code, pre {
    border: 1px solid #d6d6d6;
}
侧边栏社交链接小图标
- 打开
F:\blog\themes\next\_config.yml,搜索social_icons:
social:
  GitHub: https://github.com/DAQ121 || github
  csdn: https://blog.csdn.net/weixin_44861399 || crosshairs
  weibo: https://weibo.com/呜啦啦咦1 || weibo
  #E-Mail: mailto:[email protected] || envelope
  #Google: https://plus.google.com/yourname || google
  #Twitter: https://twitter.com/yourname || twitter
  #FB Page: https://www.facebook.com/yourname || facebook
  #VK Group: https://vk.com/yourname || vk
  #StackOverflow: https://stackoverflow.com/yourname || stack-overflow
  #YouTube: https://youtube.com/yourname || youtube
  #Instagram: https://instagram.com/yourname || instagram
  #Skype: skype:yourname?call|chat || skype

social_icons:
  enable: true

  #weibo: weibo
  GitHub: github
  csdn: crosshairs

  icons_only: false
  transition: false
添加热度
- 打开
/themes/next/layout/_macro/post.swig,加上<span>°C</span>
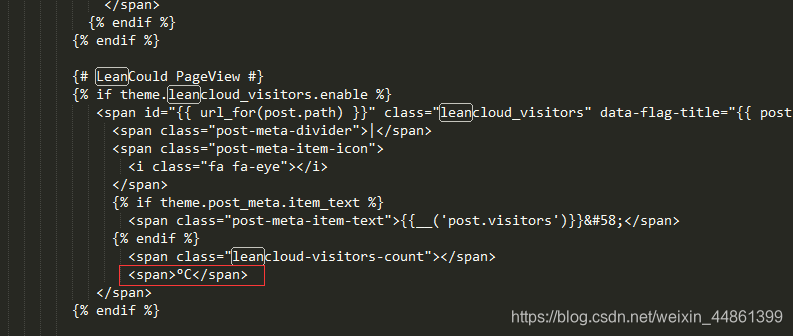
- 打开
/themes/next/languages/zh-Hans.yml,找到visitors标签,改为热度。
添加音乐
- 安装插件
npm install hexo-tag-dplayer
npm install hexo-tag-aplayer
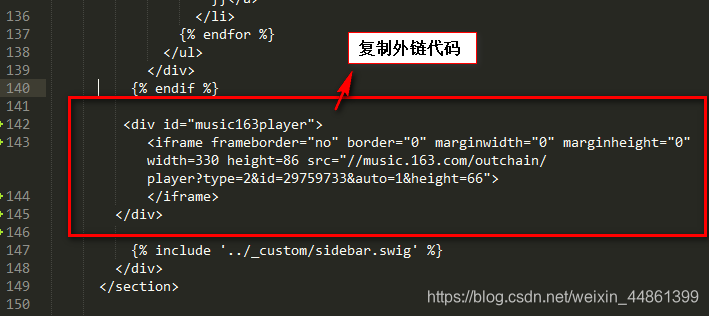
- 在网易云音乐生成外链,复制代码
- 打开
F:\blog\themes\next\layout\_macro里的sidebar.swig,在此处添加复制胡链接
网站底部字数统计
- 安装插件
$ cnpm install hexo-wordcount --save
- 在
/themes/next/layout/_partials/footer.swig文件尾部加上:
<div class="theme-info">
  <div class="powered-by"></div>
  <span class="post-count">博客全站共{{ totalcount(site) }}字</span>
</div>
实现统计功能
- 在主题配置文件中,配置:
# Post wordcount display settings
# Dependencies: https://github.com/willin/hexo-wordcount
post_wordcount:
  item_text: true
  wordcount: true
  min2read: true
  totalcount: false
  separated_meta: true
添加顶部加载条
- 打开:
/themes/next/layout/_partials/head.swig,添加代码:
<script src="//cdn.bootcss.com/pace/1.0.2/pace.min.js"></script>
<link href="//cdn.bootcss.com/pace/1.0.2/themes/pink/pace-theme-flash.css" rel="stylesheet">
修改网页底部的桃心
- 打开:
/themes/next/layout/_partials/footer.swig,修改你想用的图标
 <span class="with-love">
    <i class="far fa-grin-tongue-wink"></i>
  </span>
添加百度分享
- 给next主题添加了百度分享功能,在本地一切正常,但是当发布到github的时候,却不能正常显示,因为github上百度分享不支持在https上使用。
- 所以将主题配置
_config.yml文件中关于baidushare部分的内容改为(其中type亦可以选择button):
baidushare:
  type: slide
  baidushare: true
- 下载
static文件夹,地址:https://github.com/hrwhisper/baiduShare,将static文件夹保存至themes\next\source目录下。 - 修改文件:
themes\next\layout_partials\share\baidushare.swig
末尾部分的代码:
.src='http://bdimg.share.baidu.com/static/api/js/share.js?v=89860593.js?cdnversion='+~(-new Date()/36e5)];
改为:
.src='/static/api/js/share.js?v=89860593.js?cdnversion='+~(-new Date()/36e5)];
添加搜索功能
- 安装插件
cnpm install hexo-generator-searchdb --save
- 打开
站点配置文件。在尾部添加:
search:
   path: search.xml
   field: post
   format: html
   limit: 10000
- 打开
主题配置文件,找到Local search,改为true
# Local search
# Dependencies: https://github.com/flashlab/hexo-generator-search
local_search:
  enable: true
