安装CDH
一、关闭防火墙
(1)关闭防火墙systemctl stop firewalld
(2)禁止防火墙开机启动
systemctl disable firewalld
(3)查看防火墙状态
firewall-cmd --state
二、配置节点的名称和ip地址映射
(1)配置主机名称vi /etc/hostname
| IP Address | HostName |
| 192.168.138.118 | master |
| 192.168.138.117 | slave01 |
| 192.168.138.116 | slave02 |
| 192.168.138.115 | slave03 |
# 127.0.0.1   localhost localhost.localdomain localhost4 localhost4.localdomain4
# ::1         localhost localhost.localdomain localhost6 localhost6.localdomain6
192.168.138.118 master
192.168.138.117 slave01
192.168.138.116 slave02
192.168.138.115 slave03
三、配置ssh免密登录
(1)验证节点是否安装sshssh localhost
(2)生成密钥
ssh-keygen -t rsa -P ''
(3)拷贝公钥到其他节点
ssh-copy-id slave01
ssh-copy-id slave02
ssh-copy-id slave03
(4)验证是否免密登录节点
ssh slave01
ssh slave02
ssh slave03
(5)退出登录
exit
四、配置SELinux
(1)检测SELinux状态getenforce
(2)修改/etc/selinux/config文件(在某些系统中,/etc/sysconfig/selinux文件)
# 修改前
SELINUX=enforcing
# 修改后
SELINUX=disabled
五、启动NTP服务
(1)验证节点是否安装NTPrpm -qa | grep ntp
(2)重新安装NTP
yum -y install ntp
(3)修改/etc/ntp.conf文件
master节点
# For more information about this file, see the man pages
# ntp.conf(5), ntp_acc(5), ntp_auth(5), ntp_clock(5), ntp_misc(5), ntp_mon(5).

driftfile /var/lib/ntp/drift

# Permit time synchronization with our time source, but do not
# permit the source to query or modify the service on this system.
restrict default nomodify notrap nopeer noquery

# Permit all access over the loopback interface.  This could
# be tightened as well, but to do so would effect some of
# the administrative functions.
# restrict <ip address> nomodify notrap nopeer noquery
restrict 192.168.138.118 nomodify notrap nopeer noquery
restrict 127.0.0.1
restrict ::1

# Hosts on local network are less restricted.
# restrict 192.168.1.0 mask 255.255.255.0 nomodify notrap
# restrict <gateway> mask <prefix> nomodify notrap
restrict 192.168.138.2 mask 255.255.255.0 nomodify notrap

# Use public servers from the pool.ntp.org project.
# Please consider joining the pool (http://www.pool.ntp.org/join.html).
# server 0.centos.pool.ntp.org iburst
# server 1.centos.pool.ntp.org iburst
# server 2.centos.pool.ntp.org iburst
# server 3.centos.pool.ntp.org iburst
server 127.127.1.0
Fudge 127.127.1.0 stratum 10

#broadcast 192.168.1.255 autokey	# broadcast server
#broadcastclient			# broadcast client
#broadcast 224.0.1.1 autokey		# multicast server
#multicastclient 224.0.1.1		# multicast client
#manycastserver 239.255.254.254		# manycast server
#manycastclient 239.255.254.254 autokey # manycast client

# Enable public key cryptography.
#crypto

includefile /etc/ntp/crypto/pw

# Key file containing the keys and key identifiers used when operating
# with symmetric key cryptography.
keys /etc/ntp/keys

# Specify the key identifiers which are trusted.
#trustedkey 4 8 42

# Specify the key identifier to use with the ntpdc utility.
#requestkey 8

# Specify the key identifier to use with the ntpq utility.
#controlkey 8

# Enable writing of statistics records.
#statistics clockstats cryptostats loopstats peerstats

# Disable the monitoring facility to prevent amplification attacks using ntpdc
# monlist command when default restrict does not include the noquery flag. See
# CVE-2013-5211 for more details.
# Note: Monitoring will not be disabled with the limited restriction flag.
disable monitor
slave01节点
# For more information about this file, see the man pages
# ntp.conf(5), ntp_acc(5), ntp_auth(5), ntp_clock(5), ntp_misc(5), ntp_mon(5).

driftfile /var/lib/ntp/drift

# Permit time synchronization with our time source, but do not
# permit the source to query or modify the service on this system.
restrict default nomodify notrap nopeer noquery

# Permit all access over the loopback interface.  This could
# be tightened as well, but to do so would effect some of
# the administrative functions.
# restrict <ip address> nomodify notrap nopeer noquery
restrict 192.168.138.117 nomodify notrap nopeer noquery
restrict 127.0.0.1
restrict ::1

# Hosts on local network are less restricted.
# restrict 192.168.1.0 mask 255.255.255.0 nomodify notrap
# restrict <gateway> mask <prefix> nomodify notrap
restrict 192.168.138.2 mask 255.255.255.0 nomodify notrap

# Use public servers from the pool.ntp.org project.
# Please consider joining the pool (http://www.pool.ntp.org/join.html).
# server 0.centos.pool.ntp.org iburst
# server 1.centos.pool.ntp.org iburst
# server 2.centos.pool.ntp.org iburst
# server 3.centos.pool.ntp.org iburst
server 192.168.138.118
Fudge 192.168.138.118 stratum 10

#broadcast 192.168.1.255 autokey	# broadcast server
#broadcastclient			# broadcast client
#broadcast 224.0.1.1 autokey		# multicast server
#multicastclient 224.0.1.1		# multicast client
#manycastserver 239.255.254.254		# manycast server
#manycastclient 239.255.254.254 autokey # manycast client

# Enable public key cryptography.
#crypto

includefile /etc/ntp/crypto/pw

# Key file containing the keys and key identifiers used when operating
# with symmetric key cryptography.
keys /etc/ntp/keys

# Specify the key identifiers which are trusted.
#trustedkey 4 8 42

# Specify the key identifier to use with the ntpdc utility.
#requestkey 8

# Specify the key identifier to use with the ntpq utility.
#controlkey 8

# Enable writing of statistics records.
#statistics clockstats cryptostats loopstats peerstats

# Disable the monitoring facility to prevent amplification attacks using ntpdc
# monlist command when default restrict does not include the noquery flag. See
# CVE-2013-5211 for more details.
# Note: Monitoring will not be disabled with the limited restriction flag.
disable monitor
其它节点跟Slave01节点配置一样
(4)启动NTP服务
systemctl start ntpd
(5)开机启动NTP服务
systemctl enable ntpd
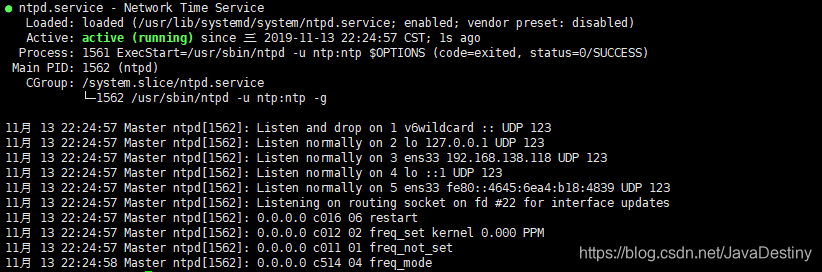
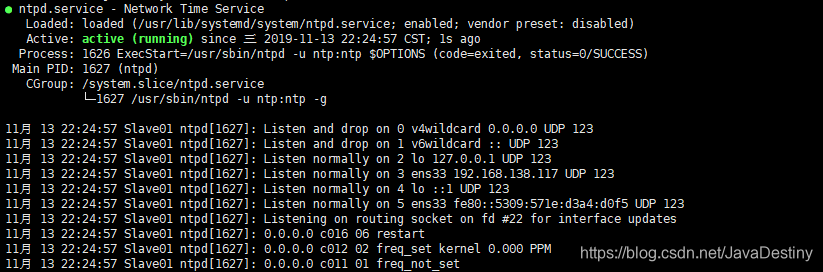
(6)查看NTP服务状态
systemctl status ntpd
Master节点
Slave01节点
六、安装jdk1.8
(1)下载jdk-8u11-linux-x64.tar.gz压缩包(2)解压jdk-8u11-linux-x64.tar.gz压缩包
tar -zvxf jdk-8u11-linux-x64.tar.gz
(3)修改jdk1.8.0_11文件名
mv jdk1.8.0_11 jdk1.8
(4)修改/etc/profile文件,设置java环境变量
export JAVA_HOME=/usr/java/jdk1.8
export CLASSPATH=.:$JAVA_HOME/lib/dt.jar:$JAVA_HOME/lib/tool.jar
export PATH=$PATH:$JAVA_HOME/bin
七、配置httpd分发服务器
(1)安装httpdyum -y install httpd
(2)修改/etc/httpd/conf/httpd.conf配置文件
<IfModule mime_module>
    #
    # TypesConfig points to the file containing the list of mappings from
    # filename extension to MIME-type.
    #
    TypesConfig /etc/mime.types

    #
    # AddType allows you to add to or override the MIME configuration
    # file specified in TypesConfig for specific file types.
    #
    #AddType application/x-gzip .tgz
    #
    # AddEncoding allows you to have certain browsers uncompress
    # information on the fly. Note: Not all browsers support this.
    #
    #AddEncoding x-compress .Z
    #AddEncoding x-gzip .gz .tgz
    #
    # If the AddEncoding directives above are commented-out, then you
    # probably should define those extensions to indicate media types:
    #
    AddType application/x-compress .Z
    AddType application/x-gzip .gz .tgz .parcel

    #
    # AddHandler allows you to map certain file extensions to "handlers":
    # actions unrelated to filetype. These can be either built into the server
    # or added with the Action directive (see below)
    #
    # To use CGI scripts outside of ScriptAliased directories:
    # (You will also need to add "ExecCGI" to the "Options" directive.)
    #
    #AddHandler cgi-script .cgi

    # For type maps (negotiated resources):
    #AddHandler type-map var

    #
    # Filters allow you to process content before it is sent to the client.
    #
    # To parse .shtml files for server-side includes (SSI):
    # (You will also need to add "Includes" to the "Options" directive.)
    #
    AddType text/html .shtml
    AddOutputFilter INCLUDES .shtml
</IfModule>
(3)确保httpd开机启动
systemctl enable httpd
(4)重新启动httpd服务
systemctl restart httpd
八、安装Cloudera Manager服务器
(1)预先下载Cloudera Manager和CDH的rpm包wget https://archive.cloudera.com/cm6/6.1.0/redhat7/yum/RPMS/x86_64/
wget https://archive.cloudera.com/cdh6/6.1.0/redhat7/yum/RPMS/x86_64/


(2)创建仓库·
createrepo .
(3)移动cm6.1和cdh6.1文件夹到/var/www/html/文件夹下·
mv cm6.1 /var/www/html/
mv cdh6.1 /var/www/html/
(4)各个机器在/etc/yum.repos.d下创建Centos7.repo文件·
[centos7]
name=centos7
baseurl=http://192.168.138.118/cm6.1
enable=true
gpgcheck=false
(5)各个机器建立云数据缓存·
yum makecache
(6)在Cloudera Manager服务器主机(Master节点)上安装Cloudera Manager包·
sudo yum install cloudera-manager-daemons cloudera-manager-agent cloudera-manager-server
(7)在Slave从节点上安装Cloudera Manager包·
sudo yum install cloudera-manager-daemons cloudera-manager-agent
(8)修改/etc/cloudera-scm-agent/config.ini文件
# Hostname of the CM server.
server_host=Master
更多的Agent配置,请参考Agent Configuration File
(9)确保主节点的server和agent服务启动
sudo systemctl enable cloudera-scm-agent
sudo systemctl enable cloudera-scm-server
(10)确保从节点的agent服务启动
sudo systemctl enable cloudera-scm-agent
九、安装MySQL
(1)下载和安装MySQL仓库wget http://repo.mysql.com/mysql-community-release-el7-5.noarch.rpm
sudo rpm -ivh mysql-community-release-el7-5.noarch.rpm
sudo yum install mysql-server
sudo systemctl start mysqld
(2)停止MySQL服务
如果要对现有数据库进行更改,请确保在继续之前停止使用该数据库的所有服务
sudo systemctl stop mysqld
(3)修改/etc/my.cnf文件
[mysqld]
datadir=/var/lib/mysql
socket=/var/lib/mysql/mysql.sock
# To prevent deadlocks
transaction-isolation = READ-COMMITTED

# Disabling symbolic-links is recommended to prevent assorted security risks;
# to do so, uncomment this line:
symbolic-links = 0

key_buffer_size = 32M
max_allowed_packet = 32M
thread_stack = 256K
thread_cache_size = 64
query_cache_limit = 8M
query_cache_size = 64M
query_cache_type = 1

# Set the max_connections property according to the size of your cluster
max_connections = 550
#expire_logs_days = 10
#max_binlog_size = 100M

#log_bin should be on a disk with enough free space.
#Replace '/var/lib/mysql/mysql_binary_log' with an appropriate path for your
#system and chown the specified folder to the mysql user.
log_bin=/var/lib/mysql/mysql_binary_log

#In later versions of MySQL, if you enable the binary log and do not set
#a server_id, MySQL will not start. The server_id must be unique within
#the replicating group.
server_id=1

binlog_format = mixed

read_buffer_size = 2M
read_rnd_buffer_size = 16M
sort_buffer_size = 8M
join_buffer_size = 8M

# InnoDB settings
# Cloudera Manager will not start if its tables are configured with the MyISAM engine
innodb_file_per_table = 1
innodb_flush_log_at_trx_commit  = 2
innodb_log_buffer_size = 64M
innodb_buffer_pool_size = 4G
innodb_thread_concurrency = 8
# Cloudera Management Service roles need high write throughput because they might insert many records in the database
innodb_flush_method = O_DIRECT
innodb_log_file_size = 512M

[mysqld_safe]
log-error=/var/log/mysqld.log
pid-file=/var/run/mysqld/mysqld.pid

sql_mode=STRICT_ALL_TABLES
(4)确保MySQL服务启动
sudo systemctl enable mysqld
(5)开启MySQL服务
sudo systemctl start mysqld
(6)设置MySQL管理员密码和安全相关的设置
sudo /usr/bin/mysql_secure_installation
[...]
Enter current password for root (enter for none):
OK, successfully used password, moving on...
[...]
Set root password? [Y/n] Y
New password:
Re-enter new password:
Remove anonymous users? [Y/n] Y
[...]
Disallow root login remotely? [Y/n] N
[...]
Remove test database and access to it [Y/n] Y
[...]
Reload privilege tables now? [Y/n] Y
All done!
(7)下载MySQL的JDBC驱动
wget https://dev.mysql.com/get/Downloads/Connector-J/mysql-connector-java-5.1.46.tar.gz
(8)解压mysql-connector-java-5.1.46.tar.gz压缩包
tar zxvf mysql-connector-java-5.1.46.tar.gz
(9)复制JDBC驱动到/usr/share/java/目录下
cd mysql-connector-java-5.1.46
sudo cp mysql-connector-java-5.1.46-bin.jar /opt/cloudera/cm/schema/../lib/mysql-connector-java.jar
(10)登录MySQL
mysql -uroot -proot
(11)为Cloudera软件创建数据库
| Service | Database | User |
| Cloudera Manager Server | scm | scm |
| Activity Monitor | amon | amon |
| Reports Manager | rman | rman |
| Hue | hue | hue |
| Hive Metastore Server | metastore | hive |
| Sentry Server | sentry | sentry |
| Cloudera Navigator Audit Server | nav | nav |
| Cloudera Navigator Metadata Server | navms | navms |
| Oozie | oozie | oozie |
CREATE DATABASE scm DEFAULT CHARACTER SET utf8 DEFAULT COLLATE utf8_general_ci;
CREATE DATABASE amon DEFAULT CHARACTER SET utf8 DEFAULT COLLATE utf8_general_ci;
CREATE DATABASE rman DEFAULT CHARACTER SET utf8 DEFAULT COLLATE utf8_general_ci;
CREATE DATABASE hue DEFAULT CHARACTER SET utf8 DEFAULT COLLATE utf8_general_ci;
CREATE DATABASE metastore DEFAULT CHARACTER SET utf8 DEFAULT COLLATE utf8_general_ci;
CREATE DATABASE sentry DEFAULT CHARACTER SET utf8 DEFAULT COLLATE utf8_general_ci;
CREATE DATABASE nav DEFAULT CHARACTER SET utf8 DEFAULT COLLATE utf8_general_ci;
CREATE DATABASE navms DEFAULT CHARACTER SET utf8 DEFAULT COLLATE utf8_general_ci;
CREATE DATABASE oozie DEFAULT CHARACTER SET utf8 DEFAULT COLLATE utf8_general_ci;
(12)设置权限
GRANT ALL ON scm.* TO 'scm'@'%' IDENTIFIED BY '123456';
GRANT ALL ON amon.* TO 'amon'@'%' IDENTIFIED BY '123456';
GRANT ALL ON rman.* TO 'rman'@'%' IDENTIFIED BY '123456';
GRANT ALL ON hue.* TO 'hue'@'%' IDENTIFIED BY '123456';
GRANT ALL ON metastore.* TO 'metastore'@'%' IDENTIFIED BY '123456';
GRANT ALL ON sentry.* TO 'sentry'@'%' IDENTIFIED BY '123456';
GRANT ALL ON nav.* TO 'nav'@'%' IDENTIFIED BY '123456';
GRANT ALL ON navms.* TO 'navms'@'%' IDENTIFIED BY '123456';
GRANT ALL ON oozie.* TO 'oozie'@'%' IDENTIFIED BY '123456';
(13)刷新权限
FLUSH PRIVILEGES;
(14)检查所创建的数据库
SHOW DATABASES;
(15)检查用户的权限
SHOW GRANTS FOR '<user>'@'%';
十、配置Cloudera Manager数据库
sudo /opt/cloudera/cm/schema/scm_prepare_database.sh mysql scm scm
sudo /opt/cloudera/cm/schema/scm_prepare_database.sh mysql -h master --scm-host master scm scm
十一·、安装CDH
(1)启动Cloudera Manager服务sudo systemctl start cloudera-scm-server
(2)查看Cloudera Manager服务器日志
tail -f /var/log/cloudera-scm-server/cloudera-scm-server.log
