文章目录
从本篇文章开始,简单分析下mybatis源码。
本篇文章先分析下mapper接口是如何被扫描到spring容器中的。
springboot集成mybatis非常简单,只需要在pom文件中添加如下依赖(本文分析的是1.3.2版本):
<dependency>
    <groupId>org.mybatis.spring.boot</groupId>
     <artifactId>mybatis-spring-boot-starter</artifactId>
     <version>1.3.2</version>
 </dependency>
1. mybatis如何被加载启动
在使用mybatis时,我们写了很多的mapper接口,接口上面使用了@Mapper注解修饰;但是此注解是mybais中的内容,并非spring,也就是说spring并不认识此注解,那么这些mapper接口是如何被加载到spring容器中的呢?
这部分内容,实际上是springboot的内容,至于springboot的启动流程以及原理,如果不清楚可以先看下之前的分析文章《springboot源码(一)启动流程+自动配置原理分析》,
从这篇文章中,我们知道springboot默认会加载starter包中的spring.factories文件,并读取其中的配置类。
上述mybatis-spring-boot-starter中并没有这个spring.factories文件,但是当我们打开这个pom文件,发现它有如下依赖:
<dependency>
      <groupId>org.mybatis.spring.boot</groupId>
      <artifactId>mybatis-spring-boot-autoconfigure</artifactId>
    </dependency>
从依赖的libraries中扎到此依赖,打开,发现存在spring.factories文件:
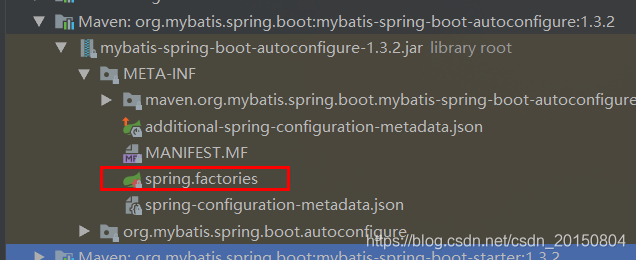
继续打开此文件:

发现只有一个配置类MybatisAutoConfiguration,没错,入口就在这里了。
2. MybatisAutoConfiguration
这是一个被@Configuration注解修饰bean,是配置类。
看一下类结构:

内容不多,包含两个内部类,四个方法以及一些属性。
先简单介绍他们的作用:
- MybatisAutoConfiguration():构造方法;
- checkConfigFileExists():检查是否需要加载存在的mybatis的config xml配置文件,有就加载;
- sqlSessionFactory(): 初始化SqlSessionFactory对象,这个是Mybatis的核心类之一。
- sqlSessionTemplate(): 初始化SqlSessionTemplate对象;
- MapperScannerRegistrarNotFoundConfiguration:这是一个内部类,也是配置类,核心是上面的@import注解,内容是下面的内部类AutoConfiguredMapperScannerRegistrar;
  @org.springframework.context.annotation.Configuration
  @Import({ AutoConfiguredMapperScannerRegistrar.class })
  @ConditionalOnMissingBean(MapperFactoryBean.class)
  public static class MapperScannerRegistrarNotFoundConfiguration {
    @PostConstruct
    public void afterPropertiesSet() {
      logger.debug("No {} found.", MapperFactoryBean.class.getName());
    }
  }
- AutoConfiguredMapperScannerRegistrar:也是个内部类,提供了扫描Mapper接口的方法;
我们看下这个AutoConfiguredMapperScannerRegistrar,其中有一个方法:
	@Override
    public void registerBeanDefinitions(AnnotationMetadata importingClassMetadata, BeanDefinitionRegistry registry) {
		//扫描被@Mapper修饰的mapper接口
      logger.debug("Searching for mappers annotated with @Mapper");

      ClassPathMapperScanner scanner = new ClassPathMapperScanner(registry);

      try {
        if (this.resourceLoader != null) {
          scanner.setResourceLoader(this.resourceLoader);
        }
		//得到要扫描的包
        List<String> packages = AutoConfigurationPackages.get(this.beanFactory);
        if (logger.isDebugEnabled()) {
          for (String pkg : packages) {
            logger.debug("Using auto-configuration base package '{}'", pkg);
          }
        }
		//设置只扫描@Mapper注解修饰的bean
        scanner.setAnnotationClass(Mapper.class);
        scanner.registerFilters();
        //执行扫描动作
        scanner.doScan(StringUtils.toStringArray(packages));
      } catch (IllegalStateException ex) {
        logger.debug("Could not determine auto-configuration package, automatic mapper scanning disabled.", ex);
      }
    }
此方法名字应该很熟悉了,他是ImportBeanDefinitionRegistrar接口方法的实现(不熟悉这个类的可以看下使用场景《spring @Import注解的作用和几种使用方式》);
registerBeanDefinitions这个方法,看名字就知道它的作用是注册bean定义,就是往spring容器中注册,注册的bean,就是mapper接口。作者通过第一行log打印出了此方法的功能:Searching for mappers annotated with @Mapper。
到这里,我们基本已经知道了mybatis在springboot中到底是如何被扫描并注册的。
下面我们详细看下。
3. AutoConfiguredMapperScannerRegistrar#registerBeanDefinitions
上面已经贴出了此方法的代码,发现主要是通过ClassPathMapperScanner类来完成具体扫描动作。
其中核心方法是 scanner.doScan(StringUtils.toStringArray(packages));
@Override
  public Set<BeanDefinitionHolder> doScan(String... basePackages) {
  //通过父类方法扫描
    Set<BeanDefinitionHolder> beanDefinitions = super.doScan(basePackages);

    if (beanDefinitions.isEmpty()) {
      logger.warn("No MyBatis mapper was found in '" + Arrays.toString(basePackages) + "' package. Please check your configuration.");
    } else {
    //处理bean定义
      processBeanDefinitions(beanDefinitions);
    }

    return beanDefinitions;
  }
首先调用父类方法扫描所有mapper,并得到bean定义的集合;
然后,通过processBeanDefinitions(beanDefinitions);又对bean的定义进行了二次加工:
private void processBeanDefinitions(Set<BeanDefinitionHolder> beanDefinitions) {
    GenericBeanDefinition definition;
    //遍历每个mapper接口的bean定义进行加工处理
    for (BeanDefinitionHolder holder : beanDefinitions) {
      definition = (GenericBeanDefinition) holder.getBeanDefinition();

      if (logger.isDebugEnabled()) {
        logger.debug("Creating MapperFactoryBean with name '" + holder.getBeanName()
          + "' and '" + definition.getBeanClassName() + "' mapperInterface");
      }

      // the mapper interface is the original class of the bean
      // but, the actual class of the bean is MapperFactoryBean
      //构造函数中掺入mapper的名字
      definition.getConstructorArgumentValues().addGenericArgumentValue(definition.getBeanClassName()); // issue #59
      //每个mapper接口,都变为了MapperFactoryBean;但是会通过上一行的构造函数参数(mapper名字)来区分每个mapper
      definition.setBeanClass(this.mapperFactoryBean.getClass());
	  //添加了一个属性addToConfig,值为true
      definition.getPropertyValues().add("addToConfig", this.addToConfig);

      boolean explicitFactoryUsed = false;
      //下面两个if进不去
      if (StringUtils.hasText(this.sqlSessionFactoryBeanName)) {
        definition.getPropertyValues().add("sqlSessionFactory", new RuntimeBeanReference(this.sqlSessionFactoryBeanName));
        explicitFactoryUsed = true;
      } else if (this.sqlSessionFactory != null) {
        definition.getPropertyValues().add("sqlSessionFactory", this.sqlSessionFactory);
        explicitFactoryUsed = true;
      }
		//下面两个if进不去
      if (StringUtils.hasText(this.sqlSessionTemplateBeanName)) {
        if (explicitFactoryUsed) {
          logger.warn("Cannot use both: sqlSessionTemplate and sqlSessionFactory together. sqlSessionFactory is ignored.");
        }
        definition.getPropertyValues().add("sqlSessionTemplate", new RuntimeBeanReference(this.sqlSessionTemplateBeanName));
        explicitFactoryUsed = true;
      } else if (this.sqlSessionTemplate != null) {
        if (explicitFactoryUsed) {
          logger.warn("Cannot use both: sqlSessionTemplate and sqlSessionFactory together. sqlSessionFactory is ignored.");
        }
        definition.getPropertyValues().add("sqlSessionTemplate", this.sqlSessionTemplate);
        explicitFactoryUsed = true;
      }

      if (!explicitFactoryUsed) {
        if (logger.isDebugEnabled()) {
          logger.debug("Enabling autowire by type for MapperFactoryBean with name '" + holder.getBeanName() + "'.");
        }
        //注意设置的自动注入类型
        definition.setAutowireMode(AbstractBeanDefinition.AUTOWIRE_BY_TYPE);
      }
    }
  }
此方法修改了mapper的bean定义,比较重要的有:
- 重置了beanClass为代理类 MapperFactoryBean;此时mapper接口已经物是人非成为别人了。
- 因为每个mapper都变成了MapperFactoryBean,为了区分他们,MapperFactoryBean的构造函数参数,传入了mapper接口的名字;
- sqlSessionFactory属性和sqlSessionTemplate属性注意下,虽然这里还没把具体属性设置进去,但是实例化的mapper的时候会用到这俩;
- *definition.setAutowireMode(AbstractBeanDefinition.AUTOWIRE_BY_TYPE);设置注入类型为按类型注入;sqlSessionFactory属性和sqlSessionTemplate属性就是因此才set注入的。
上述过程只是bean定义过程,这俩属性会在mapper bean实例化的之后,进行填充;
上面这几点比较重要,后续文章动态代理mapper接口都跟他们有关系。
本文先简单分析到这里,主要分析了mapper的被加载流程,到这里mapper已经被注册了,
至于mapper接口的实例化以及如何被动态代理以及sql如何执行等详细内容,放在后续文章中分析:
