养成好习惯,点个赞 再走;有问题,欢迎私信、评论,我看到都会回复的
- 爬虫除了会Python,还需要掌握HTML、CSS,注意:不需要精通HTML、CSS,只要能看懂页面结构
- 即:明白HTML怎么构成页面结构、CSS选择器这些知识,和掌握使用浏览器中检查代码即可
相关文章推荐:
scrapy:是一个应用程序框架,用于对网站进行爬行和提取结构化数据,这些结构化数据可用于各种有用的应用程序,如数据挖掘、信息处理或历史存档。
其实学习一个工具的使用方法的最好办法是阅读官方文档,但是很遗憾Scrapy是外国出品,显而易见语言为英文,阅读起来较为劳累。
虽然官方文档也有中文版的,但是他喵的满满的机翻味,细节方面太差了,专业名词、代码翻译过来反而看不懂了,语序颠倒的问题也十分严重
遂打算通过苦啃官方文档,将关键信息记录下来,分享的同时也方便日后快速查阅
文章目录
目录一:一个简单的Scrapy Spider示例
第一步:分析页面结构
http://quotes.toscrape.com/,是一个可以练习爬虫的网站

- 这个页面结构十分简单,内容主体由 quote 组成,以卡片式展示;页面右边展示的是10个常用标签子页面的url,暂时不用管它


- 每个 quote 由三部分组成:文本、作者和若干个标签
- 文本

- 作者

- 标签

- 文本
- 一个页面能承载的信息是有限的,需要分页展示,每个页面的底端有一个 下一页按钮


第二步:写代码
示例代码搬运自官方文档 >.<
官方文档中提供的代码爬取的就是这个网站的子页面 Viewing tag: humor,其url为http://quotes.toscrape.com/tag/humor/,页面结构还是我上面所说的
import scrapy

class QuotesSpider(scrapy.Spider):
    name = 'quotes'
    start_urls = [
        'http://quotes.toscrape.com/tag/humor/',
    ]

    def parse(self, response):
        for quote in response.css('div.quote'):
            yield {
                'author': quote.xpath('span/small/text()').get(),
                'text': quote.css('span.text::text').get(),
            }

        next_page = response.css('li.next a::attr("href")').get()
        if next_page is not None:
            yield response.follow(next_page, self.parse)
假设我将上面的代码写在quotes_spider.py代码中,我们不能按照一般情况下来运行这个python文件:python quotes_spider.py
虽然scrapy是python第三方包,但也是一个框架,我们需要按照他给定的规则来运行
- 正确的运行方式
scrapy runspider quotes_spider.py -o quotes.json
一:运行时
在代码的运行过程中,会在终端输出许多信息:可以看作三部分
- 第一部分:输出的是Scrapy及其依赖包的信息
- 第二部分:输出的是爬取的内容
- 第三部分:输出的是对爬取信息的一个总结 ,形如下图

二:运行完成后
运行完成之后,Scrapy Spider会将爬取的内容写入quotes.json文件(它会被创建在quotes_spider.py文件路径下)
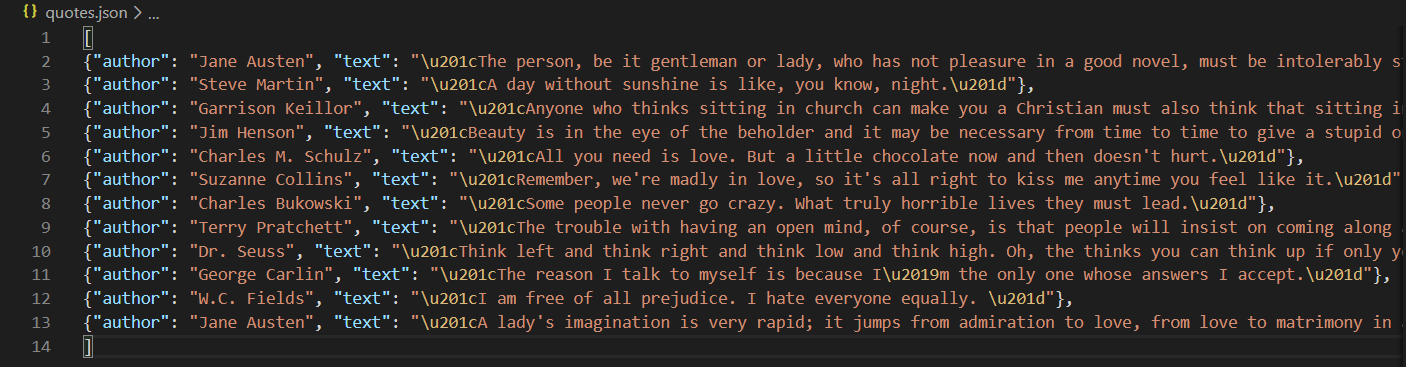
Viewing tag: humor 下每个 quote 的作者、文本以字典形式存储,若干个字典存放在列表中
第三步:分析代码
- 当我们输入
scrapy runspider quotes_spider.py命令后,Scrapy 通过crawler engine运行代码 - crawler 对 start_urls 属性中定义的URL发出请求,并调用默认的回调方法 parse()
通俗来说:
这个 parse() 方法通常解析response,将抓取的数据提取为dict,并查找新的URL以跟踪和创建新的请求
按照本代码来说:
def parse(self, response):
    for quote in response.css('div.quote'):
        yield {
            'author': quote.xpath('span/small/text()').get(),
            'text': quote.css('span.text::text').get(),
        }

    next_page = response.css('li.next a::attr("href")').get()
    if next_page is not None:
        yield response.follow(next_page, self.parse)
- 使用CSS选择器循环 div.quote 元素,然后使用css选择器或者xpath生成一个包含 quote的作者、文本的列表
css选择器的使用无缝对接css中我们对选择器的认知
xpath是官方推荐我们使用的 - 查找到下一页的链接,并使用它继续调度 parse() 方法
目录二:Scrapy Spider
好了,通过目录一,我想你应该对Scrapy有了一个直观的印象
教程正式开始
第一步:创建一个新的Scrapy项目
xxx是存储代码并运行的目录(文件夹)及其下内容
scrapy startproject xxx
会生成该目录(我输入的目录名为zgh)


并且通过它给的信息

可知,这个目录及其下内容是通过Spider中的模板生成的
目录结构:
xxx/
- scrapy.cfg,部署配置文件
- xxx/ ,Python项目模板,你将从这儿导入你的代码
- __init__.py
- items.py,项目定义文件
- middlewares.py,项目中间件文件
- pipelines.py,项目管道文件
- settings.py,项目设置文件
- spiders/,你将在这儿存放你写的Spider代码
- __init__.py
第二步:定义继承Spider的类并定义初始请求
示例代码搬运自官方文档 >.<
在xxx/xxx/spiders/ 路径下存代码文件,代码中定义一个类,需要继承 scrapy.Spider
import scrapy

class QuotesSpider(scrapy.Spider):
    name = "quotes"
    start_urls = [
        'http://quotes.toscrape.com/page/1/',
        'http://quotes.toscrape.com/page/2/',
    ]

    def parse(self, response):
        page = response.url.split("/")[-2] #根据上面的链接提取分页,如:/page/1/,提取到的就是:1
        filename = 'quotes-%s.html' % page #拼接文件名,如果是第一页,最终文件名便是:newpage-1.html
        with open(filename, 'wb') as f:
            f.write(response.body)
        self.log('Saved file %s' % filename)
还要定义属性和方法
-
name :标识Spider。它在一个项目中必须是唯一的,也就是说,不能为不同的Spider设置相同的名称。
-
start_urls:具有URL列表的类属性
-
parse() :将被调用来处理这些URL的每个请求。parse() 是Scrapy的默认回调方法,对没有显式分配回调的请求调用该方法。
parse() 方法通常解析响应,将抓取的数据提取为dict,并查找新的URL以跟踪和创建新的请求。
第三步:在项目中运行Spider
首先明确一点:上述Spider代码中定义的name属性为:quotes
先转到项目的顶层目录(即第一步中创建的文件夹下),在终端中运行
scrapy crawl quotes
终端会输出许多信息,信息中间可以看到

-
上述代码只是将两个URL的页面源代码爬取下来,并分别存放在quotes-1.html、quotes-1.html文件中(文件在项目的顶层目录下)
-
上述代码parse()方法并没有解析HTML哦,先看目录三学习怎么在Scrapy中提取数据,然后目录四观看提取数据的示例
题外话:很有意思的一点,在截图的第四行中可以看到这个网站并没有在网站根目录下定义爬虫协议robots.txt
目录三:Scrapy Shell
学习使用scrappy提取数据的最佳方法是使用 Scrapy shell
在终端中输入
scrapy shell url
- url:输入网页url字符串,在Windows中请使用双引号!
比如,我输入的url为:"http://quotes.toscrape.com/page/1/"
终端中会输出一些信息
- 首先是:Scrapy log 信息(不用管它们)
- 然后是:返回状态码200,代表该网站爬取成功

- 最后给出:我们可以使用的Scrapy对象

- 最下面一行就是交互式命令行:Shell
在Shell中输入view(response),就会在你电脑上默认的浏览器上打开该网页(你上面输入的url)
response.css()
这个方法无缝对接CSS选择器,用来选择页面的元素
一:response.css()
>>> response.css('title')
[<Selector xpath='descendant-or-self::title' data='<title>Quotes to Scrape</title>'>]

>>> response.css('title::text')
[<Selector xpath='descendant-or-self::title/text()' data='Quotes to Scrape'>]
response.css('xxx')返回的是一个类似列表的对象:SelectorList,- data中存储的是提取到的标签,
- xpath中存储的XPath表达式,实际上CSS选择器是在后台转换为XPath表达式的
- 允许你进一步的细化选择和提取数据
response.css('xxx::text')与上面方法不同之处在于,data中存储的是提取到的标签的文本
二:response.css().getall()
>>> response.css('title').getall()
['<title>Quotes to Scrape</title>']

>>> response.css('title::text').getall()
['Quotes to Scrape']
response.css('xxx').getall()、response.css('xxx::text').getall()
getall() 方法,返回的是一个列表,
列表中的值是 SelectorList 中的 data 值- 一般而言,选择器返回的结果不止一个,getall() 方法 提取全部内容
三:response.css().get()
- 如果你只想要选择器提取的结果中的第一个,你可以使用 get() 方法
>>> response.css('title').get()
'<title>Quotes to Scrape</title>'

>>> response.css('title::text').get()
'Quotes to Scrape'
- get() 方法,返回的是字符串
四:response.re()
Scrapy还支持 re() 方法,使用正则表达式来提取数据
response.xpath()
除了CSS,Scrapy选择器还支持使用XPath表达式
>>> response.xpath('//title')
[<Selector xpath='//title' data='<title>Quotes to Scrape</title>'>]

>>> response.xpath('//title/text()')
[<Selector xpath='//title/text()' data='Quotes to Scrape'>]
>>> response.xpath('//title').get()
'<title>Quotes to Scrape</title>'

>>> response.xpath('//title/text()').get()
'Quotes to Scrape'
在Scrapy中,XPath表达式是Scrapy Selectors的基础。实际上,CSS选择器是在后台转换为XPath的。如果你仔细阅读 Shell 中 SelectorList 的文本表示形式。
如果你对XPath表达式感兴趣,推荐阅读:
- 官方文档:using XPath with Scrapy Selectors here
- 官方文档:this tutorial to learn XPath through examples
- 官方文档:this tutorial to learn “how to think in XPath
目录四:提取数据
演示
先在Shell中给你演示一下
scrapy shell "http://quotes.toscrape.com/"
(1)提取页面内全部quote


>>> response.css("div.quote")
[<Selector xpath="descendant-or-self::div[@class and contains(concat(' ', normalize-space(@class), ' '), ' quote ')]" data='<div class="quote" itemscope itemtype...'>,
<Selector xpath="descendant-or-self::div[@class and contains(concat(' ', normalize-space(@class), ' '), ' quote ')]" data='<div class="quote" itemscope itemtype...'>,
...]
(2)获取第一个quote的文本内容
每个 quote 由三部分组成:文本、作者和若干个标签
- 文本

- 作者

- 标签

>>> quote = response.css("div.quote")[0]

>>> text = quote.css("span.text::text").get()
>>> text
'“The world as we have created it is a process of our thinking. It cannot be changed without changing our thinking.”'

>>> author = quote.css("small.author::text").get()
>>> author
'Albert Einstein'

>>> tags = quote.css("div.tags a.tag::text").getall()
>>> tags
['change', 'deep-thoughts', 'thinking', 'world']
(3)获取下一页url
-
- 需要抓取a标签中href属性值,有两种方法
>>> response.css('li.next a').attrib['href']
'/page/2/'

>>> next = response.css('li.next a::attr(href)').get()
>>> next
'/page/2/'
- 注意,href 给的是相对地址,在使用的时候要结合网站根地址,拼接为绝对地址
一般而言,我们可以这样拼接字符串
>>> next = response.css('li.next a::attr(href)').get()
>>> next_page
'/page/2/'
>>> next = 'http://quotes.toscrape.c' + next
>>> next
'http://quotes.toscrape.c/page/2/'
幸运的是,Srapy提供了一个方法response.urljoin('url'):将相对地址转化为绝对地址,而且也可以在其中输入绝对地址哦
>>> next_page = response.css('li.next a::attr(href)').get()
>>> next_page
'/page/2/'
>>> response.urljoin(next_page)
'http://quotes.toscrape.com/page/2/'
抓取网站所有quote
import scrapy
class QuotesSpider(scrapy.Spider):
name = "quotes"
start_urls = [
'http://quotes.toscrape.com/page/1/',
]
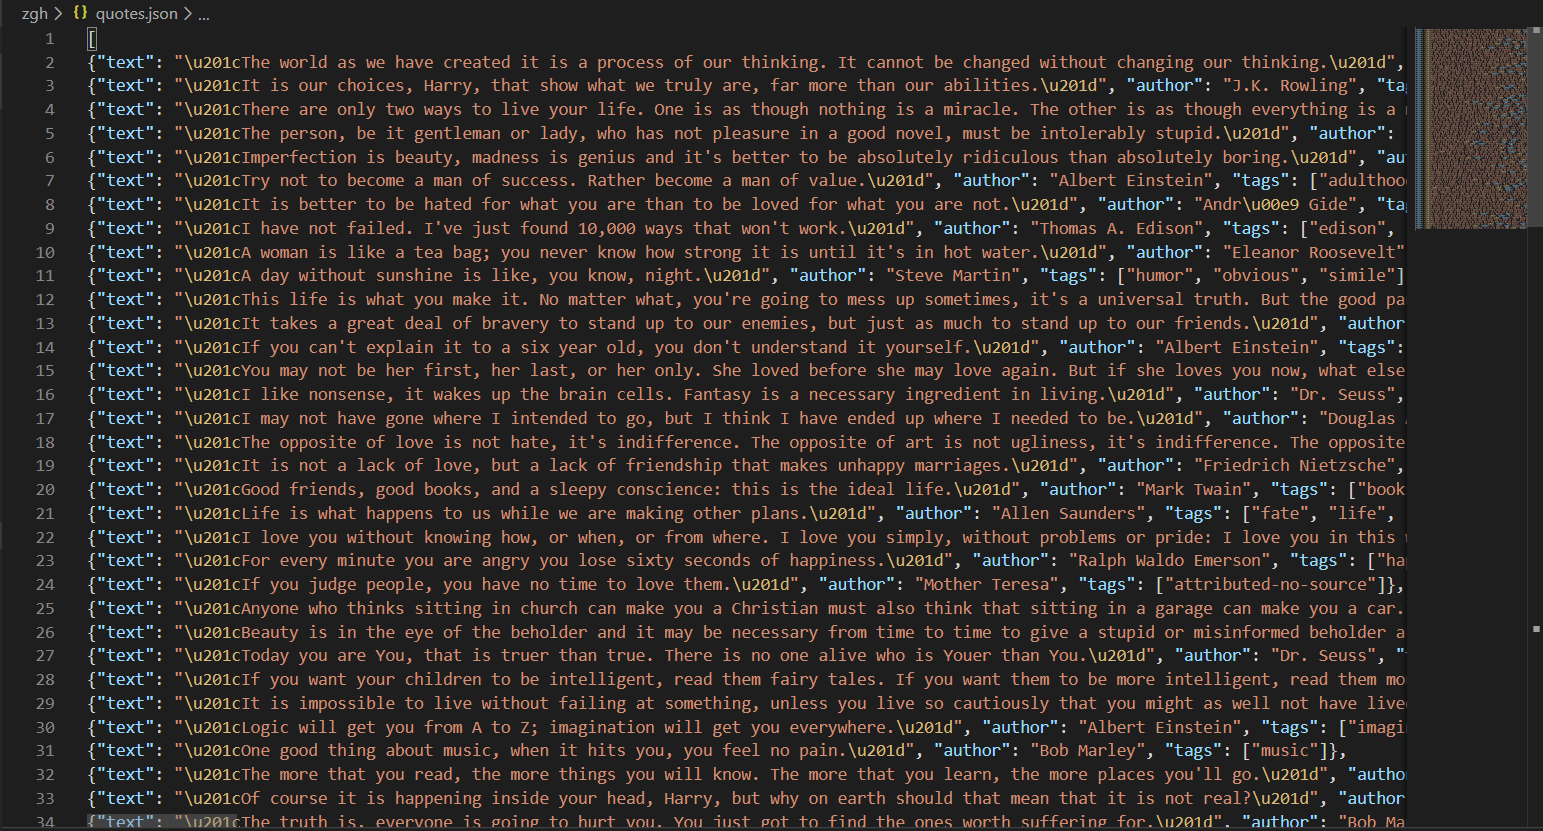
def parse(self, response):
for quote in response.css('div.quote'):
yield {
'text': quote.css('span.text::text').get(),
'author': quote.css('small.author::text').get(),
'tags': quote.css('div.tags a.tag::text').getall(),
}
next_page = response.css('li.next a::attr(href)').get()
if next_page is not None:
next_page = response.urljoin(next_page)
yield scrapy.Request(next_page, callback = self.parse)
在项目顶层目录下输入scrapy crawl quotes,运行该Spider代码
在终端输出的日志中显示爬取的信息:
2020-04-03 12:32:17 [scrapy.core.scraper] DEBUG: Scraped from <200 http://quotes.toscrape.com/page/1/>
{'text': '“The world as we have created it is a process of our thinking. It cannot be changed without changing our thinking.”', 'author': 'Albert Einstein', 'tags': ['change', 'deep-thoughts', 'thinking', 'world']}
2020-04-03 12:32:17 [scrapy.core.scraper] DEBUG: Scraped from <200 http://quotes.toscrape.com/page/1/>
{'text': '“It is our choices, Harry, that show what we truly are, far more than our abilities.”', 'author': 'J.K. Rowling', 'tags': ['abilities', 'choices']}
...
目录五:存储抓取到的数据
JSON文件
在项目顶层目录下输入scrapy crawl quotes -o quotes.json
Scrapy 会生成quotes.json文件,并将爬取到的数据放到quotes.json文件中
注意:Scrapy有一个小缺陷,Scrapy往json文件(例如:quotes.json)中写入信息时,是附加进去而不是覆盖。二次写入json文件会导致json文件格式混乱,所以你不能把一个非空json文件作为输出文件
JSON Lines文件
在项目顶层目录下输入scrapy crawl quotes -o quotes.jl
Scrapy 会生成quotes.jl文件,并将爬取到的数据放到quotes.jl文件中
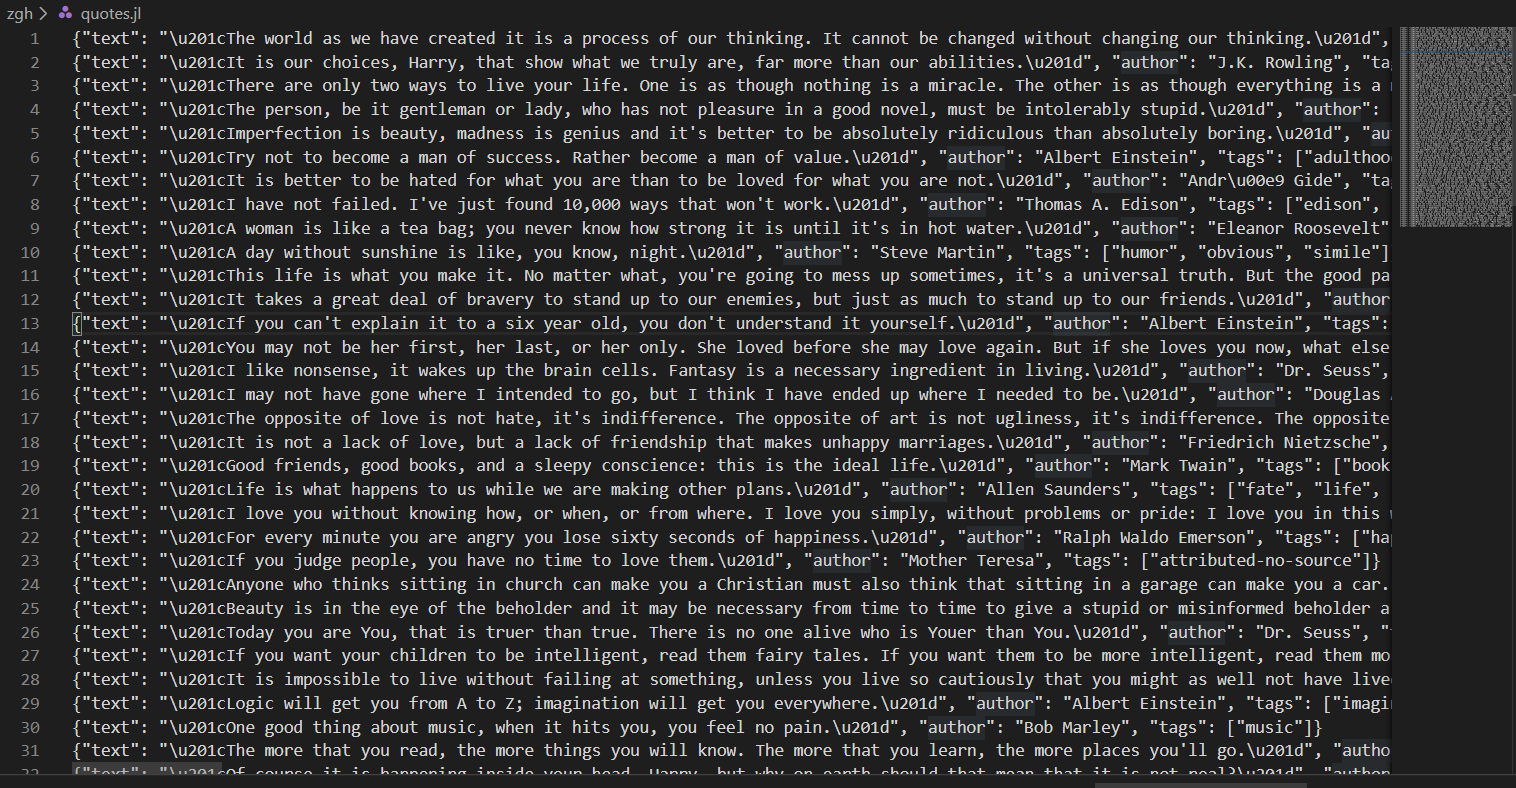
JSON Lines格式像流一样,所以你可以轻松地向其添加新记录
目录六:分页查询的额外写法
在上文中,对于parse()方法中对于对于获取下一页链接,并递归访问的代码是这么写的:
next_page = response.css('li.next a::attr(href)').get()
if next_page is not None:
    next_page = response.urljoin(next_page)
    yield scrapy.Request(next_page, callback = self.parse)
第二种写法:
- 与 scrapy.Request 不同,response.follow 直接支持相对URL
next_page = response.css('li.next a::attr(href)').get()
if next_page is not None:
    yield response.follow(next_page, callback=self.parse)
第三种写法:
- css选择器提取到的数据直接传给 response.follow
for href in response.css('ul.pager a::attr(href)'):
    yield response.follow(href, callback=self.parse)
第四种写法:
- response.follow 可以自动获取a标签中的href值
for a in response.css('ul.pager a'):
    yield response.follow(a, callback=self.parse)
第五种写法:
- yield from 语法可以拼接可迭代对象、自动处理异常,相比 yield 语法更加简洁、好用
- 要结合 response.follow_all() 方法使用
anchors = response.css('ul.pager a')
yield from response.follow_all(anchors, callback=self.parse)
第六种写法:
- 上一个写法简化
yield from response.follow_all(css='ul.pager a', callback=self.parse)
目录七:最后,我们再来看一个例子吧
每一个quote的作者都指向一个链接

作者页面形如此:
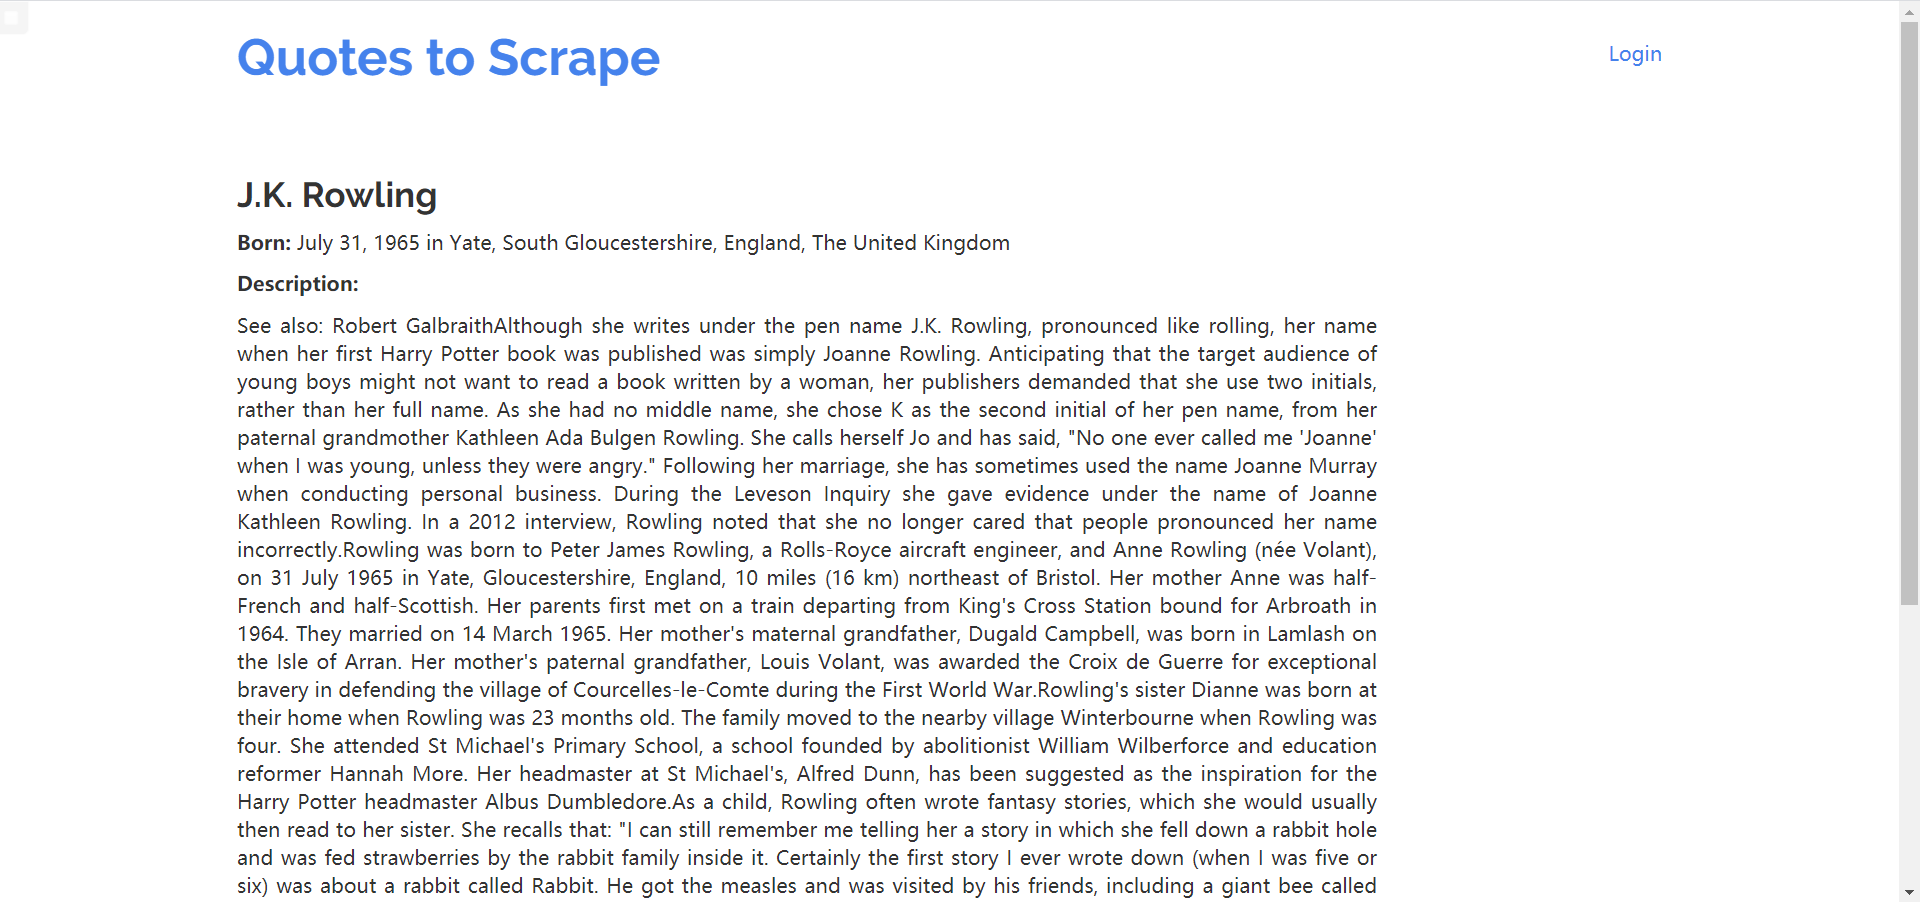
- 作者名

- 出生日期、地址

- 介绍

import scrapy

class AuthorSpider(scrapy.Spider):
    name = 'author'

    start_urls = ['http://quotes.toscrape.com/']

    def parse(self, response):
        author_page_links = response.css('.author + a')
        yield from response.follow_all(author_page_links, self.parse_author)

        pagination_links = response.css('li.next a')
        yield from response.follow_all(pagination_links, self.parse)

    def parse_author(self, response):
        def extract_with_css(query):
            return response.css(query).get(default='').strip()

        yield {
            'name': extract_with_css('h3.author-title::text'),
            'birthdate': extract_with_css('.author-born-date::text'),
            'birthlocation': extract_with_css('.author-born-location::text'),
            'bio': extract_with_css('.author-description::text'),
        }
即使同一位作者的quote很多,我们也不必担心会多次访问同一作者页面。默认情况下,Scrapy会过滤重复的请求:已经访问过的URL
