三层架构与MVC
- 我们开发服务器端程序,一般都基于两种形式,一种C/S架构程序,一种B/S架构程序。
- 使用Java语言基本上都是开发B/S架构的程序,B/S架构又分成了三层架构。
- 三层架构
1… 表现层:WEB层,用来和客户端进行数据交互的。表现层一般会采用MVC的设计模型
2… 业务层:处理公司具体的业务逻辑的
3… 持久层:用来操作数据库的
了解SpringMVC
SpringMVC的概述
- 是一种基于Java实现的MVC设计模型的请求驱动类型的轻量级WEB框架。
- Spring MVC属于SpringFrameWork的后续产品,已经融合在Spring Web Flow里面。Spring 框架提供了构建 Web 应用程序的全功能 MVC 模块。
- 使用 Spring 可插入的 MVC 架构,从而在使用Spring进行WEB开发时,可以选择使用Spring的SpringMVC框架或集成其他MVC开发框架,如Struts1(现在一般不用),Struts2等。
SpringMVC在三层架构中的位置
表现层框架
SpringMVC入门实战
话不多说,我们现在进行SpringMVC的入门实战吧。
1.我们先创建一个Maven web的工程
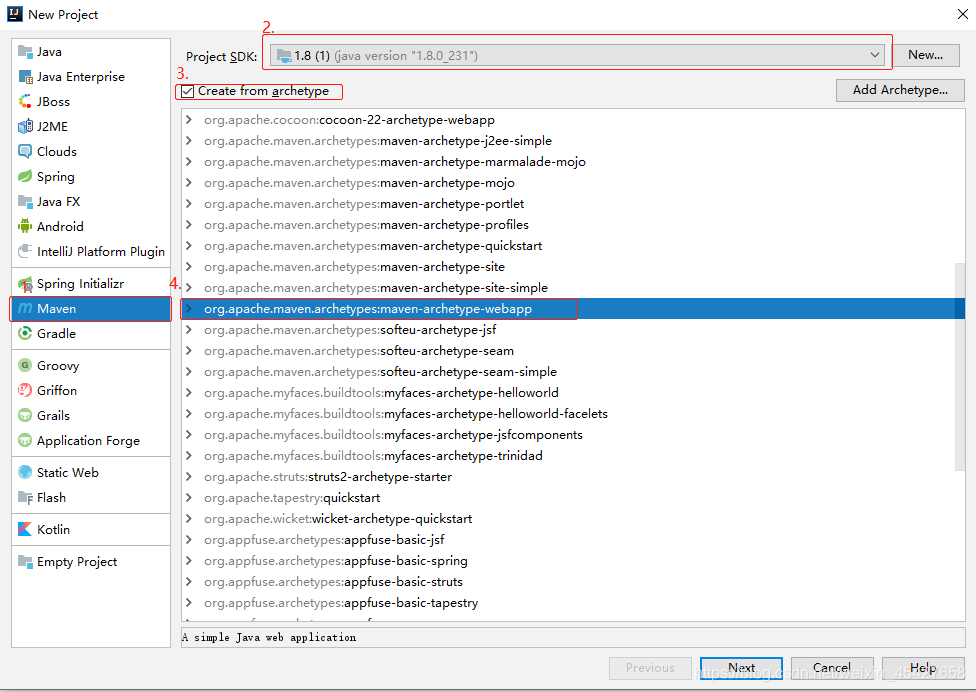
然后一路Next~
2.在pom.xml文件中添加相关依赖
  <properties>
    <spring.version>5.0.2.RELEASE</spring.version>
  </properties>

  <dependencies>
    <dependency>
      <groupId>org.springframework</groupId>
      <artifactId>spring-context</artifactId>
      <version>${spring.version}</version>
    </dependency>
    <dependency>
      <groupId>org.springframework</groupId>
      <artifactId>spring-web</artifactId>
      <version>${spring.version}</version>
    </dependency>
    <dependency>
      <groupId>org.springframework</groupId>
      <artifactId>spring-webmvc</artifactId>
      <version>${spring.version}</version>
    </dependency>
    <dependency>
      <groupId>javax.servlet</groupId>
      <artifactId>servlet-api</artifactId>
      <version>2.5</version>
      <scope>provided</scope>
    </dependency>
    <dependency>
      <groupId>javax.servlet.jsp</groupId>
      <artifactId>jsp-api</artifactId>
      <version>2.0</version>
      <scope>provided</scope>
    </dependency>
  </dependencies>
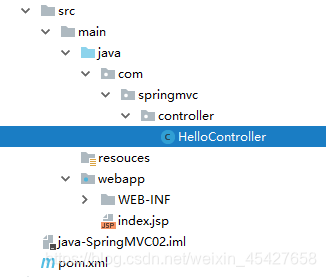
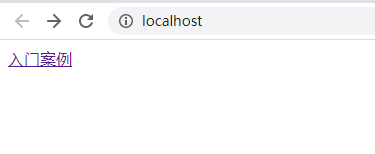
3.在index.jsp文件下编写以下内容
<%@ page contentType="text/html;charset=UTF-8" language="java" %>
<html>
<head>
    <title>hello</title>
</head>
<body>
<a href="/hello">入门案例</a>
</body>
</html>
这里我们超链接的路径为“/hello”,这时我们需要创建一个Controller接收
4.创建Controller
@Controller
public class HelloController {

    @RequestMapping("/hello")
    public String Hello(){
        System.out.println("Hello SpringMVC");
        return null;
    }
}
注解介绍
@Controller:定义了一个控制器类,把此类注入进Spring容器
@RequestMapping: 注解映射请求路径
5.这时我们的controller还不能接收到页面的请求,要在web.xml配置文件中核心控制器DispatcherServlet
<!--配置核心控制类-->
  <servlet>
    <servlet-name>dispatcherServlet</servlet-name>
    <servlet-class>org.springframework.web.servlet.DispatcherServlet</servlet-class>
  </servlet>

  <servlet-mapping>
    <servlet-name>dispatcherServlet</servlet-name>
    <!--拦截所有路径-->
    <url-pattern>/</url-pattern>
  </servlet-mapping>
6.同时我们要在resouces下创建springmvc.xml文件,该文件用于注入依赖,配置视图解析器
<?xml version="1.0" encoding="UTF-8"?>
<beans xmlns="http://www.springframework.org/schema/beans"
xmlns:mvc="http://www.springframework.org/schema/mvc"
xmlns:context="http://www.springframework.org/schema/context"
xmlns:xsi="http://www.w3.org/2001/XMLSchema-instance"
xsi:schemaLocation="
http://www.springframework.org/schema/beans
http://www.springframework.org/schema/beans/spring-beans.xsd
http://www.springframework.org/schema/mvc
http://www.springframework.org/schema/mvc/spring-mvc.xsd
http://www.springframework.org/schema/context
http://www.springframework.org/schema/context/spring-context.xsd">
<!-- 配置spring创建容器时要扫描的包 -->
<context:component-scan base-package="com.springmvc"></context:component-scan>
<!-- 配置视图解析器 -->
<bean id="viewResolver"	class="org.springframework.web.servlet.view.InternalResourceViewResolver">
<property name="prefix" value="/WEB-INF/pages/"></property>
<property name="suffix" value=".jsp"></property>
</bean>
<!-- 配置spring开启注解mvc的支持-->
<mvc:annotation-driven></mvc:annotation-driven>-->
</beans>
7.这时我们要在核心控制器把该配置文件初始化
<servlet>
    <servlet-name>dispatcherServlet</servlet-name>
    <servlet-class>org.springframework.web.servlet.DispatcherServlet</servlet-class>
    <!--初始化配置-->
    <init-param>
      <param-name>contextConfigLocation</param-name>
      <param-value>classpath:springmvc.xml</param-value>
    </init-param>
    <!--初始化优先级-->
    <load-on-startup>1</load-on-startup>
  </servlet>
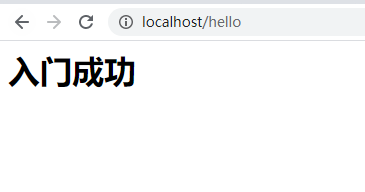
8.把以上配置完以后我们可以制定成功跳转页面了!

这里需要注意,根据我们配置的视图解析器的路径,因此页面要建在WEB-INF/page的目录下,页面内容为
<%@ page contentType="text/html;charset=UTF-8" language="java" %>
<html>
<head>
    <title>Title</title>
</head>
<body>
<h1>入门成功</h1>
</body>
</html>
9.最后我们可以在Controller中返回该成功页面了!
@Controller
public class HelloController {

    @RequestMapping("/hello")
    public String Hello(){
        System.out.println("Hello SpringMVC");
        return "success";
    }
}
当我们点击超链接时,会跳转到成功页面!
入门案例的执行流程
- 当启动Tomcat服务器的时候,因为配置了load-on-startup标签,所以会创建DispatcherServlet对象,就会加载springmvc.xml配置文件
- 开启了注解扫描,那么HelloController对象就会被创建
- 从index.jsp发送请求,请求会先到达DispatcherServlet核心控制器,根据配置@RequestMapping注解找到执行的具体方法
- 根据执行方法的返回值,再根据配置的视图解析器,去指定的目录下查找指定名称的JSP文件
- Tomcat服务器渲染页面,做出响应
