new 一个 empty project出来
添加父module manager,然后删除src文件夹

<!--手动指定 pom -->
<packaging>pom</packaging>
在pom中定义公共依赖,并将各个子模块聚合进来
<groupId>org.djh</groupId>
<artifactId>manager</artifactId>
<version>1.0-SNAPSHOT</version>
<modules>
    <module>../good_service</module>
    <module>../public</module>
    <module>../good_service1</module>
    <module>../eureka</module>
    <module>../eureka1</module>
    <module>../feign</module>
    <module>../zuul</module>
    <module>../config</module>
</modules>
<!--手动指定 pom -->
<packaging>pom</packaging>
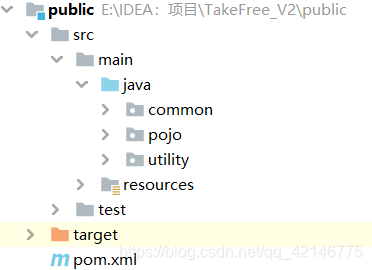
添加一个 公共module 存放的是像entity、common和utility等
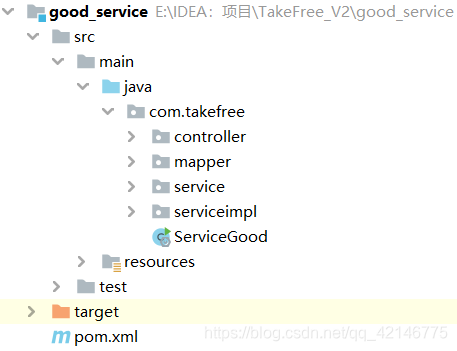
添加一个商品微服务module:good_service
就是 mapper
service
controller 的一条龙服务,接口restful风格最后能可以测试出来数据
copy上面的商品微服务module:good_service1,用于集群
整个复制下来,把pom的artifactId改了
<artifactId>good_service1</artifactId>
端口号改了
到此目录结构如下
- manager :声明和整合
- public:存放公共部分
- good_service:用于good服务集群
- good_service1:用于good服务集群
整合eureka
假如出现了消费这个服务的,那么服务服务之间是直接交互的,要进行远程调用就需要知道服务端的ip地址和端口
而eureka注册和管理微服务的,注册中心帮助我们管理这些服务,

微服务会实时上报自己的状态,注册中心统一管理这些微服务的状态,将存在问题的服务踢出服务列表,客户端获取到可用的服务进行调用。
创建两个springboot的module项目,用于做上图的服务中心
① 服务中心(服务端)
- 既然是服务端就需要在pom.xml依赖eureka-server
<dependencies>
    <!-- 导入Eureka-server 服务端依赖 -->
    <dependency>
        <groupId>org.springframework.cloud</groupId>
        <artifactId>spring-cloud-starter-netflix-eureka-server</artifactId>
    </dependency>
</dependencies>
- 进行集群配置,registerWithEureka不需要自己注册因为自己就是服务端false,fetchRegistry也不需要被发现
server:
  port: 6001
eureka:
  instance:
    hostname: eureka6001.com # eureka服务端的实例名称
  client:
    registerWithEureka: false # 服务注册,false表示不将自已注册到Eureka服务中
    fetchRegistry: false # 服务发现,false表示自己不从Eureka服务中获取注册信息
    serviceUrl:    # Eureka客户端与Eureka服务端的交互地址,集群版配置对方的地址,单机版配置自己(如果不配置则默认本机8761端口)
      #defaultZone: http://${eureka.instance.hostname}:${server.port}/eureka/
      #集群版
      defaultZone: http://eureka6002.com:6002/eureka/
  server:
     enable-self-preservation: false # 禁用自我保护机制
- 启动类
@EnableEurekaClient
@EnableEurekaServer //标识一个Eureka Server 服务注册中心
@SpringBootApplication
public class eureka {
    public static void main(String[] args) {
        SpringApplication.run(eureka.class, args);
    }
}
另一台变端口和defaultZone
② 两个商品微服务客户端
- 既然是商品服务端就需要在pom.xml依赖eureka-client
<dependencies>
    <!-- 导入Eureka客户端的依赖,将 微服务提供者 注册进 Eureka -->
    <dependency>
        <groupId>org.springframework.cloud</groupId>
        <artifactId>spring-cloud-starter-netflix-eureka-client</artifactId>
    </dependency>
</dependencies>
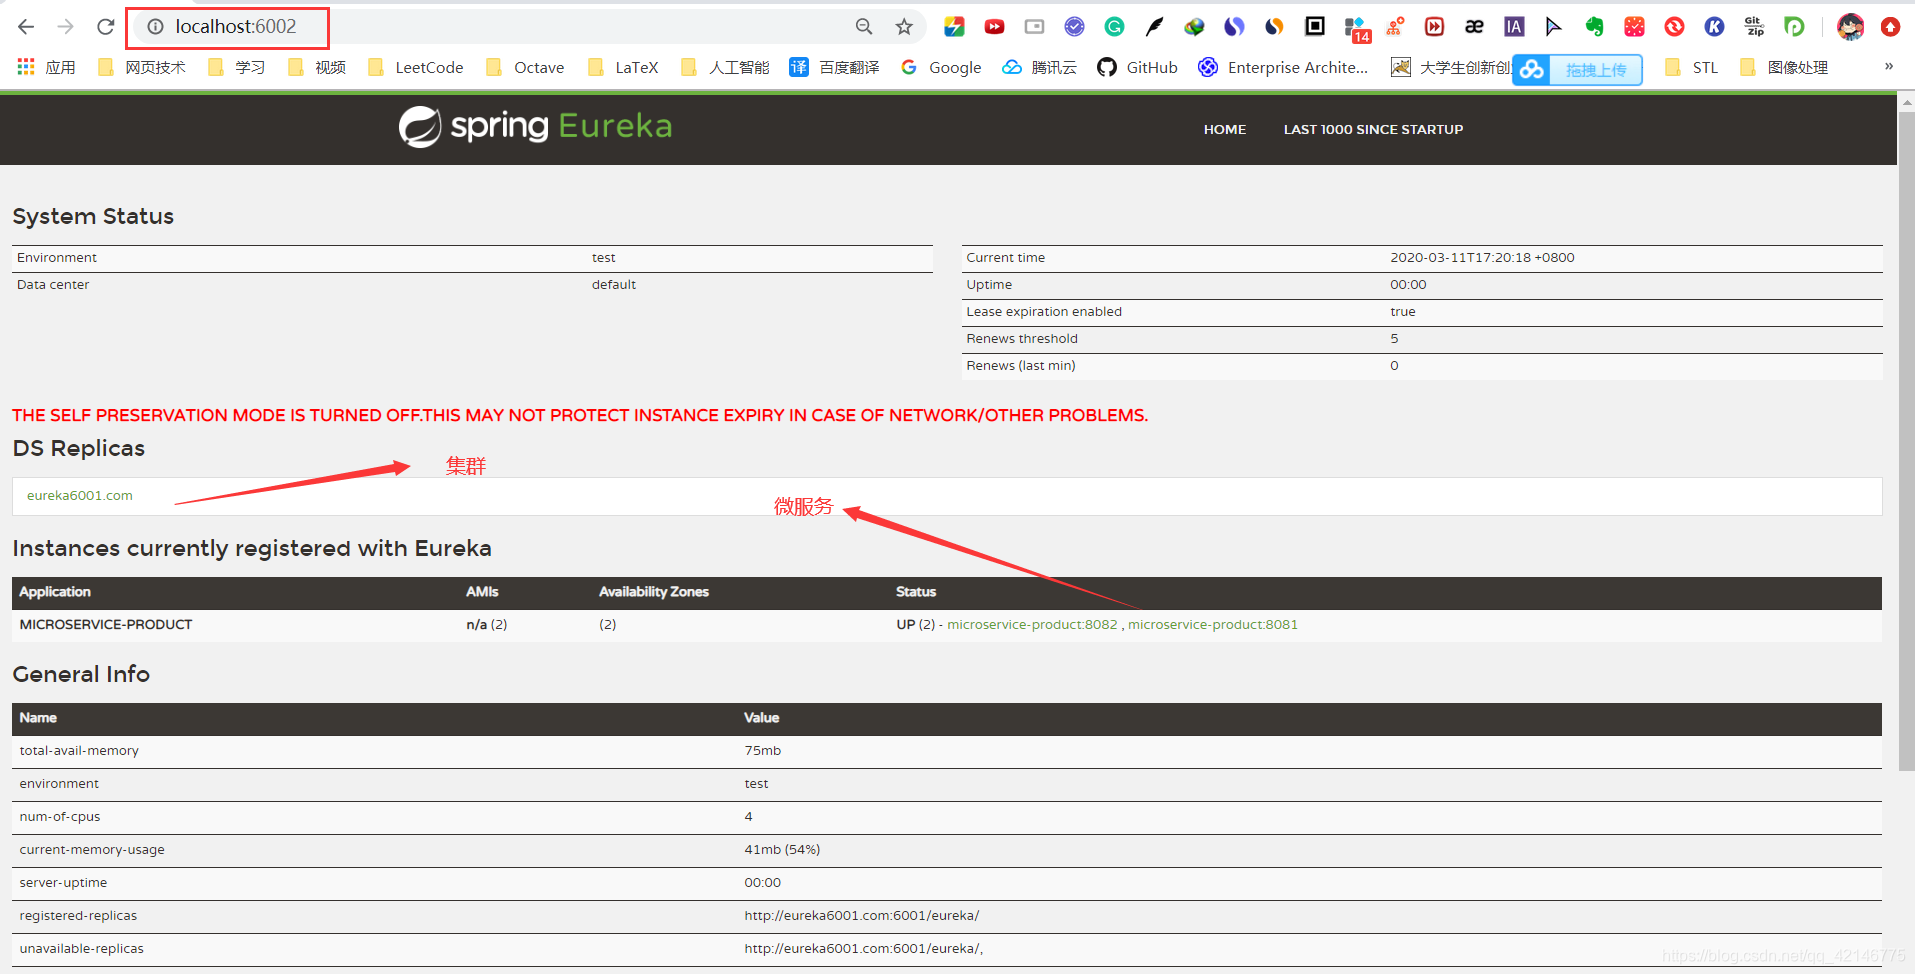
- 因为是微服务提供者,所以这里写明registerWithEureka注册和被fetchRegistry发现为true,然后defaultZone为注册的地方,即两台erueka服务端
eureka:
  client:
    registerWithEureka: true # 服务注册开关
    fetchRegistry: true # 服务发现开关
    serviceUrl: # 客户端(服务提供者)注册到哪一个Eureka Server服务注册中心,多个用逗号分隔
      defaultZone: http://localhost:6001/eureka/,http://localhost:6002/eureka/
  instance:
    instanceId: ${spring.application.name}:${server.port} # 指定实例ID,就不会显示主机名了
    preferIpAddress: true
spring:
  application:
    name: microservice-good#这个很重要,这在以后的服务与服务之间相互调用一般都是根据这个name
这时候就可以 查看重启所有springboot项目,然后输入localhost:6001 || /6002
整合feign
使用feign达到负载均衡,可以让我们面向接口编程
Spring Cloud 对 Feign 进行了封装,Feign 默认集成了 Ribbon 实现了客户端负载均衡调用。

1、在消费者微服务中使用 Ribbon 实现负载均衡,Ribbon 先从EurekaServer中获取服务列表。
2、Ribbon 根据负载均衡的算法(默认轮训算法)去调用微服务。
现在我们将消费者实现出来
- 添加Feign依赖,并且这也是eureka-client
<dependencies>
   <!-- 导入Eureka客户端的依赖,将 微服务提供者 注册进 Eureka -->
    <dependency>
        <groupId>org.springframework.cloud</groupId>
        <artifactId>spring-cloud-starter-netflix-eureka-client</artifactId>
    </dependency>
    <dependency>
        <groupId>org.springframework.boot</groupId>
        <artifactId>spring-boot-autoconfigure</artifactId>
    </dependency>
</dependencies>
- 配置文件,registerWithEureka不需要注册,可以去发现服务
spring:
  application:
    name: feign
eureka:
  client:
    registerWithEureka: false # 服务注册开关
    fetchRegistry: true # 服务发现开关
    serviceUrl: # 客户端(服务提供者)注册到哪一个Eureka Server服务注册中心,多个用逗号分隔
      defaultZone: http://localhost:6001/eureka,http://localhost:6002/eureka
  instance:
    instanceId: ${spring.application.name}:${server.port} # 指定实例ID,就不会显示主机名了
    preferIpAddress: true
ribbon:
  eureka:
    enabled: true
3.代码使用
@RestController
public class ProductController {

    @Autowired
    ProductClientService service;
    @RequestMapping(value = "/consumer/product/list")
    public List<Product> list() {
        return service.list();
    }

}
@FeignClient(value = "microservice-product") //指定调用的微服务名称
public interface ProductClientService {
    @RequestMapping(value = "/product/list", method = RequestMethod.GET)
    List<Product> list();
}
启动类
//会扫描指定包下面使用@FeignClient标识的接口
@EnableFeignClients(basePackages = "com.takefree.service")
@EnableEurekaClient //将此服务注册到Eureka 服务注册中心
@SpringBootApplication
public class Feign {

    public static void main(String[] args) {
        SpringApplication.run(Feign.class, args);
    }

}
整合zuul(不全)
其中路由功能负责将外部请求转发到具体的微服务实例上,是实现外部访问统一入口的基础,
客户端请求网关/api/good,通过路由转发到 good服务
客户端请求网关/api/order,通过路由转发到 order 服务
而过滤功能则负责对请求的处理过程进行干预,是实现请求校验等功能的基础.
因为需要注册进入erueka,依赖netflix-eureka-client
 <dependencies>
        <dependency>
            <groupId>org.springframework.cloud</groupId>
            <artifactId>spring-cloud-starter-netflix-eureka-client</artifactId>
        </dependency>
        <dependency>
            <groupId>org.springframework.boot</groupId>
            <artifactId>spring-boot-starter-web</artifactId>
        </dependency>

        <!--zuul路由网关依赖-->
        <dependency>
            <groupId>org.springframework.cloud</groupId>
            <artifactId>spring-cloud-starter-netflix-zuul</artifactId>
        </dependency>
    </dependencies>
整合配置中心Config

创建github仓库,新建本地文件夹 git clone 一下
然后新建一个UTF8的yml文件,然后推送
也就是 add commit push 一条龙服务
创造一个config服务端module读取git上的配置文件
服务端
添加config module,web启动器依赖
<dependencies>
    <!-- Spring Cloud Config配置中心依赖 -->
    <dependency>
        <groupId>org.springframework.cloud</groupId>
        <artifactId>spring-cloud-config-server</artifactId>
    </dependency>

    <dependency>
        <groupId>org.springframework.boot</groupId>
        <artifactId>spring-boot-starter-web</artifactId>
    </dependency>

</dependencies>
新建yml
server:
  port: 5001

spring:
  application:
    name: microservice-config
  cloud:
    config:
      server:
        git: # 远程库的git地址
          uri: https://github.com/xxx/microservice-cloud-config.git
启动类上写
@EnableConfigServer
@SpringBootApplication
public class Config {

    public static void main(String[] args) {
        SpringApplication.run(Config.class, args);
    }

}
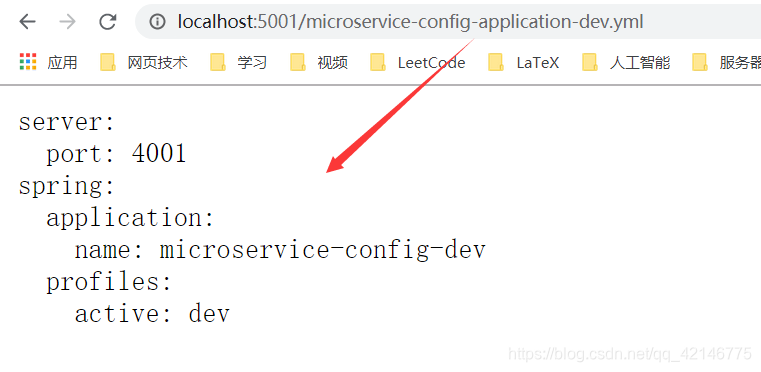
就可以读取了

客户端
然后就是把微服务的配置库顺利的读进去,依赖config
 <!-- Spring Cloud Config 客户端依赖-->
  <dependency>
      <groupId>org.springframework.cloud</groupId>
      <artifactId>spring-cloud-starter-config</artifactId>
  </dependency>
在类路径resources下创建 bootstrap.yml 配application.yml 是用户级别的配置项bootstrap.yml 是系统级别的配置项,优先级更高Spring Cloud 会创建一个 Bootstrap Context ,Bootstrap Context 会负责从外部资源加载配置属性并解析配置; Bootstrap 属性有高优先级,默认情况下,它们不会被本地配置覆盖。
spring:
  cloud:
    config:
      name: microservice-config-application #github上的配置名称,注意没有yml后缀名
      profile: prod #本次访问的环境配置项
      label: master #远程库的分支名
      uri: http://localhost:5001 #Config配置中心地址,通过它获取microservice-configapplication.yml配置信息
然后可以把原来的application.yml和git中重复的配置删去了
整合Bus实现自动更新配置文件

安装RabbitMQ
在安装RabbitMQ需要有Erlang,然后配置erlang bin目录的环境变量
然后安装Rabbit,安装完了start,访问localhost:15632
如果不行,切入sbin 下cmd执行
# 开启RabbitMQ节点
rabbitmqctl start_app
# 开启RabbitMQ管理模块的插件,并配置到RabbitMQ节点上
rabbitmq-plugins enable rabbitmq_management
# 关闭RabbitMQ节点
rabbitmqctl stop
然后再start,再访问localhost:15632默认账户密码全为guest

<dependency>
	<groupId>org.springframework.cloud</groupId>
    <artifactId>spring-cloud-starter-bus-amqp</artifactId>
</dependency>
<!--监听器-->
<dependency>
    <groupId>org.springframework.boot</groupId>
    <artifactId>spring-boot-starter-actuator</artifactId>
</dependency>
在bootstrap.properties 配置文件新增RabbitMQ配置以及
消息总线配置
spring:
  cloud:
    config:
      name: microservice-config-application #github上的配置名称,注意没有yml后缀名
      profile: prod #本次访问的环境配置项
      label: master #远程库的分支名
      uri: http://localhost:5001 #Config配置中心地址,通过它获取microservice-configapplication.yml配置信息
  # ---------------新增---------------
  rabbitmq:
    host: localhost
    port: 5672
    username: guest
    password: guest
# 暴露触发消息总线的地址
management:
  endpoints:
    web:
      exposure:
        include: bus-refresh
可以测试一下,首先修改GitHub上的文件
工具发送 POST 请求: http://localhost:8081/actuator/bus-refresh
但是更新druid数据源不会刷新(使用默认的会刷新),需要自定义配置类
@Configuration
public class DruidConfig {

    @RefreshScope //刷新配置
    @ConfigurationProperties(prefix = "spring.datasource")
    @Bean
    public DataSource druid() {
        return new DruidDataSource();
    }

}
