1. 相关理论
基于轮廓绘制出来的图片。
-
常见的模糊处理方式以及应用场景
- blur,高斯模糊 - 抑制噪声;
- 中值模糊 - 去除椒盐噪声
-
轮廓周围绘制矩形 -API
approxPolyDP(InputArray curve, OutputArray approxCurve, double epsilon, bool closed)
基于RDP算法实现,目的是减少多边形轮廓点数 -
轮廓周围绘制矩形-API
cv::boundingRect(InputArray points)得到轮廓周围最小矩形左上交点坐标和右下角点坐标,绘制一个矩形cv::minAreaRect(InputArray points)得到一个旋转的矩形,返回旋转矩形 -
轮廓周围绘制圆和椭圆-API
cv::minEnclosingCircle(
	InputArray points, //得到最小区域圆形
	Point2f& center, // 圆心位置
	float& radius)// 圆的半径
	cv::fitEllipse(InputArray  points)得到最小椭圆
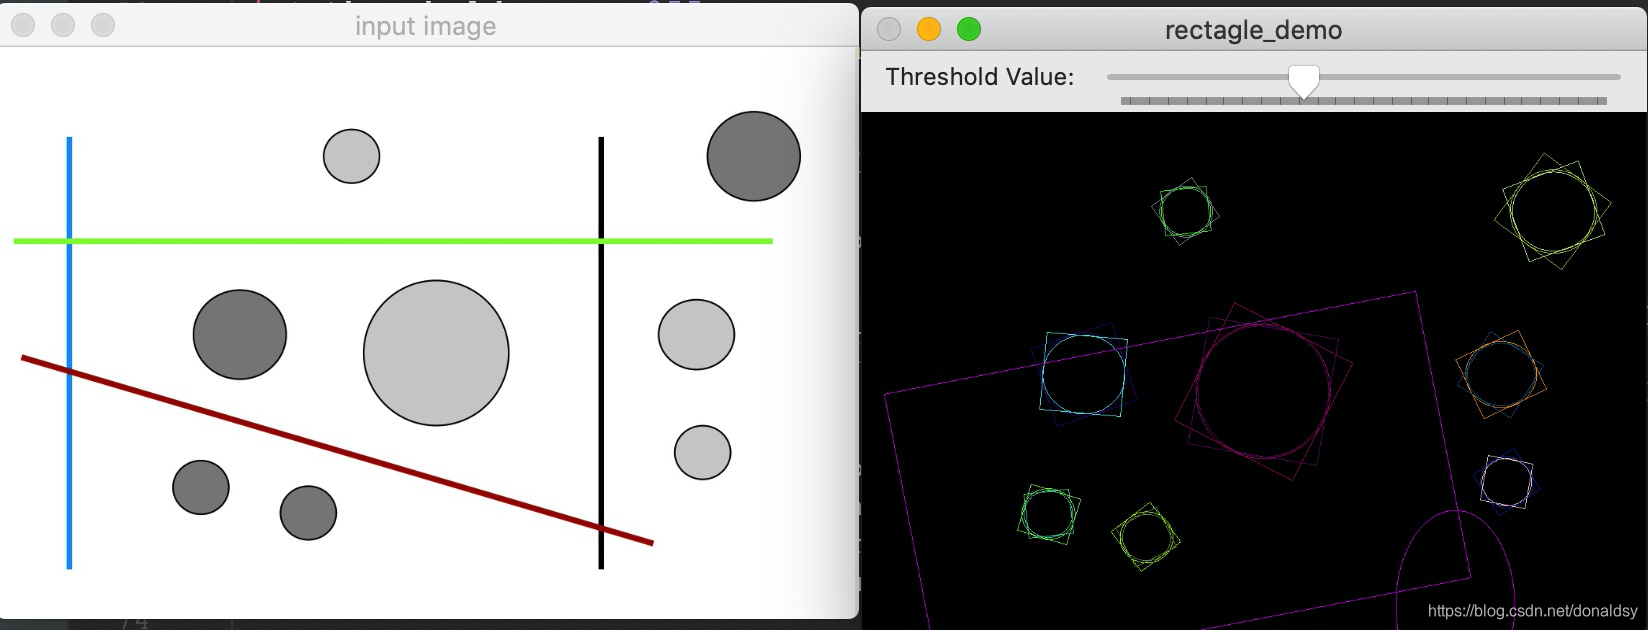
2. 代码 & 效果展示
- 演示代码 – 步骤
- 首先将图像变为二值图像
- 发现轮廓,找到图像轮廓
- 通过相关API在轮廓点上找到最小包含矩形和圆,旋转矩形与椭圆。
- 绘制它们。
相关代码:
#include <iostream>
#include <opencv2/opencv.hpp>
#include <opencv2/imgproc/types_c.h>

using namespace std;
using namespace cv;

#ifndef P30
#define P30 30
#endif

#if P30
Mat src, gray_src, drawImg;
int threshold_v = 170;
int threshold_max = 255;
const char* output_win = "rectagle_demo";
RNG rng(12345);

void Contours_Callback(int, void*) {
    Mat binary_output;
    vector<vector<Point>> contours;
    vector<Vec4i> hierachy;
    threshold(gray_src, binary_output, threshold_v, threshold_max, THRESH_BINARY);
    //imshow("binary image", binary_output);
    findContours(binary_output, contours, hierachy, RETR_TREE, CHAIN_APPROX_SIMPLE, Point(-1, -1));

    vector<vector<Point>> contours_ploy(contours.size());
    vector<Rect> ploy_rects(contours.size());
    vector<Point2f> ccs(contours.size());
    vector<float> radius(contours.size());

    vector<RotatedRect> minRects(contours.size());
    vector<RotatedRect> myellipse(contours.size());

    for (size_t i = 0; i < contours.size(); i++) {
        approxPolyDP(Mat(contours[i]), contours_ploy[i], 3, true);
        ploy_rects[i] = boundingRect(contours_ploy[i]);
        minEnclosingCircle(contours_ploy[i], ccs[i], radius[i]);
        if (contours_ploy[i].size() > 5) {
            myellipse[i] = fitEllipse(contours_ploy[i]);
            minRects[i] = minAreaRect(contours_ploy[i]);
        }
    }

    // draw it
    drawImg = Mat::zeros(src.size(), src.type());
    Point2f pts[4];
    for (size_t t = 0; t < contours.size(); t++) {
        Scalar color = Scalar(rng.uniform(0, 255), rng.uniform(0, 255), rng.uniform(0, 255));
        //rectangle(drawImg, ploy_rects[t], color, 2, 8);
        //circle(drawImg, ccs[t], radius[t], color, 2, 8);
        if (contours_ploy[t].size() > 5) {
            ellipse(drawImg, myellipse[t], color, 1, 8);
            minRects[t].points(pts);
            for (int r = 0; r < 4; r++) {
                line(drawImg, pts[r], pts[(r + 1) % 4], color, 1, 8);
            }
        }
    }

    imshow(output_win, drawImg);
    return;
}
#endif

int main() {
    std::string path = "../circle.JPG";
    cv::Mat img = cv::imread(path, 5);

    string str_input = "input image";
    string str_output = "output image";

    if (img.empty()) {
        std::cout << "open file failed" << std::endl;
        return -1;
    }

    namedWindow(str_input, WINDOW_AUTOSIZE);
    namedWindow(str_output, WINDOW_AUTOSIZE);
    imshow(str_input, img);

#if P30
    src = img;
    cvtColor(src, gray_src, CV_BGR2GRAY);
    blur(gray_src, gray_src, Size(3, 3), Point(-1, -1));

    const char *source_win = "input image";
    namedWindow(source_win, WINDOW_AUTOSIZE);
    namedWindow(output_win, WINDOW_AUTOSIZE);
    imshow(source_win, src);

    createTrackbar("Threshold Value:", output_win, &threshold_v, threshold_max, Contours_Callback);
    Contours_Callback(0, 0);
#endif

    cv::waitKey(0);
    cv::destroyAllWindows();
    return 0;
}
展示效果:
3. other
OpenCV每一个算法都封装了一个算法,如果把几百个API背后的代码搞明白,知道原理,如:Haar、级联分类器等背后的原理,你就不仅仅是大神,将会超过绝大多数人!
