Python Web全栈开发入门实战教程教程
大家好,我叫亓官劼(qí guān jié ),这个
《Python Web全栈开发入门实战教程教程》是一个零基础的实战教程,手把手带你开发一套系统,带你了解Python web全栈开发。写这篇文章的初衷就是想给想入门Python Web开发还没入门的小伙伴们一个详细的,真正零基础的一个开发教程,可以让小伙伴们在入门的途中少走很多弯路。
在服务端端开发上,主流还是Java开发,Python的话虽说开发快速、便捷,但是在一些地方还是有缺陷的。但是Python Web有一个非常好的优点就是方便、快捷、易学、易用,可以让小伙伴们快速的入门Web开发。
之前有不少小伙伴来问我,怎么开发Web系统啊?毕业论文的中期检查马上就要来了,我的毕业设计还一动没动,我完全不会Web系统的开发,我该怎么办?,虽说大学四年我们或多或少的都学过各种各样的语音,但是项目开发做的却很少,很多学校开了点项目开发的也,最后也都是上了点理论,开发?那是不可能开发的,最后还是一套试卷定成绩,期末背背就是高分,导致很多小伙伴们到了写毕设的时候,连个简简单单的web系统都不会开发。这篇文章也可以给小伙伴们一个参考吧,如果毕设的时候开发web系统的时候无从下手,可以来尝试一下Python Web,这篇文章将会真正零基础的,每步都进行一个详细的说明,带你完成一个小项目,实现各种各样的一个功能,给你提供一些思路。
写这篇文章的另一个初衷就是,想给想入门Python Web开发的同学或者想学习Web开发的同学,提供一个练手的项目,一套完整的项目实现过程,避免刚入门时的茫然无措。我当时大二刚刚开始做Web开发时,由于学校里面做开发的比较少吧,自己一个人摸索,找网上的各种教程,在教程里他们总是会忽略一些细节,然后我实践运行的时候就是频频报错,一个小小的BUG就要折腾很久,还记得当时项目完成,部署到CentOS服务器上的时候,使用的Nginx+UWSGI进行部署,当时直接跑UWSGI可以跑,直接跑Nginx也可以,两个加起来就是一直错误,各种百度、谷歌,也找不到问题所在,最后折腾了半个月,在一篇很小的文章上看到了UWSGI的一个接口文件(安装的时候不是自动生成的,需要自己创建),然后一个很小的bug吧,折腾了半个月。所以这篇文章,也是想给刚入门的小白提供一个参考,一个少走弯路的方法吧!
大家一起加油,时光荏苒,未来可期!
博主的站内博客导航:博客文章内容导航(实时更新)
更多精彩博客文章推荐
- 小白都能看懂的实战教程 手把手教你Python Web全栈开发 (DAY 1)
- 小白都能看懂的实战教程 手把手教你Python Web全栈开发 (DAY 2)
- 小白都能看懂的实战教程 手把手教你Python Web全栈开发 (DAY 3)
- 小白都能看懂的实战教程 手把手教你Python Web全栈开发 (DAY 4)
- 小白都能看懂的实战教程 手把手教你Python Web全栈开发 (DAY 5)
- 小白都能看懂的实战教程 手把手教你Python Web全栈开发 (DAY 6)
- 小白都能看懂的实战教程 手把手教你Python Web全栈开发 (DAY 7)
- 一本教你如何在前端实现富文本编辑器
- 小白都能看得懂的教程 一本教你如何在前端实现markdown编辑器
- Flask学习(基本语法)
- 一文教会你Bootstrap,让你也可以快速建站
- 一文教你如何白嫖JetBrains全家桶(IDEA/PtChram/CLion)免费正版
本篇文章目录
- Python Web全栈开发入门实战教程教程
- @[TOC](本篇文章目录)
- 一、开发环境 & 项目简介
- 二、新建一个Flask项目
- 三、Flask基础知识部分
- 3.1 Flask程序的基本构造
- 3.2 路由器请求方法限定
- 3.3 动态路由
- 3.4 Jinja2模板引擎
- 3.4 传参时,列表和字典的使用:
- 3.5 控制语句的使用
- 3.6 过滤器的基本使用
- 3.7 使用flash传递消息
- 3.8 使用WTF实现web表单
- 3.9 Flask-SQLAlchemy拓展
- 3.9.1 Flask-SQLAlchemy拓展安装方法:
- 3.9.2 配置数据库:
- 3.9.3创建数据库类,映射数据库表
- 3.9.4在视图中操作数据库查询
- 3.9.5 常用的SQLAlchemy查询过滤器
- 3.9.6常用SQLAlchemy查询执行方法
- 3.10 使用werkzeug计算密码散列值
- 3.11 文件的上传、下载
- 3.12 Flask 蓝图
- 四、导航栏、注册、登录、注销、主页功能的实现
- 五、发布帖子、论坛页面实现
- 六、帖子详情、回复帖子、访问过滤功能实现
- 七、个人中心相关页面功能实现
- 八、资源专区相关功能实现
- 九、项目迁移
如果嫌本篇文章太长,不好拉动的话,可以使用上面的目录今天跳转,或者查看博主之前分篇幅写的博客,相对简短一些,博客地址为:
- 小白都能看懂的实战教程 手把手教你Python Web全栈开发 (DAY 1)
- 小白都能看懂的实战教程 手把手教你Python Web全栈开发 (DAY 2)
- 小白都能看懂的实战教程 手把手教你Python Web全栈开发 (DAY 3)
- 小白都能看懂的实战教程 手把手教你Python Web全栈开发 (DAY 4)
- 小白都能看懂的实战教程 手把手教你Python Web全栈开发 (DAY 5)
- 小白都能看懂的实战教程 手把手教你Python Web全栈开发 (DAY 6)
- 小白都能看懂的实战教程 手把手教你Python Web全栈开发 (DAY 7)
一、开发环境 & 项目简介
本项目源码在GitHub上进行开源,本项目的GitHub地址为:OnlineForumPlatform,大家可以去clone全部源码,喜欢的话,也欢迎大家star一下。
我们这里使用的是Python Web的Flask框架进行开发,使用的集成开发环境为Pycharm,使用的开发语言为Python3,前端为HTML/CSS/JavaScript/Bootstrap,数据库为MySQL,使用SQL语句进行描述。
我们这次实战采用的项目是一个在线论坛系统,字如其名,就是开发一个在线的论坛系统。需要实现各个的功能如下:
- 注册:注册账号
- 登录:登录账号进入系统,如果登录普通用户,则只有普通用户的权限,如果是管理员账号,则有管理员账号权限。
- 查看论坛问题列表:查看在线论坛系统中所有已发布的问题.
- 发布问题:
- 发布自己的问题,等待他人回答
- 支持富文本输入
- 支持Markdown输入
- 问题详情页面:显示当前问题的讨论、回复。
- 回答问题:回答他人问题。
- 个人中心:
- 显示个人账号信息
- 可以修改个人账号信息
- 显示个人发帖情况
- 资源专区
- 查看资源列表(已有资源)
- 在线预览资源
- 下载资源
- 上传资源
项目目前所涉及的功能就是这些,同时还有一些网页安全的一些措施,例如对访问客户的过滤等等功能。这就是我们这个实战项目的一个大致的功能介绍。
博主的站内博客导航:博客文章内容导航(实时更新)
更多精彩博客文章推荐
- 一本教你如何在前端实现富文本编辑器
- 小白都能看得懂的教程 一本教你如何在前端实现markdown编辑器
- 一文教会你Bootstrap,让你也可以快速建站
- 一文教你如何白嫖JetBrains全家桶(IDEA/PtChram/CLion)免费正版
二、新建一个Flask项目
既然是开发项目,我们第一步当然是先新建一个项目啦!本来打算第一章写我们的Flask基础知识部分,但是又怕有的小伙伴不会创建我们的Flask项目,索性我们就保姆式教学到底,我们从新建项目开始。
2.1 创建项目
这里使用Pycharm专业版作为开发工具,如果还没有Pycharm的同学可以下载安装一个,如果没有激活的话,可以查看一文教你如何白嫖JetBrains全家桶(IDEA/PtChram/CLion)免费正版
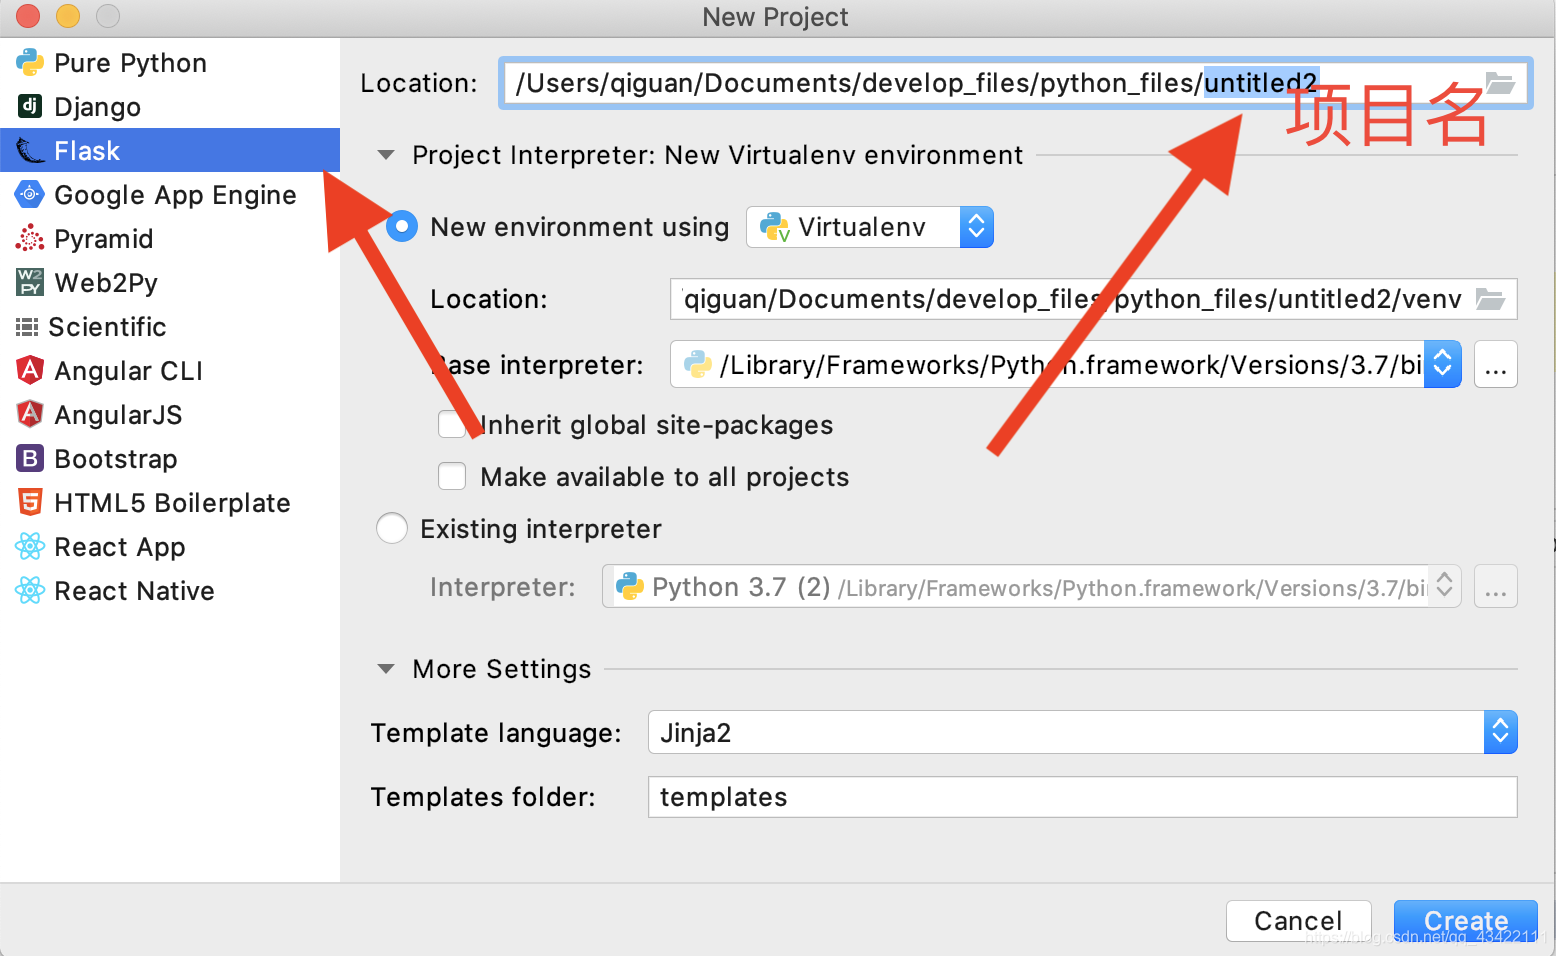
这里选择Flask项目,我这里的项目名称为OnlineForumPltform,使用virtualenv虚拟环境,模板引擎为Jinja2。
这样一个Flask基本项目就创建好啦。创建完成之后页面为这样:
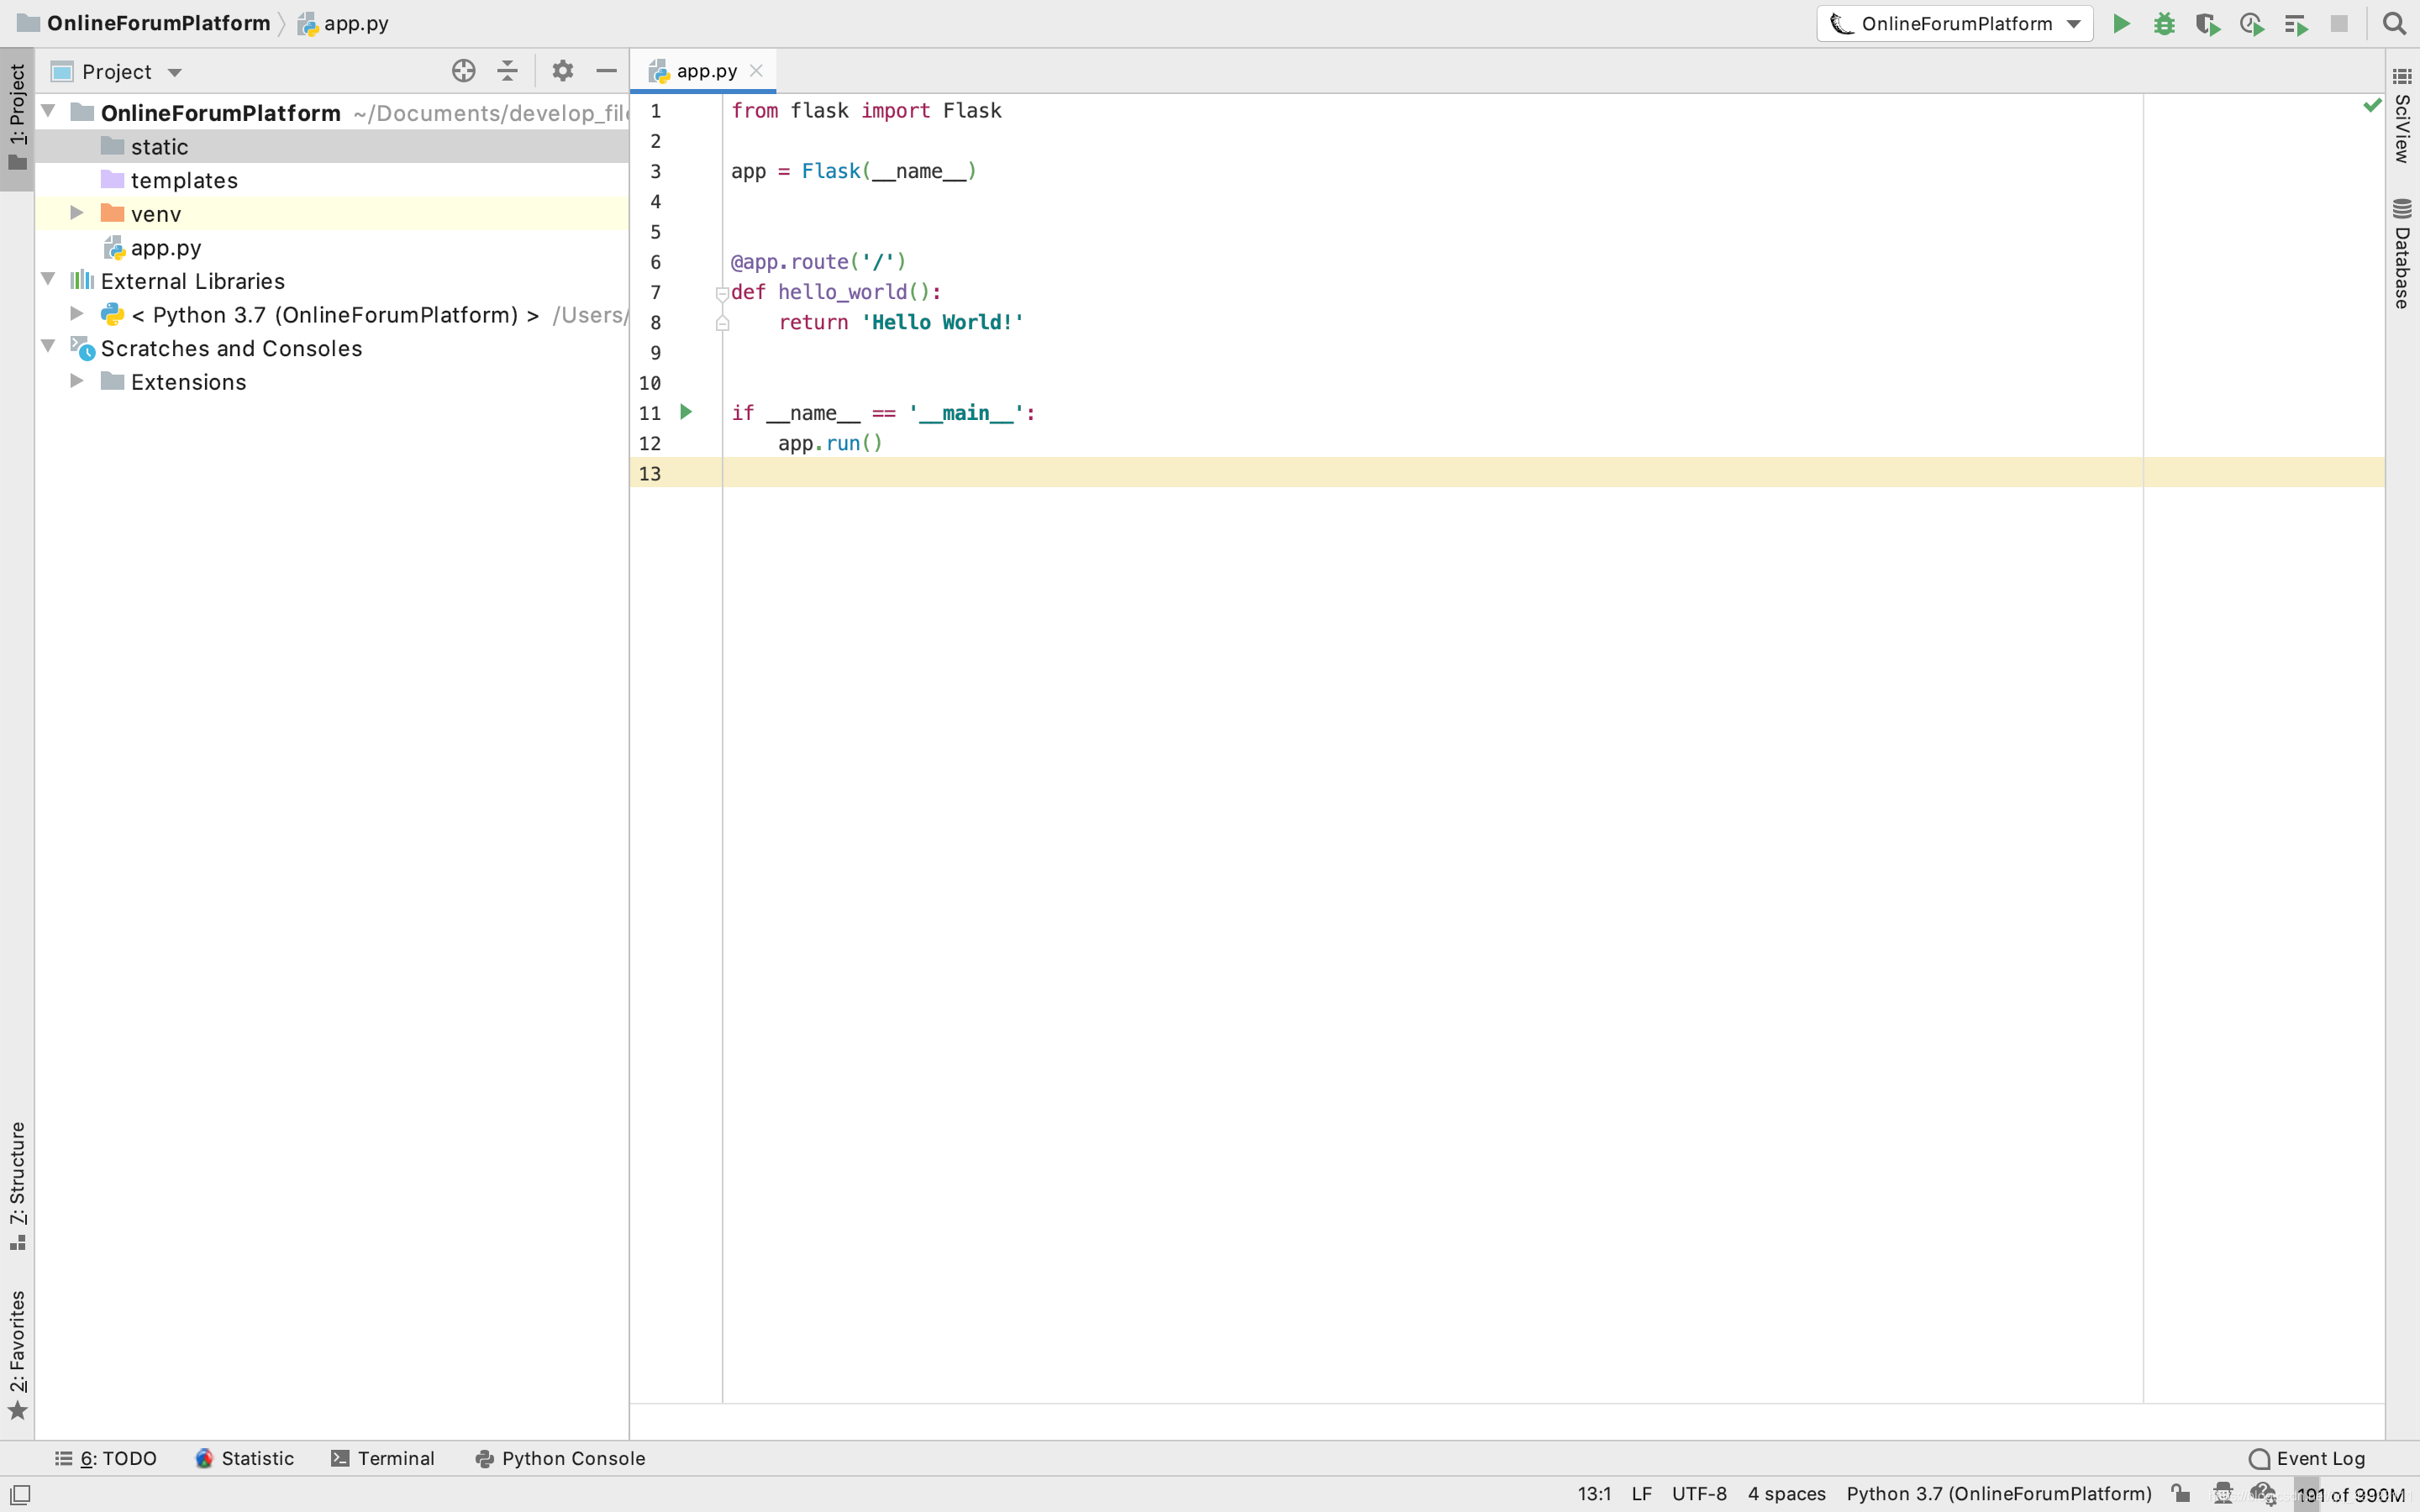
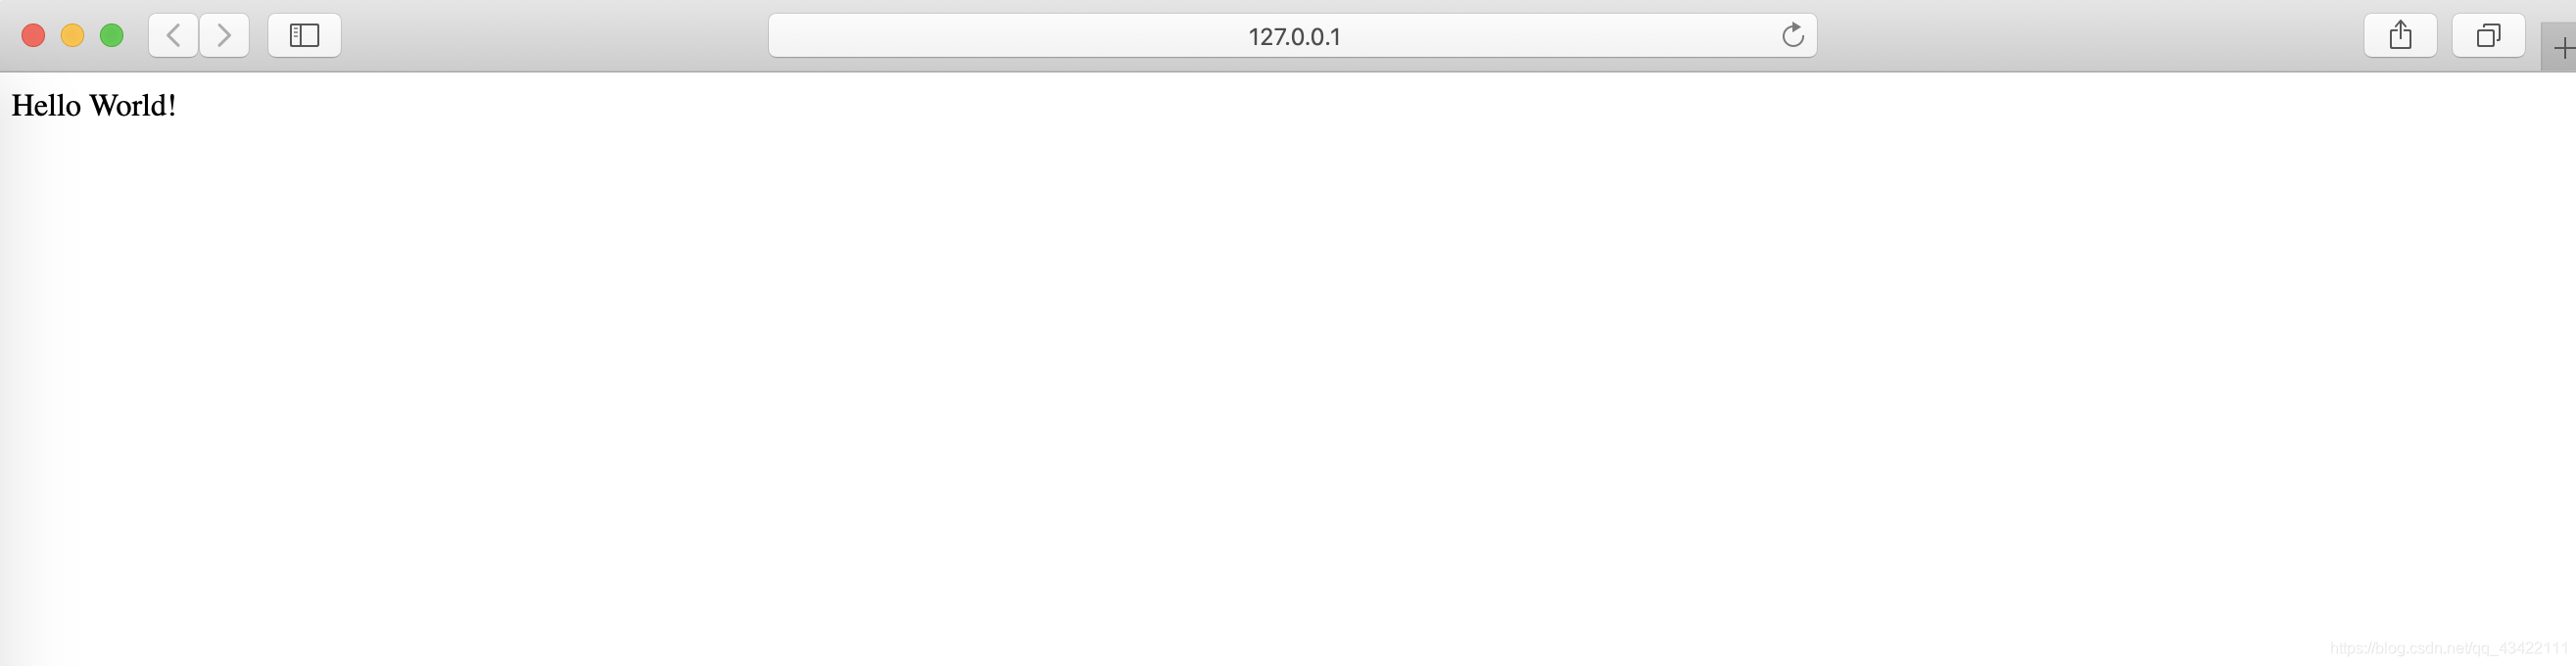
我们点击运行,测试一下第一个hello world:
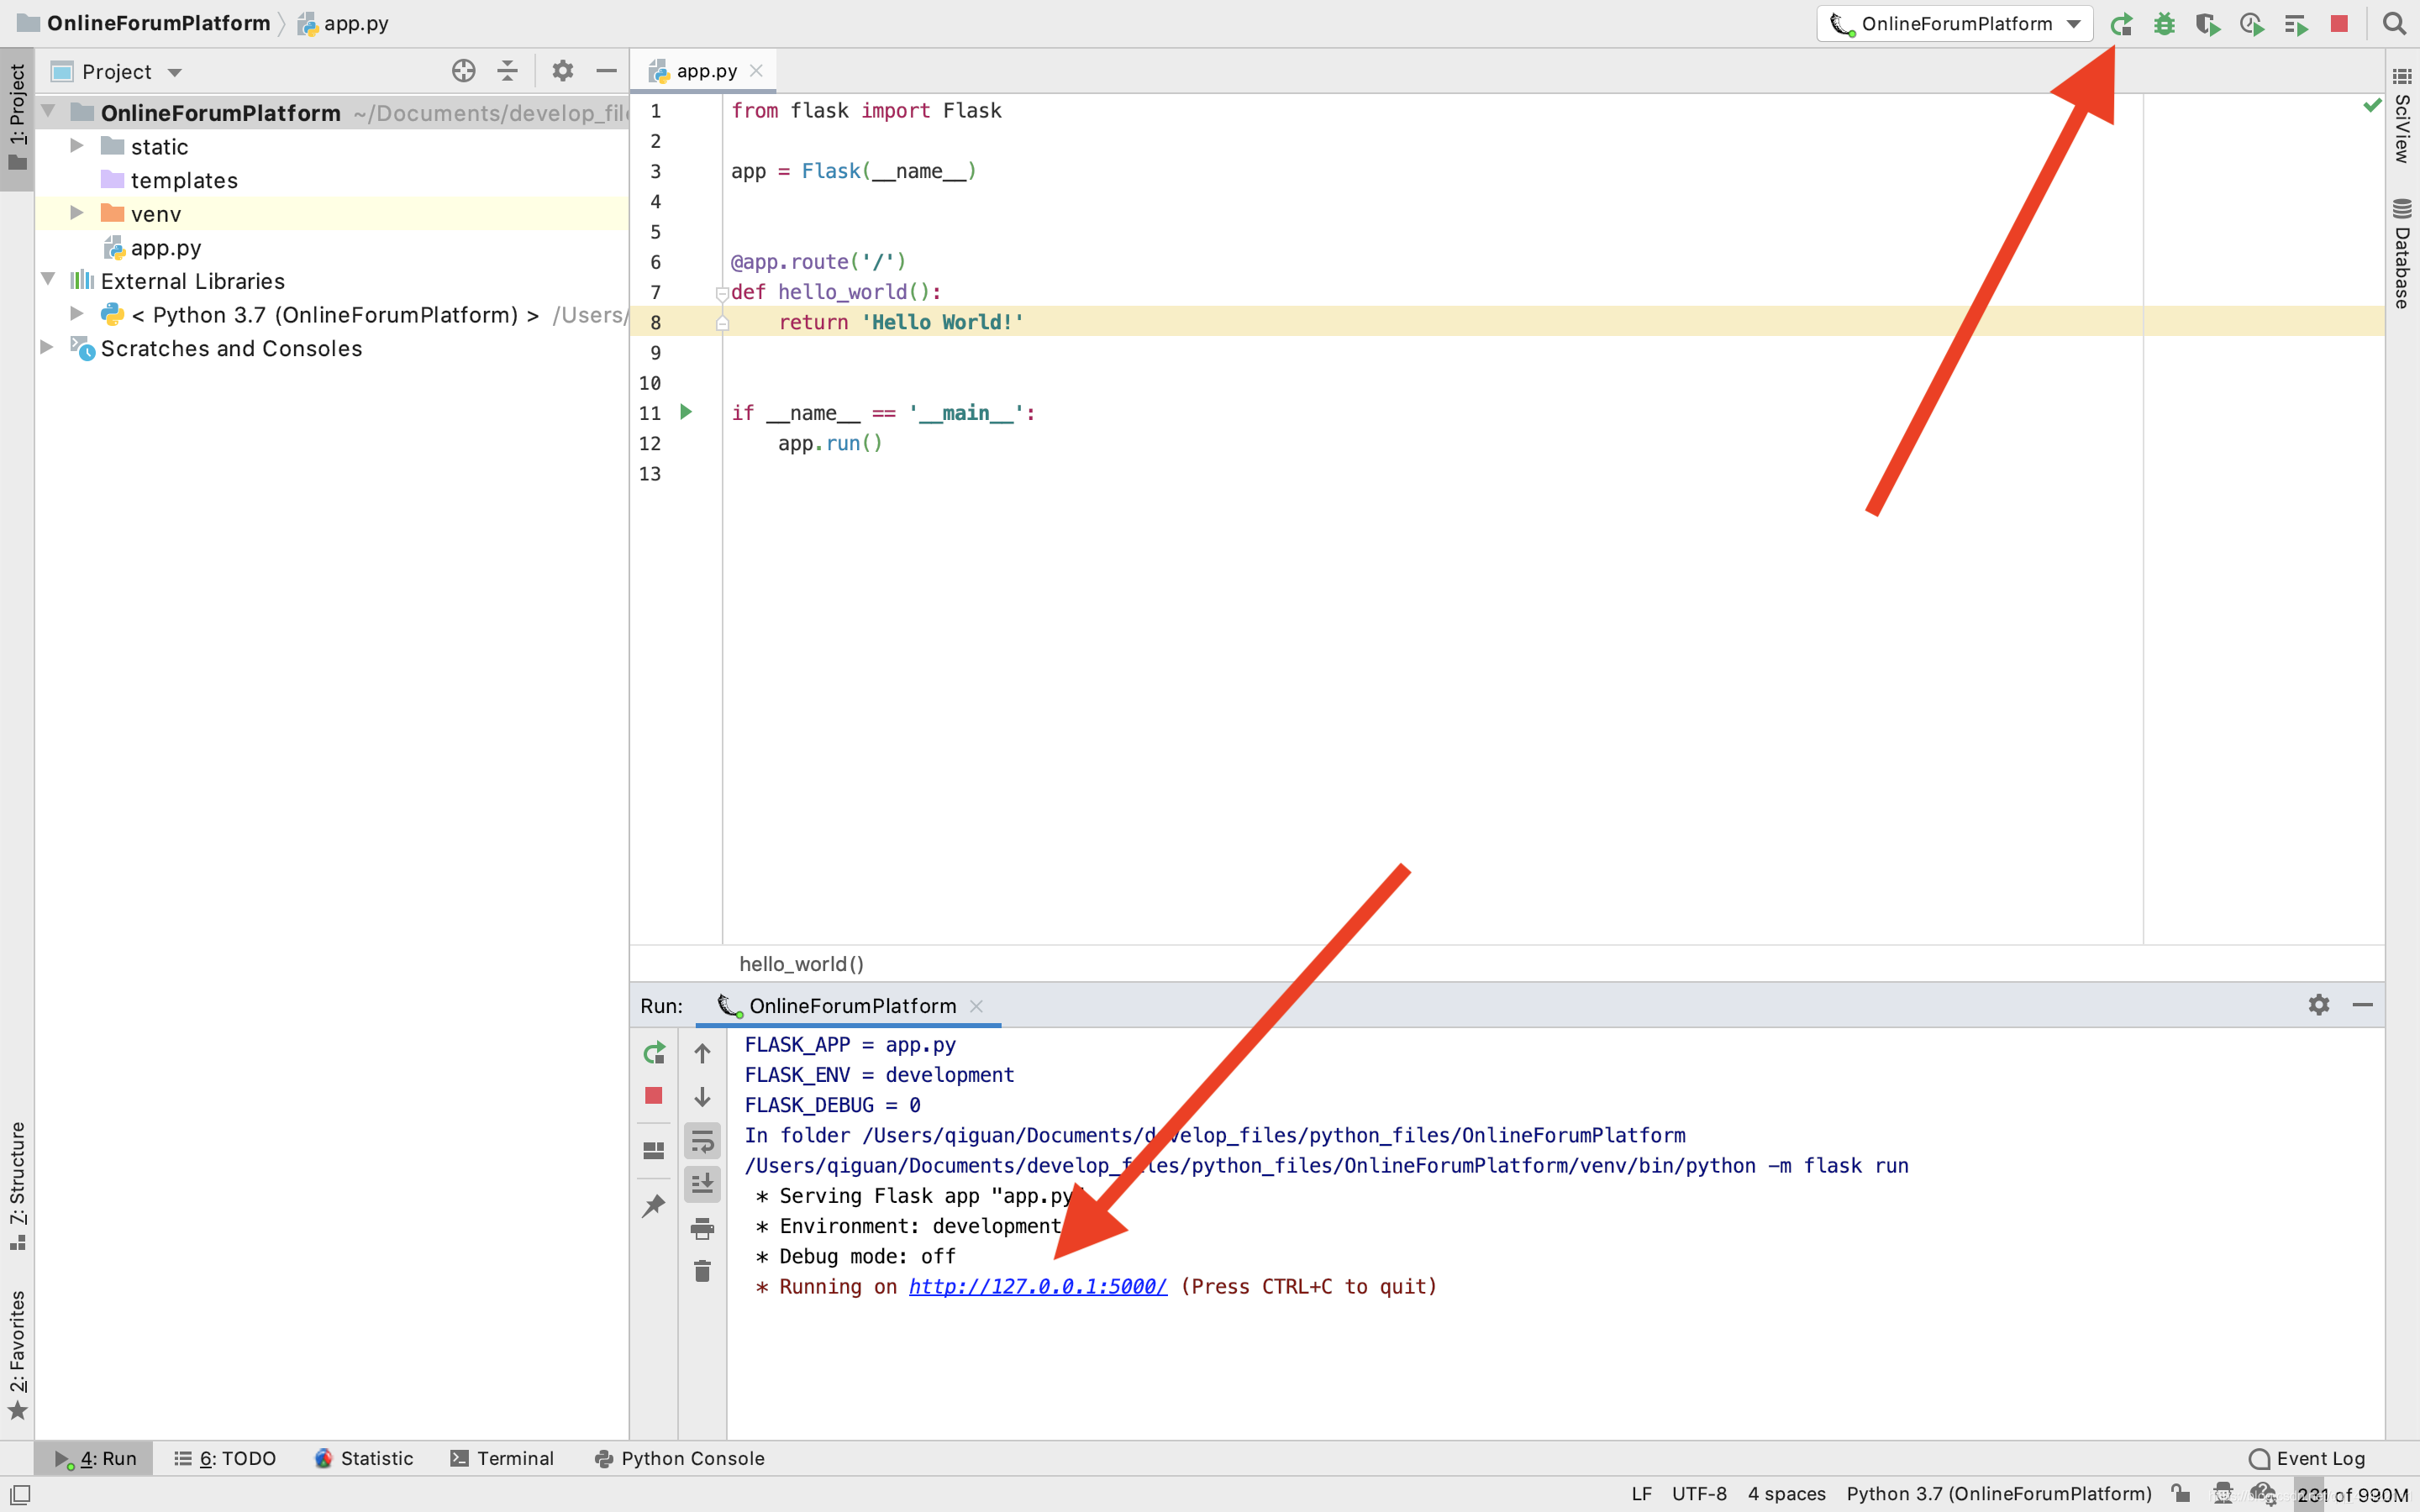
运行之后,我们访问运行栏中的地址,默认的地址为:http://127.0.0.1:5000
页面返回Hello World!就表示我们第一个已经完成了第一步!
下面我们来创建一些我们下面开发所需要的文件和文件夹。
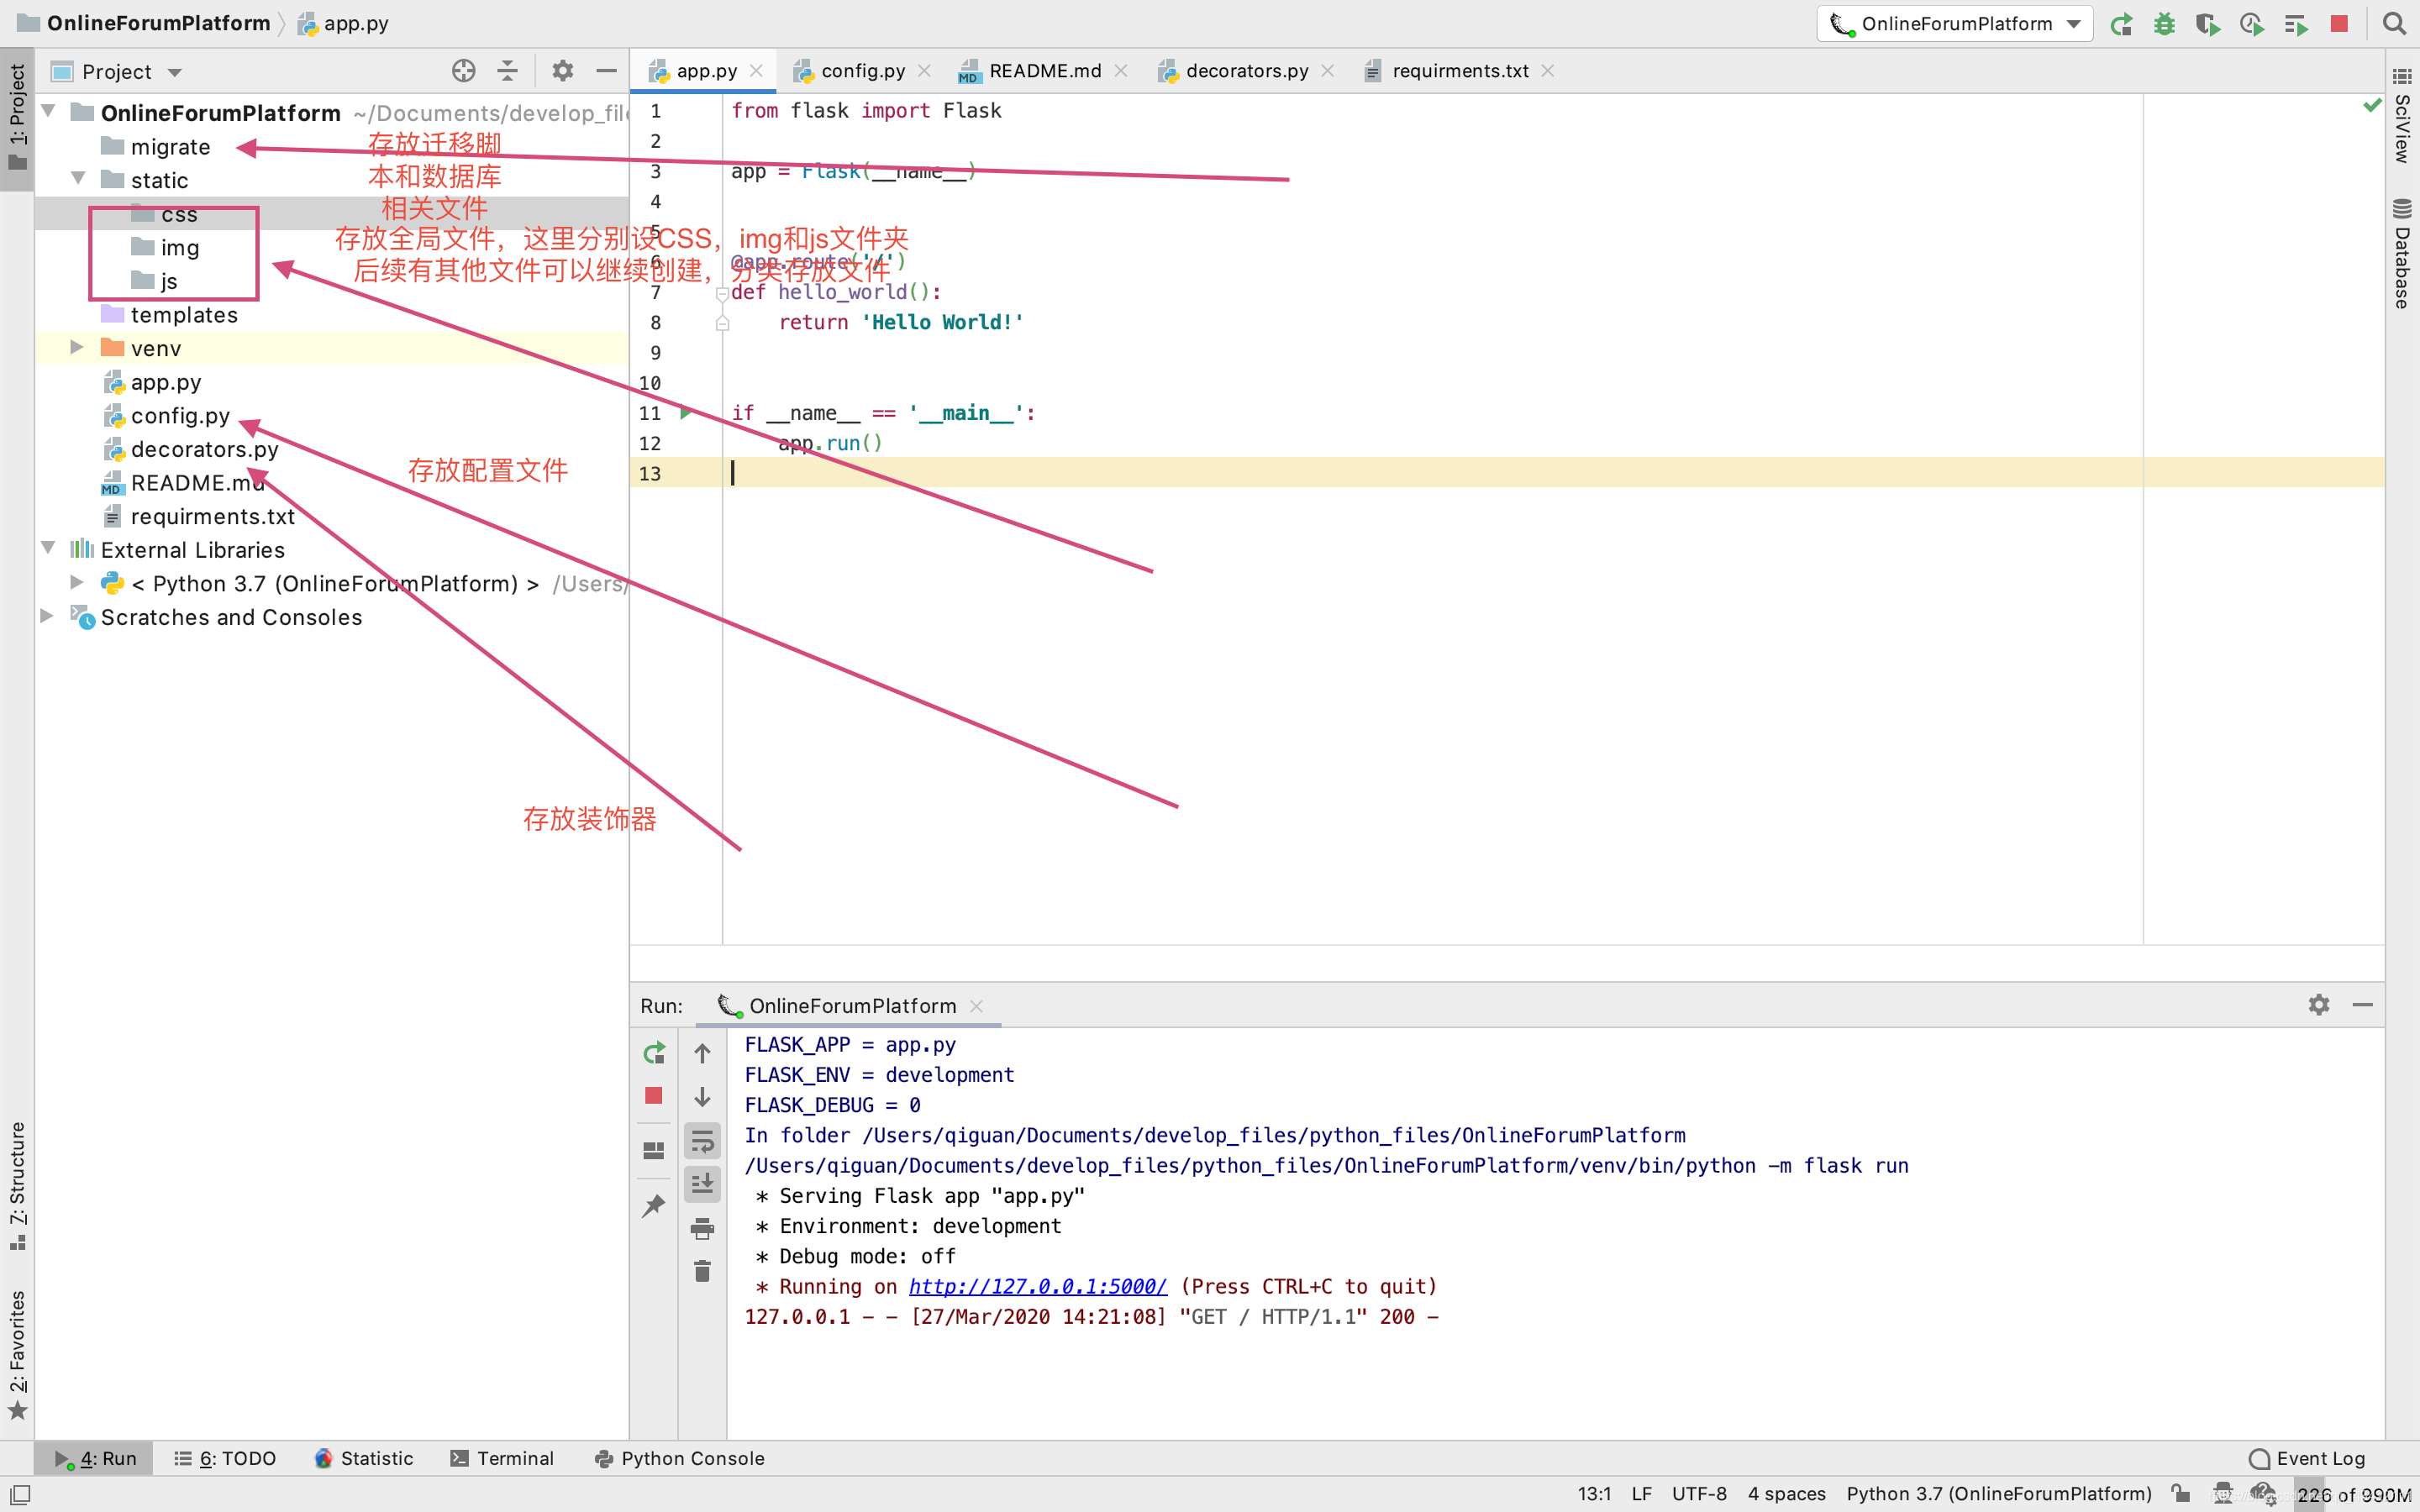
还有requirements.txt文件是存放本项目所有插件和版本信息的文本,README.md文件是本项目的说明文件。
2.2 安装本项目所需要的一些插件
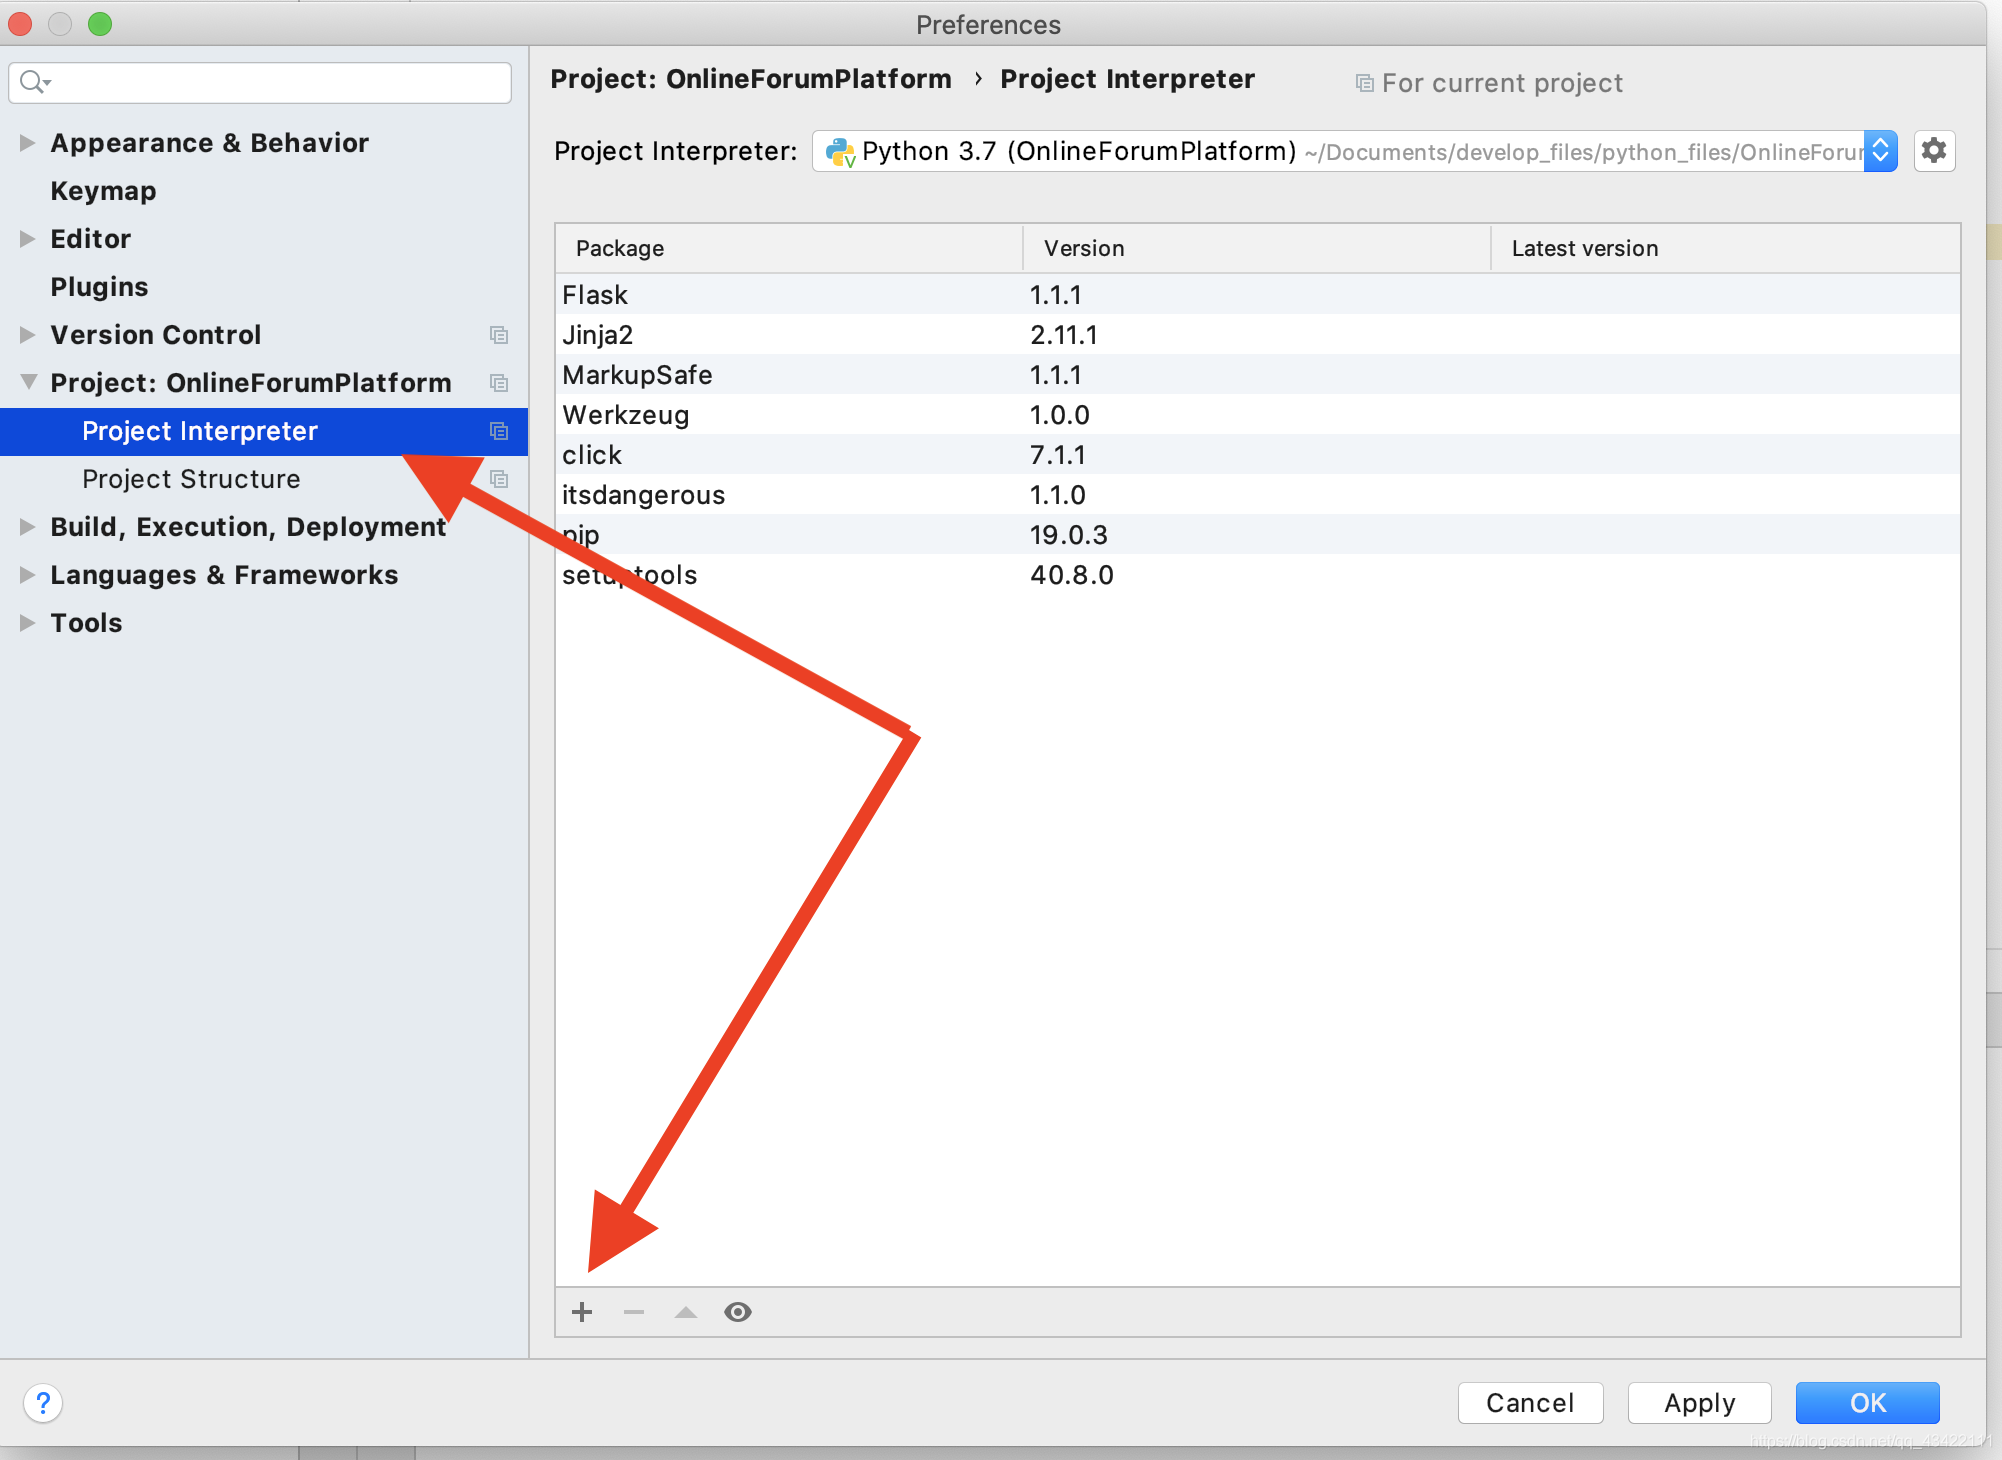
点开设置,进行安装插件:
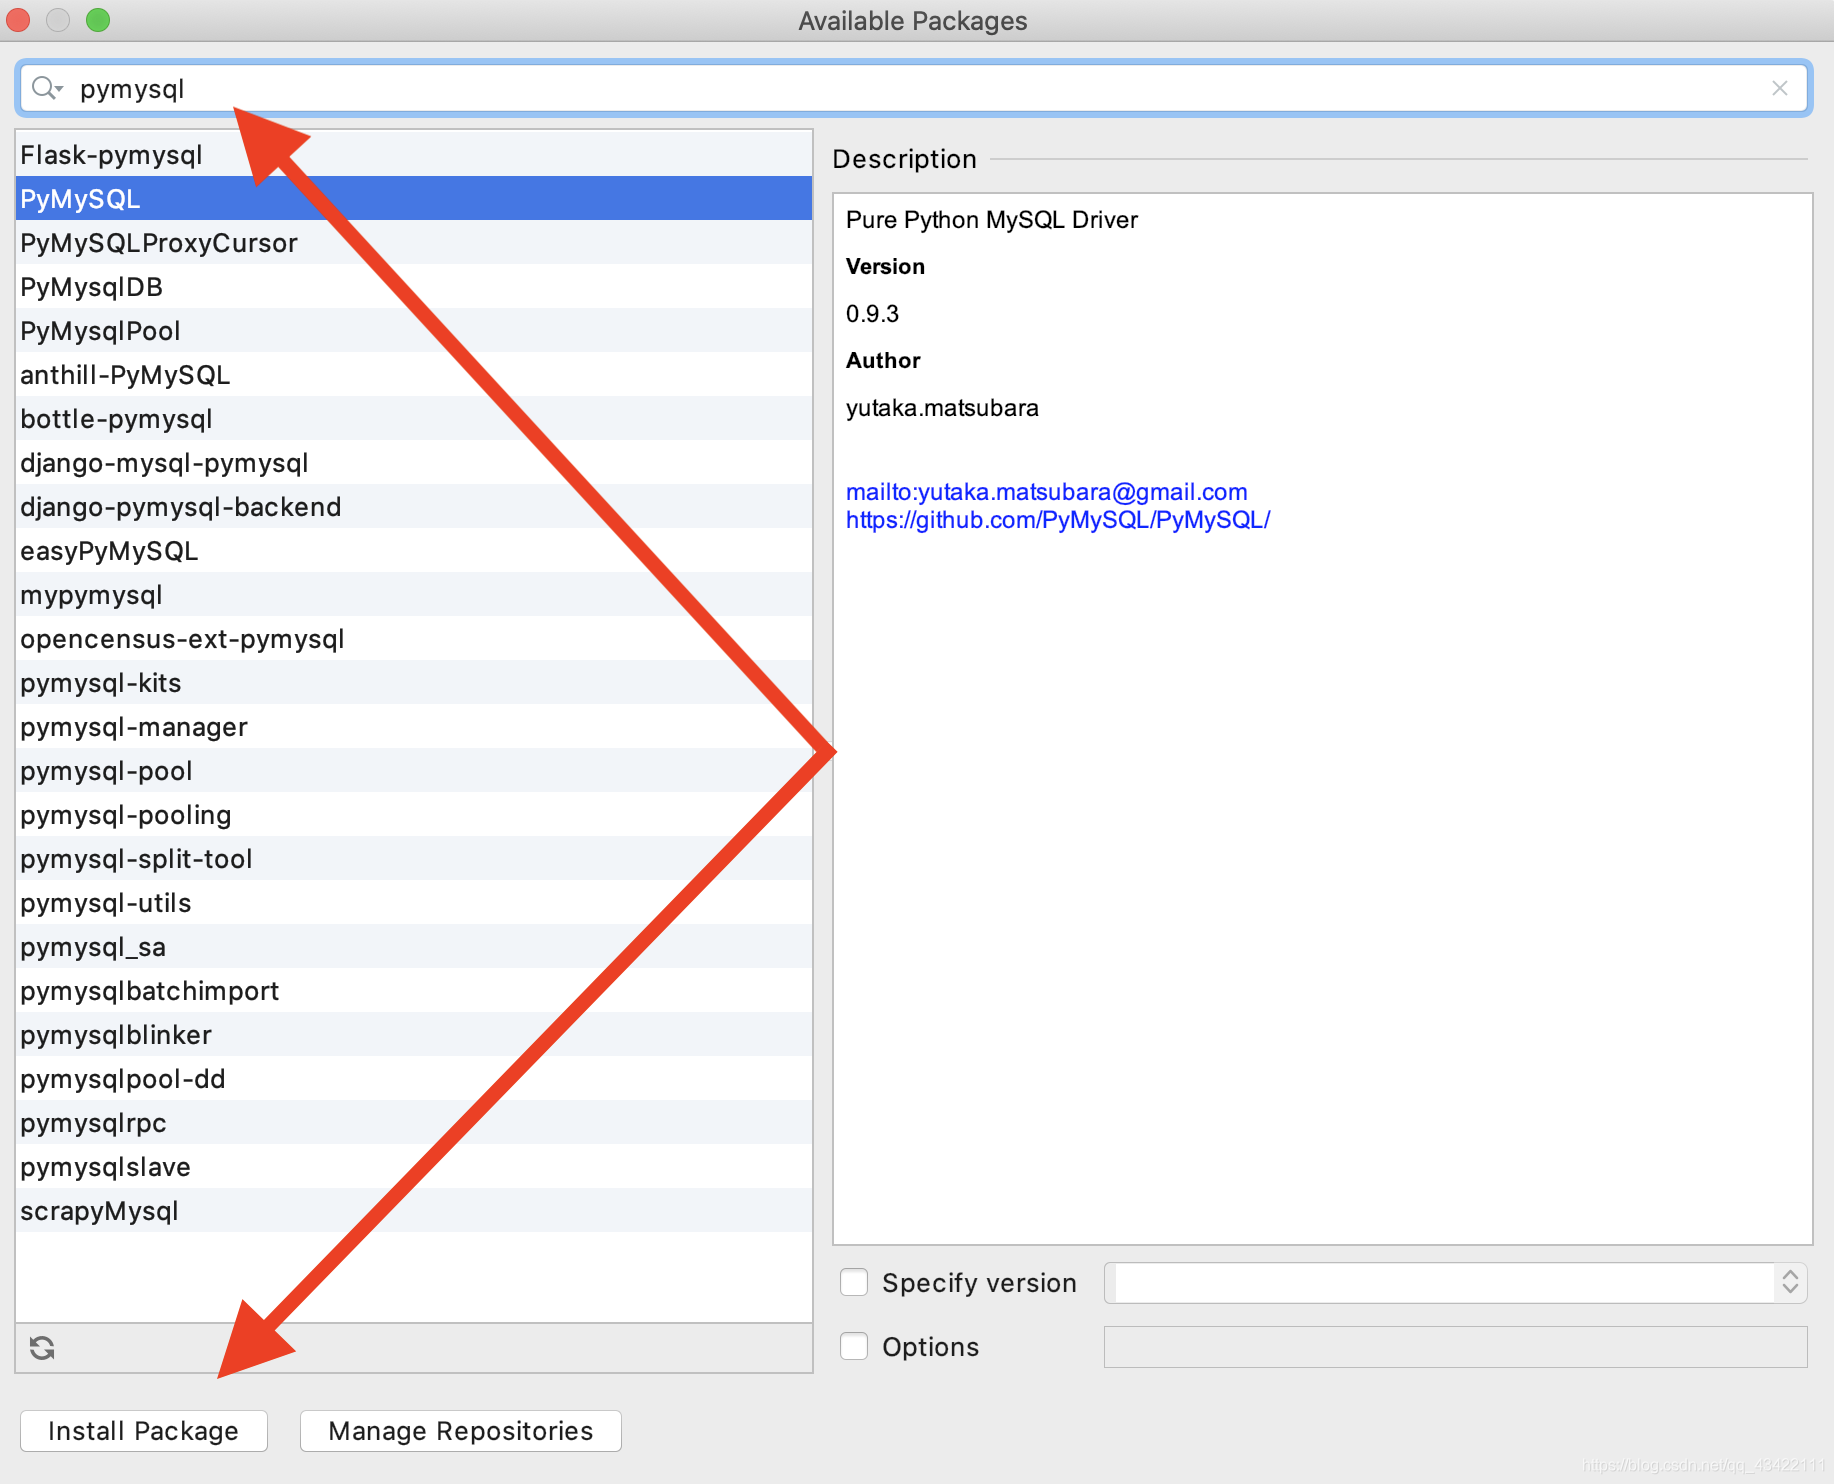
点击+进入添加插件页面,这里我们先添加一个PyMysql,其他的等我们需要的时候再进行添加。
2.3 创建数据库
这里我们先创建一个空的数据库,然后我们使用PyCharm连接这个数据库,方便我们后面进行数据库相关的操作。
(我这里是mac系统,mysql只安装了命令行版本,如果是安装图像界面版本的可以直接进行创建).终端进入mysql的命令为mysql -u root -p然后输入密码即可进入。
Enter password:
Welcome to the MySQL monitor.  Commands end with ; or \g.
Your MySQL connection id is 8
Server version: 8.0.16 MySQL Community Server - GPL

Copyright (c) 2000, 2019, Oracle and/or its affiliates. All rights reserved.

Oracle is a registered trademark of Oracle Corporation and/or its
affiliates. Other names may be trademarks of their respective
owners.

Type 'help;' or '\h' for help. Type '\c' to clear the current input statement.

mysql> create database OnlineForumPlatform;
Query OK, 1 row affected (0.06 sec)

mysql>
即可创建成功。
创建完成之后我们使用PyChram来连接数据库。
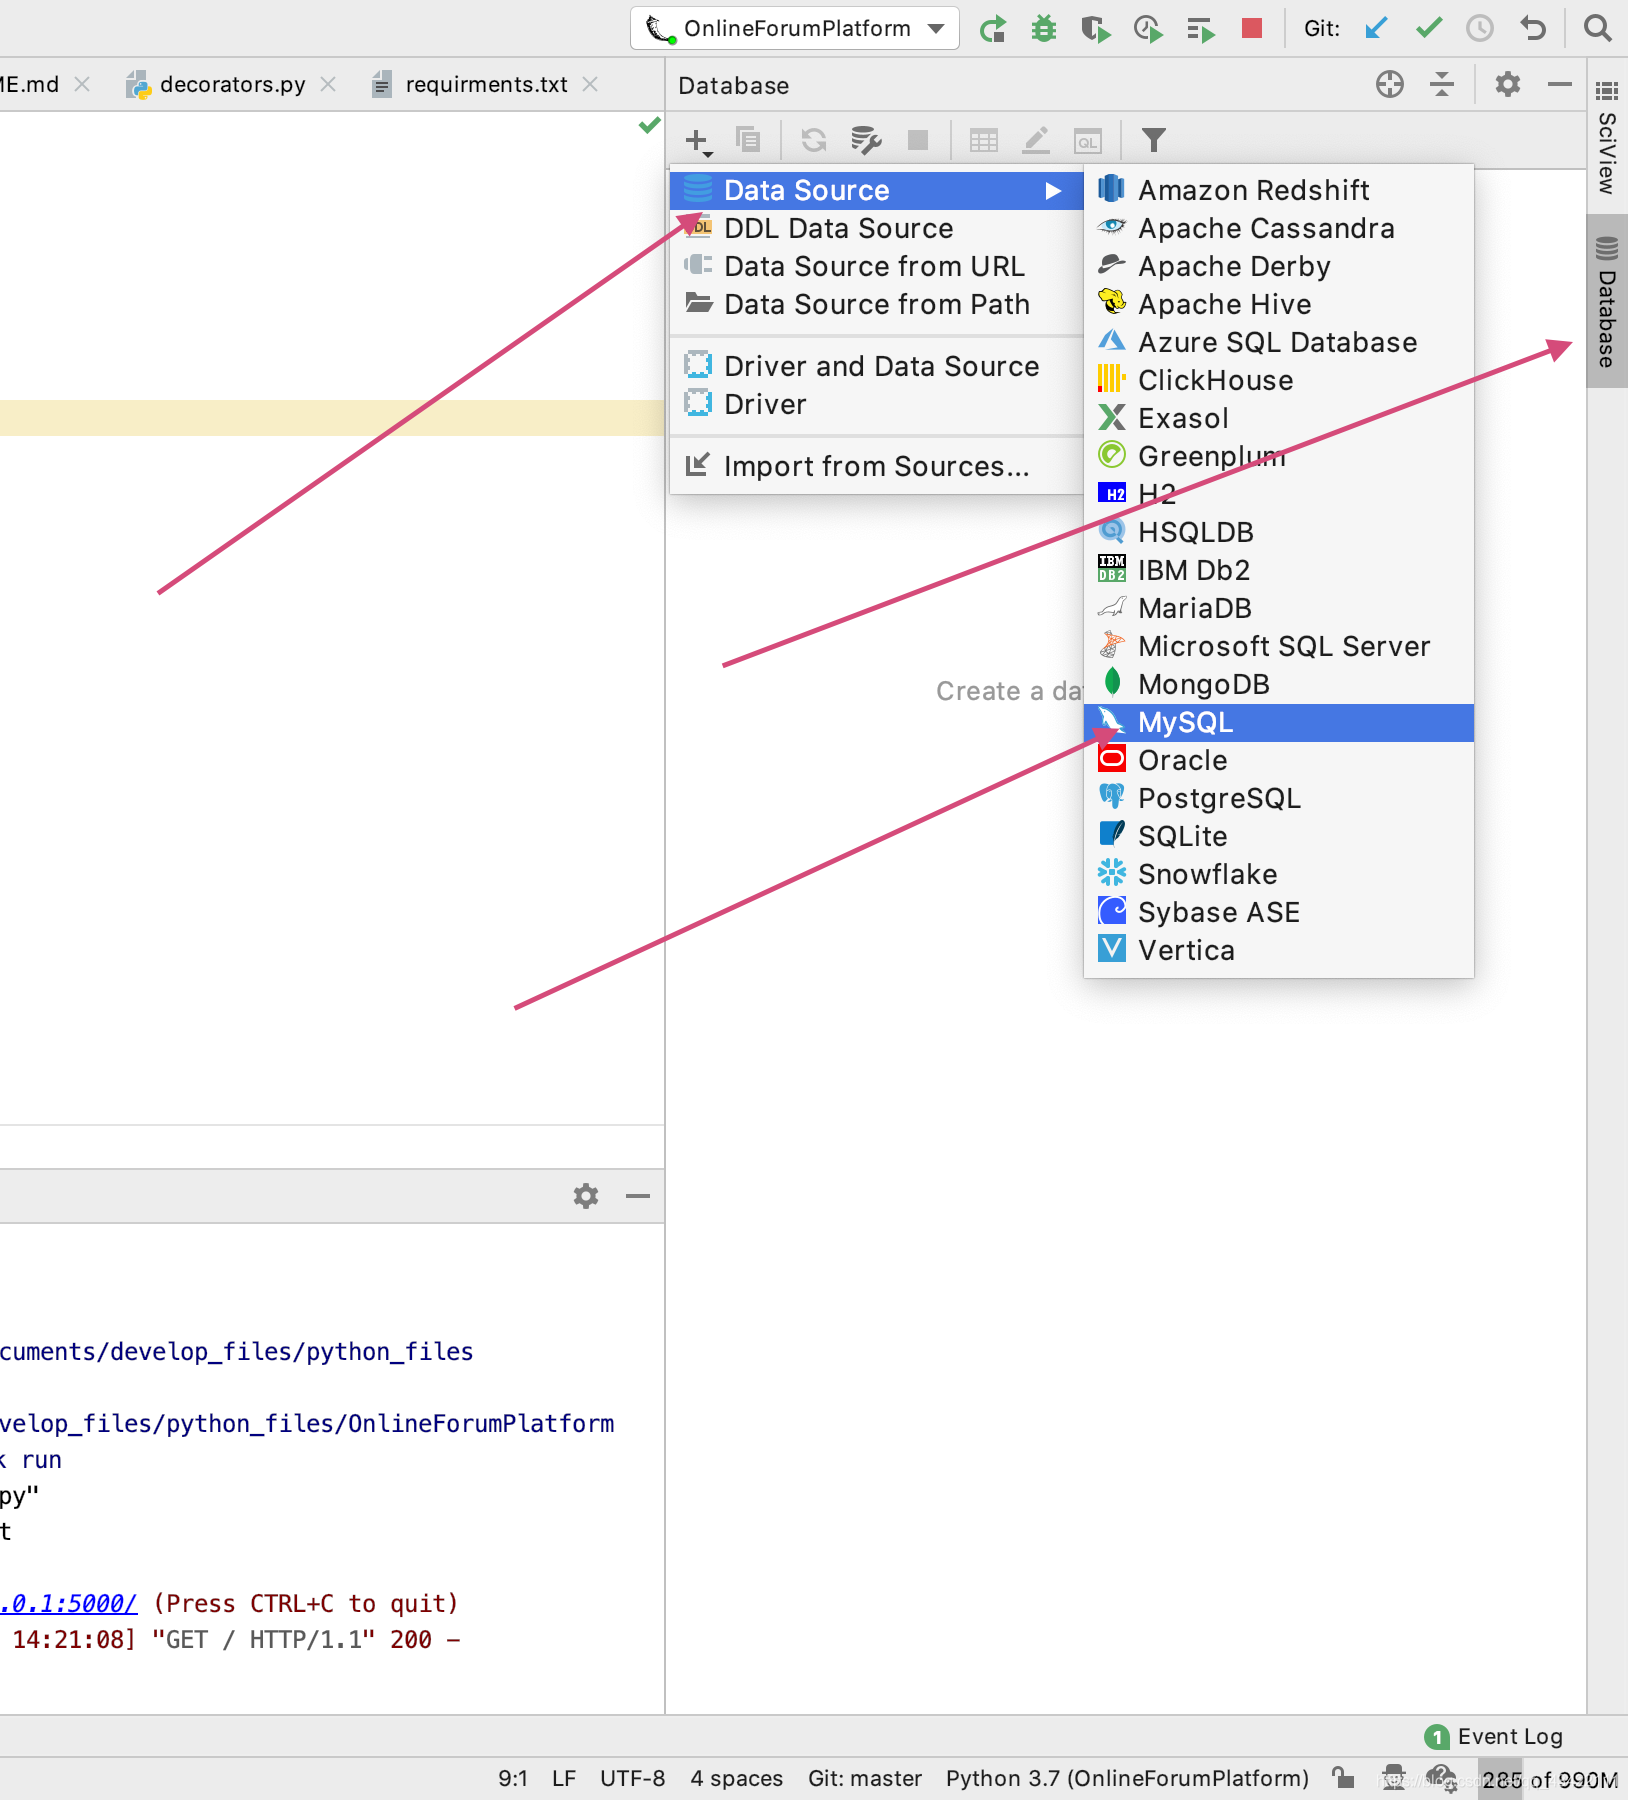
选择mysql数据库,然后我们填写用户名root和密码,然后填写创建的数据库名称即可,填写完成之后点击测试连接
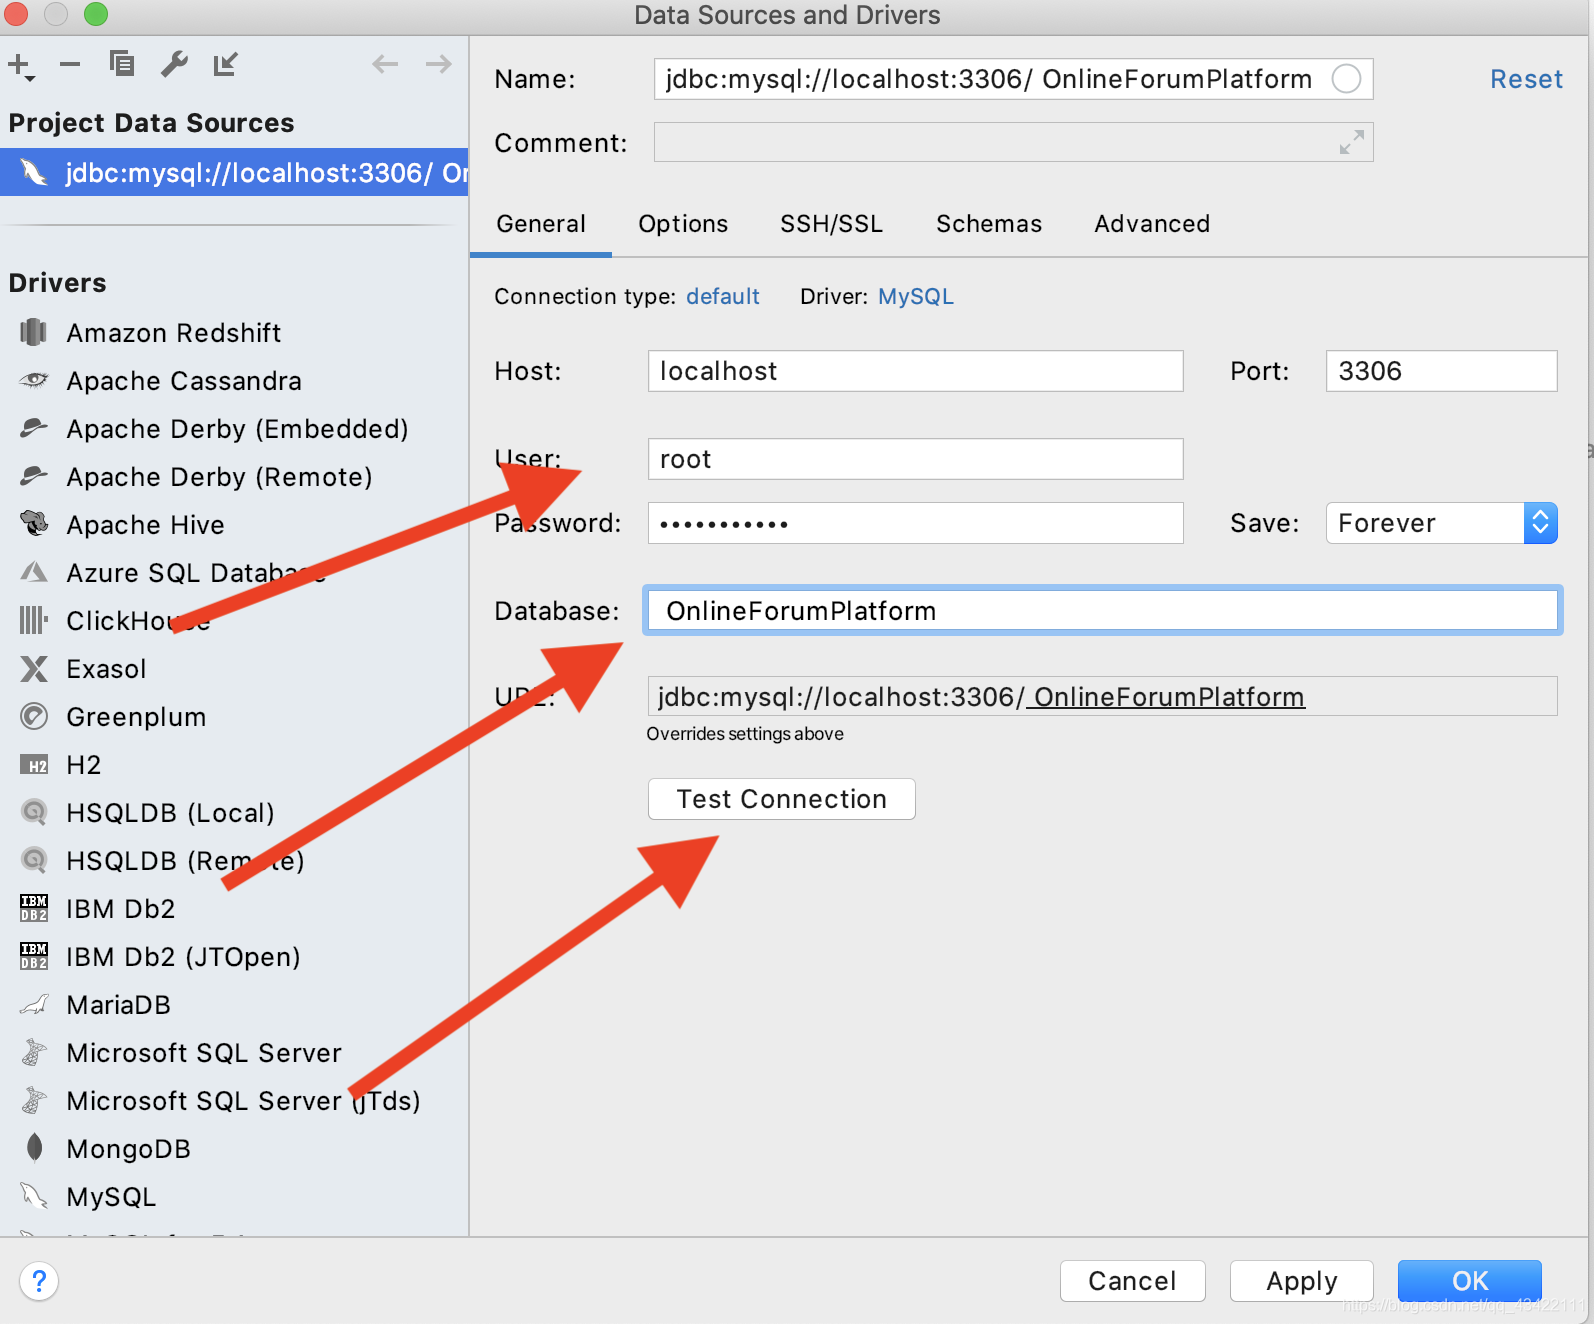
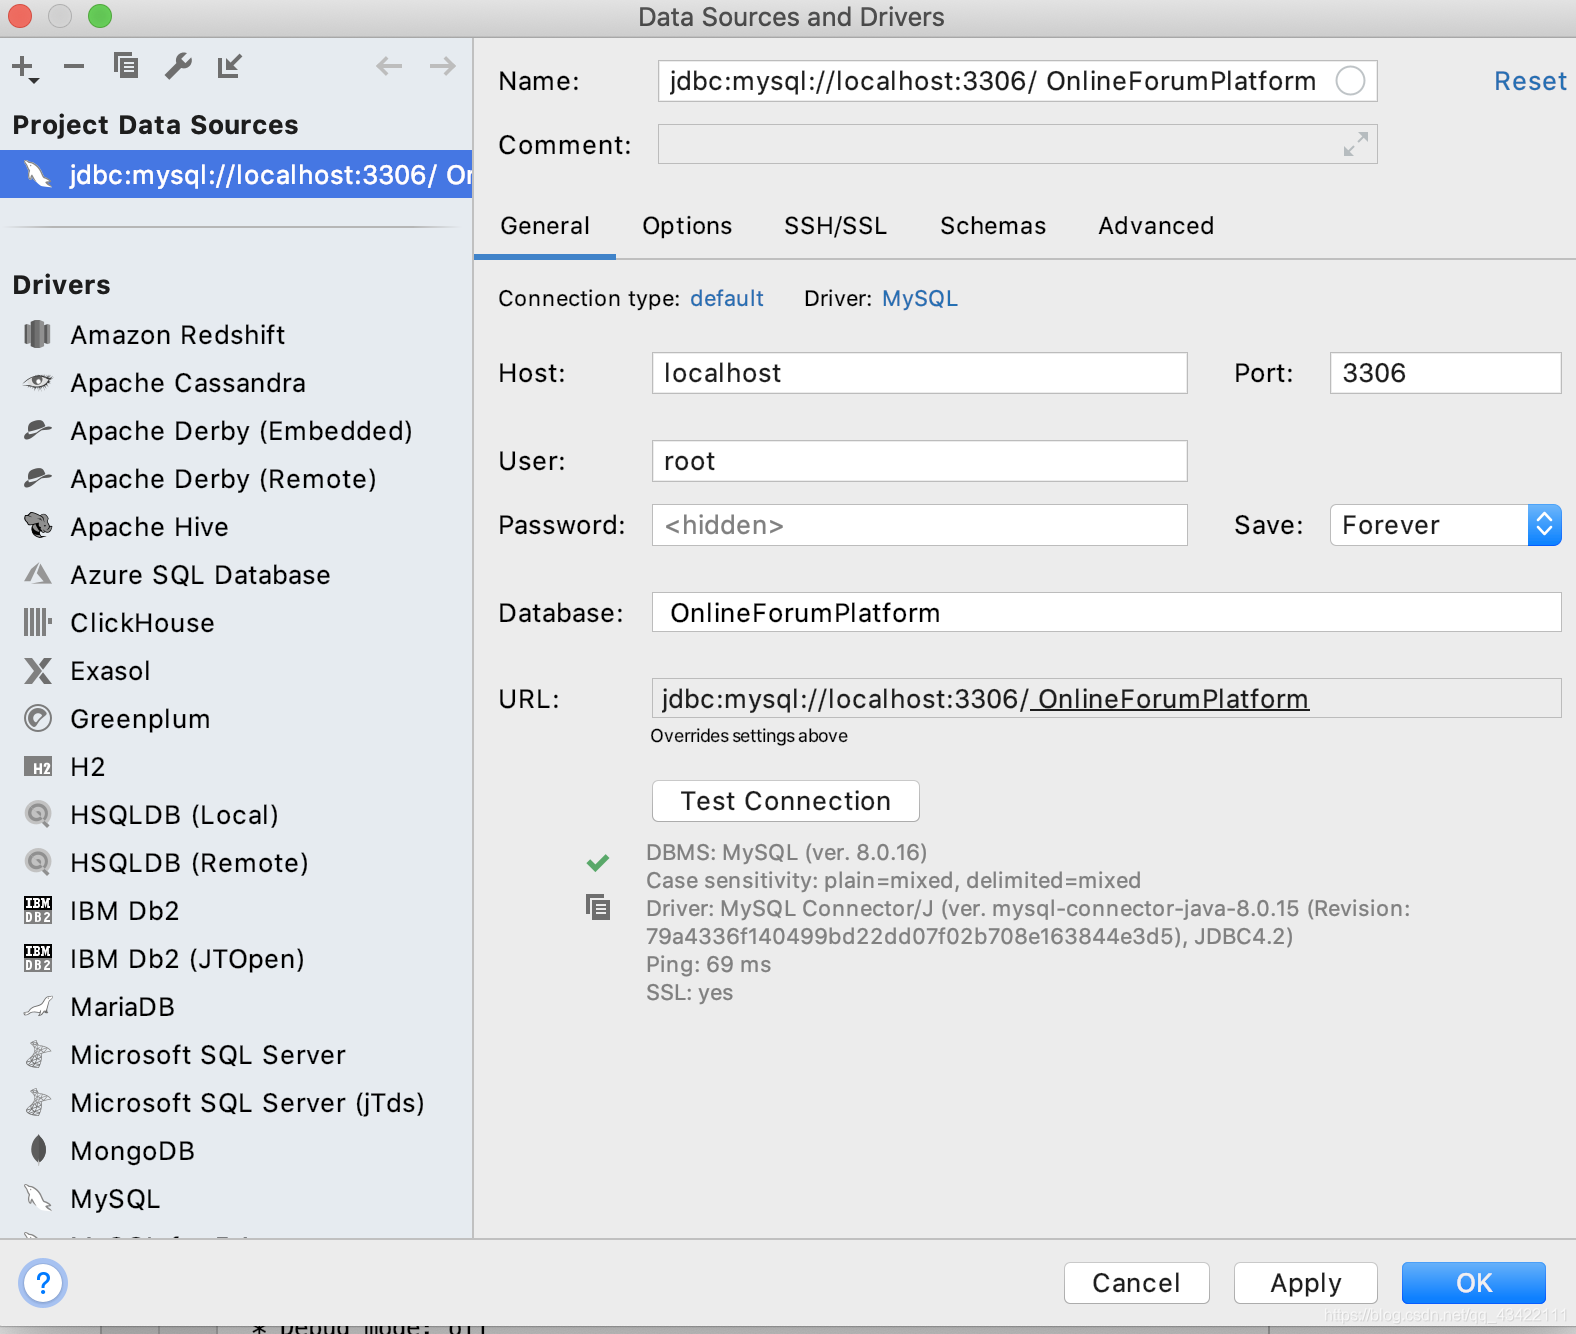
测试连接正确之后,我们点击OK即可
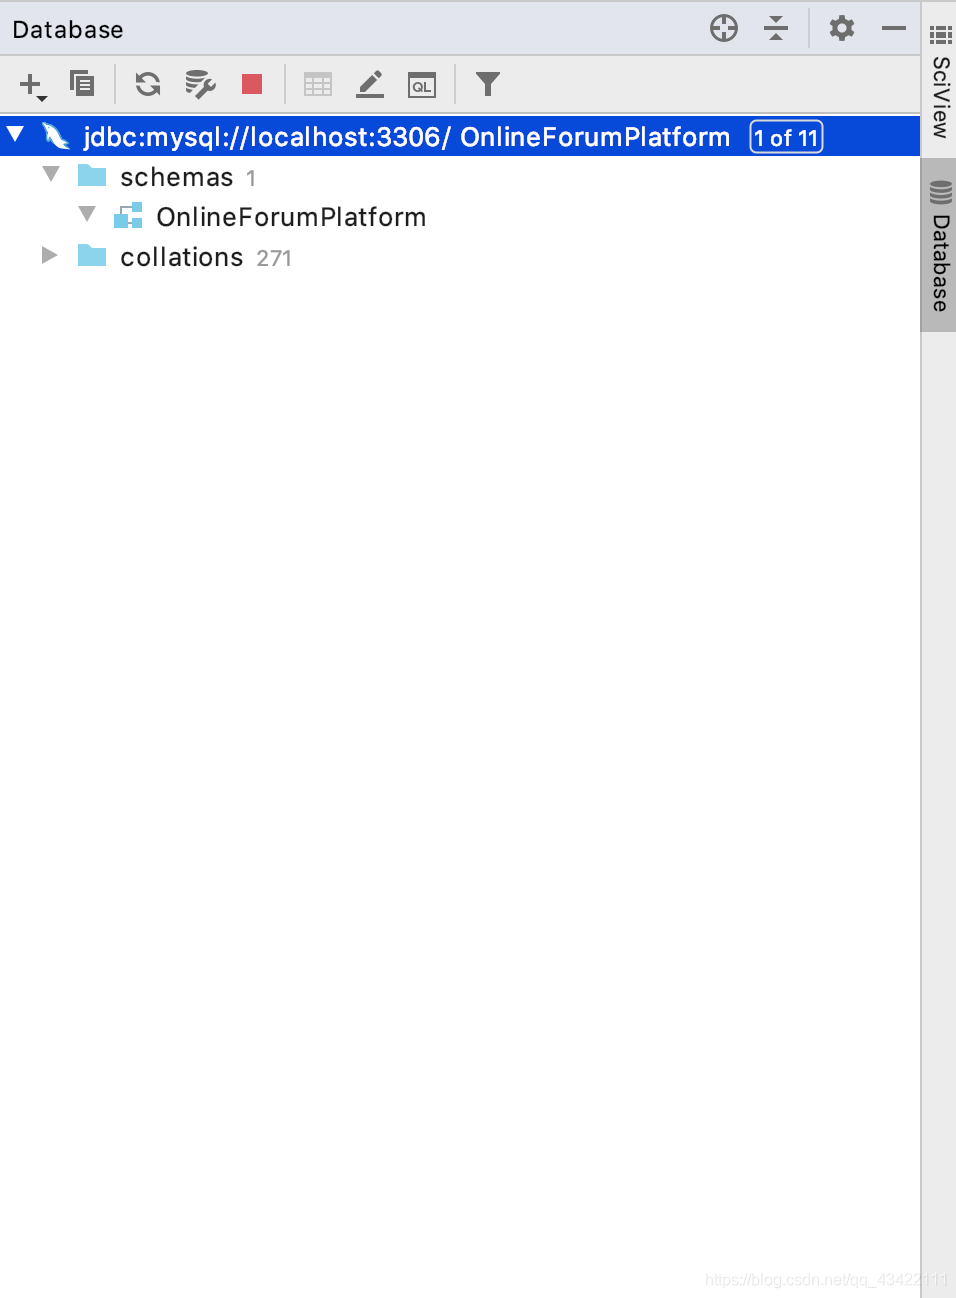
然后我们在pycharm右面的Database就可以看到我们的数据库了
好了,到目前为止我们项目所需要的一些基本的插件和数据库都创建完成啦~大家都创建的顺利吗?下面我们先插播一章基础的Flask基础知识讲解,然后就正式的到我们的项目实战环节啦!如果Flask基础知识部分已经了解的,可以直接跳到我们的四,开始我们的项目实战部分啦!在文章顶部有我们文章内的目录,可以直接进行跳转。
博主的站内博客导航:博客文章内容导航(实时更新)
更多精彩博客文章推荐
- 一本教你如何在前端实现富文本编辑器
- 小白都能看得懂的教程 一本教你如何在前端实现markdown编辑器
- 一文教会你Bootstrap,让你也可以快速建站
- 一文教你如何白嫖JetBrains全家桶(IDEA/PtChram/CLion)免费正版
三、Flask基础知识部分
磨刀不误砍柴工,既然是真正的零基础,我们就先来温习一下Flask的一些基础的语法,如果已经了解的这部分的话,可以直接跳到第四章呦~
3.1 Flask程序的基本构造
首先就是我们的Flask程序的一个基本构造,我们首先需要从flask模块中导入我们的Flask,这是我们框架的主要模块,然后我们还需要导入我们的render_template,这是用来渲染我们的模板的,将我们的HTML页面返回给请求者。
在前面我新建的时候已经有一个默认的app.py,是return一个Hello World,各位小伙伴们都运行成功了吗?这里我们返回的是一个Html文件,在这里说一句,我们的HTML文件一般都是存放在我们的templates文件夹中,我们就可以直接在这里返回呦,大家可以创建一个demo.html,然后使用下面这个语看看能否返回你的页面呢?
# 从flask中导入Flask和render_template
from flask import Flask,render_template

app = Flask(__name__)

@app.route('/')
def index():
    return render_template('demo.html')

if __name__ == '__main__':
    app.run()
3.2 路由器请求方法限定
在route的参数中设置method的值,默认是GET方法,但是我们很多涉及到表单的页面为了数据的安全性,我们需要使用POST方法去创建,所以我们这里就需要设置我们的请求方式啦methods=['GET', 'POST'],完整的样例为:
@app.route('/', methods=['GET', 'POST'])
def index():
    return render_template('demo.html')
3.3 动态路由
有时候我们需要一个动态的参数,然后我们根据参数来返回一个对应的页面,这个时候就需要使用到动态路由啦!例如下面这个路由,他需要一个参数交错name,然后他会返回一个hello + { 你输入的name},大家可以测试一下,是不是能正确的返回你的名字。这里当你在王志中只输入http://127.0.0.1:5000/user/则会报错,因为没有输入name参数。
@app.route('/user/<name>', methods=['GET', 'POST'])
def user(name):
    return 'hello {}'.format(name)
其中参数可以通过类型进行限定,例如:int:name即只接受int类型的参数
3.4 Jinja2模板引擎
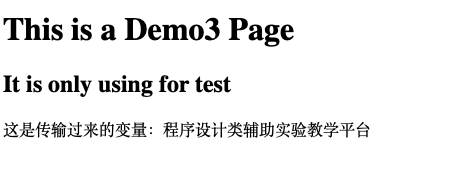
由于我们的Web系统是需要一个动态的网页,可能有部分内容数据是需要计算出来的,或者是从后端服务器的数据库中获取的,所以我们需要使用Jinja2模板引擎来对我们的模板进行一个渲染。在函数中传递参数,在HTML页面中,利用{{ }}获取传递的参数,例如我们下面这个例子,在服务器端向前端传输一个变量user_var,其中变量名称为html_var,然后我们在前端进行获取变量,并且显示。需要注意的是我们在传递参数的时候,等号前面的传递的参数名(也就是我们在前端获取的时候所需要使用的名),在等号后面的是我们当地的参数名,也就是服务器中的参数,一般来说,我们两名的命名是一样的。
app.py
from flask import Flask,render_template

app = Flask(__name__)

@app.route('/user', methods=['GET', 'POST'])
def user():
    user_var="程序设计类辅助实验教学平台"
    return render_template('demo3.html', html_var=user_var)

if __name__ == '__main__':
    app.run()
demo3.html
<!DOCTYPE html>
<html lang="en">
<head>
    <meta charset="UTF-8">
    <title>Title</title>
</head>
<body>
<h1>This is a Demo3 Page</h1>
<h2>It is only using for test</h2>
这是传输过来的变量:{{ html_var }}
</body>
</html>
显示效果:
在模板中注释符号为{# #},例如{# This is a annotation #}
3.4 传参时,列表和字典的使用:
app.py
from flask import Flask,render_template

app = Flask(__name__)


@app.route('/', methods=['GET', 'POST'])
def user():
    user_var="程序设计类辅助实验教学平台"
    list_test=['这是list的1','这是list的2','这是list的3','这是list的4','这是list的5']
    dict_test={
        'name': "这是测试name",
        'key': "这是测试key"
    }
    return render_template('demo3.html', html_var=user_var,list_test=list_test,dict_test=dict_test)


if __name__ == '__main__':
    app.run()
demo3.html
<!DOCTYPE html>
<html lang="en">
<head>
    <meta charset="UTF-8">
    <title>Title</title>
</head>
<body>
<h1>This is a Demo3 Page</h1>
<h2>It is only using for test</h2>
这是传输过来的变量:{{ html_var }}<br>
<h2>列表使用:</h2>
{{ list_test }}<br>
{{ list_test.1 }}<br>
{{ list_test[2] }}<br>
<h2>dict使用:</h2>
{{ dict_test }}<br>
{{ dict_test.name }}<br>
{{ dict_test['key']}}<br>
</body>
</html>
页面效果:
![[外链图片转存失败,源站可能有防盗链机制,建议将图片保存下来直接上传(img-mPgyPAlk-1581604100658)(evernotecid://5DBAB900-A080-44B3-994E-762E3B8C44D4/appyinxiangcom/22161713/ENResource/p554)]](https://img-blog.csdnimg.cn/20200213223138201.png?x-oss-process=image/watermark,type_ZmFuZ3poZW5naGVpdGk,shadow_10,text_aHR0cHM6Ly9ibG9nLmNzZG4ubmV0L3FxXzQzNDIyMTEx,size_16,color_FFFFFF,t_70)
3.5 控制语句的使用
在{% %}中进行写Python控制语句,这里使用的语法规范是Python的,在结束控制的是要使用end例如for命令结束的时候,我们要写一行{% endfor %}
{% for num in list_test %}
    {% if num > 2 %}
    {{ num }}<br>
    {% endif %}
{% endfor %}
3.6 过滤器的基本使用
{{ var_test|upper }}
常见的过滤器
| 过滤器名 | 说明 |
|---|---|
| safe | 渲染时不转义 |
| capitalize | 把值的首字母大写,其余小写 |
| lower | 把值转换成小写形式 |
| upper | 把值转换成大写形式 |
| title | 把值中每个单词的首字母都转换成大写 |
| trim | 把值的首位空格去掉 |
| striptags | 渲染之前把值中所有的HTML标签删掉 |
3.7 使用flash传递消息
app.py
from flask import Flask,render_template,request,flash

app = Flask(__name__)
app.secret_key='this is a secret key'


@app.route('/', methods=['GET', 'POST'])
def user():
    #request请求对象,包括请求方式,数据等
    #flash需要对内容加密,因此要设置secret_key,做加密消息混淆
    if request.method == 'POST':
        username=request.form.get('username')
        password1=request.form.get('password1')
        password2=request.form.get('password2')
        if not all([username,password1,password2]):
            #return '参数不完整'
            flash('参数不完整')
        elif password1 == password2:
            #return 'true'
            flash("true")
        else:
            #return 'false'
            flash("false")
    return render_template('demo3.html')


if __name__ == '__main__':
    app.run()
demo3.html
<!DOCTYPE html>
<html lang="en">
<head>
    <meta charset="UTF-8">
    <title>Title</title>
</head>
<body>
<form method="post">
    <label>用户名:</label><input type="text" name="username"><br>
    <label>密码:</label><input type="password" name="password1"><br>
    <label>确认密码:</label><input type="password" name="password2"><br>
    <input type="submit" value="提交"><br>

    {% for message in get_flashed_messages() %}
        {{ message }}
    {% endfor %}
</form>
</body>
</html>
显示效果:
3.8 使用WTF实现web表单
这里可以使用Flask-WTF扩展也可以直接使用我们HTML的<form>表单,都可以。
3.8.1 WTForms支持的HTML标准字段
| 字段类型 | 说明 |
|---|---|
| BooleanField | 复选框,值为True和False |
| DateField | 文本字段,值为datetime.date格式 |
| DareTimeField | 文本字段,值为datetime.datetime格式 |
| FileField | 文件上传字段 |
| HiddenField | 隐藏的文本字段 |
| MultipleFileField | 多文本上传字段 |
| FieldList | 一组指定类型的字段 |
| FloatField | 文本字段,值为浮点数 |
| FormField | 把一个表单作为字段嵌入另一个表单 |
| IntegerField | 文本字段,值为整数 |
| PasswordField | 密码文本字段 |
| RadioField | 一组单选按钮 |
| SelectField | 下拉列表 |
| SelectMultipleField | 下拉列表,可选择多个值 |
| SubmitField | 表单提交按钮 |
| StringField | 文本字段 |
| TextAreaField | 多行文本字段 |
3.8.2 WTForms验证函数
| 验证函数 | 说明 |
|---|---|
| DateRequired | 确保转换类型后字段中有数据 |
| 验证电子邮件地址 | |
| EqualTo | 比较两个字段的值,常用于要求输入两次密码进行确认的时候 |
| InputRequired | 确保转换类型前字段中有数据 |
| IPAddress | 验证IPv4网络地址 |
| Length | 验证输入字符串的长度 |
| MacAddress | 验证MAC地址 |
| NumberRange | 验证输入的值在数字范围之内 |
| Optional | 允许字段中没有输入,将跳过其他验证函数 |
| Regexp | 使用正则表达式验证输入值 |
| URL | 验证URL |
| UUID | 验证UUID |
| AnyOf | 确保输入值在一组可能的值中 |
| NoneOf | 确保输入值不在一组可能的值中 |
3.8.3Flask-WTF扩展的安装
![[外链图片转存失败,源站可能有防盗链机制,建议将图片保存下来直接上传(img-hVSzefxi-1581604100659)(evernotecid://5DBAB900-A080-44B3-994E-762E3B8C44D4/appyinxiangcom/22161713/ENResource/p560)]](https://img-blog.csdnimg.cn/20200213223322395.png?x-oss-process=image/watermark,type_ZmFuZ3poZW5naGVpdGk,shadow_10,text_aHR0cHM6Ly9ibG9nLmNzZG4ubmV0L3FxXzQzNDIyMTEx,size_16,color_FFFFFF,t_70)
在PyCharm中打开Preferences
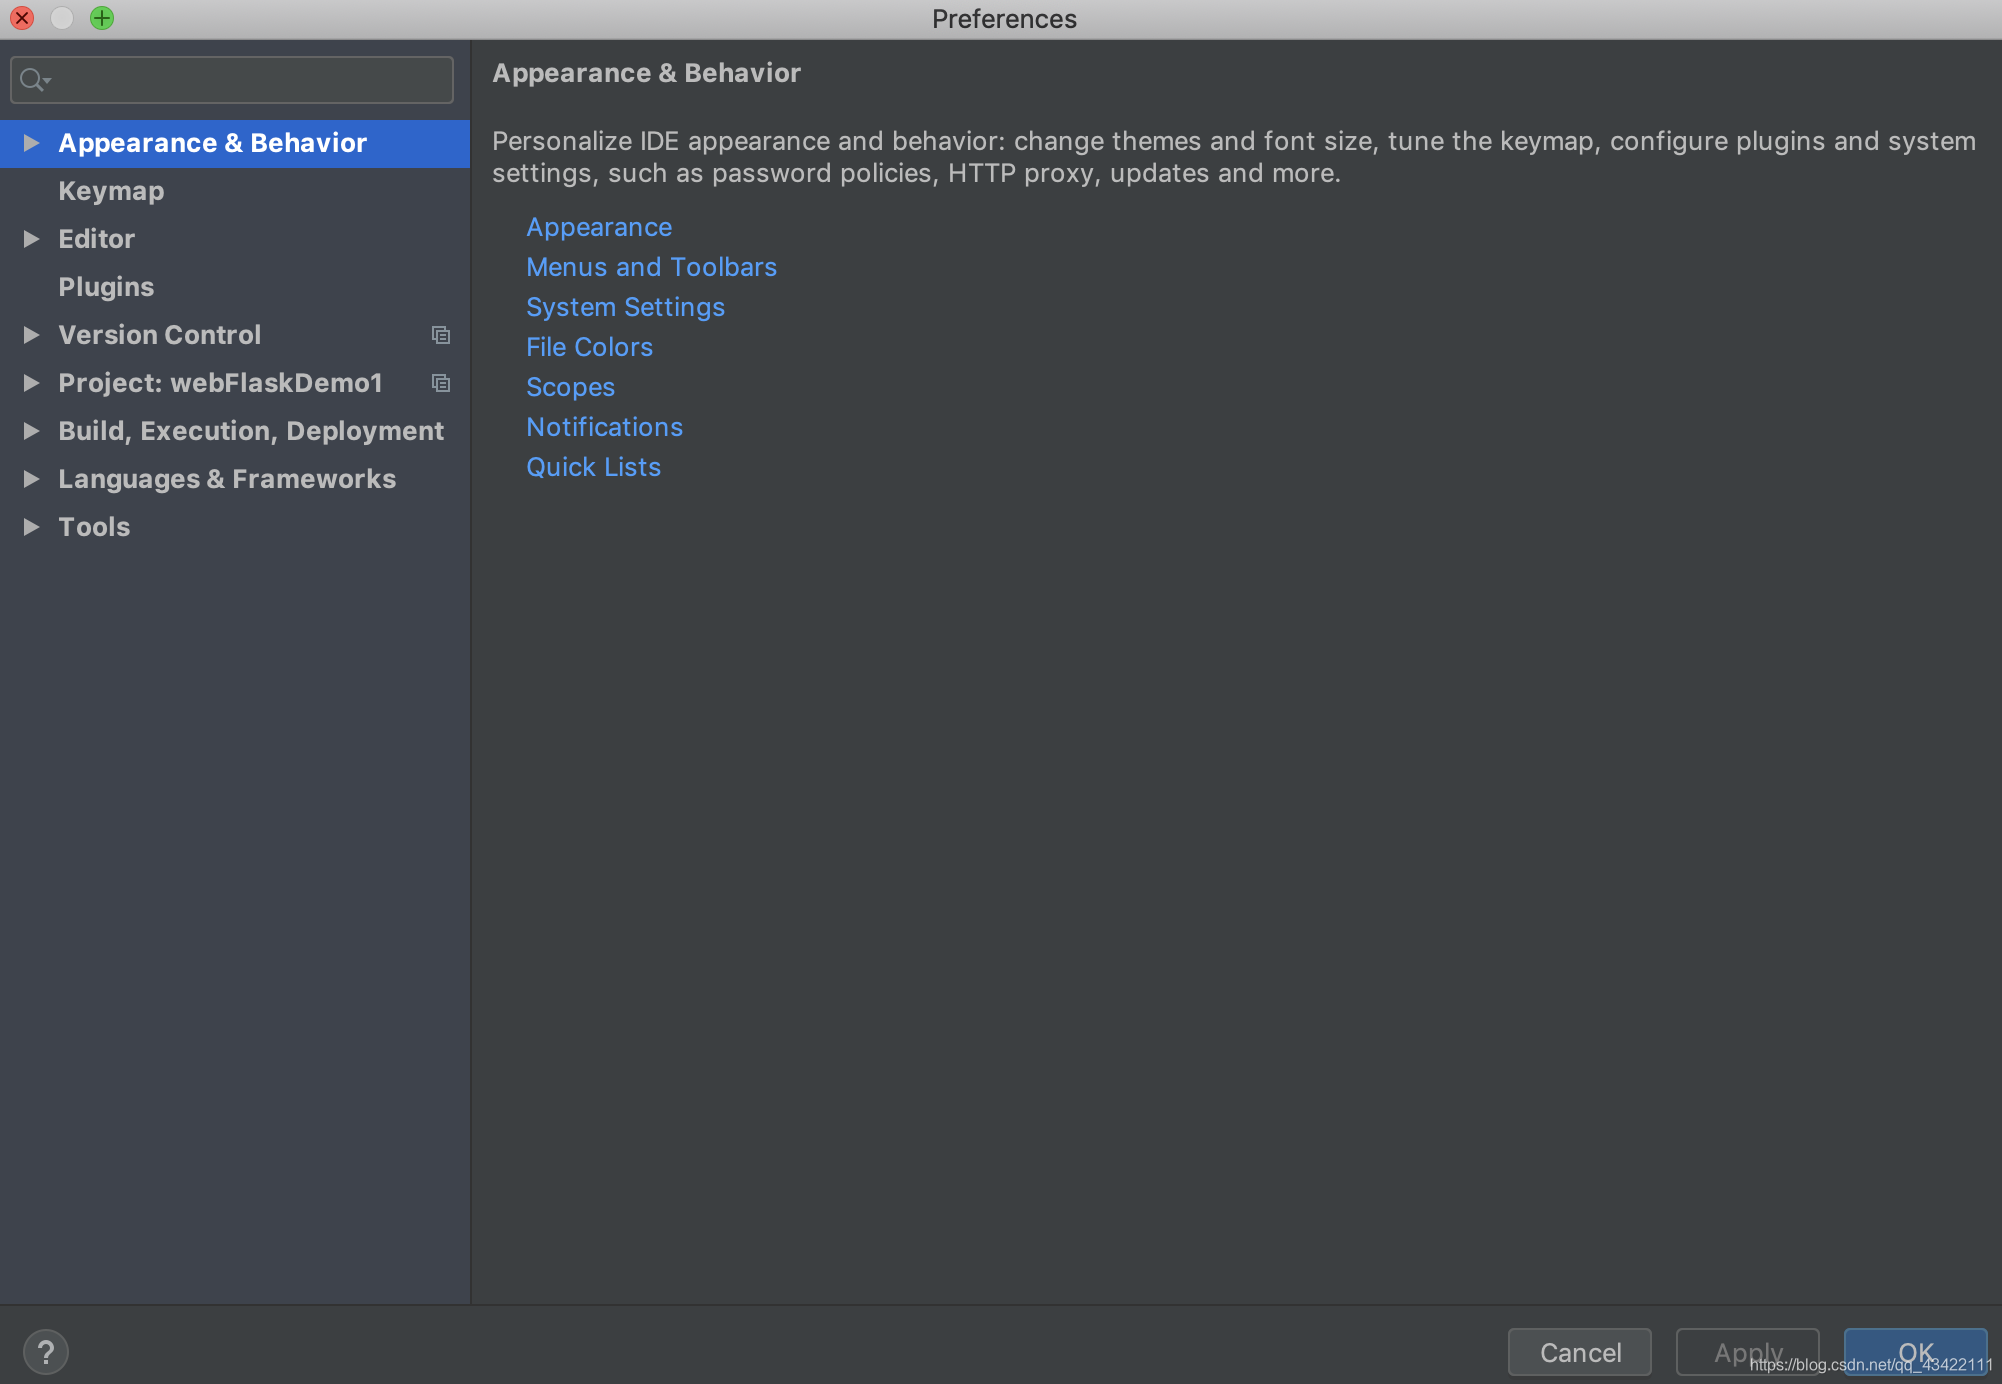
打开Project选项板
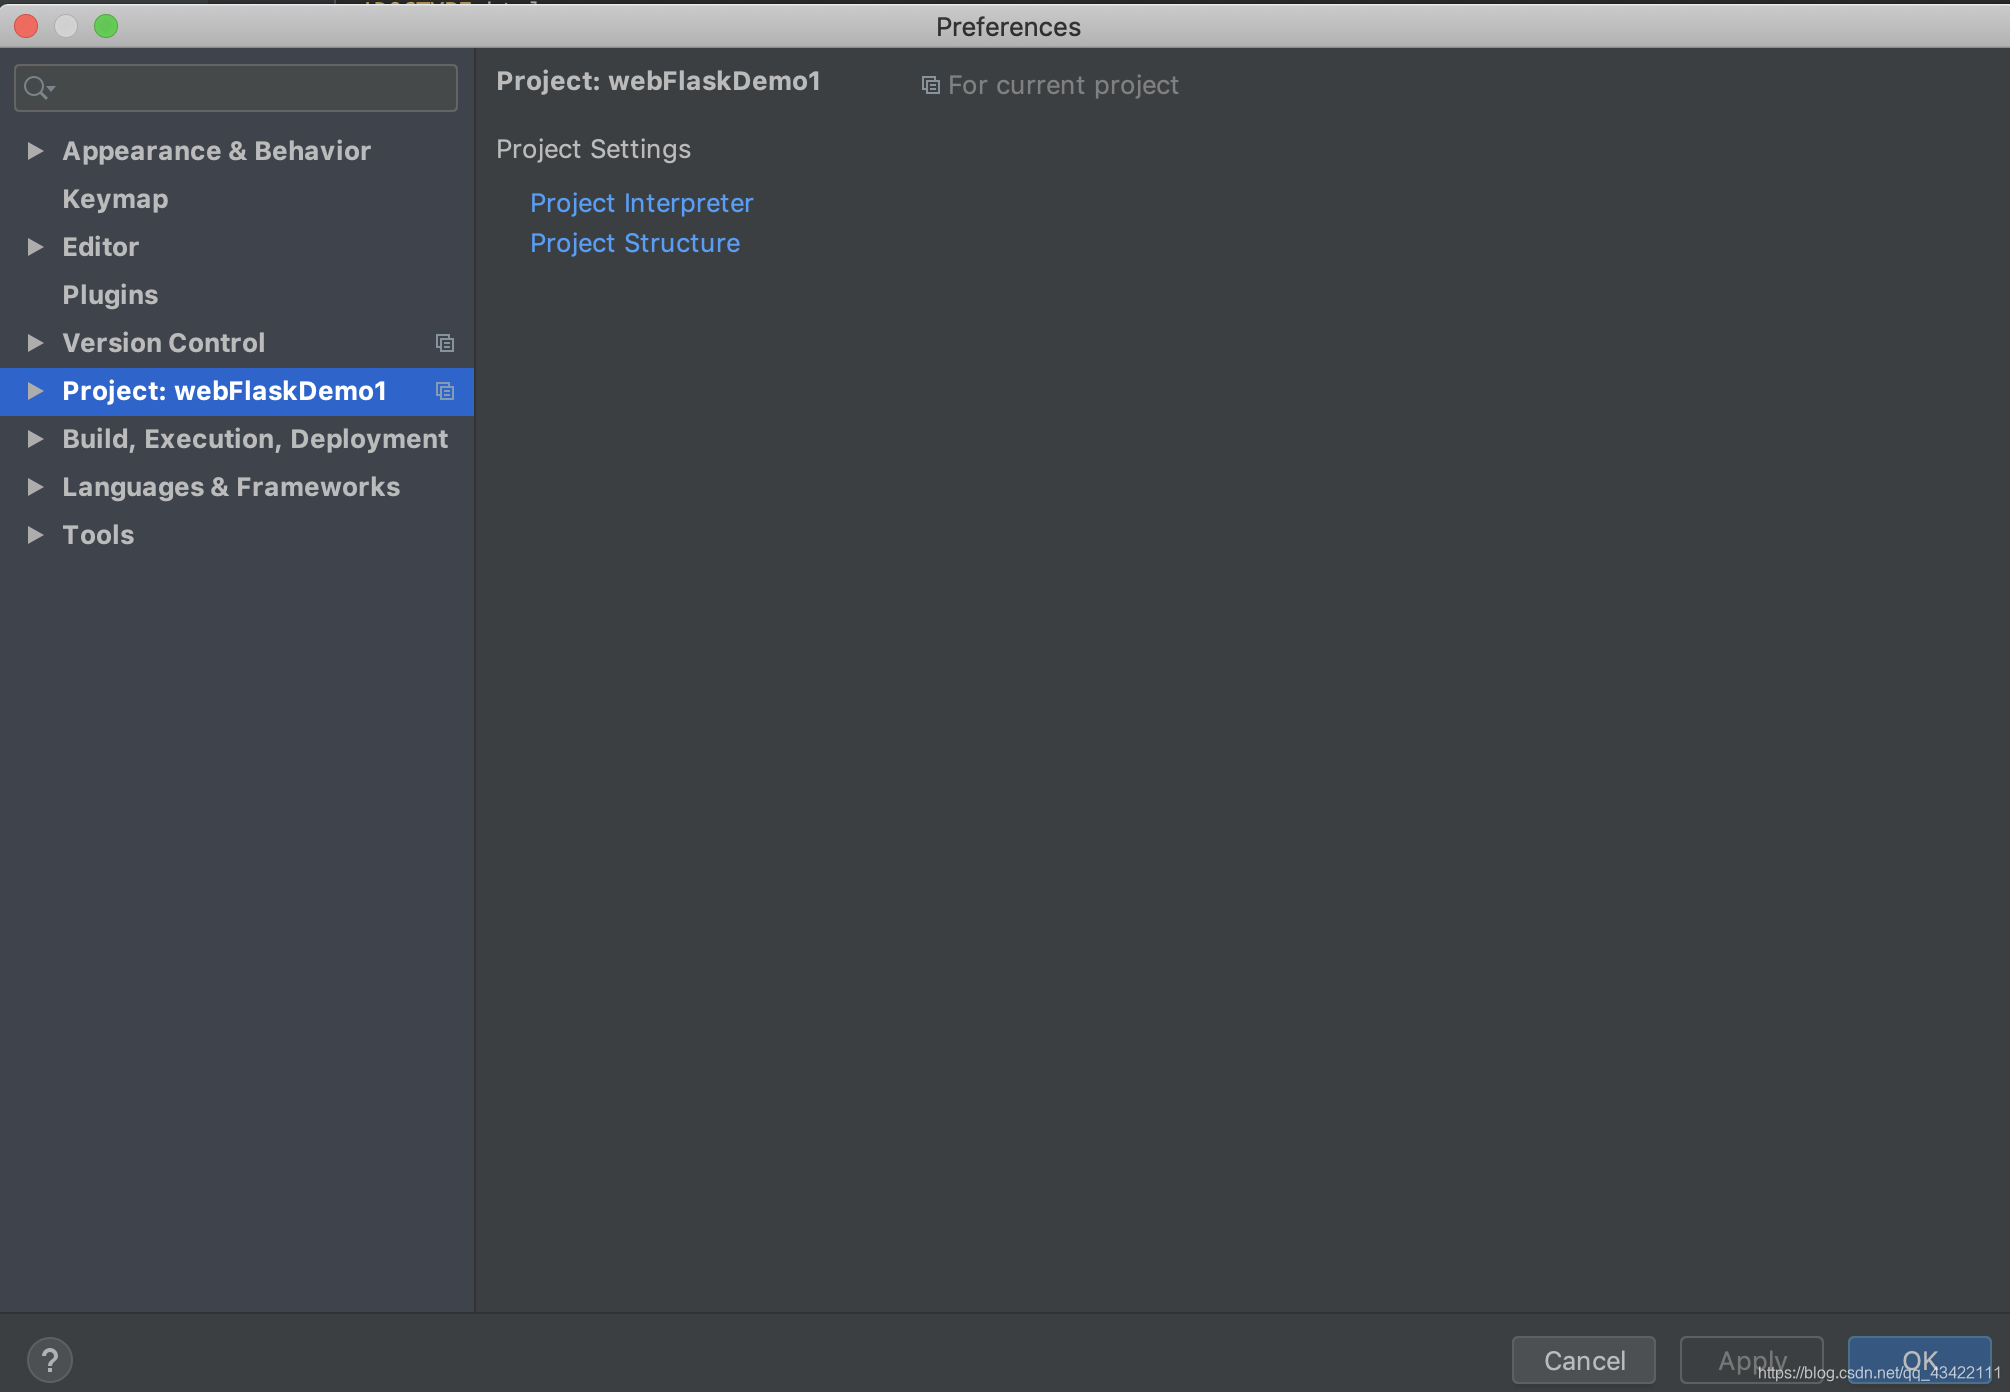
进行Project Interpreter设置
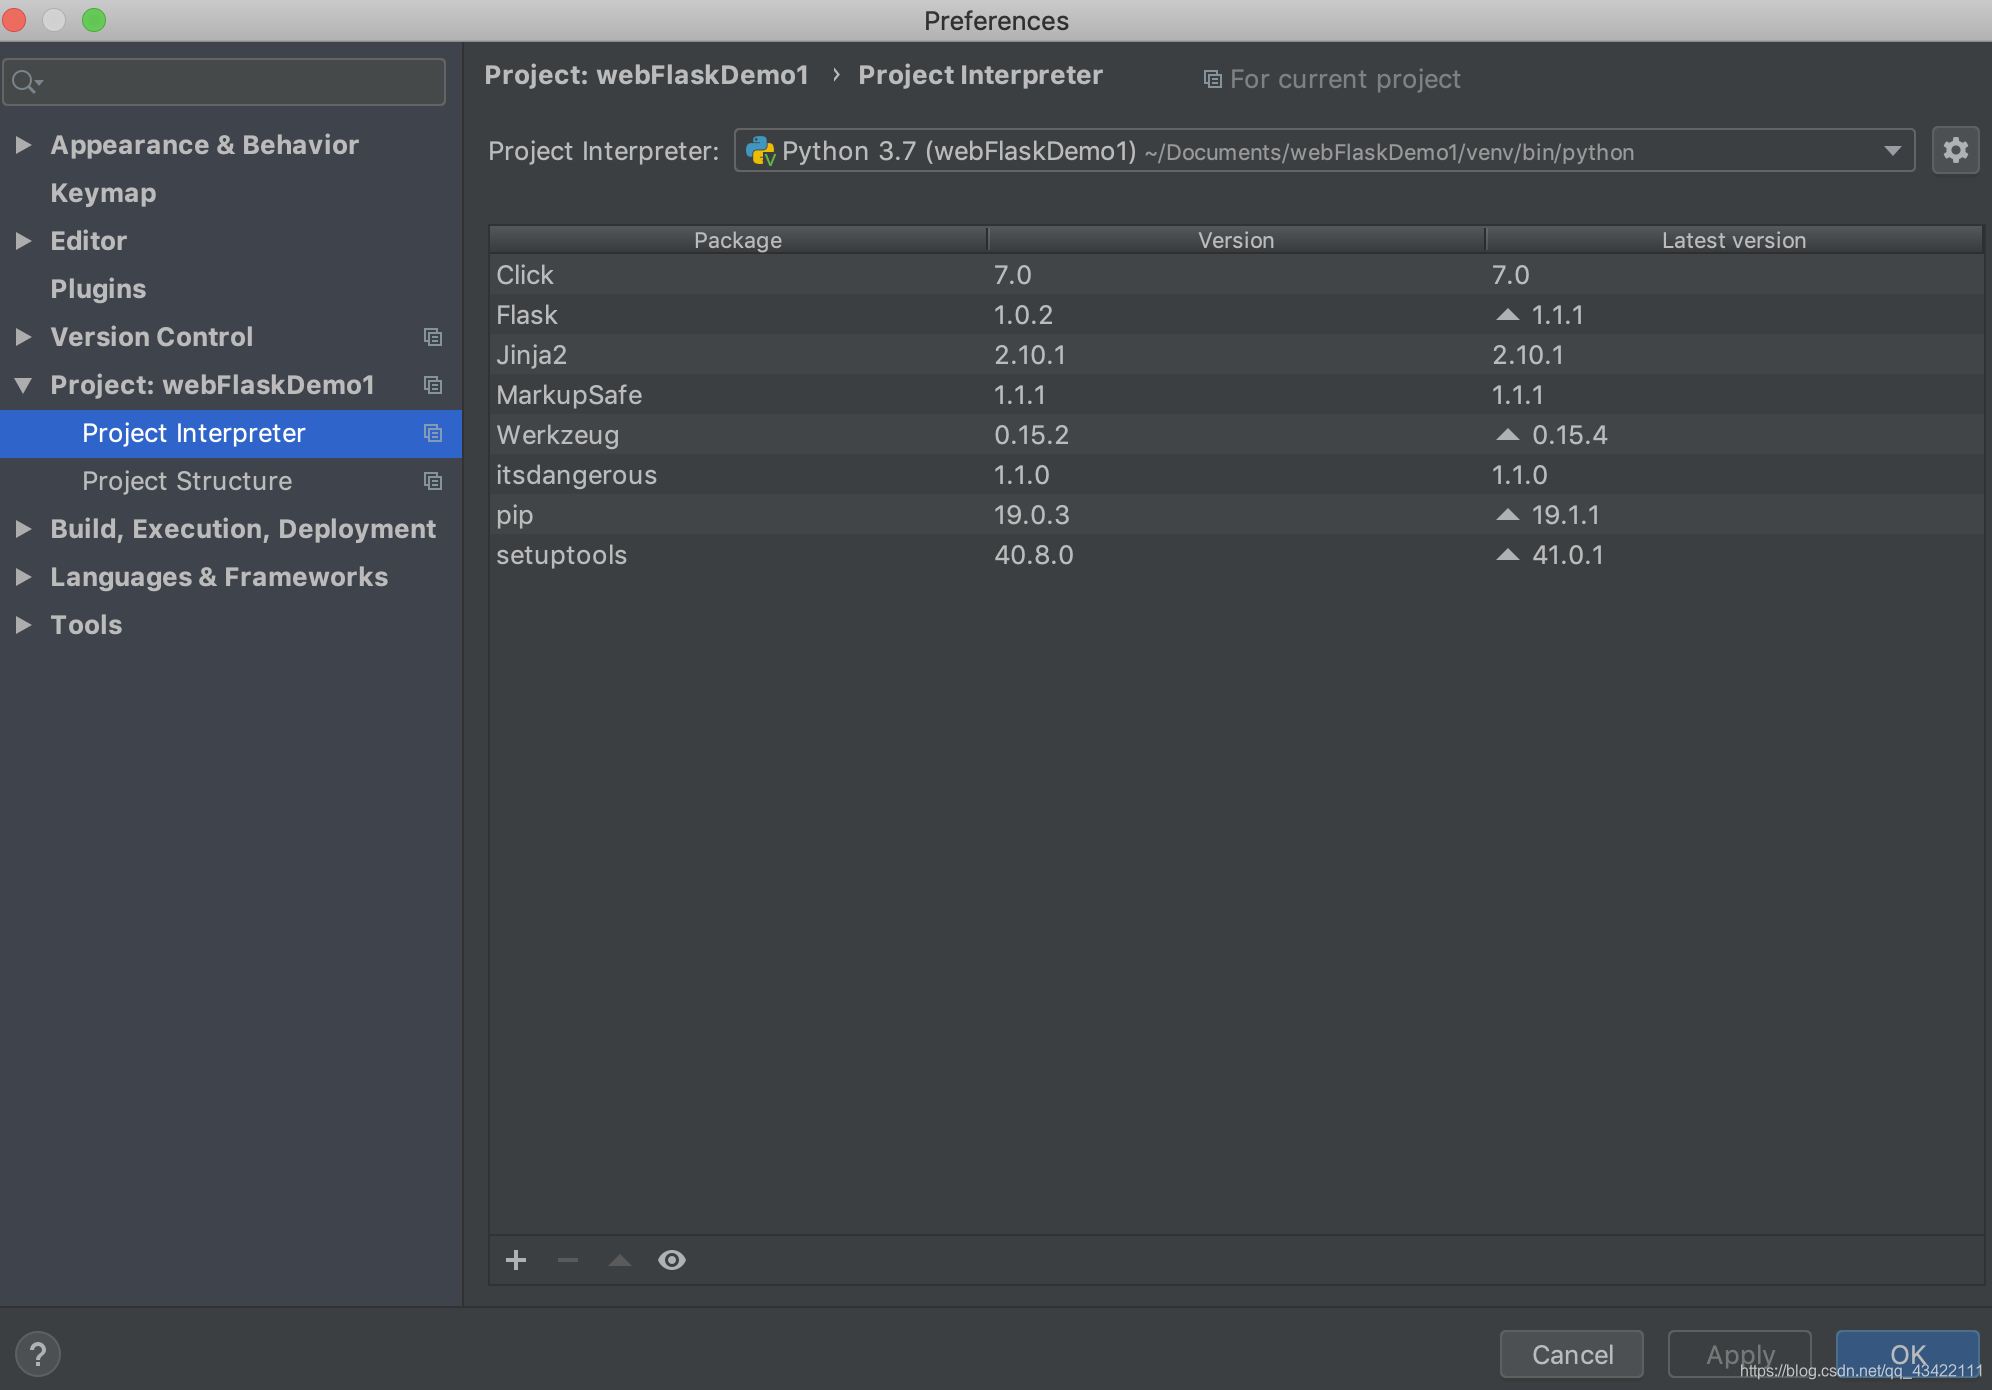
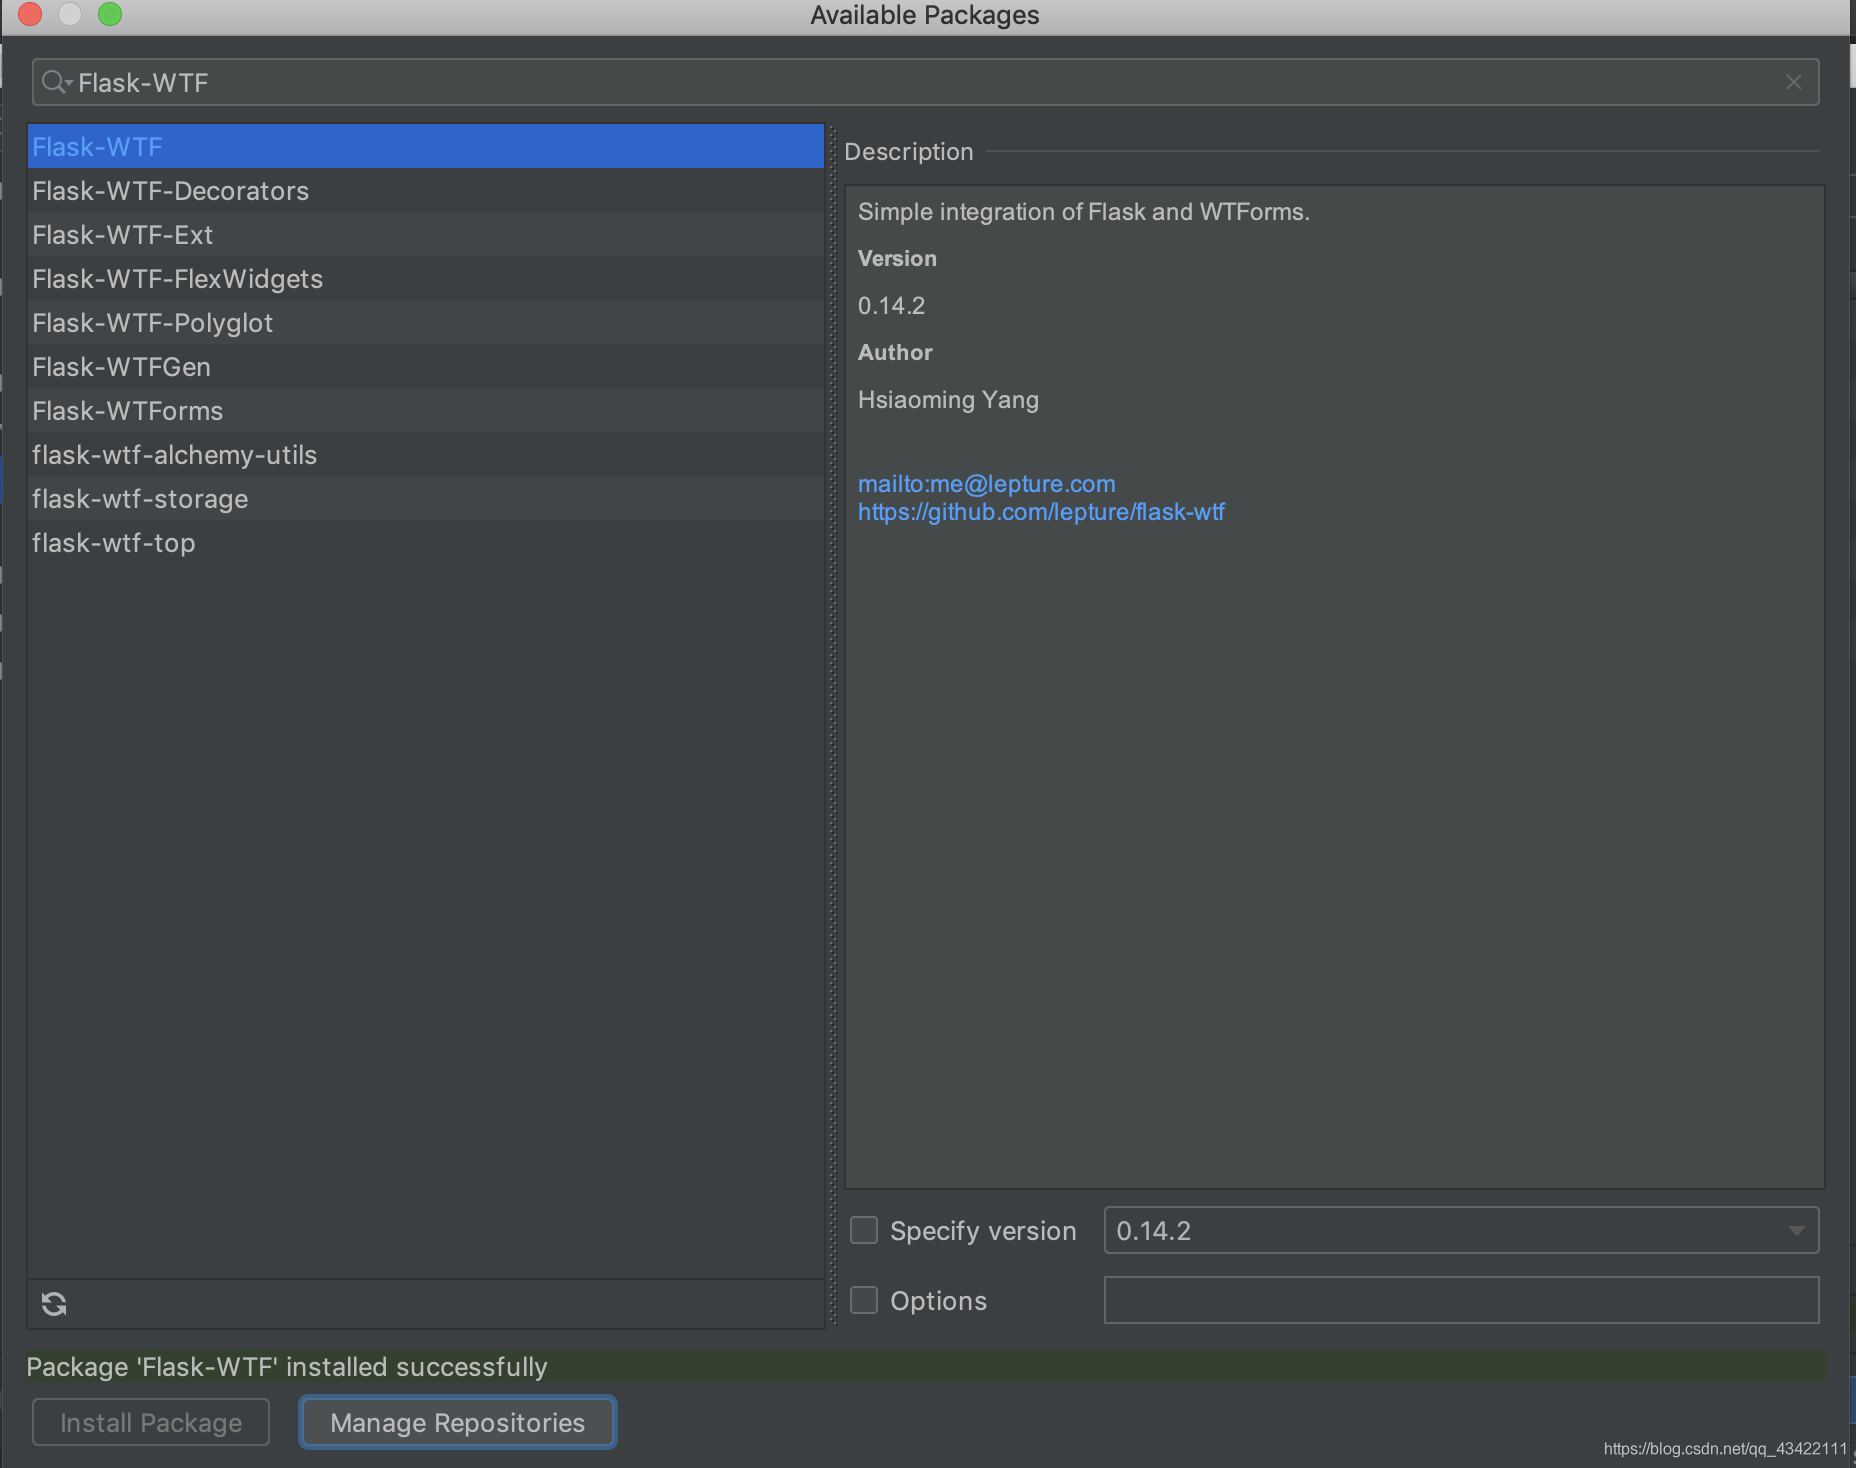
点击添加‘+’,然后搜索Flask-WTF
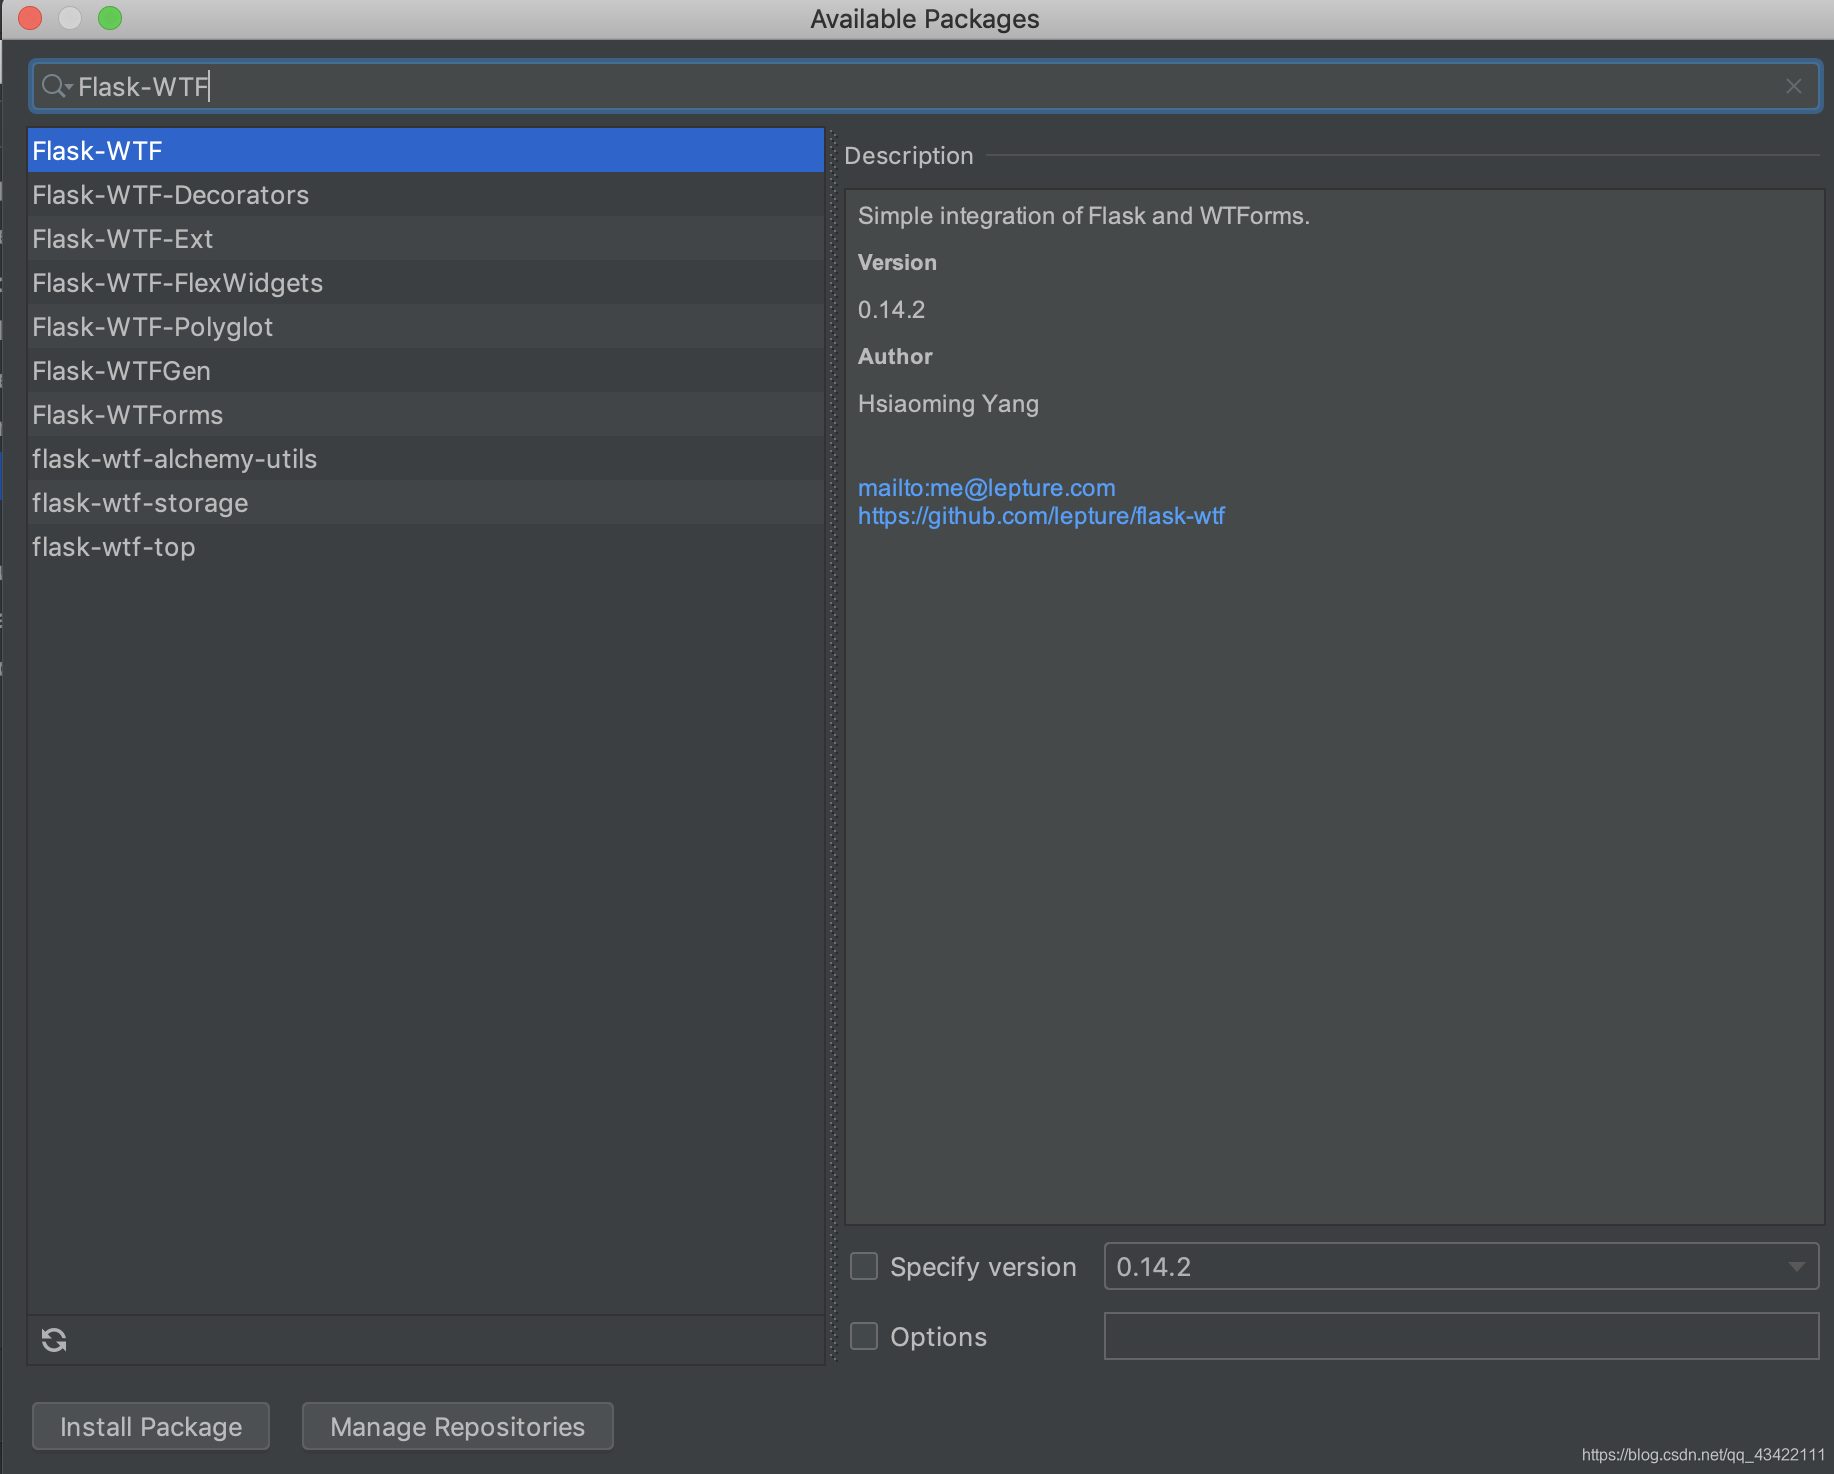
选择好版本之后,Install Package,拓展包就添加完成了
在项目中导入Flask-WTF
from flask_wtf import FlaskForm
在项目中导入Flaks-WTF的HTML标准字段
from wtforms import StringField,PasswordField,SubmitField
在项目中导入Flask-WTF的验证函数
from wtforms.validators import DataRequired, EqualTo
在使用Flask-WTF拓展的时候,需要使用CSRF Token
在html页面中加入
{{ html_form.csrf_token() }}
3.8.4使用Flask-WTF创建表单示例
app.py
from flask import Flask, render_template, request, flash
from flask_wtf import FlaskForm
from wtforms import StringField, PasswordField, SubmitField
from wtforms.validators import DataRequired, EqualTo
app = Flask(__name__)
app.secret_key = "dsauhfabf"
class LoginForm(FlaskForm):
username = StringField('用户名', validators=[DataRequired()])
password1 = PasswordField('密码', validators=[DataRequired()])
password2 = PasswordField('确认密码', validators=[DataRequired(), EqualTo('password1', "两次密码填入不一致")])
submit = SubmitField('提交')
@app.route('/form', methods=['GET', 'POST'])
def login():
login_form = LoginForm()
if request.method == 'POST':
username = request.form.get('username')
password1 = request.form.get('password1')
password2 = request.form.get('password2')
if login_form.validate_on_submit():
return 'success'
else:
flash("false")
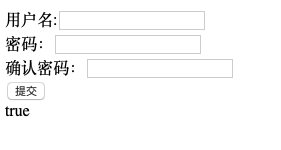
return render_template('demo3.html', html_form=login_form)
if __name__ == '__main__':
app.run()
demo3.html
<!DOCTYPE html>
<html lang="en">
<head>
    <meta charset="UTF-8">
    <title>Title</title>
</head>
<body>
<form method="post">
    <br>
    {{ html_form.csrf_token() }}
    {{ html_form.username.label }}{{ html_form.username }}<br>
    {{ html_form.password1.label }}{{ html_form.password1 }}<br>
    {{ html_form.password2.label }}{{ html_form.password2 }}<br>
    {{ html_form.submit }}<br>

    {% for message in get_flashed_messages() %}
        {{ message }}
    {% endfor %}
</form>
</body>
</html>
页面效果:
![[外链图片转存失败,源站可能有防盗链机制,建议将图片保存下来直接上传(img-RLYBfuGA-1581604100662)(evernotecid://5DBAB900-A080-44B3-994E-762E3B8C44D4/appyinxiangcom/22161713/ENResource/p565)]](https://img-blog.csdnimg.cn/20200213223632431.png?x-oss-process=image/watermark,type_ZmFuZ3poZW5naGVpdGk,shadow_10,text_aHR0cHM6Ly9ibG9nLmNzZG4ubmV0L3FxXzQzNDIyMTEx,size_16,color_FFFFFF,t_70)
![[外链图片转存失败,源站可能有防盗链机制,建议将图片保存下来直接上传(img-20LlkPBu-1581604100662)(evernotecid://5DBAB900-A080-44B3-994E-762E3B8C44D4/appyinxiangcom/22161713/ENResource/p563)]](https://img-blog.csdnimg.cn/20200213223638604.png?x-oss-process=image/watermark,type_ZmFuZ3poZW5naGVpdGk,shadow_10,text_aHR0cHM6Ly9ibG9nLmNzZG4ubmV0L3FxXzQzNDIyMTEx,size_16,color_FFFFFF,t_70)
![[外链图片转存失败,源站可能有防盗链机制,建议将图片保存下来直接上传(img-cEHqLKt5-1581604100663)(evernotecid://5DBAB900-A080-44B3-994E-762E3B8C44D4/appyinxiangcom/22161713/ENResource/p566)]](https://img-blog.csdnimg.cn/20200213223710739.png?x-oss-process=image/watermark,type_ZmFuZ3poZW5naGVpdGk,shadow_10,text_aHR0cHM6Ly9ibG9nLmNzZG4ubmV0L3FxXzQzNDIyMTEx,size_16,color_FFFFFF,t_70)
![[外链图片转存失败,源站可能有防盗链机制,建议将图片保存下来直接上传(img-R1tiRf7J-1581604100663)(evernotecid://5DBAB900-A080-44B3-994E-762E3B8C44D4/appyinxiangcom/22161713/ENResource/p567)]](https://img-blog.csdnimg.cn/20200213223719866.png?x-oss-process=image/watermark,type_ZmFuZ3poZW5naGVpdGk,shadow_10,text_aHR0cHM6Ly9ibG9nLmNzZG4ubmV0L3FxXzQzNDIyMTEx,size_16,color_FFFFFF,t_70)
3.9 Flask-SQLAlchemy拓展
使用Flask-SQLAichemy可以处理Python对象,而不是数据实体。这里我们也可以在项目中直接使用sql语句进行操纵数据库。
3.9.1 Flask-SQLAlchemy拓展安装方法:
- 通过PyCharm的project interpret 继续安装
- 通过命令行进行安装
pip install flask-sqlalchemy
在Flask-SQLAlchemy中,数据库使用URL进行指定,MySQL的URL格式为:
mysql://username:password@hostname/datebase
例如 mysql://root:[email protected]:3306/demoDatabse
安装pymysql
pip install pymysql
3.9.2 配置数据库:
from flask_sqlalchemy import SQLAlchemy
app.config['SQLALCHEMY_DATABASE_URI']= 'mysql+pymysql://root:[email protected]:3306/Demo'
app.config['SQLALCHEMY_TRACK_MODIFICATIONS'] = False
db = SQLAlchemy(app)
3.9.3创建数据库类,映射数据库表
class ClassInfo(db.Model):
    __tablename__ = 'classinfo'
    id = db.Column(db.Integer(), primary_key=True)
    className = db.Column(db.String(20))
    classSize = db.Column(db.Integer())
注意,其中的类型的第一个字母要大写
3.9.4在视图中操作数据库查询
通过数据库类的query对象中的方法进行查询
mylist = ClassInfo.query.all()
    print(mylist)
    for it in mylist:
        print(it)
    test = mylist[0].className
    return render_template('demo3.html', html_form=login_form, test=test)
3.9.5 常用的SQLAlchemy查询过滤器
| 过滤器 | 说明 |
|---|---|
| filter() | 把过滤器添加到原查询上,返回一个新查询 |
| filter_by() | 把等值过滤器添加到原查询上,返回一个新查询 |
| limit() | 使用指定的值限制原查询返回的结果数量,返回一个新查询 |
| offset() | 偏移原查询返回的结果,返回一个新查询 |
| order_by() | 根据指定条件对原查询进行排序,返回一个新查询 |
| group_by() | 根据指定调教对原查询结果进行分组,返回一个新查询 |
3.9.6常用SQLAlchemy查询执行方法
| 方法 | 说明 |
|---|---|
| all() | 以列表形式返回查询的所有结果 |
| first() | 返回查询的第一个结果,如果没有结果,则返回None |
| first_or_404() | 返回查询的第一个结果,如果没有结果,则终止请求,返回4040错误响应 |
| get() | 返回指定主键对应的行,如果没有对应的行,则返回NOne |
| get_or_404 | 返回指定主键对应的行,如果没找到指定的主键,则终止请求,返回404错误响应 |
| count() | 返回查询结果的数量 |
| paginate() | 返回一个Paginate对象,包含指定范围内的结果 |
3.10 使用werkzeug计算密码散列值
在项目中我们一般都需要进行注册、登录账户,而账户密码又是一个非常重要的用户信息,我们一般都需要对他进行加密处理,这里我们在werkzeug中的security模块实现了密码散列值的计算。共有两个函数generate_password_hash(password, method='pbkdf2:sha256', salt_length=8)
这个函数的输入为原始密码,返回密码散列值的字符串形式,供存入用户数据库。
check_password_hash(hash,password)
这个函数的两个参数为,数据库中存放的密码hash值,和用户输入的密码,如果一致,返回True,如果不一致,返回False。
这里是采用的128位的散列加密,所以我们在创建数据库表的时候要注意我们字段的类型。
3.11 文件的上传、下载
3.11.1 上传文件
html代码:
<!DOCTYPE html>
<html lang="en">
<head>
    <meta charset="UTF-8">
    <title>上传文件</title>
</head>
<body>
<div>
    <form action="" method="post" enctype="multipart/form-data">
        <table>
                <tr>
                    <td>
                        选择你需要上传的文件
                    </td>
                    <td>
                        <input type="file" name="file">
                    </td>
                    <td>
                        <input type="submit">
                    </td>
                </tr>
        </table>

    </form>
</div>
</body>
</html>
要注意,在中要设置属性enctype="multipart/form-data"
3.11.2 在后台接收文件并保存
在后台接受文件使用
uoload_file = request.files.get('file')
进行获取,get(‘’)中参数是前端页面中的input的name
3.11.3 在后台保存文件
可以使用save()进行保存
upload_file = request.files.get('file')
file_path = 'store'
wenjian.save(os.path.join(file_path,upload.filename))
可以secure_filename()生成随机文件名,在werkzeug.utils中,也可以手动设置文件名,加安全性
3.12 Flask 蓝图
蓝图的作用是使Flask项目更加的模块化,结构更清晰。可以将相同的模块视图函数放在同一个蓝图下,同一个文件中,方便管理。
3.12.1 蓝图的基本用法
- 在蓝图文件中导入Blueprint:
from flask import Blueprint
- 初始化蓝图:例如user蓝图
user_bp = Blueprint('user',__name__)
- 在主app文件中注册蓝图:
例如user_bp蓝图在Blueprint/user.py文件中,注册函数为下
from flask import Flask
from flask import Blueprint
from Blueprint.user import user_bp
app = Flask(__name__)
app.register_blueprint(user_bp)
- 给每个蓝图添加前缀
要给某个蓝图下的所有route添加各自的前缀,可以在初始化蓝图的时候设置:例如给user_bp的每个route前添加/user前缀
from flask import Blueprint
user_bp = Blueprint('user',__name__,url_prefix='/user')
到这里为止,我们第Flask基本知识部分就技术了,这里面涵盖了一些Flask的一些基本的语法和应用,下面我们就要开始正式的进入我们的实战系列教程了。
博主的站内博客导航:博客文章内容导航(实时更新)
更多精彩博客文章推荐
- 一本教你如何在前端实现富文本编辑器
- 小白都能看得懂的教程 一本教你如何在前端实现markdown编辑器
- 一文教会你Bootstrap,让你也可以快速建站
- 一文教你如何白嫖JetBrains全家桶(IDEA/PtChram/CLion)免费正版
四、导航栏、注册、登录、注销、主页功能的实现
下面来到我们正式的实战环节了,在第四部分我们将一起实现导航栏、注册、登录、注销、主页功能,手把手的带你来完成这些功能的实现。
更多博主的文章可以查看博主的站内导航博客文章内容导航(实时更新)
本项目所有源码在GitHub开源,GitHub地址为:OnlineForumPlatform
有需要源码可以前去查看,喜欢的话可以star一下。在做完准备工作之后,我们就正式的开始开发了。博主将带领你实现在线论坛系统的导航条、注册、登录和主页功能,在实现的同时会讲解各个功能实现的原理,手把手的教你进入Python Web全栈开发,一个字一个字的代码完成本项目。
4.1 导航栏实现
我们首先从导航栏开始开发,每个页面需要有导航栏,可以说一个非常常用的组件了。这里我们先创建一个hmtl页面base.html进行开发导航栏相关功能,将文件建立在templates文件夹中。
在这里先说明一下为什么要使用base.html这个名字,因为Jinja2模板是支持继承机制的,而导航栏又是几乎每个页面都需要使用到的一个组件,所以我们这里将导航栏这个文件base.html作为一个基类,其他所有的视图文件都继承自它,并在它的基础上进行重写相关的内容,实现各个视图的不同内容。
在创建完文件之后,由于我们这个项目前端UI部分使用Bootstrap进行快速建站,还有不会Bootstarp的同学可以看一下之前的这篇教程:什么?你还不会Bootstrap?一文教会你Bootstrap,让你也可以快速建站
我们这里选择一个3.4.0的版本,在html中引入:
<script src="https://cdn.bootcss.com/jquery/3.4.1/jquery.js"></script>
<script src="https://cdn.bootcss.com/twitter-bootstrap/3.4.0/js/bootstrap.min.js"></script>
<link href="https://cdn.bootcss.com/twitter-bootstrap/3.4.0/css/bootstrap.min.css" rel="stylesheet">
在引用完成之后,我们先去bootstrap样式库中找一个喜欢的导航条样式,然后加入到我们的base.html中。
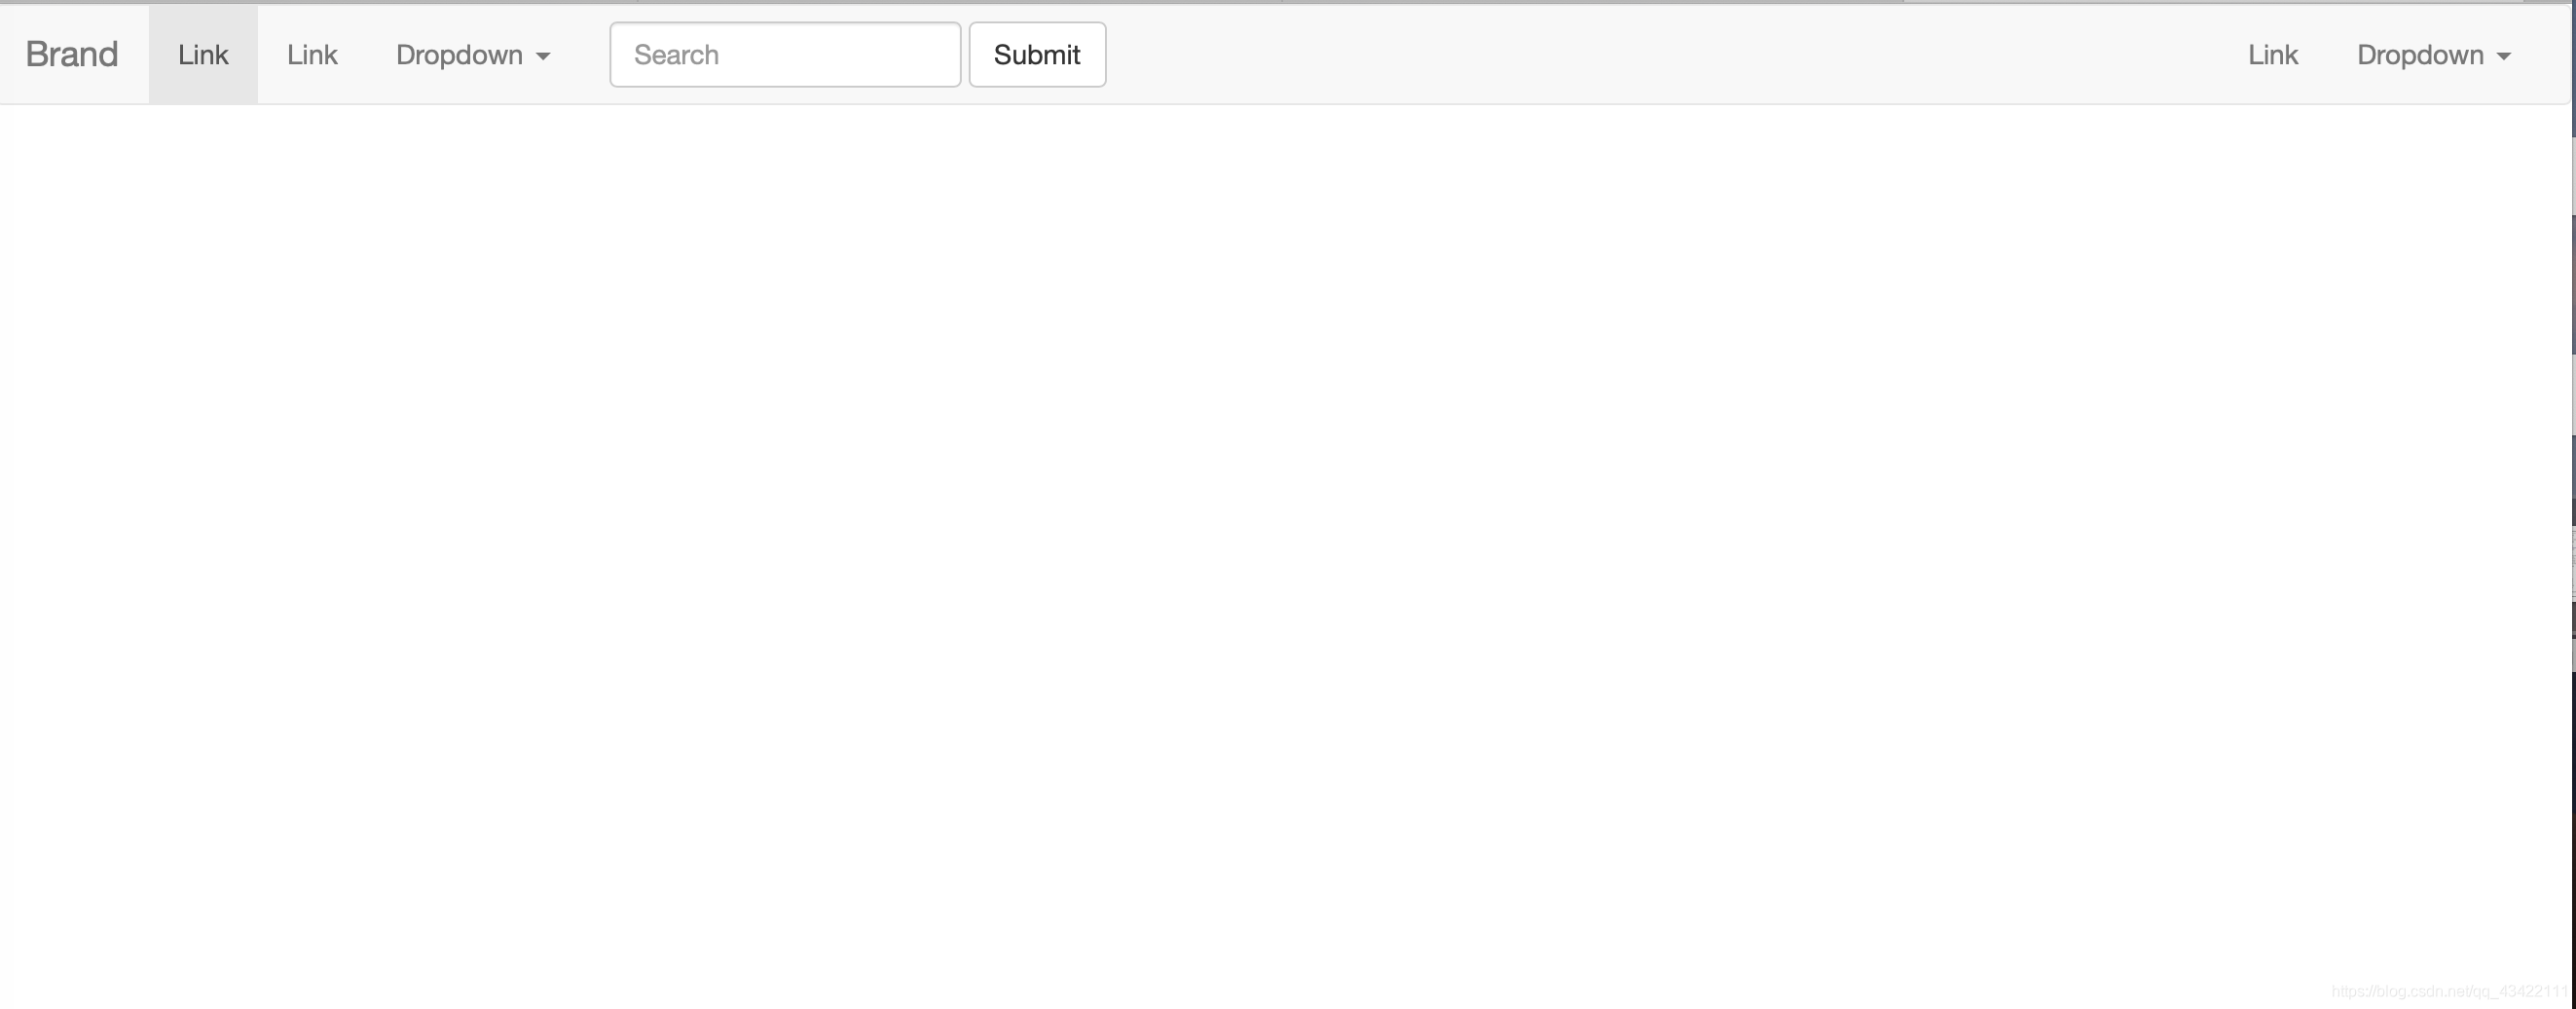
我们这里使用这个样式的,直接加入到base.html中:
<nav class="navbar navbar-default">
  <div class="container-fluid">
    <!-- Brand and toggle get grouped for better mobile display -->
    <div class="navbar-header">
      <button type="button" class="navbar-toggle collapsed" data-toggle="collapse" data-target="#bs-example-navbar-collapse-1" aria-expanded="false">
        <span class="sr-only">Toggle navigation</span>
        <span class="icon-bar"></span>
        <span class="icon-bar"></span>
        <span class="icon-bar"></span>
      </button>
      <a class="navbar-brand" href="#">Brand</a>
    </div>

    <!-- Collect the nav links, forms, and other content for toggling -->
    <div class="collapse navbar-collapse" id="bs-example-navbar-collapse-1">
      <ul class="nav navbar-nav">
        <li class="active"><a href="#">Link <span class="sr-only">(current)</span></a></li>
        <li><a href="#">Link</a></li>
        <li class="dropdown">
          <a href="#" class="dropdown-toggle" data-toggle="dropdown" role="button" aria-haspopup="true" aria-expanded="false">Dropdown <span class="caret"></span></a>
          <ul class="dropdown-menu">
            <li><a href="#">Action</a></li>
            <li><a href="#">Another action</a></li>
            <li><a href="#">Something else here</a></li>
            <li role="separator" class="divider"></li>
            <li><a href="#">Separated link</a></li>
            <li role="separator" class="divider"></li>
            <li><a href="#">One more separated link</a></li>
          </ul>
        </li>
      </ul>
      <form class="navbar-form navbar-left">
        <div class="form-group">
          <input type="text" class="form-control" placeholder="Search">
        </div>
        <button type="submit" class="btn btn-default">Submit</button>
      </form>
      <ul class="nav navbar-nav navbar-right">
        <li><a href="#">Link</a></li>
        <li class="dropdown">
          <a href="#" class="dropdown-toggle" data-toggle="dropdown" role="button" aria-haspopup="true" aria-expanded="false">Dropdown <span class="caret"></span></a>
          <ul class="dropdown-menu">
            <li><a href="#">Action</a></li>
            <li><a href="#">Another action</a></li>
            <li><a href="#">Something else here</a></li>
            <li role="separator" class="divider"></li>
            <li><a href="#">Separated link</a></li>
          </ul>
        </li>
      </ul>
    </div><!-- /.navbar-collapse -->
  </div><!-- /.container-fluid -->
</nav>
插入之后我们打开网页就可以看到如下效果:
然后我们在根据我们的需求,对这个导航条进行一定的更改,并且为base.html页面划分几个block。
暂时先修改为这样,后续我们加完导航之后,还需再对各个标定的页面进行一个修改。修改之后的完整代码为:
<!DOCTYPE html>
<html lang="en">
<head>
    <meta charset="UTF-8">
    <title>
        {% block title %}
{#        其他页面重写标题的地方#}
        {% endblock %}
    </title>
    {% block css %}
{#    其他页面引用样式或者js的地方#}
    {% endblock %}
    <script src="https://cdn.bootcss.com/jquery/3.4.1/jquery.js"></script>
    <script src="https://cdn.bootcss.com/twitter-bootstrap/3.4.0/js/bootstrap.min.js"></script>
    <link href="https://cdn.bootcss.com/twitter-bootstrap/3.4.0/css/bootstrap.min.css" rel="stylesheet">
</head>
<body>
    <div class="navigation_bar">
        <nav class="navbar navbar-default">
          <div class="container-fluid">
{#              由于这里我们不需要使用商标,所以对Bran部分进行了删除#}
            <!-- Collect the nav links, forms, and other content for toggling -->
            <div class="collapse navbar-collapse" id="bs-example-navbar-collapse-1">
              <ul class="nav navbar-nav">
                <li class="active"><a href="#">首页<span class="sr-only">(current)</span></a></li>
                <li><a href="#">Link</a></li>
                <li class="dropdown">
                  <a href="#" class="dropdown-toggle" data-toggle="dropdown" role="button" aria-haspopup="true" aria-expanded="false">Dropdown <span class="caret"></span></a>
                  <ul class="dropdown-menu">
                    <li><a href="#">Action</a></li>
                    <li><a href="#">Another action</a></li>
                    <li><a href="#">Something else here</a></li>
                    <li role="separator" class="divider"></li>
                    <li><a href="#">Separated link</a></li>
                    <li role="separator" class="divider"></li>
                    <li><a href="#">One more separated link</a></li>
                  </ul>
                </li>
              </ul>
              <form class="navbar-form navbar-left">
                <div class="form-group">
                  <input type="text" class="form-control" placeholder="Search">
                </div>
                <button type="submit" class="btn btn-default">Submit</button>
              </form>
              <ul class="nav navbar-nav navbar-right">
                <li><a href="#">Link</a></li>
                <li class="dropdown">
                  <a href="#" class="dropdown-toggle" data-toggle="dropdown" role="button" aria-haspopup="true" aria-expanded="false">Dropdown <span class="caret"></span></a>
                  <ul class="dropdown-menu">
                    <li><a href="#">Action</a></li>
                    <li><a href="#">Another action</a></li>
                    <li><a href="#">Something else here</a></li>
                    <li role="separator" class="divider"></li>
                    <li><a href="#">Separated link</a></li>
                  </ul>
                </li>
              </ul>
            </div><!-- /.navbar-collapse -->
          </div><!-- /.container-fluid -->
        </nav>
    </div>
    <div>
        {% block content %}
{#        其他页面重写页面内容的地方#}
        {% endblock %}
    </div>
</body>
</html>
这里暂时加了3个block,分别是title:标题。css:引用css样式和js脚本。content:页面主题内容部分。
导航栏的剩下内容将会在项目开发的过程中逐渐完善,因为它涉及多个页面,下面我们进行下一项功能页面。
4.2 注册功能实现
4.2.1 注册功能实现-数据库
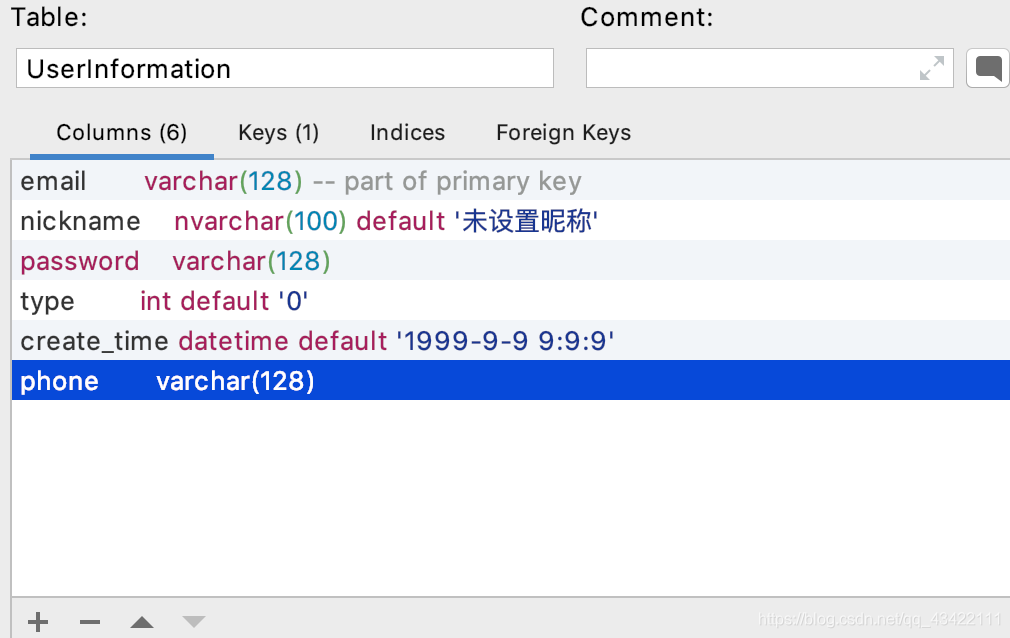
在实现注册功能的时候,我们首先就需要在数据库中创建一个表来存储我们的注册信息了。这个项目预设2端(普通用户端和管理员端),那么我们表中需要存储用户的信息有:用户名(这里使用邮箱),昵称,密码,用户的权限,注册时间,联系方式等信息,我们这里暂定收集用户名,昵称,密码,用户的权限,注册时间,联系方式,这6种信息用于注册,下面我们创建一个UserInformation表。这里可以使用pychram右面的Database使用图像界面创建,也可以使用命令行创建。
 SQL语句为:
create table UserInformation
(
	email varchar(128) not null,
	nickname nvarchar(100) default '未设置昵称' null,
	password varchar(128) not null,
	type int default '0' null,
	create_time datetime default '1999-9-9 9:9:9' not null,
	phone varchar(128) null,
	constraint UserInformation_pk
		primary key (email)
);
这样我们一个用于存储用户信息的表就创建好了,下面我们来设计一个注册的前端页面。
4.2.2 注册功能实现-前端
在写前端页面之前,由于我们每个页面都是继承自base.html,因此我们可以写个extend.html来方便我们每次进行继承,在此基础上进行开发。
extend.html页面代码为:
{% extends 'base.html' %}

{% block title %}

{% endblock %}

{% block css %}

{% endblock %}

{% block content %}

{% endblock %}
下面我们就正式的开始写register.html页面了。
首先我们去bootstrap样式库中去找个页头,为页面添加一个大标题。
<div class="page-header">
  <h1>Example page header <small>Subtext for header</small></h1>
</div>
为了方便我们实时的调试我们的页面,我们先在app.py中为注册页面添加一个路由:
from flask import *

app = Flask(__name__)


@app.route('/')
def hello_world():
    return render_template('base.html')


# 注册页面
@app.route('/register')
def register():
    return render_template('register.html')


if __name__ == '__main__':
    app.run()
这样我们访问http://127.0.0.1:5000/register就可以实时查看我们页面的信息了,方便我们对UI部分进行调试,设计一个自己喜欢的UI。在引入页头之后,我们访问发现页面有点差强人意,左对齐一点也不好看,我们可以让他居中。我们在static/css文件夹中创建一个register.css来为register.html提供样式。创建完之后我们在register.html中引入这个css。
<link rel="stylesheet" href="/static/css/register.css">
下面我们就来选择一个表单进行设计一个注册页面。这里调整UI部分比较简单并且繁琐,所以就不一步一步的记录了,在调整完之后贴上完整的代码,给大家看一下整体的效果。
初步设计之后,register.css:
#page_header{
    text-align: center;
}

.register_content{
    /*调整边距,调到相对中间的位置*/
    margin:10% 25%;
}

#register_butt{
    text-align: center;
}
register.html:
{% extends 'base.html' %}

{% block title %}
注册
{% endblock %}

{% block css %}
<link rel="stylesheet" href="/static/css/register.css">
{% endblock %}

{% block content %}
<div class="register_content">
    <div class="page-header" id="page_header">
      <h1>注册<small>Register</small></h1>
    </div>
    <div id="register_form">
        <form method="post">
          <div class="form-group">
            <label for="exampleInputEmail1">Email address</label>
            <input type="email" class="form-control" name="email" id="exampleInputEmail1" placeholder="Email address">
          </div>
          <div class="form-group">
            <label for="exampleInputEmail1">昵称</label>
            <input type="text" class="form-control" name="nickname" id="exampleInputEmail1" placeholder="昵称">
          </div>
          <div class="form-group">
            <label for="exampleInputPassword1">密码</label>
            <input type="password" class="form-control" name="password_1" id="exampleInputPassword1" placeholder="密码">
          </div>
            <div class="form-group">
            <label for="exampleInputPassword1">确认密码</label>
            <input type="password" class="form-control" name="password_2" id="exampleInputPassword1" placeholder="确认密码">
          </div>
          <div class="form-group">
            <label for="exampleInputEmail1">联系方式</label>
            <input type="text" class="form-control" name="phone" id="exampleInputEmail1" placeholder="联系方式">
          </div>
          <div id="register_butt">
              <button type="submit" class="btn btn-default">注册</button>
              <button type="button" class="btn btn-default" onclick="location.href='#'">登录</button>
          </div>
        </form>
    </div>

</div>
{% endblock %}
页面效果为:
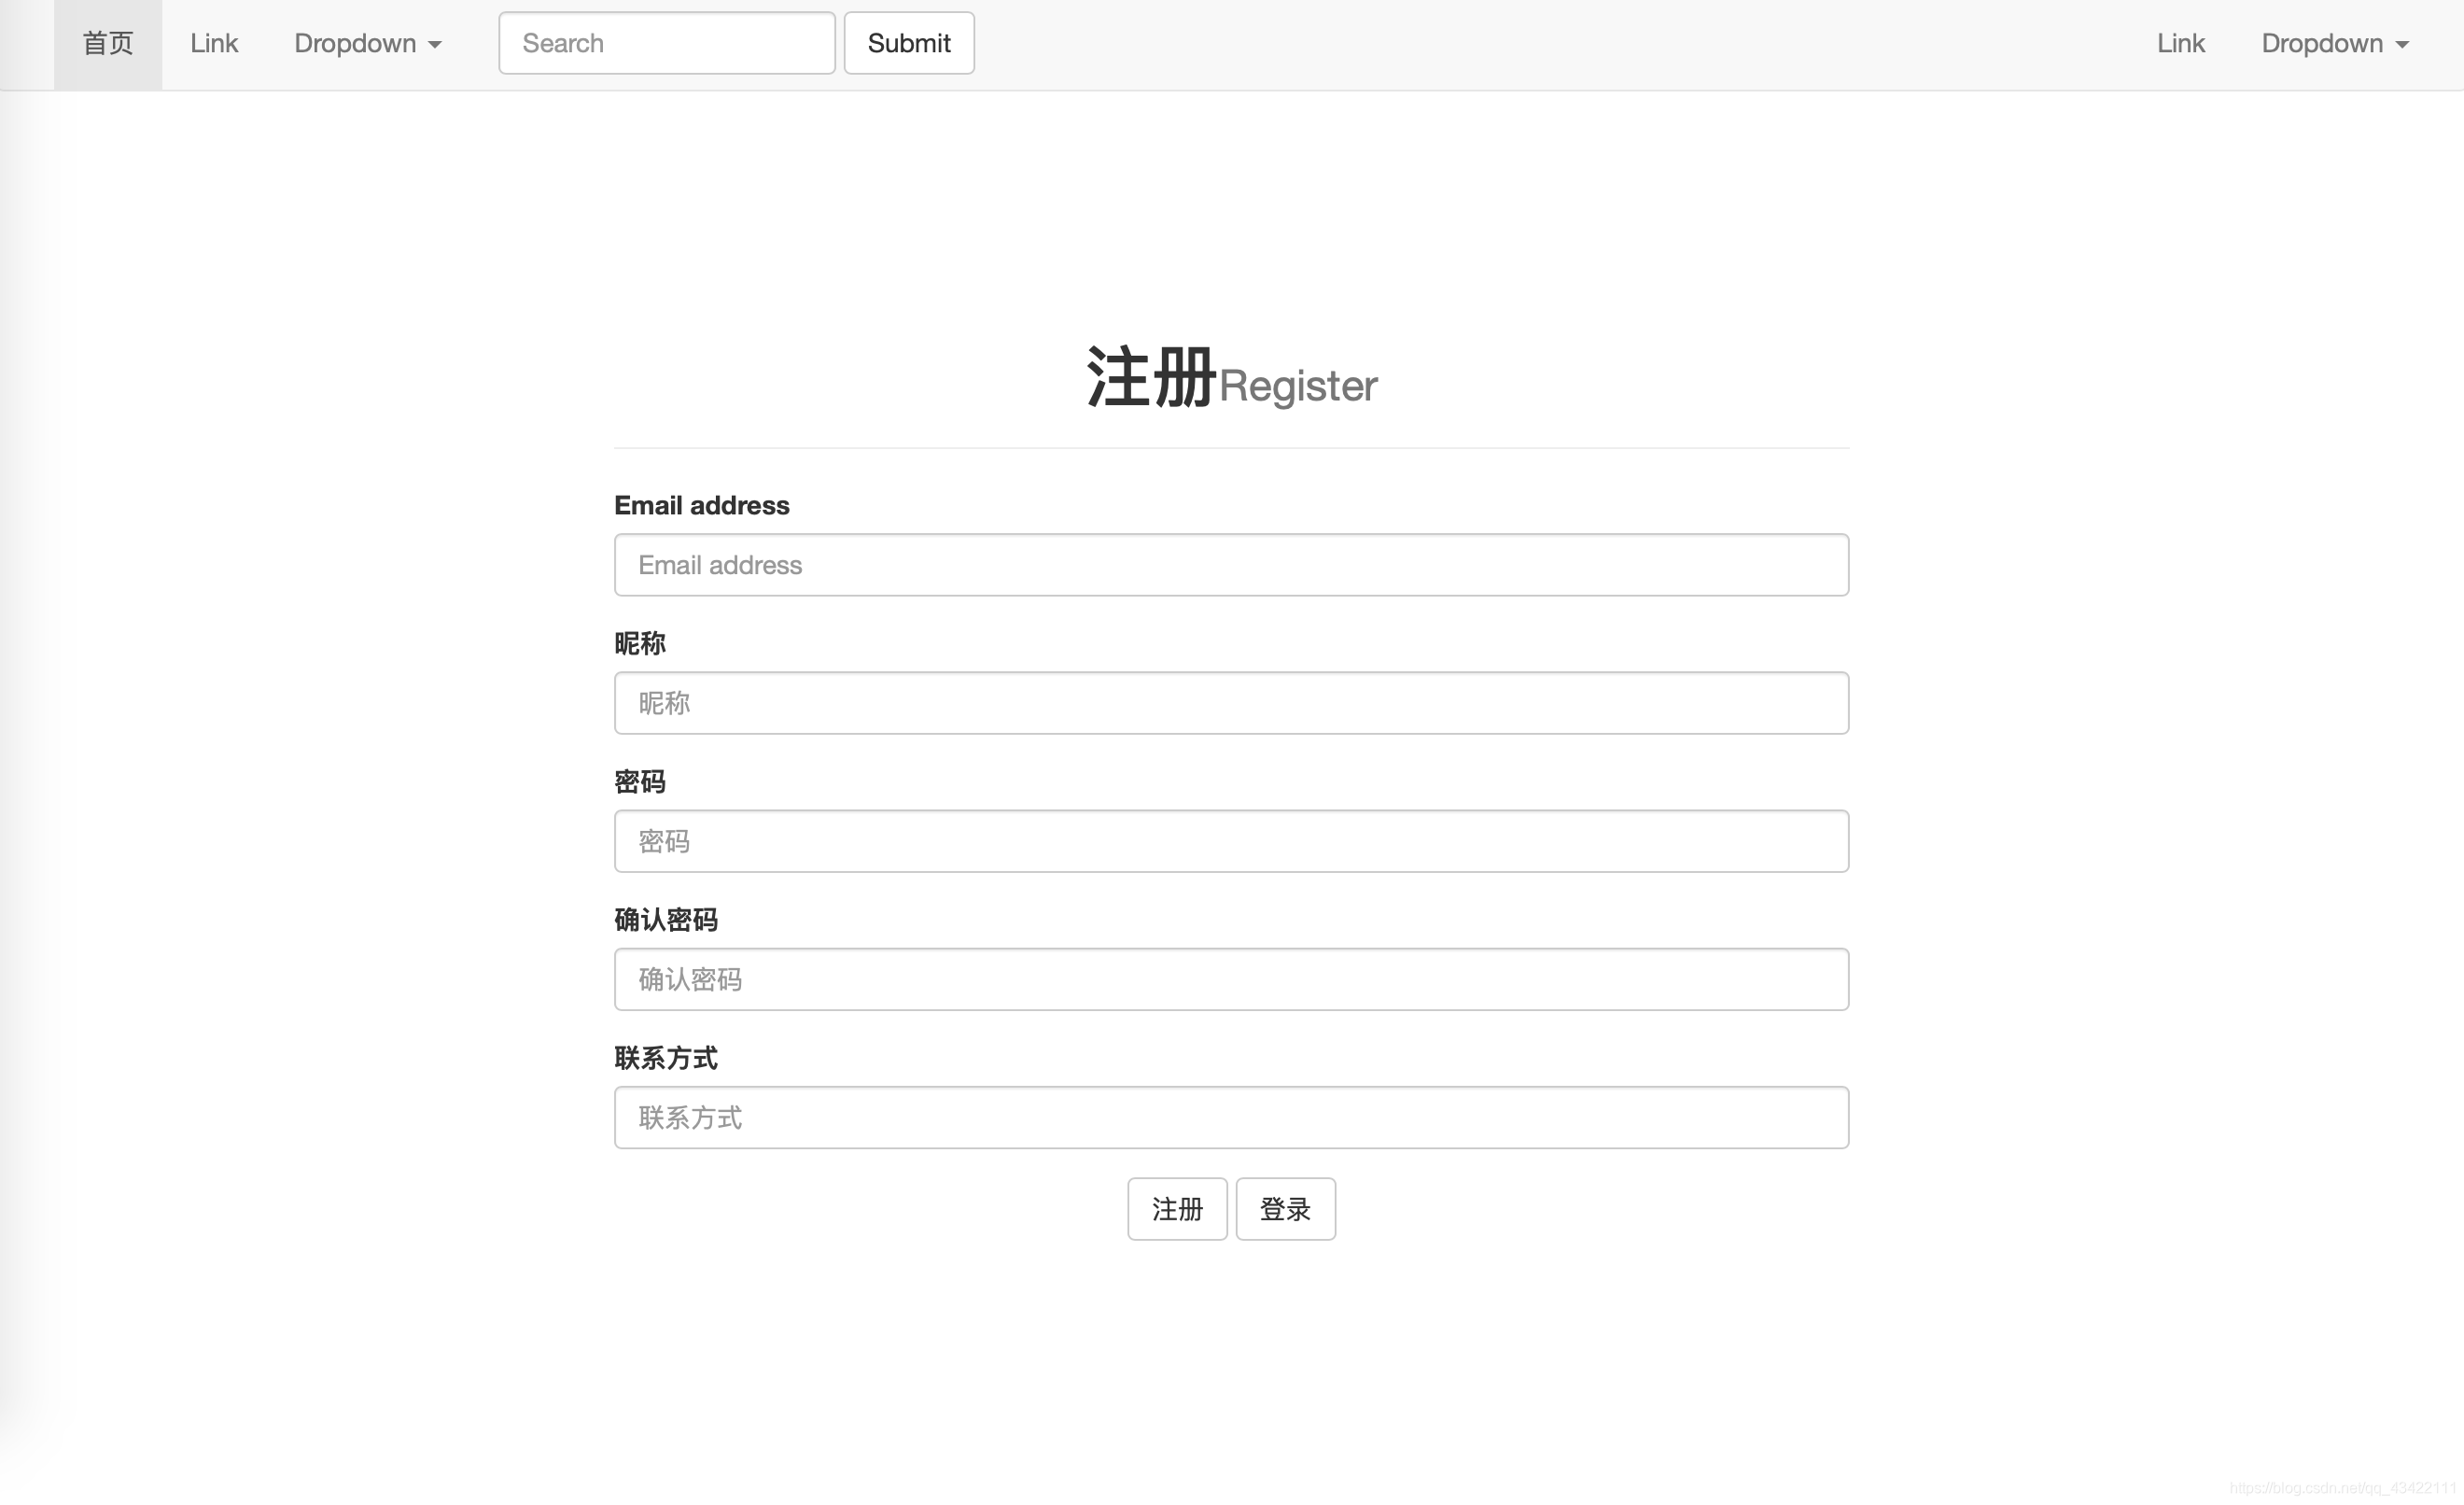
整体还是简洁大方的,下面我们在针对注册页面修改一下导航条,在导航条中添加到注册页面的导航,并且添加一个block来标定上面选取的页面。
修改之后的base.html为:
<!DOCTYPE html>
<html lang="en">
<head>
    <meta charset="UTF-8">
    <title>
        {% block title %}
{#        其他页面重写标题的地方#}
        {% endblock %}
    </title>
    {% block css %}
{#    其他页面引用样式或者js的地方#}
    {% endblock %}
    <script src="https://cdn.bootcss.com/jquery/3.4.1/jquery.js"></script>
    <script src="https://cdn.bootcss.com/twitter-bootstrap/3.4.0/js/bootstrap.min.js"></script>
    <link href="https://cdn.bootcss.com/twitter-bootstrap/3.4.0/css/bootstrap.min.css" rel="stylesheet">
</head>
<body>
    <div class="navigation_bar">
        <nav class="navbar navbar-default">
          <div class="container-fluid">
{#              由于这里我们不需要使用商标,所以对Bran部分进行了删除#}
            <!-- Collect the nav links, forms, and other content for toggling -->
            <div class="collapse navbar-collapse" id="bs-example-navbar-collapse-1">
              <ul class="nav navbar-nav">
                <li class="{% block homepage_class %}{% endblock %}"><a href="#">首页<span class="sr-only">(current)</span></a></li>
                <li><a href="#">Link</a></li>
                <li class="dropdown">
                  <a href="#" class="dropdown-toggle" data-toggle="dropdown" role="button" aria-haspopup="true" aria-expanded="false">Dropdown <span class="caret"></span></a>
                  <ul class="dropdown-menu">
                    <li><a href="#">Action</a></li>
                    <li><a href="#">Another action</a></li>
                    <li><a href="#">Something else here</a></li>
                    <li role="separator" class="divider"></li>
                    <li><a href="#">Separated link</a></li>
                    <li role="separator" class="divider"></li>
                    <li><a href="#">One more separated link</a></li>
                  </ul>
                </li>
              </ul>
              <form class="navbar-form navbar-left">
                <div class="form-group">
                  <input type="text" class="form-control" placeholder="Search">
                </div>
                <button type="submit" class="btn btn-default">Submit</button>
              </form>
              <ul class="nav navbar-nav navbar-right">
                <li class="{% block register_class %}{% endblock %}"><a href="{{ url_for('register') }}">注册</a></li>
                <li><a href="#">登录</a></li>
{#                <li class="dropdown">#}
{#                  <a href="#" class="dropdown-toggle" data-toggle="dropdown" role="button" aria-haspopup="true" aria-expanded="false">Dropdown <span class="caret"></span></a>#}
{#                  <ul class="dropdown-menu">#}
{#                    <li><a href="#">Action</a></li>#}
{#                    <li><a href="#">Another action</a></li>#}
{#                    <li><a href="#">Something else here</a></li>#}
{#                    <li role="separator" class="divider"></li>#}
{#                    <li><a href="#">Separated link</a></li>#}
{#                  </ul>#}
{#                </li>#}
              </ul>
            </div><!-- /.navbar-collapse -->
          </div><!-- /.container-fluid -->
        </nav>
    </div>
    <div>
        {% block content %}
{#        其他页面重写页面内容的地方#}
        {% endblock %}
    </div>
</body>
</html>
同时在对register.html中进行添加block register_class,添加完成之后的register.html为:
{% extends 'base.html' %}

{% block title %}
注册
{% endblock %}

{% block css %}
<link rel="stylesheet" href="/static/css/register.css">
{% endblock %}

{% block content %}
<div class="register_content">
    <div class="page-header" id="page_header">
      <h1>注册<small>Register</small></h1>
    </div>
    <div id="register_form">
        <form method="post">
          <div class="form-group">
            <label for="exampleInputEmail1">Email address</label>
            <input type="email" class="form-control" name="email" id="exampleInputEmail1" placeholder="Email address">
          </div>
          <div class="form-group">
            <label for="exampleInputEmail1">昵称</label>
            <input type="text" class="form-control" name="nickname" id="exampleInputEmail1" placeholder="昵称">
          </div>
          <div class="form-group">
            <label for="exampleInputPassword1">密码</label>
            <input type="password" class="form-control" name="password_1" id="exampleInputPassword1" placeholder="密码">
          </div>
            <div class="form-group">
            <label for="exampleInputPassword1">确认密码</label>
            <input type="password" class="form-control" name="password_2" id="exampleInputPassword1" placeholder="确认密码">
          </div>
          <div class="form-group">
            <label for="exampleInputEmail1">联系方式</label>
            <input type="text" class="form-control" name="phone" id="exampleInputEmail1" placeholder="联系方式">
          </div>
          <div id="register_butt">
              <button type="submit" class="btn btn-default">注册</button>
              <button type="button" class="btn btn-default" onclick="location.href='#'">登录</button>
          </div>
        </form>
    </div>

</div>
{% endblock %}

{% block register_class %}
active
{% endblock %}
调整之后的注册页面为:
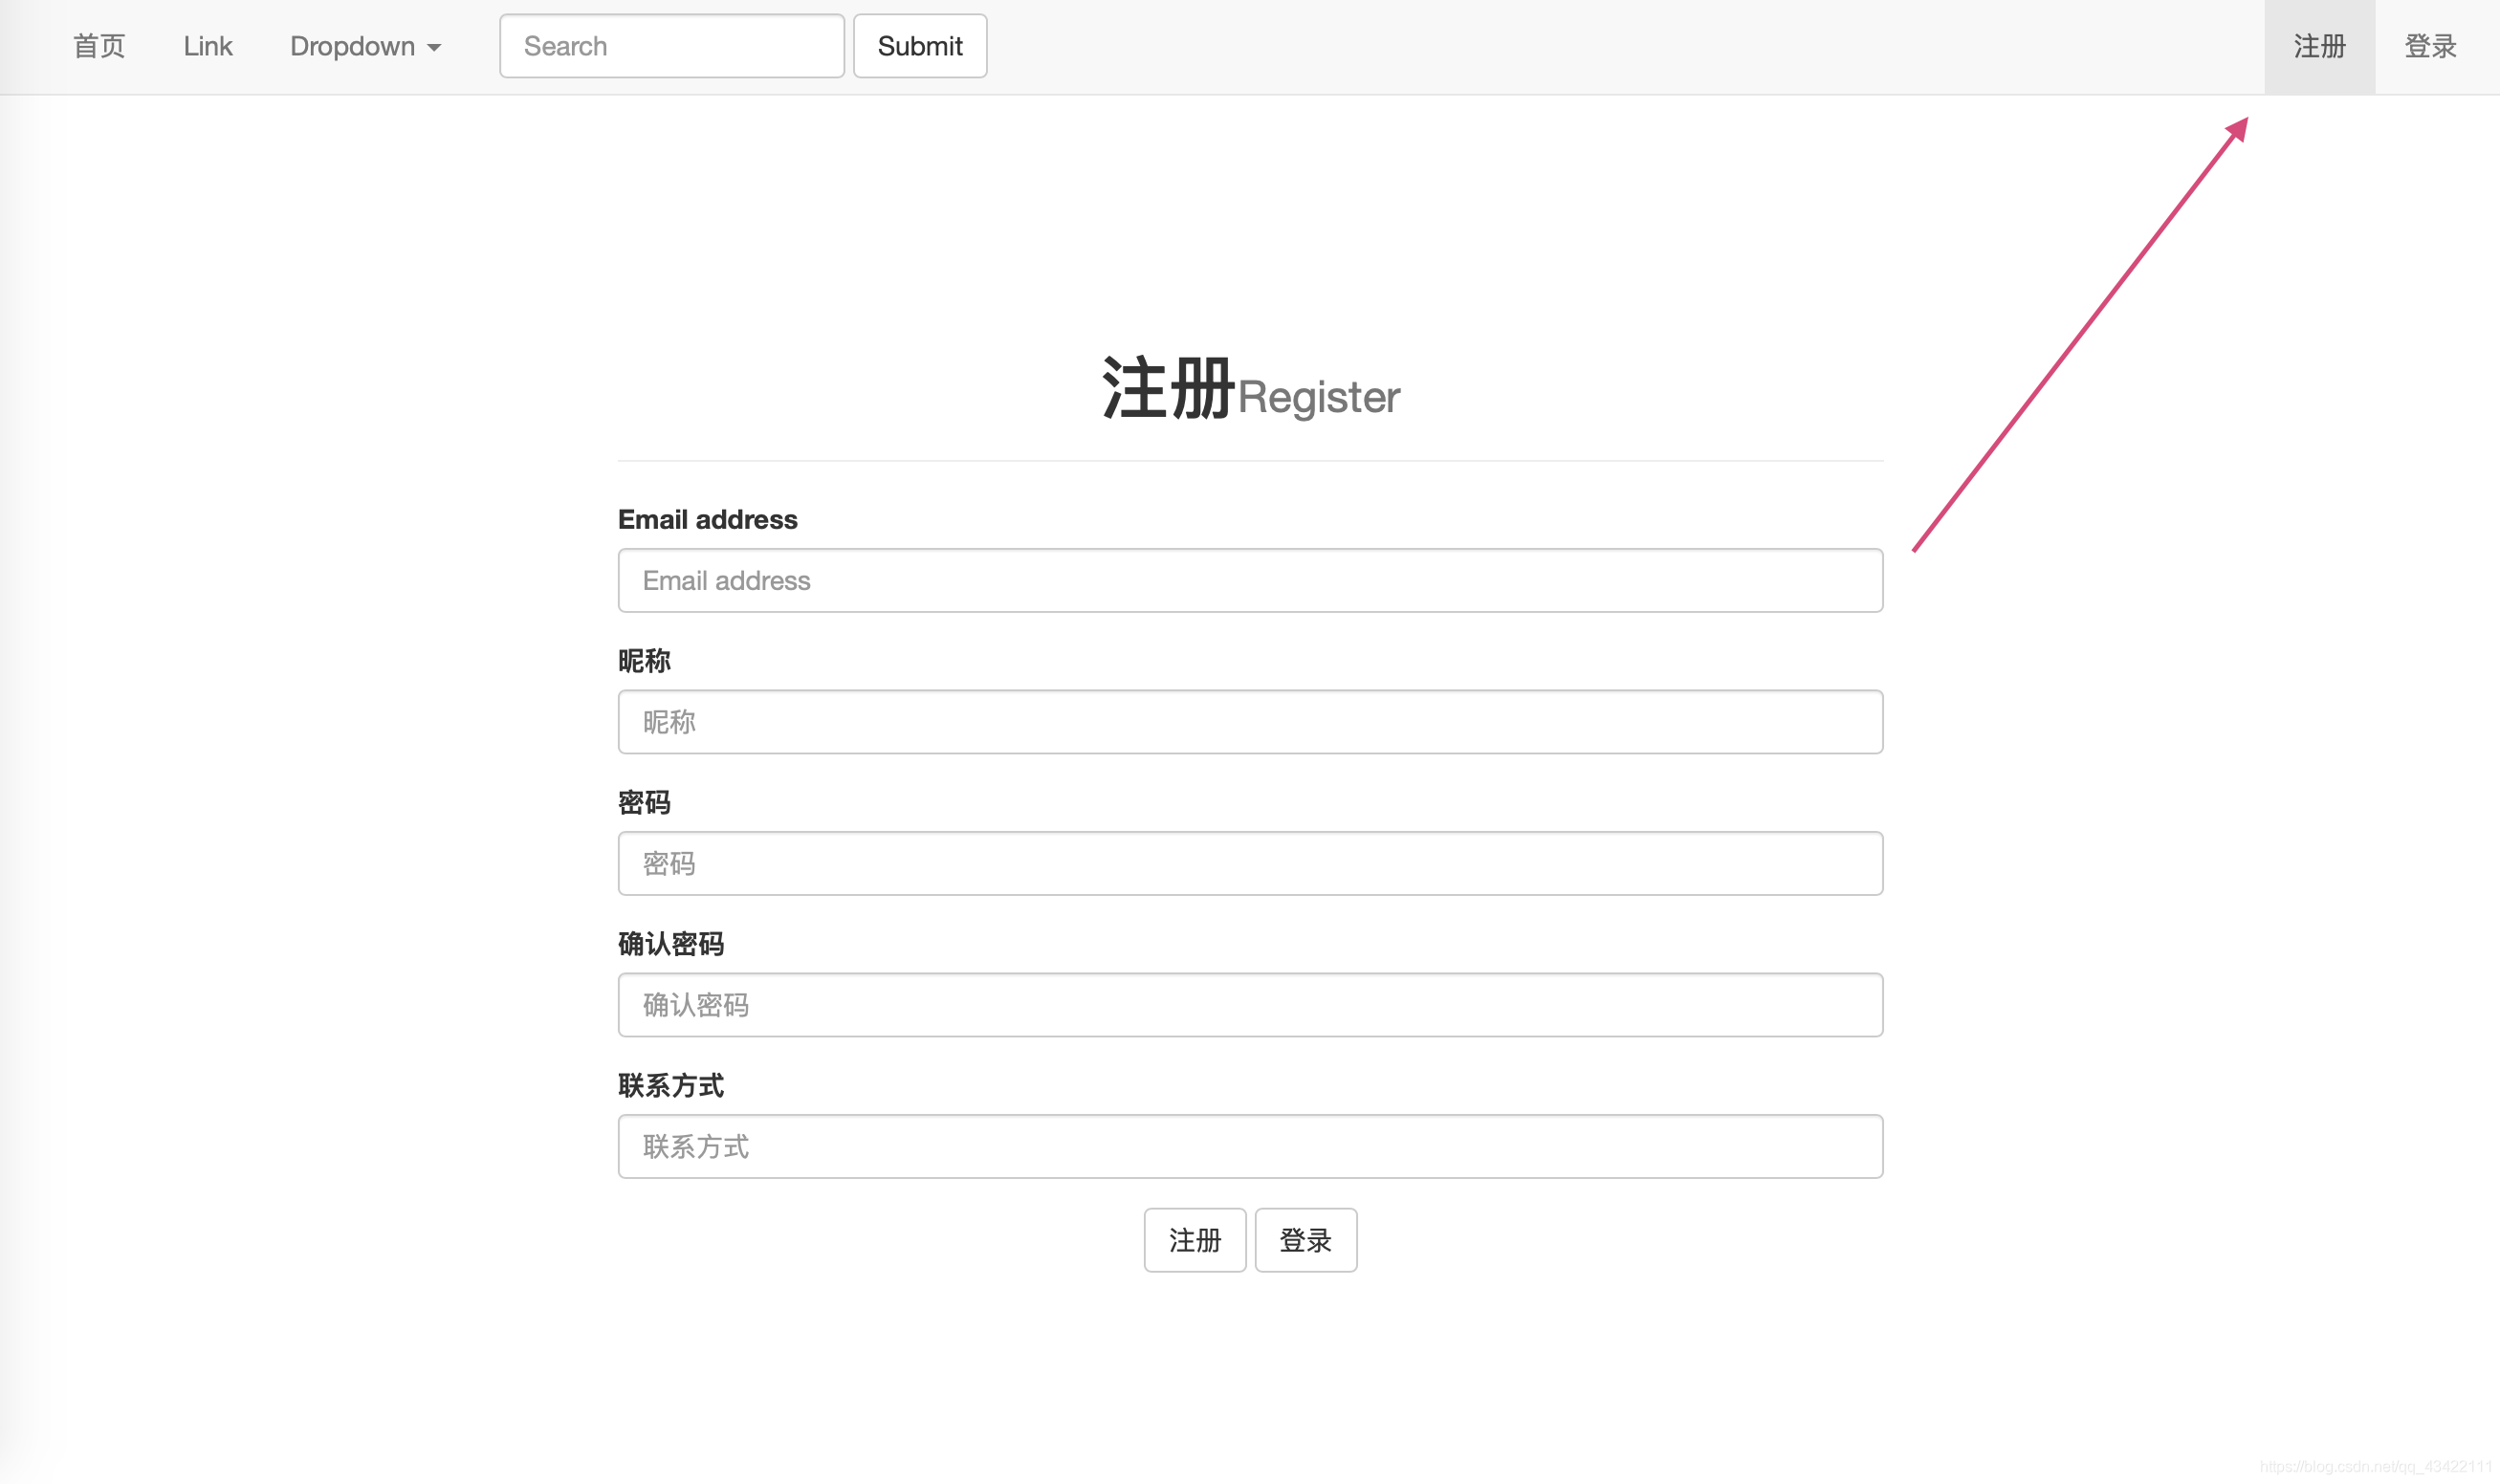
当在注册页面时,会将注册的导航着重显示。同时在导航条上添加了注册和登录页面的导航。
4.2.3 注册功能实现-后端
下面我们就来实现注册的服务器端功能,将前端发送的信息检查,如果不正确则返回提示,如果正确则将用户信息存储到数据库中。
既然要使用到数据库,那我们就先来配置一下config.py,这个文件主要存放项目的配置信息。
这里我们设置一下SECRET_KEY和db。
config.py:
# encoding:utf-8
import os
import pymysql

DEBUG = False

SECRET_KEY = os.urandom(24)

db = pymysql.connect(host='localhost', user='root', password='password1q!', db='OnlineForumPlatform', port=3306)
配置完成之后我们在app.py中导入config.py,并且绑定配置。
from flask import *
import config

app = Flask(__name__)

# 从对象中导入config
app.config.from_object(config)
然后我们开始写注册的后端逻辑功能。本系列第一次写后端代码,这里做一个详细的说明,有Flask基础不错的同学可以直接跳到后面的整体代码。
由于我们路由默认的请求方式只有一种是GET请求,但是我们注册的话,为了安全,form表单一般使用POST请求,因此我们这里先设置请求方式:
@app.route('/register',methods=['GET','POST'])
然后我们再获取前端表单的信息:
email = request.form.get('email')
nickname = request.form.get('nickname')
password_1 = request.form.get('password_1')
password_2 = request.form.get('password_2')
phone = request.form.get('phone')
在获取完之后我们就需要对这些数据进行处理了,首先我们要检查数据是否完整,如果信息填写不完整肯定是不可以注册的,我们返回提示,这里我们使用flash传递提示回到注册页面。
        if not all([email,nickname,password_1,password_2,phone]):
            flash("信息填写不全,请将信息填写完整")
            return render_template('register.html')
既然使用flash进行传递消息,那我们就需要在前端将flash消息显示出来。我们将这段代码放到前端合适的一个位置,这个位置自己选择一个显眼的位置即可。这里我讲这个信息提示放在了页头的下方。
<span style=" font-size:20px;color: red" >
	{% for item in get_flashed_messages() %}
		{{ item }}
	{% endfor %}
</span>
下面继续来完善我们的后端,信息填写完整之后,我们还需要验证两次密码输入的是否一致,如果不一致,则需要返回错误提示。
if password_1 != password_2:
	flash("两次密码填写不一致!")
	return render_template('register.html')
如果信息都填写正确了,那下面我们开始对密码进行加密,我们这里使用的是pbkdf2:sha256加密方式,对密码进行128位的散列加密,可以极大的保护用户信息的安全性。要使用这个加密,我们需要导入它:
from werkzeug.security import generate_password_hash, check_password_hash
然后我们使用generate_password_hash来加密我们的密码,由于password_1和password_2是一样的,那么我们只需要加密password_1即可:
password = generate_password_hash(password_1, method="pbkdf2:sha256", salt_length=8)
这样我们的准备工作就完成了,下面我们开始将信息存储到数据库中:
首先我们要将我们config文件中配置的db导入进来:
from config import db
然后我们来获取db的cursor,来进行相关数据库操作,这里我们使用Python直接操纵数据库,当然,大家也可以使用Flask-SQLAlchemy来进行操作数据库,这里就使用Python直接操纵数据库的方式进行。
首先我们要检查我们的数据库中email是否存在,即当前用户是否已经存在,我们使用email进行唯一表示用户,所以不允许重复,我们还需要检查一下email。
try:
	cur = db.cursor()
	sql = "select * from UserInformation where email = '%s'"%email
    db.ping(reconnect=True)
    cur.execute(sql)
 	result = cur.fetchone()
	if result is not None:
		flash("该Email已存在!")
 		return render_template('register.html')
except Exception as e:
	raise e
这里注册的用户类型我们肯定是不可以注册管理员的,不然这个管理员就是形同虚设了,我们这里通过register页面来注册的用户,我们统一都是普通用户,这里type置为0。然后创建时间我们使用服务器端来获取当前的时间。这里要使用time库,需要导入
import time
create_time = time.strftime("%Y-%m-%d %H:%M:%S")
然后将数据插入数据库中,同时在插入完成之后我们应该返回首页,并且为登录状态,由于我们这里首页和登录都还没有实现,所以这里我们先写一个空的首页路由,并且创建一个index.html,使用路由返回index.html页面。
index.html我们先这样空置,等在本讲的最后我们来实现这个首页。
index.html:
{% extends 'base.html' %}

{% block title %}
主页
{% endblock %}

{% block css %}

{% endblock %}

{% block content %}

{% endblock %}
完成注册服务器端功能之后的app.py全部代码为:
from flask import *
from werkzeug.security import generate_password_hash, check_password_hash
from config import db
import time
import config

app = Flask(__name__)

# 从对象中导入config
app.config.from_object(config)


@app.route('/')
def index():
    return render_template('index.html')


# 注册页面
@app.route('/register',methods=['GET','POST'])
def register():
    if request.method == 'GET':
        return render_template('register.html')
    if request.method == 'POST':
        email = request.form.get('email')
        nickname = request.form.get('nickname')
        password_1 = request.form.get('password_1')
        password_2 = request.form.get('password_2')
        phone = request.form.get('phone')
        if not all([email,nickname,password_1,password_2,phone]):
            flash("信息填写不全,请将信息填写完整")
            return render_template('register.html')
        if password_1 != password_2:
            flash("两次密码填写不一致!")
            return render_template('register.html')
        password = generate_password_hash(password_1, method="pbkdf2:sha256", salt_length=8)
        try:
            cur = db.cursor()
            sql = "select * from UserInformation where email = '%s'"%email
            db.ping(reconnect=True)
            cur.execute(sql)
            result = cur.fetchone()
            if result is not None:
                flash("该Email已存在!")
                return render_template('register.html')
            else:
                create_time = time.strftime("%Y-%m-%d %H:%M:%S")
                sql = "insert into UserInformation(email, nickname, password, type, create_time, phone) VALUES ('%s','%s','%s','0','%s','%s')" %(email,nickname,password,create_time,phone)
                db.ping(reconnect=True)
                cur.execute(sql)
                db.commit()
                cur.close()
                return redirect(url_for('index'))
        except Exception as e:
            raise e

if __name__ == '__main__':
    app.run()
这样我们的注册功能就全部实现啦!可以先去注册一个自己的测试账号,方便我们后面的各项功能测试呦!
4.3 登录功能实现
下面我们就来实现登录功能
4.3.1 登录功能实现-前端
登录的话,前端和我们的注册类似,上面一个页头,然后下面使用一个表单,并且设置一个block用来标记一下当前的页面即可,在注册的前端设计的时候已经有详细的说明,这里就不在赘述了,创建一个login.html,下面废话不过说,直接上代码:
首先我们在app.py中写一个空的路由,方便我们在前端页面中使用url_for来重定向页面:
# 注册页面
@app.route('/login')
def login():
    return render_template('login.html')
然后我们创建一个login.css来设置页面的样式:
#page_header{
    text-align: center;
}

.login_content{
    /*调整边距,调到相对中间的位置*/
    margin:10% 30%;
}

#login_butt{
    text-align: center;
}
login.html部分为:
{% extends 'base.html' %}

{% block title %}
登录
{% endblock %}

{% block css %}
<link rel="stylesheet" href="/static/css/login.css">
{% endblock %}

{% block content %}
<div class="login_content">
    <div class="page-header" id="page_header">
      <h1>登录<small>Login</small></h1>
    </div>
    <div id="login_form">
        <form method="post">
            <span style=" font-size:20px;color: red" >
                {% for item in get_flashed_messages() %}
                {{ item }}
                {% endfor %}
            </span>
          <div class="form-group">
            <label for="exampleInputEmail1">Email address</label>
            <input type="email" class="form-control" name="email" id="exampleInputEmail1" placeholder="Email address">
          </div>
          <div class="form-group">
            <label for="exampleInputPassword1">密码</label>
            <input type="password" class="form-control" name="password" id="exampleInputPassword1" placeholder="密码">
          </div>
          <div id="login_butt">
              <button type="submit" class="btn btn-default">登录</button>
              <button type="button" class="btn btn-default" onclick="location.href='{{ url_for('register') }}'">注册</button>
          </div>
        </form>
    </div>
</div>
{% endblock %}

{% block login_class %}
active
{% endblock %}
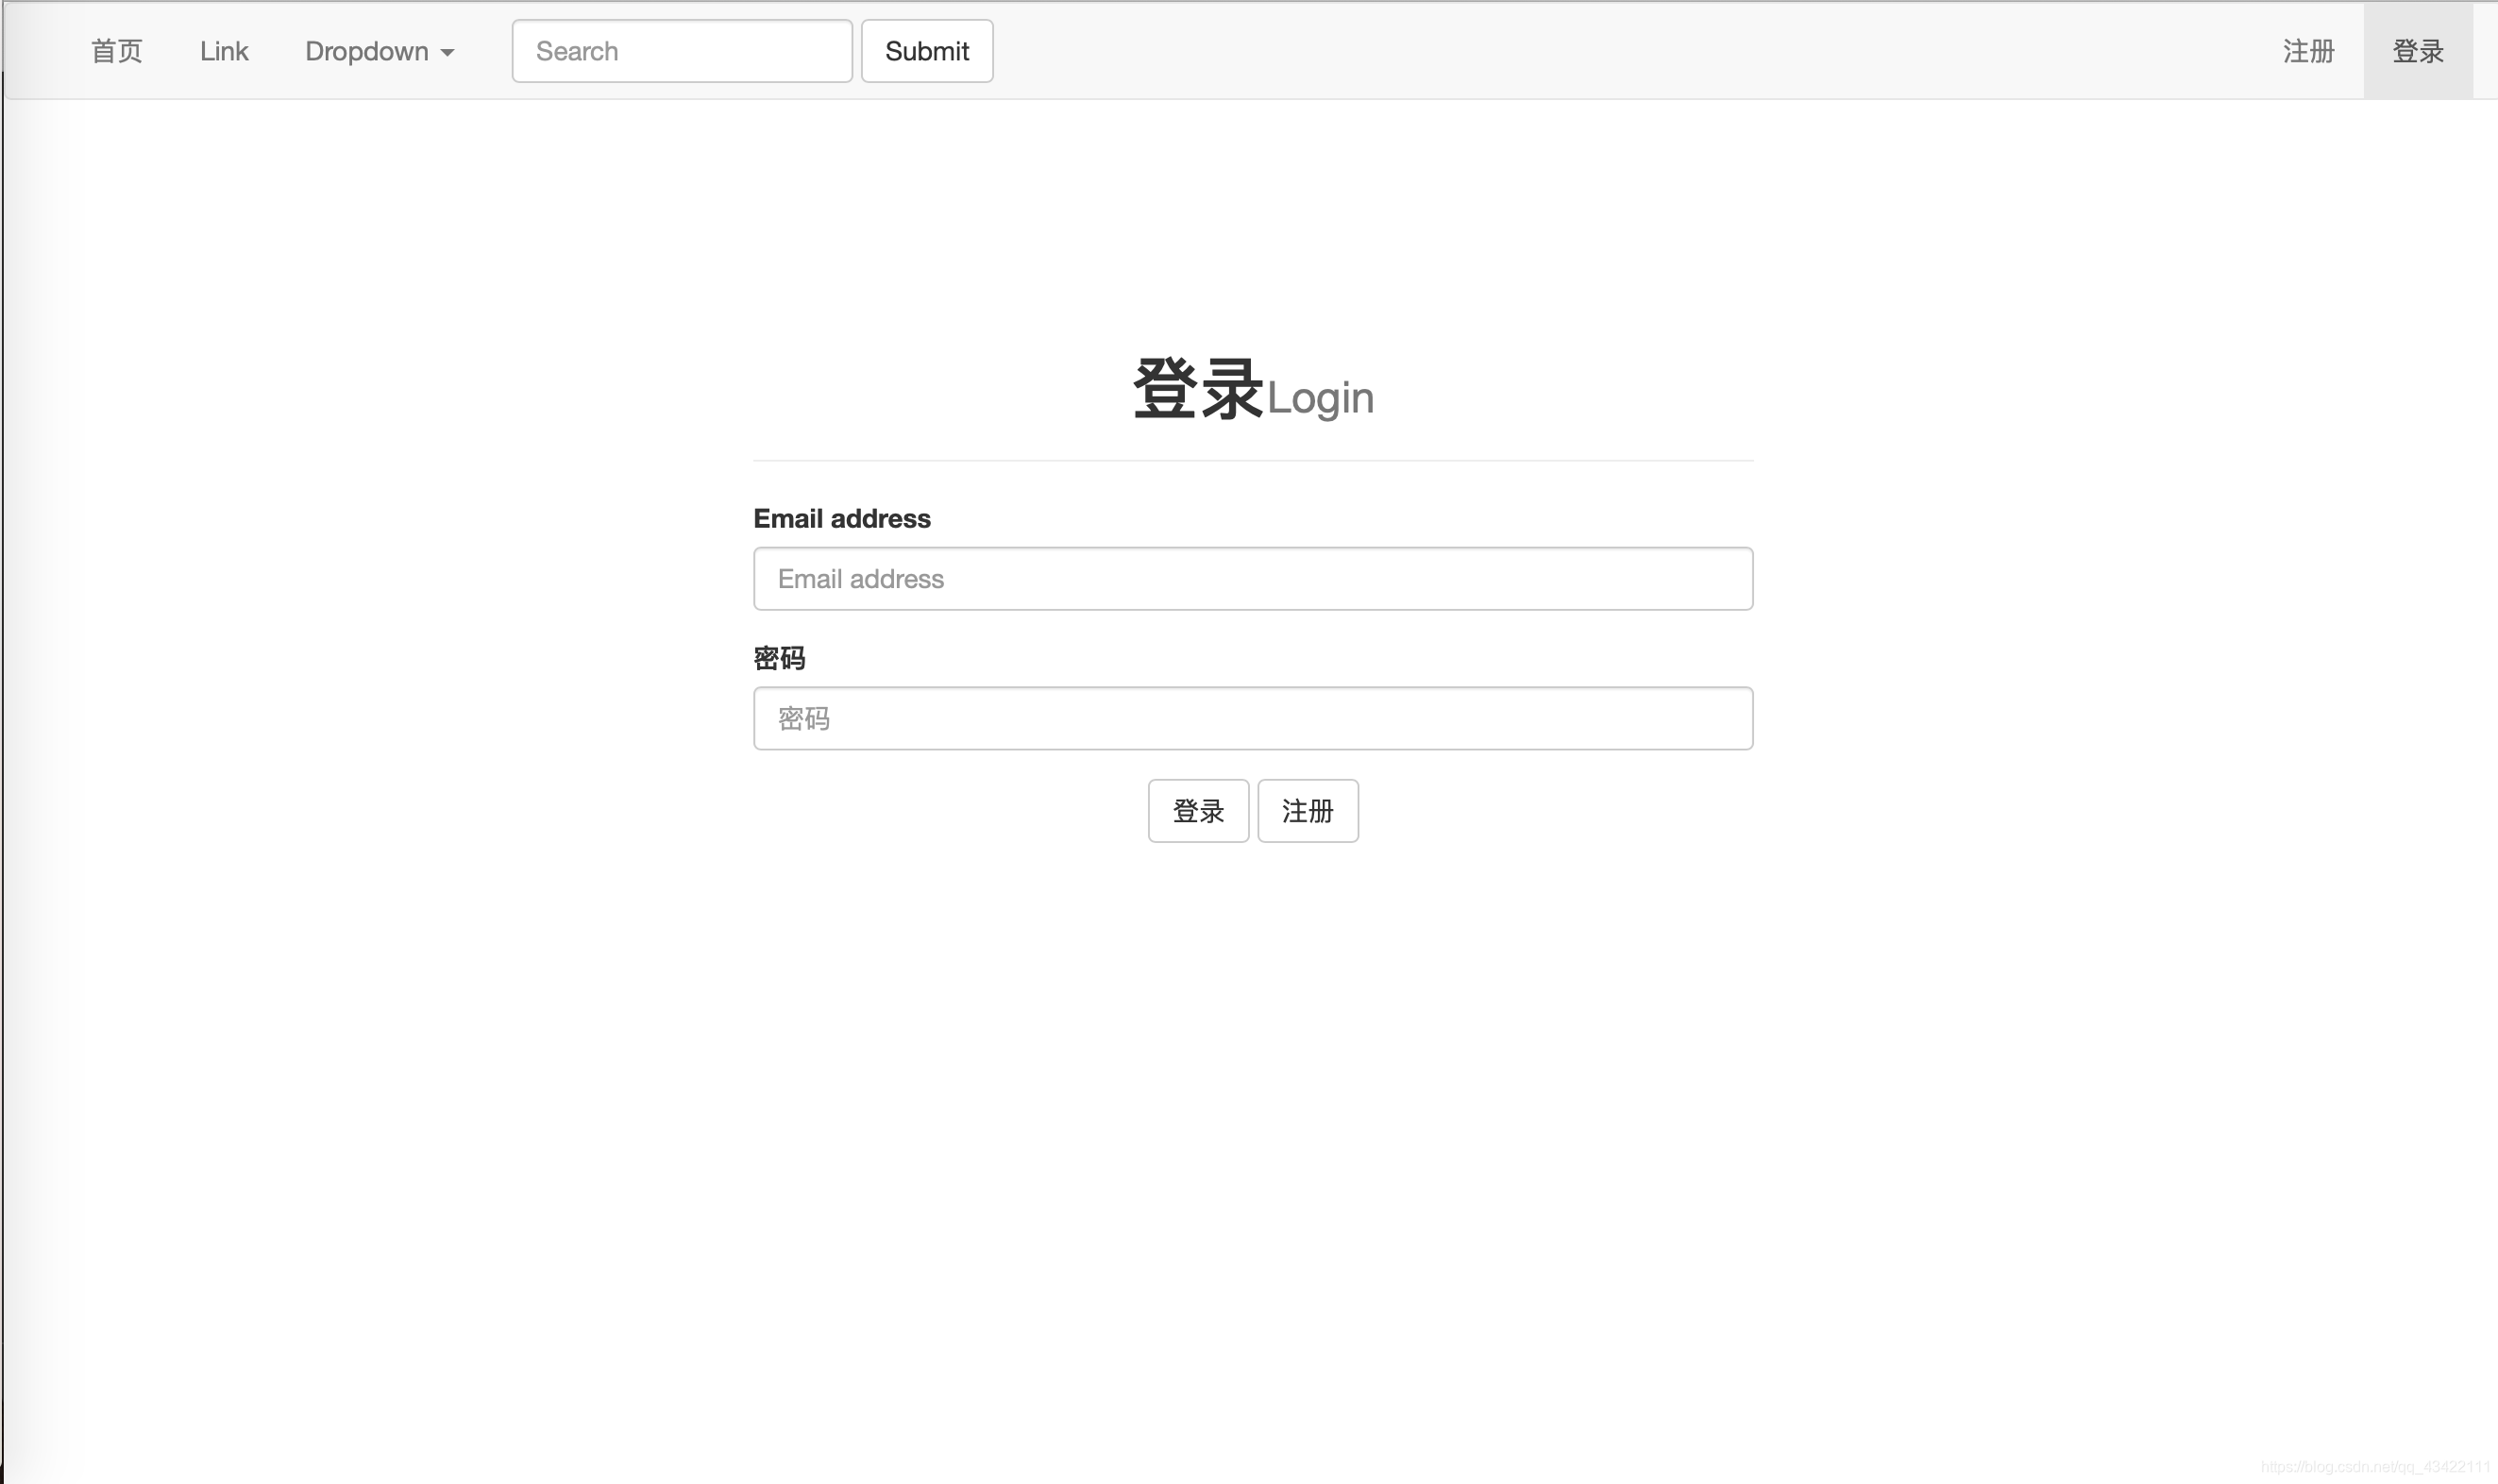
在登录页面完成之后,我们同时修改一下导航条的内容,在base.html中,将首页的导航修改为:
<li class="{% block login_class %} {% endblock %}"><a href="{{ url_for('login') }}">登录</a></li>
如果不修改base的话,直接运行上面的html修改之后的页面会报错,因为在login.html中使用了{% block login_class %} {% endblock %},这个是刚刚在base.html中添加的block,用于标记当前页面。
修改完成之后我们的登录页面效果为:
4.3.2 登录功能实现-后端
登录功能的后端我们主要分为两部分,一个是接受表单并验证表单信息的正确性,并进行反馈,第二部分就是登录状态的保持,下面我们将分这两部分来实现后端的功能。
4.3.2.1 登录功能实现-后端-验证登录信息
这里同样的,我们登录的表单为了安全性,一般都使用POST来发送,这里先设置允许的请求方式。
@app.route('/login',methods=['GET','POST'])
然后我们来获取前端的Email和密码:
# 登录页面
@app.route('/login',methods=['GET','POST'])
def login():
    if request.method == 'GET':
        return render_template('login.html')
    if request.method == 'POST':
        email = request.form.get('email')
        password = request.form.get('password')
然后为了防止出错,我们先验证数据的完整性:
if not all([email,password]):
    flash("请将信息填写完整!")
    return render_template('login.html')
然后我们来验证密码是否正确,首先我们先从数据库中获取当前登录email的密码,并验证它,如果密码不存,则说明该用户不存在,即未注册,我们返回提示。如果密码存在,那么我就获取密码,然后使用check_password_hash()函数来验证它,如果密码正确,我们将用户名(即email)放入session中,方便我们下面进行实现登录状态保持的功能。
代码为:
# 登录页面
@app.route('/login',methods=['GET','POST'])
def login():
    if request.method == 'GET':
        return render_template('login.html')
    if request.method == 'POST':
        email = request.form.get('email')
        password = request.form.get('password')
        if not all([email,password]):
            flash("请将信息填写完整!")
            return render_template('login.html')
        try:
            cur = db.cursor()
            sql = "select password from UserInformation where email = '%s'" % email
            db.ping(reconnect=True)
            cur.execute(sql)
            result = cur.fetchone()
            if result is None:
                flash("该用户不存在")
                return render_template('login.html')
            if check_password_hash(result[0],password):
                session['email'] = email
                session.permanent = True
                return redirect(url_for('index'))
            else:
                flash("密码错误!")
                return render_template('login.html')
        except Exception as e:
            raise e
这样我们的登录的基本功能就实现了,大家可以去测试下,如果登录正常则会返回首页,如果登录失败则会显示各种各样的提示。下面我们就要实现登录的另一个功能,登录状态保持,我们登录之后如何让系统一直保持我们的登录状态呢?
4.3.2.2 登录功能实现-后端-登录状态保持
要实现登录状态保持,我们这里可以使用上下文钩子函数来一直保持登录状态。
# 登录状态保持
@app.context_processor
def login_status():
    # 从session中获取email
    email = session.get('email')
    # 如果有email信息,则证明已经登录了,我们从数据库中获取登陆者的昵称和用户类型,来返回到全局
    if email:
        try:
            cur = db.cursor()
            sql = "select nickname,type from UserInformation where email = '%s'" % email
            db.ping(reconnect=True)
            cur.execute(sql)
            result = cur.fetchone()
            if result:
                return {'email':email,'nickname':result[0] ,'user_type':result[1]}
        except Exception as e:
            raise e
    # 如果email信息不存在,则未登录,返回空
    return {}
有了登录状态保持之后,我们就可以再次的修改导航条,将右侧的注册登录进行修改,当未登录时,显示登录注册,当已登录的时候,显示注销和{ 用户昵称 },用户昵称处我们可以使用下拉列表,等后期我们会在此添加功能。
修改之后的导航栏右面内容为:
{% if email %}
    <li class="{% block login_out_class %}{% endblock %}"><a href="{{ url_for('register') }}">注销</a></li>
    <li class="dropdown">
      <a href="#" class="dropdown-toggle" data-toggle="dropdown" role="button" aria-haspopup="true" aria-expanded="false">{{ nickname }} <span class="caret"></span></a>
      <ul class="dropdown-menu">
        <li><a href="#">Action</a></li>
        <li><a href="#">Another action</a></li>
        <li><a href="#">Something else here</a></li>
        <li role="separator" class="divider"></li>
        <li><a href="#">Separated link</a></li>
      </ul>
    </li>
{% else %}
    <li class="{% block register_class %}{% endblock %}"><a href="{{ url_for('register') }}">注册</a></li>
    <li class="{% block login_class %} {% endblock %}"><a href="{{ url_for('login') }}">登录</a></li>
{% endif %}
这样我们登录之后的页面效果为:
为了防止小伙伴不知道上面的这段代码到底在哪里修改,这里再贴一下修改后的base.html的全部代码:这里的注销的链接还没有写,在等会我们实现了注销的功能之后再在这里添加链接。
<!DOCTYPE html>
<html lang="en">
<head>
    <meta charset="UTF-8">
    <title>
        {% block title %}
{#        其他页面重写标题的地方#}
        {% endblock %}
    </title>
    {% block css %}
{#    其他页面引用样式或者js的地方#}
    {% endblock %}
    <script src="https://cdn.bootcss.com/jquery/3.4.1/jquery.js"></script>
    <script src="https://cdn.bootcss.com/twitter-bootstrap/3.4.0/js/bootstrap.min.js"></script>
    <link href="https://cdn.bootcss.com/twitter-bootstrap/3.4.0/css/bootstrap.min.css" rel="stylesheet">
</head>
<body>
    <div class="navigation_bar">
        <nav class="navbar navbar-default">
          <div class="container-fluid">
{#              由于这里我们不需要使用商标,所以对Bran部分进行了删除#}
            <!-- Collect the nav links, forms, and other content for toggling -->
            <div class="collapse navbar-collapse" id="bs-example-navbar-collapse-1">
              <ul class="nav navbar-nav">
                <li class="{% block homepage_class %}{% endblock %}"><a href="{{ url_for('index') }}">首页<span class="sr-only">(current)</span></a></li>
                <li><a href="#">Link</a></li>
                <li class="dropdown">
                  <a href="#" class="dropdown-toggle" data-toggle="dropdown" role="button" aria-haspopup="true" aria-expanded="false">Dropdown <span class="caret"></span></a>
                  <ul class="dropdown-menu">
                    <li><a href="#">Action</a></li>
                    <li><a href="#">Another action</a></li>
                    <li><a href="#">Something else here</a></li>
                    <li role="separator" class="divider"></li>
                    <li><a href="#">Separated link</a></li>
                    <li role="separator" class="divider"></li>
                    <li><a href="#">One more separated link</a></li>
                  </ul>
                </li>
              </ul>
              <form class="navbar-form navbar-left">
                <div class="form-group">
                  <input type="text" class="form-control" placeholder="Search">
                </div>
                <button type="submit" class="btn btn-default">Submit</button>
              </form>
              <ul class="nav navbar-nav navbar-right">
                {% if email %}
                    <li class=""><a href="{{ url_for('register') }}">注销</a></li>
                    <li class="dropdown">
                      <a href="#" class="dropdown-toggle" data-toggle="dropdown" role="button" aria-haspopup="true" aria-expanded="false">{{ nickname }} <span class="caret"></span></a>
                      <ul class="dropdown-menu">
                        <li><a href="#">Action</a></li>
                        <li><a href="#">Another action</a></li>
                        <li><a href="#">Something else here</a></li>
                        <li role="separator" class="divider"></li>
                        <li><a href="#">Separated link</a></li>
                      </ul>
                    </li>
                {% else %}
                    <li class="{% block register_class %}{% endblock %}"><a href="{{ url_for('register') }}">注册</a></li>
                    <li class="{% block login_class %} {% endblock %}"><a href="{{ url_for('login') }}">登录</a></li>
                {% endif %}
              </ul>
            </div><!-- /.navbar-collapse -->
          </div><!-- /.container-fluid -->
        </nav>
    </div>
    <div>
        {% block content %}
{#        其他页面重写页面内容的地方#}
        {% endblock %}
    </div>
</body>
</html>
4.4 注销功能实现
下面我们就来完成用户的注销功能,其实注销功能实现很简单,我们这里就简单粗暴的将session清空即可达到注销的效果,清空之后我们重定向到首页即可。
# 用户注销
@app.route('/logout')
def logout():
    session.clear()
    return redirect(url_for(('index')))
4.5 主页实现
其实这里排版有一点小小的失误,我们应该第一个实现首页的,不过现在实现也并不影响。首页我们需要的功能很简单,找个漂亮唯美的背景图,中间加上几个"在线论坛系统"大字即可,一个漂漂亮亮的首页就完成了,因为我们目前首页不需要别的功能在,暂时就设置这样子就好了,我们先去随便找一个唯美的风景图。我们这里在百度图库中随便找了一个,然后把它下载放到我们的/static/img文件中。然后在我们之前创建的index.html中插入这张图片,再创建一个index.css,对样式进行调整。
在插入之后我们发现图片和上面导航栏会有一点点的空隙,看着还不舒服。这里我们需要为base.html创建一个base.css来设置一下导航条的样式,为他设置height = 52px;这样会无缝衔接,这个值也可以稍微大一点。然后我们在base.html中引入样式。
.navigation_bar{
    height: 52px;
}
<link rel="stylesheet" href="/static/css/base.css">
这样之后我们的图片就可以无缝衔接了。我们的图片是作为一个大的div背景图片插入的,这样方便我们在上面进行显示标题。下面直接贴代码:
index.html:
{% extends 'base.html' %}

{% block title %}
主页
{% endblock %}

{% block css %}
<link rel="stylesheet" href="/static/css/index.css">
{% endblock %}

{% block content %}
<div class="index_content">
    <div class="index_title">
        <h1>在线论坛系统<small>Online Forum Platform</small></h1>
    </div>
</div>
{% endblock %}
index.css:
.index_content{
    margin: 0;
    padding: 0;
    width: 100%;
    /*这里由于图片高为1200,所以直接设置了1200,大家可以可以根据自己的需求进行设置*/
    height: 1200px;
    background-image: url("/static/img/index.jpeg");
}
.index_title{
    text-align: center;
    padding: 20% 20%;
}
.index_title h1{
    font-style: italic;
    font-size: 60px;
    text-shadow: 0.15em 0.15em 0.1em #333;
    font-weight: bolder;
}
在app.py中,我们主页的路由暂时只需要返回页面即可:
# 主页
@app.route('/')
def index():
    return render_template('index.html')
下面来让我们看一下主页的效果图:(博客直男审美,各位可以自己设计主页的效果)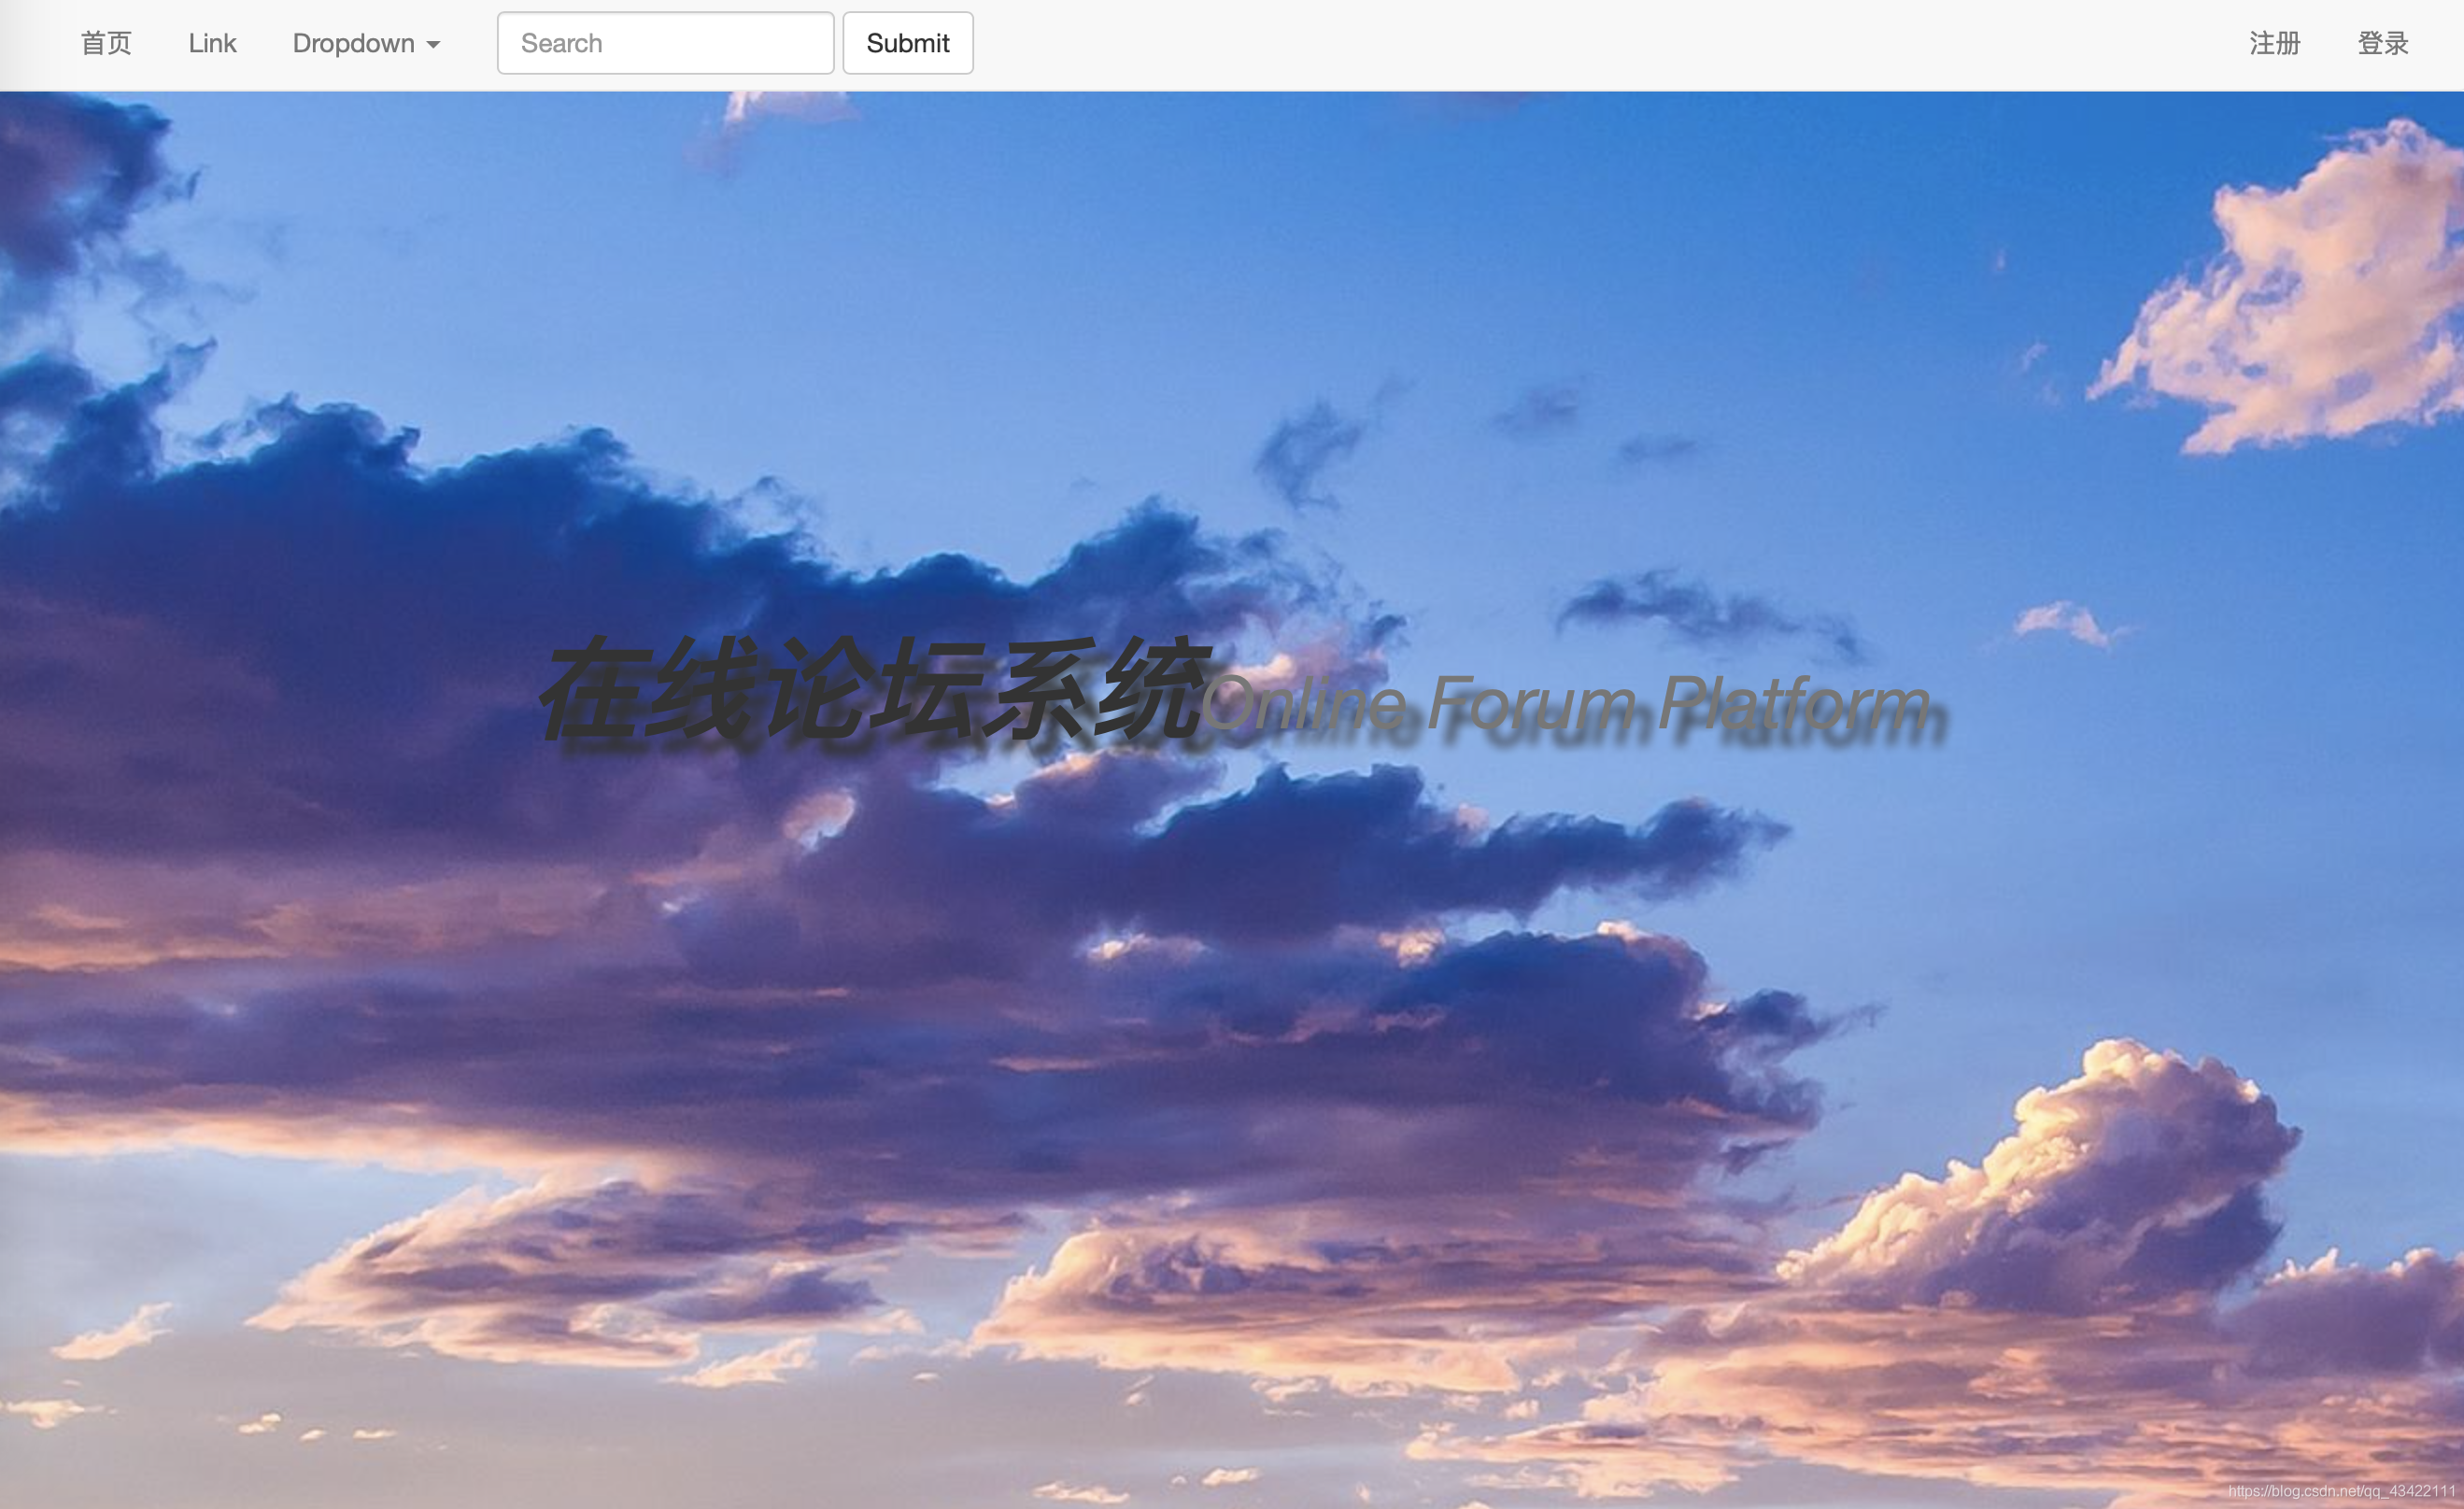
好了,第四部分就讲到这里,下面我们将继续实现论坛的功能,该到了实现论坛真正功能的时候,这部分主要是各个系统都通用的功能:导航条、登录、注册、注销、主页。大家都顺利实现了吗?如果有什么问题可以评论区里进行询问,如果喜欢这篇文章的话,可以点赞关注支持下博主。
五、发布帖子、论坛页面实现
本项目所有源码在GitHub开源,GitHub地址为:OnlineForumPlatform
有需要源码可以前去查看,喜欢的话可以star一下
下面就开始第五部分的内容了,这部分将会带领大家一起实现论坛的主体功能,论坛的问题列表,帖子详情页面,发布帖子,回答问题等功能,让这个在线论坛系统成为一个“真正的论坛”,让他具有论坛的功能。
博主的站内博客导航:博客文章内容导航(实时更新)
更多精彩博客文章推荐
- 一本教你如何在前端实现富文本编辑器
- 小白都能看得懂的教程 一本教你如何在前端实现markdown编辑器
- 一文教会你Bootstrap,让你也可以快速建站
- 一文教你如何白嫖JetBrains全家桶(IDEA/PtChram/CLion)免费正版
5.1 发布帖子的功能实现
在这里的haul,由于问题列表等页面,没问题的话无法具体的进行显示,所以这里我们先开发发布问题的功能,然后再开发问题列表页面。
5.1.1 发布帖子的实现-前端
前端的话我们先实现一个富文本编辑器来实现信息的编辑,使我们编辑的文章具有格式化,如果不知道如何在前端嵌入富文本编辑器的话,可以看我之前的博客:一本教你如何在前端实现富文本编辑器:一本教你如何在前端实现富文本编辑器如果需要创建Markdown文本编辑器的话,也可以看博主的博客:小白都能看得懂的教程 一本教你如何在前端实现富文本编辑器
在此基础上,我们来设计我们的前端页面。
这里我们直接上代码:
post_issue.css:
.post_issue_content{
    margin-left: 20%;
    margin-right: 20%;
}

#page_header{
    text-align: center;
}

#issue_titile_div{
    height: 35px;
    margin: 0;
}

/*设置富文本编辑器默认的高度*/
#edui1_iframeholder{
    height: 200px;
}

#inputEmail3{
    margin-left: 0;
    padding-left: 0;
    width: 100%;
}

#post_issue_butt{
    margin-top: 60px;
    text-align: center;
    height: 35px;
}

#post_issue_butt button{
    height: 35px;
}
post_issue.html:
{% extends 'base.html' %}

{% block title %}
发布帖子
{% endblock %}

{% block css %}
    <link rel="stylesheet" href="/static/css/post_issue.css">
    <!-- 引入配置文件 -->
    <script src="/static/ueditor/ueditor.config.js"}></script>
    <!-- 引入编辑器源码文件 -->
    <script src="/static/ueditor/ueditor.all.min.js"}></script>
{% endblock %}

{% block content %}
<div class="post_issue_content">
    <div class="page-header" id="page_header">
      <h1>发布帖子<small>Post issue</small></h1>
    </div>
    <form class="post_issue_form">
        <div class="form-group" id="issue_titile_div">
            <input type="text" class="form-control" name="title" id="inputEmail3" placeholder="请输入标题">
        </div>
        <div class="ueditor_div">
            <script id="editor" type="text/plain">
                请输入发布的内容!

            </script>
        </div>
        <div id="post_issue_butt">
          <button type="submit" class="btn btn-default">发布帖子</button>
        </div>
    </form>
</div>
<!-- 实例化编辑器 -->
<script type="text/javascript">
    var editor = UE.getEditor('editor');
</script>
{% endblock %}

{% block post_issue_class %}
active
{% endblock %}
同时我们也可以修改下导航栏的右端,使登录时,显示发布帖子的导航,如果不修改,则需要将post_issue.html的最后三行删除,否则会报错。
添加的内容为:添加在注销的标签之前即可.
<li class="{% block post_issue_class %}{% endblock %}"><a href="{{ url_for('post_issue') }}">发布帖子</a></li>
为了方便调试,我们这里在app.py中添加了发布帖子的路由:
# 发布帖子
@app.route('/post_issue')
def post_issue():
    return render_template('post_issue.html')
此时发布帖子的前端页面效果为:

至此,我们发布帖子的前端页面就完成了,页面还算不错,下面我们继续完成其他的功能。
5.1.2 发布帖子的实现-数据库
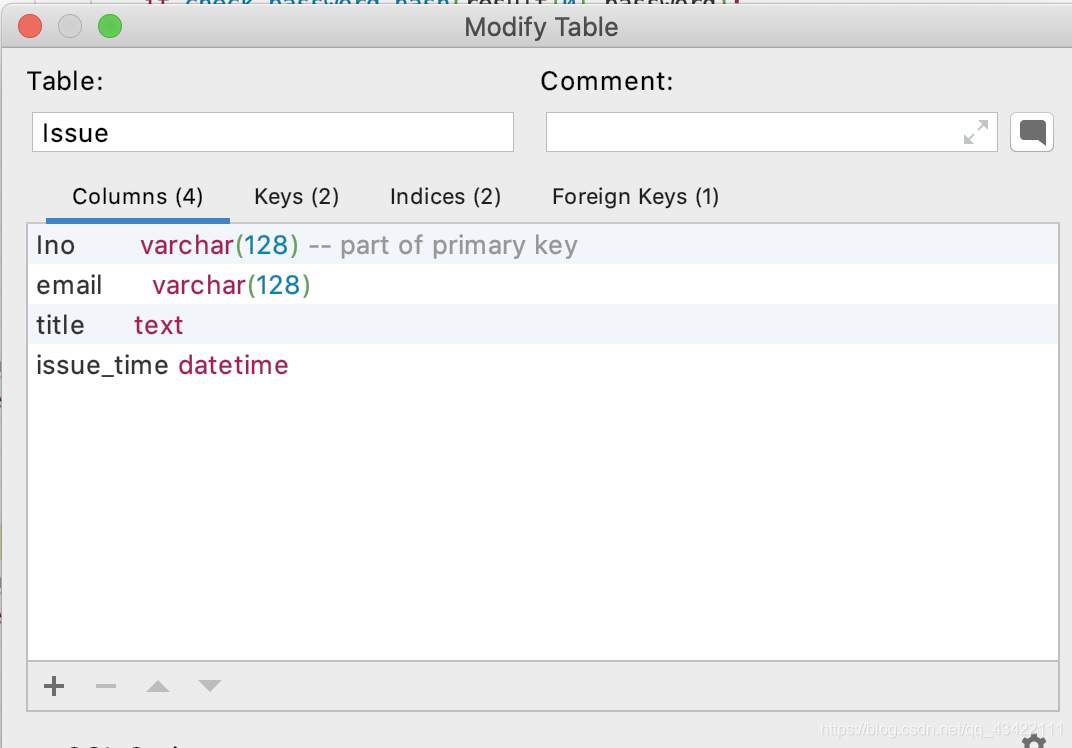
下面我们来设计帖子的数据库。首先我们需要明确我们需要存储哪些内容:标题、内容、发布人的Id(即email)、发布时间、帖子号(用来唯一标示一个帖子)。但是由于我们是一个论坛,里面的内容还需要很多人来回复,因此我们设计成2个表,分别为Issue和Comment,使用Issue表存储每个Issue的标题、发布人、发布时间、Issue号,使用Comment来存储每个评论(包括第一楼,发帖人的内容作为第一楼)的内容、发布人、发布时间和Connment号。
Issue表为:其中需要添加外键,email依赖UserInformation的email
SQL描述为:
create table Issue
(
	Ino varchar(128) null,
	email varchar(128) not null,
	title text default null,
	issue_time datetime null,
	constraint Issue_UserInformation_email_fk
		foreign key (email) references UserInformation (email)
);

create unique index Issue_Ino_uindex
	on Issue (Ino);

alter table Issue
	add constraint Issue_pk
		primary key (Ino);
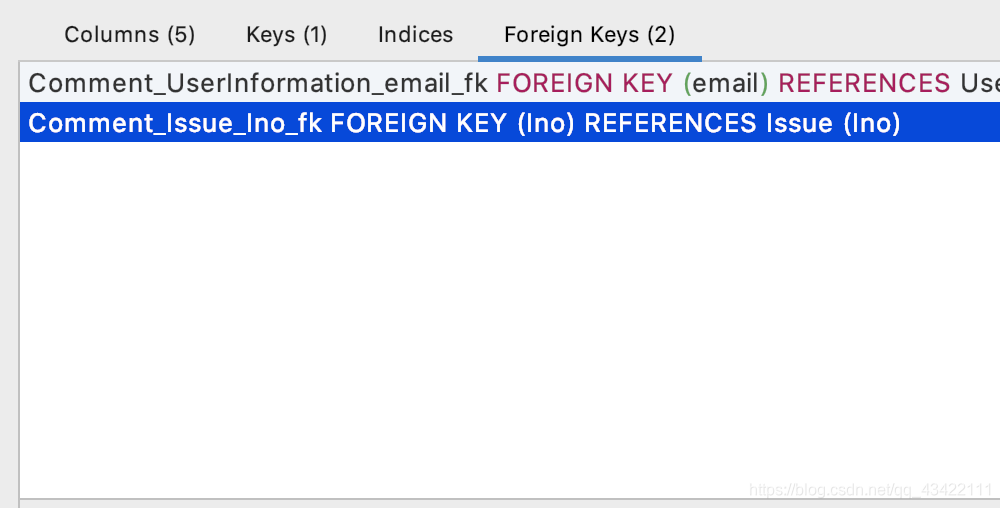
Comment表为:
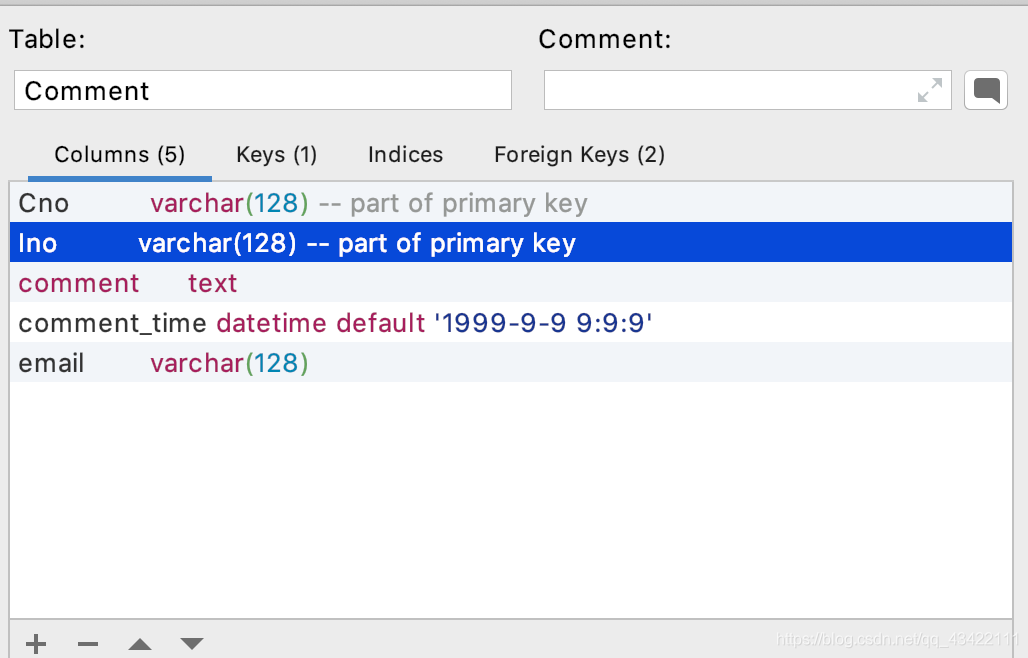
SQL语句为:
create table Comment
(
	Cno varchar(128) not null,
	Ino varchar(128) not null,
	comment text null,
	comment_time datetime default '1999-9-9 9:9:9' not null,
	email varchar(128) null,
	constraint Comment_pk
		primary key (Cno, Ino),
	constraint Comment_Issue_Ino_fk
		foreign key (Ino) references Issue (Ino),
	constraint Comment_UserInformation_email_fk
		foreign key (email) references UserInformation (email)
);
这样我们发布帖子需要使用的数据库就完成啦。
5.1.3 发布帖子的实现-后端
下面我们来完成发布帖子的后端实现。首先我们先这是允许的请求方式
@app.route('/post_issue',methods=['GET','POST'])
然后我们再去将post_issue.html中的form的method设置为post:
<form class="post_issue_form" method="post">
我们开始来后端获取前端发送的标题和内容:
title = request.form.get('title')
comment = request.form.get('editorValue')
然后我们来获取发布人(也就是当前登录账号),当前时间。
email = session.get('email')
issue_time = time.strftime("%Y-%m-%d %H:%M:%S")
下面我们开始获取Issue号,这里我们获取数据库中最大的Issue号,然后将它+1即可,如果没有,那么我们就设为1。
try:
    cur = db.cursor()
    sql = "select max(Ino) from Issue"
    db.ping(reconnect=True)
    cur.execute(sql)
    result = cur.fetchone()
    if result is None:
        Ino = int(1)
    else:
        Ino = int(request[0]) + 1
except Exception as e:
    raise e
所有需要获取的数据都获取好了,我们将数据存入数据库中,这样发布帖子的功能也就算是完成了。在Issue中,为了信息安全起见,我们使用128位随机数来作为ID,具体使用在代码中体现。
后端代码为;
# 生成128随机id
def gengenerateID():
    re = ""
    for i in range(128):
        re += chr(random.randint(65, 90))
    return re


# 发布帖子
@app.route('/post_issue', methods=['GET', 'POST'])
def post_issue():
    if request.method == 'GET':
        return render_template('post_issue.html')
    if request.method == 'POST':
        title = request.form.get('title')
        comment = request.form.get('editorValue')
        email = session.get('email')
        issue_time = time.strftime("%Y-%m-%d %H:%M:%S")
        try:
            cur = db.cursor()
            Ino = gengenerateID()
            sql = "select * from Issue where Ino = '%s'" % Ino
            db.ping(reconnect=True)
            cur.execute(sql)
            result = cur.fetchone()
            # 如果result不为空,即存在该ID,就一直生成128位随机ID,直到不重复位置
            while result is not None:
                Ino = gengenerateID()
                sql = "select * from Issue where Ino = '%s'" % Ino
                db.ping(reconnect=True)
                cur.execute(sql)
                result = cur.fetchone()
            sql = "insert into Issue(Ino, email, title, issue_time) VALUES ('%s','%s','%s','%s')" % (
            Ino, email, title, issue_time)
            db.ping(reconnect=True)
            cur.execute(sql)
            db.commit()
            sql = "insert into Comment(Cno, Ino, comment, comment_time, email) VALUES ('%s','%s','%s','%s','%s')" % (
            '1', Ino, comment, issue_time, email)
            db.ping(reconnect=True)
            cur.execute(sql)
            db.commit()
            return render_template('post_issue.html')
        except Exception as e:
            raise e
这样我们发布帖子的整体功能就是完成了,下面我们再来完成显示帖子列表的功能,让我们发布的帖子显示出来。
5.2 论坛页面的实现
5.2.1 论坛页面的实现-前端
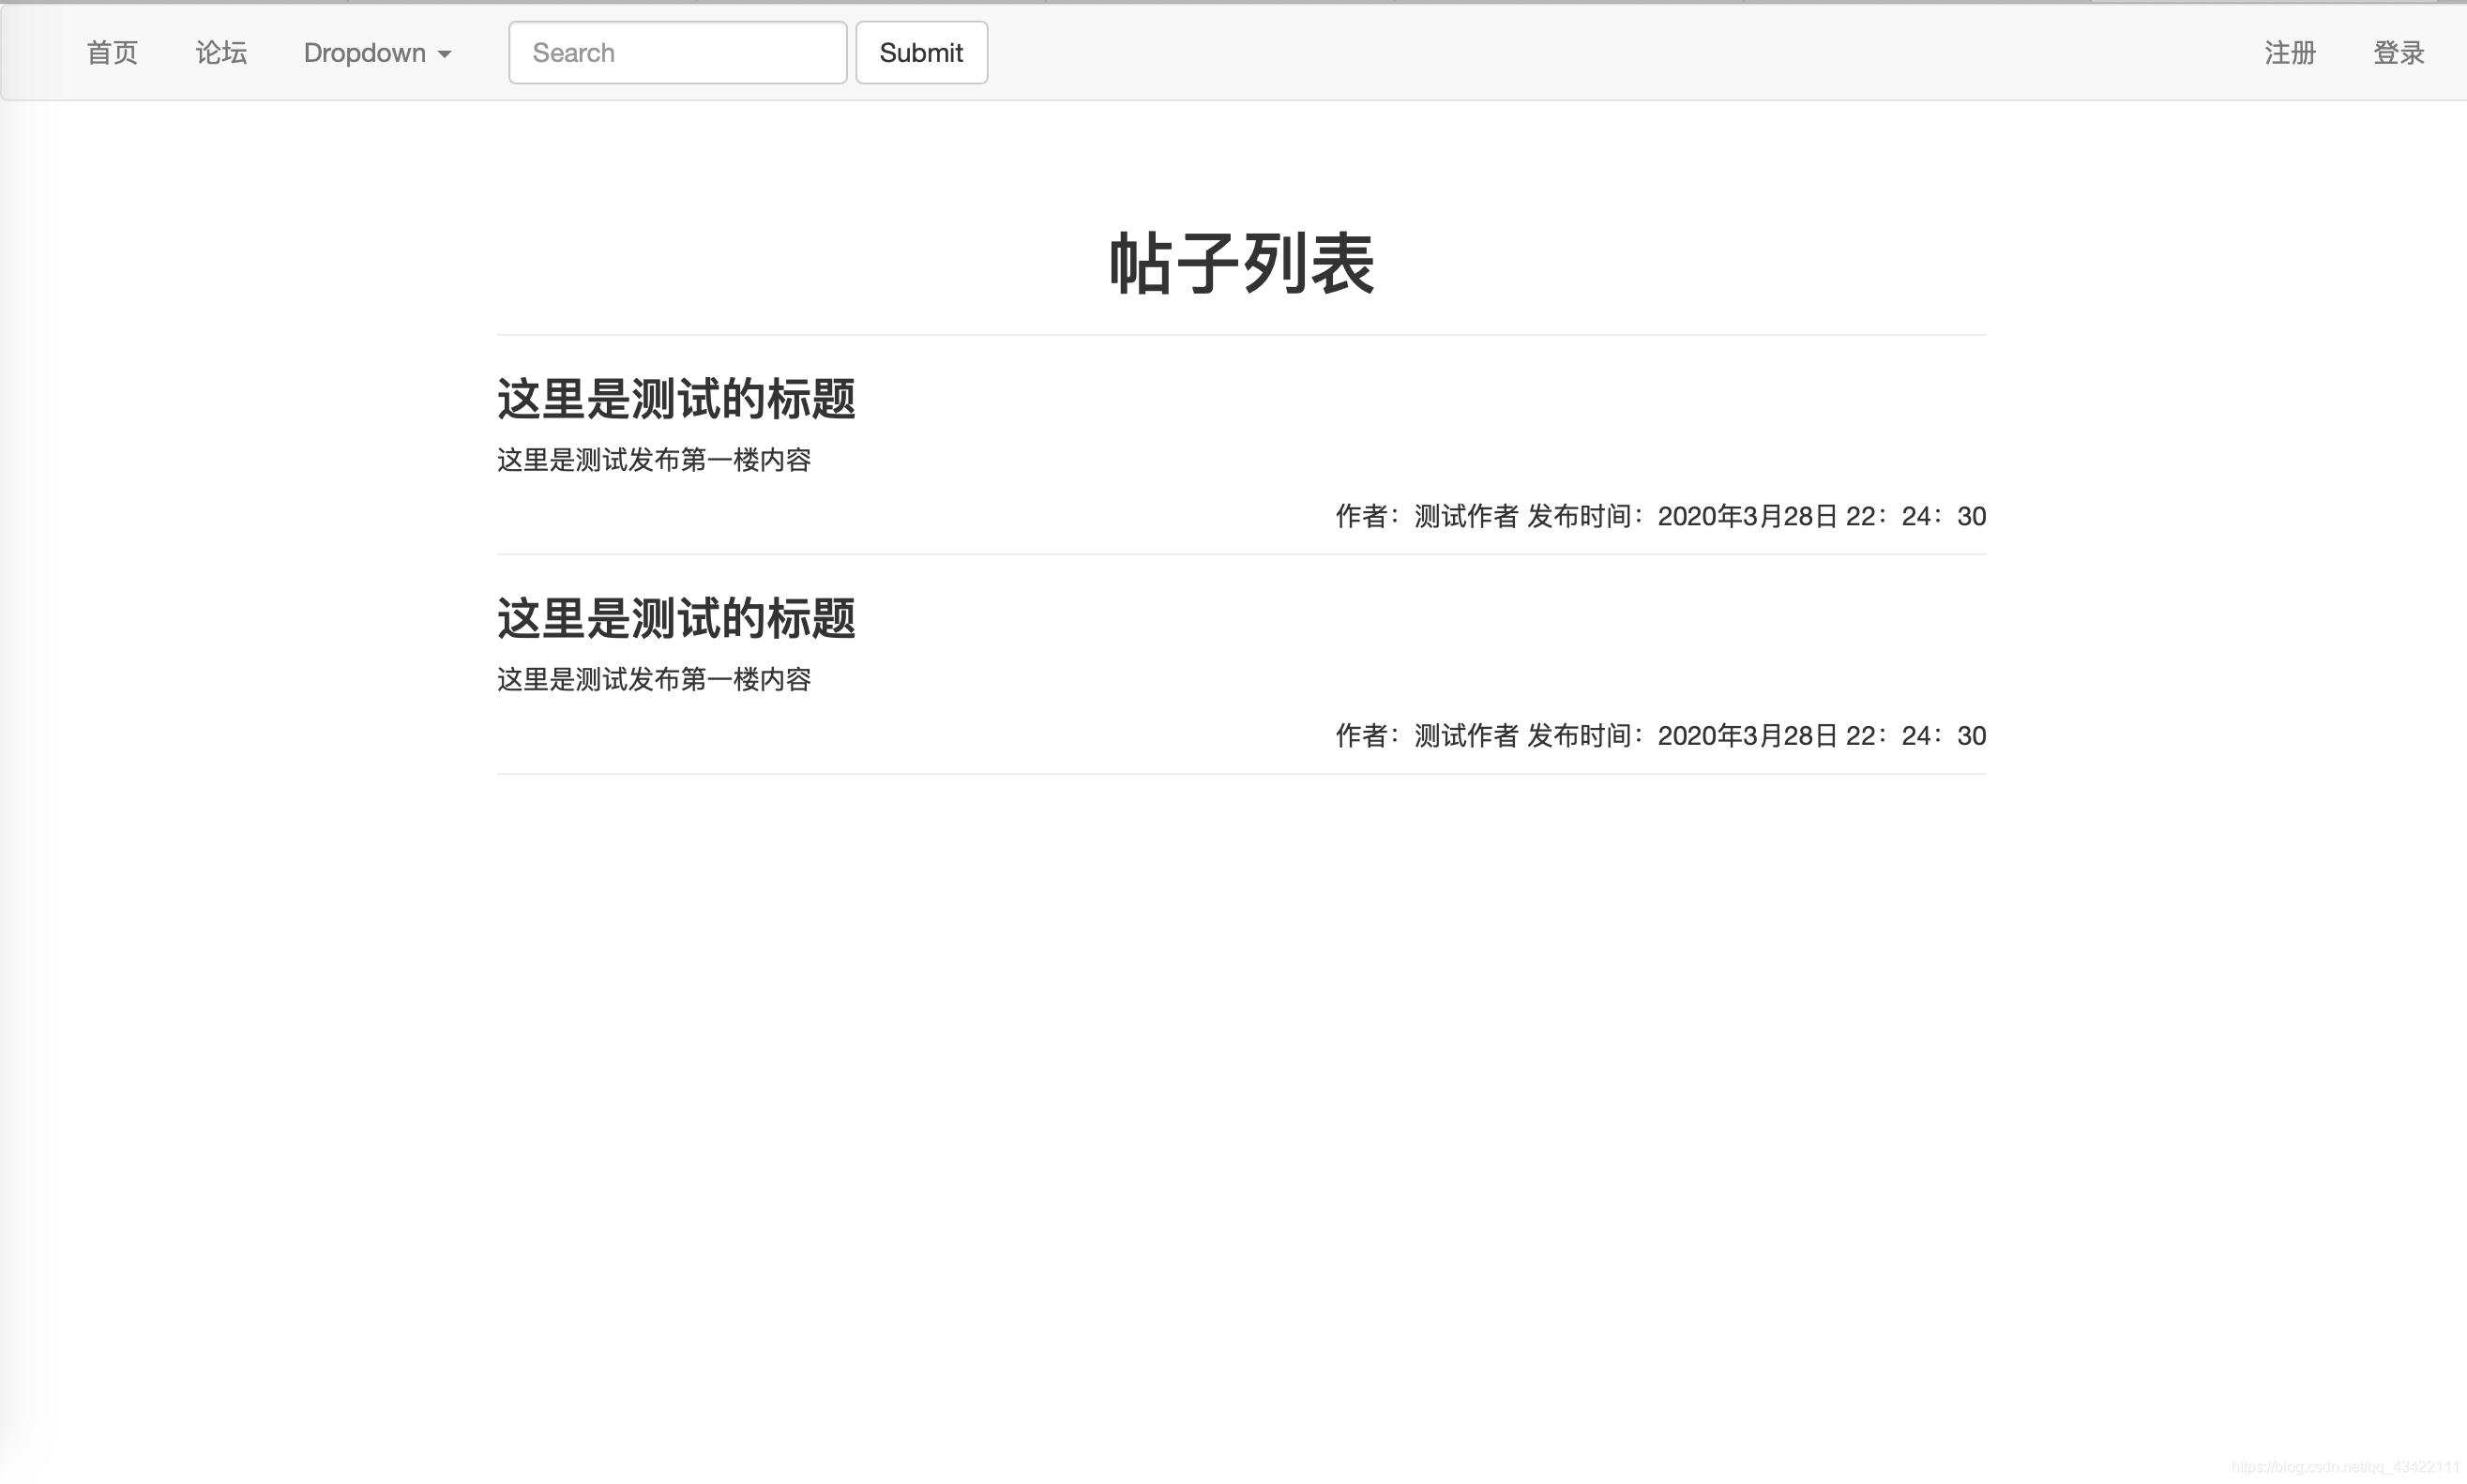
论坛页面我们先简单做一个帖子列表的显示,后续有新功能的话,我们再来添加。这里没有什么东西,这里先设置一个简洁的页面,具体的功能完后面再逐渐的去完善,手把手的带你完成这个项目的全部过程。下面我们直接上效果图和代码吧,都是上面细讲过的东西,一个简单的ul构成的页面。这里的页面是静态的,等我们完成后端功能之后,我们再来将这里修改为一个动态的更新。
效果图为:
formula.css代码:
.formula_content{
    margin: 5% 20%;
}

#page_header{
    text-align: center;
}

.issue_list_ul{
    list-style-type: none;
    margin-left: 0;
    padding-left: 0;
}
.author_info{
    text-align: right;
}

.issue_div{
    border-bottom:1px solid #eee;
}

.issue_content{
    max-height: 200px;
}
formula.html代码;
{% extends 'base.html' %}

{% block title %}
论坛
{% endblock %}

{% block css %}
<link rel="stylesheet" href="/static/css/formula.css">
{% endblock %}

{% block content %}
<div class="formula_content">
    <div class="page-header" id="page_header">
        <h1>帖子列表</h1>
    </div>
    <div class="issue_list_div">
        <ul class="issue_list_ul">
            <li class="issue_list_li">
                <div class="issue_div">
                    <div class="issue_content">
                        <h3>
                            这里是测试的标题
                        </h3>
                        <p>
                            这里是测试发布第一楼内容
                        </p>
                    </div>
                    <div class="author_info">
                        <p class="post-info">
                            <span>作者:测试作者</span>
                            <span>发布时间:2020年3月28日 22:24:30</span>
                        </p>
                    </div>
                </div>
            </li>
        </ul>
    </div>
</div>

{% endblock %}
{% block formula_class %}
active
{% endblock %}
在这里设置了block,在base.html进行了添加,如果base.html不修改的话,把最后3行删掉,否则会报错。在base.html中添加了论坛的导航<li class="{% block formula_class %}{% endblock %}"><a href="{{ url_for('formula') }}">论坛</a></li>
修改完之后的base.html全部代码为:
<!DOCTYPE html>
<html lang="en">
<head>
    <meta charset="UTF-8">
    <title>
        {% block title %}
{#        其他页面重写标题的地方#}
        {% endblock %}
    </title>
    {% block css %}
{#    其他页面引用样式或者js的地方#}
    {% endblock %}
    <link rel="stylesheet" href="/static/css/base.css">
    <script src="https://cdn.bootcss.com/jquery/3.4.1/jquery.js"></script>
    <script src="https://cdn.bootcss.com/twitter-bootstrap/3.4.0/js/bootstrap.min.js"></script>
    <link href="https://cdn.bootcss.com/twitter-bootstrap/3.4.0/css/bootstrap.min.css" rel="stylesheet">
</head>
<body>
    <div class="navigation_bar">
        <nav class="navbar navbar-default">
          <div class="container-fluid">
{#              由于这里我们不需要使用商标,所以对Bran部分进行了删除#}
            <!-- Collect the nav links, forms, and other content for toggling -->
            <div class="collapse navbar-collapse" id="bs-example-navbar-collapse-1">
              <ul class="nav navbar-nav">
                <li class="{% block homepage_class %}{% endblock %}"><a href="{{ url_for('index') }}">首页<span class="sr-only">(current)</span></a></li>
                <li class="{% block formula_class %}{% endblock %}"><a href="{{ url_for('formula') }}">论坛</a></li>
                <li class="dropdown">
                  <a href="#" class="dropdown-toggle" data-toggle="dropdown" role="button" aria-haspopup="true" aria-expanded="false">Dropdown <span class="caret"></span></a>
                  <ul class="dropdown-menu">
                    <li><a href="#">Action</a></li>
                    <li><a href="#">Another action</a></li>
                    <li><a href="#">Something else here</a></li>
                    <li role="separator" class="divider"></li>
                    <li><a href="#">Separated link</a></li>
                    <li role="separator" class="divider"></li>
                    <li><a href="#">One more separated link</a></li>
                  </ul>
                </li>
              </ul>
              <form class="navbar-form navbar-left">
                <div class="form-group">
                  <input type="text" class="form-control" placeholder="Search">
                </div>
                <button type="submit" class="btn btn-default">Submit</button>
              </form>
              <ul class="nav navbar-nav navbar-right">
                {% if email %}
                    <li class="{% block post_issue_class %}{% endblock %}"><a href="{{ url_for('post_issue') }}">发布帖子</a></li>
                    <li class=""><a href="{{ url_for('register') }}">注销</a></li>
                    <li class="dropdown">
                      <a href="#" class="dropdown-toggle" data-toggle="dropdown" role="button" aria-haspopup="true" aria-expanded="false">{{ nickname }} <span class="caret"></span></a>
                      <ul class="dropdown-menu">
                        <li><a href="#">Action</a></li>
                        <li><a href="#">Another action</a></li>
                        <li><a href="#">Something else here</a></li>
                        <li role="separator" class="divider"></li>
                        <li><a href="#">Separated link</a></li>
                      </ul>
                    </li>
                {% else %}
                    <li class="{% block register_class %}{% endblock %}"><a href="{{ url_for('register') }}">注册</a></li>
                    <li class="{% block login_class %} {% endblock %}"><a href="{{ url_for('login') }}">登录</a></li>
                {% endif %}
              </ul>
            </div><!-- /.navbar-collapse -->
          </div><!-- /.container-fluid -->
        </nav>
    </div>
    <div class="content" style="padding: 0;margin: 0;">
        {% block content %}
{#        其他页面重写页面内容的地方#}
        {% endblock %}
    </div>
</body>
</html>
在这里为了方便我们使用url_for,所以我们需要在app.py中为formula设置路由:
# 论坛页面
@app.route('/formula')
def formula():
    return render_template('formula.html')
这就是前端部分了,下面我们再来实现论坛的后端功能
5.2.2 论坛页面的实现-后端
论坛页面后端的需要也很明显,就是要从数据库中将所有Issue数据返回到前端,在前端中显示。这里我们直接使用一个3表连接,将数据查出来,然后返回到前端:
# 论坛页面
@app.route('/formula')
def formula():
    if request.method == 'GET':
        try:
            cur = db.cursor()
                        sql = "select Issue.Ino, Issue.email,UserInformation.nickname,issue_time,Issue.title,Comment.comment from Issue,UserInformation,Comment where Issue.email = UserInformation.email and Issue.Ino = Comment.Ino and Cno = '1' order by issue_time DESC "
            db.ping(reconnect=True)
            cur.execute(sql)
            issue_information = cur.fetchall()
            cur.close()
            return render_template('formula.html',issue_information = issue_information)
        except Exception as e:
            raise e
然后我们在前端进行显示,这里我们在前端的部分将两个测试的li换成:
{% for issue in issue_information %}
<li class="issue_list_li">
<div class="issue_div">
<div class="issue_content">
<h3>
{{ issue[4] }}
</h3>
<article>
{{ issue[5]|safe }}
</article>
</div>
<div class="author_info">
<p class="post-info">
<span>作者:{{ issue[2] }}</span> 
<span>发布时间:{{ issue[3] }}</span>
</p>
</div>
</div>
</li>
{% endfor %}
这样就完成了,这里再贴一下完整的formula.html代码,防止有的同学不知道替换哪些内容:
{% extends 'base.html' %}
{% block title %}
论坛
{% endblock %}
{% block css %}
<link rel="stylesheet" href="/static/css/formula.css">
{% endblock %}
{% block content %}
<div class="formula_content">
<div class="page-header" id="page_header">
<h1>帖子列表</h1>
</div>
<div class="issue_list_div">
<ul class="issue_list_ul">
{% for issue in issue_information %}
<li class="issue_list_li">
<div class="issue_div">
<div class="issue_content">
<h3>
{{ issue[4] }}
</h3>
<article>
{{ issue[5]|safe }}
</article>
</div>
<div class="author_info">
<p class="post-info">
<span>作者:{{ issue[2] }}</span> 
<span>发布时间:{{ issue[3] }}</span>
</p>
</div>
</div>
</li>
{% endfor %}
<li class="issue_list_li">
<div class="issue_div">
<div class="issue_content">
<h3>
这里是测试的标题
</h3>
<p>
这里是测试发布第一楼内容
</p>
</div>
<div class="author_info">
<p class="post-info">
<span>作者:测试作者</span>
<span>发布时间:2020年3月28日 22:24:30</span>
</p>
</div>
</div>
</li>
<li class="issue_list_li">
<div class="issue_div">
<div class="issue_content">
<h3>
这里是测试的标题
</h3>
<p>
这里是测试发布第一楼内容
</p>
</div>
<div class="author_info">
<p class="post-info">
<span>作者:测试作者</span>
<span>发布时间:2020年3月28日 22:24:30</span>
</p>
</div>
</div>
</li>
</ul>
</div>
</div>
{% endblock %}
{% block formula_class %}
active
{% endblock %}
论坛现在的页面效果:现在已经可以将我们之前发布的帖子显示出来了,小伙伴们可以再发几个帖子测试下功能:
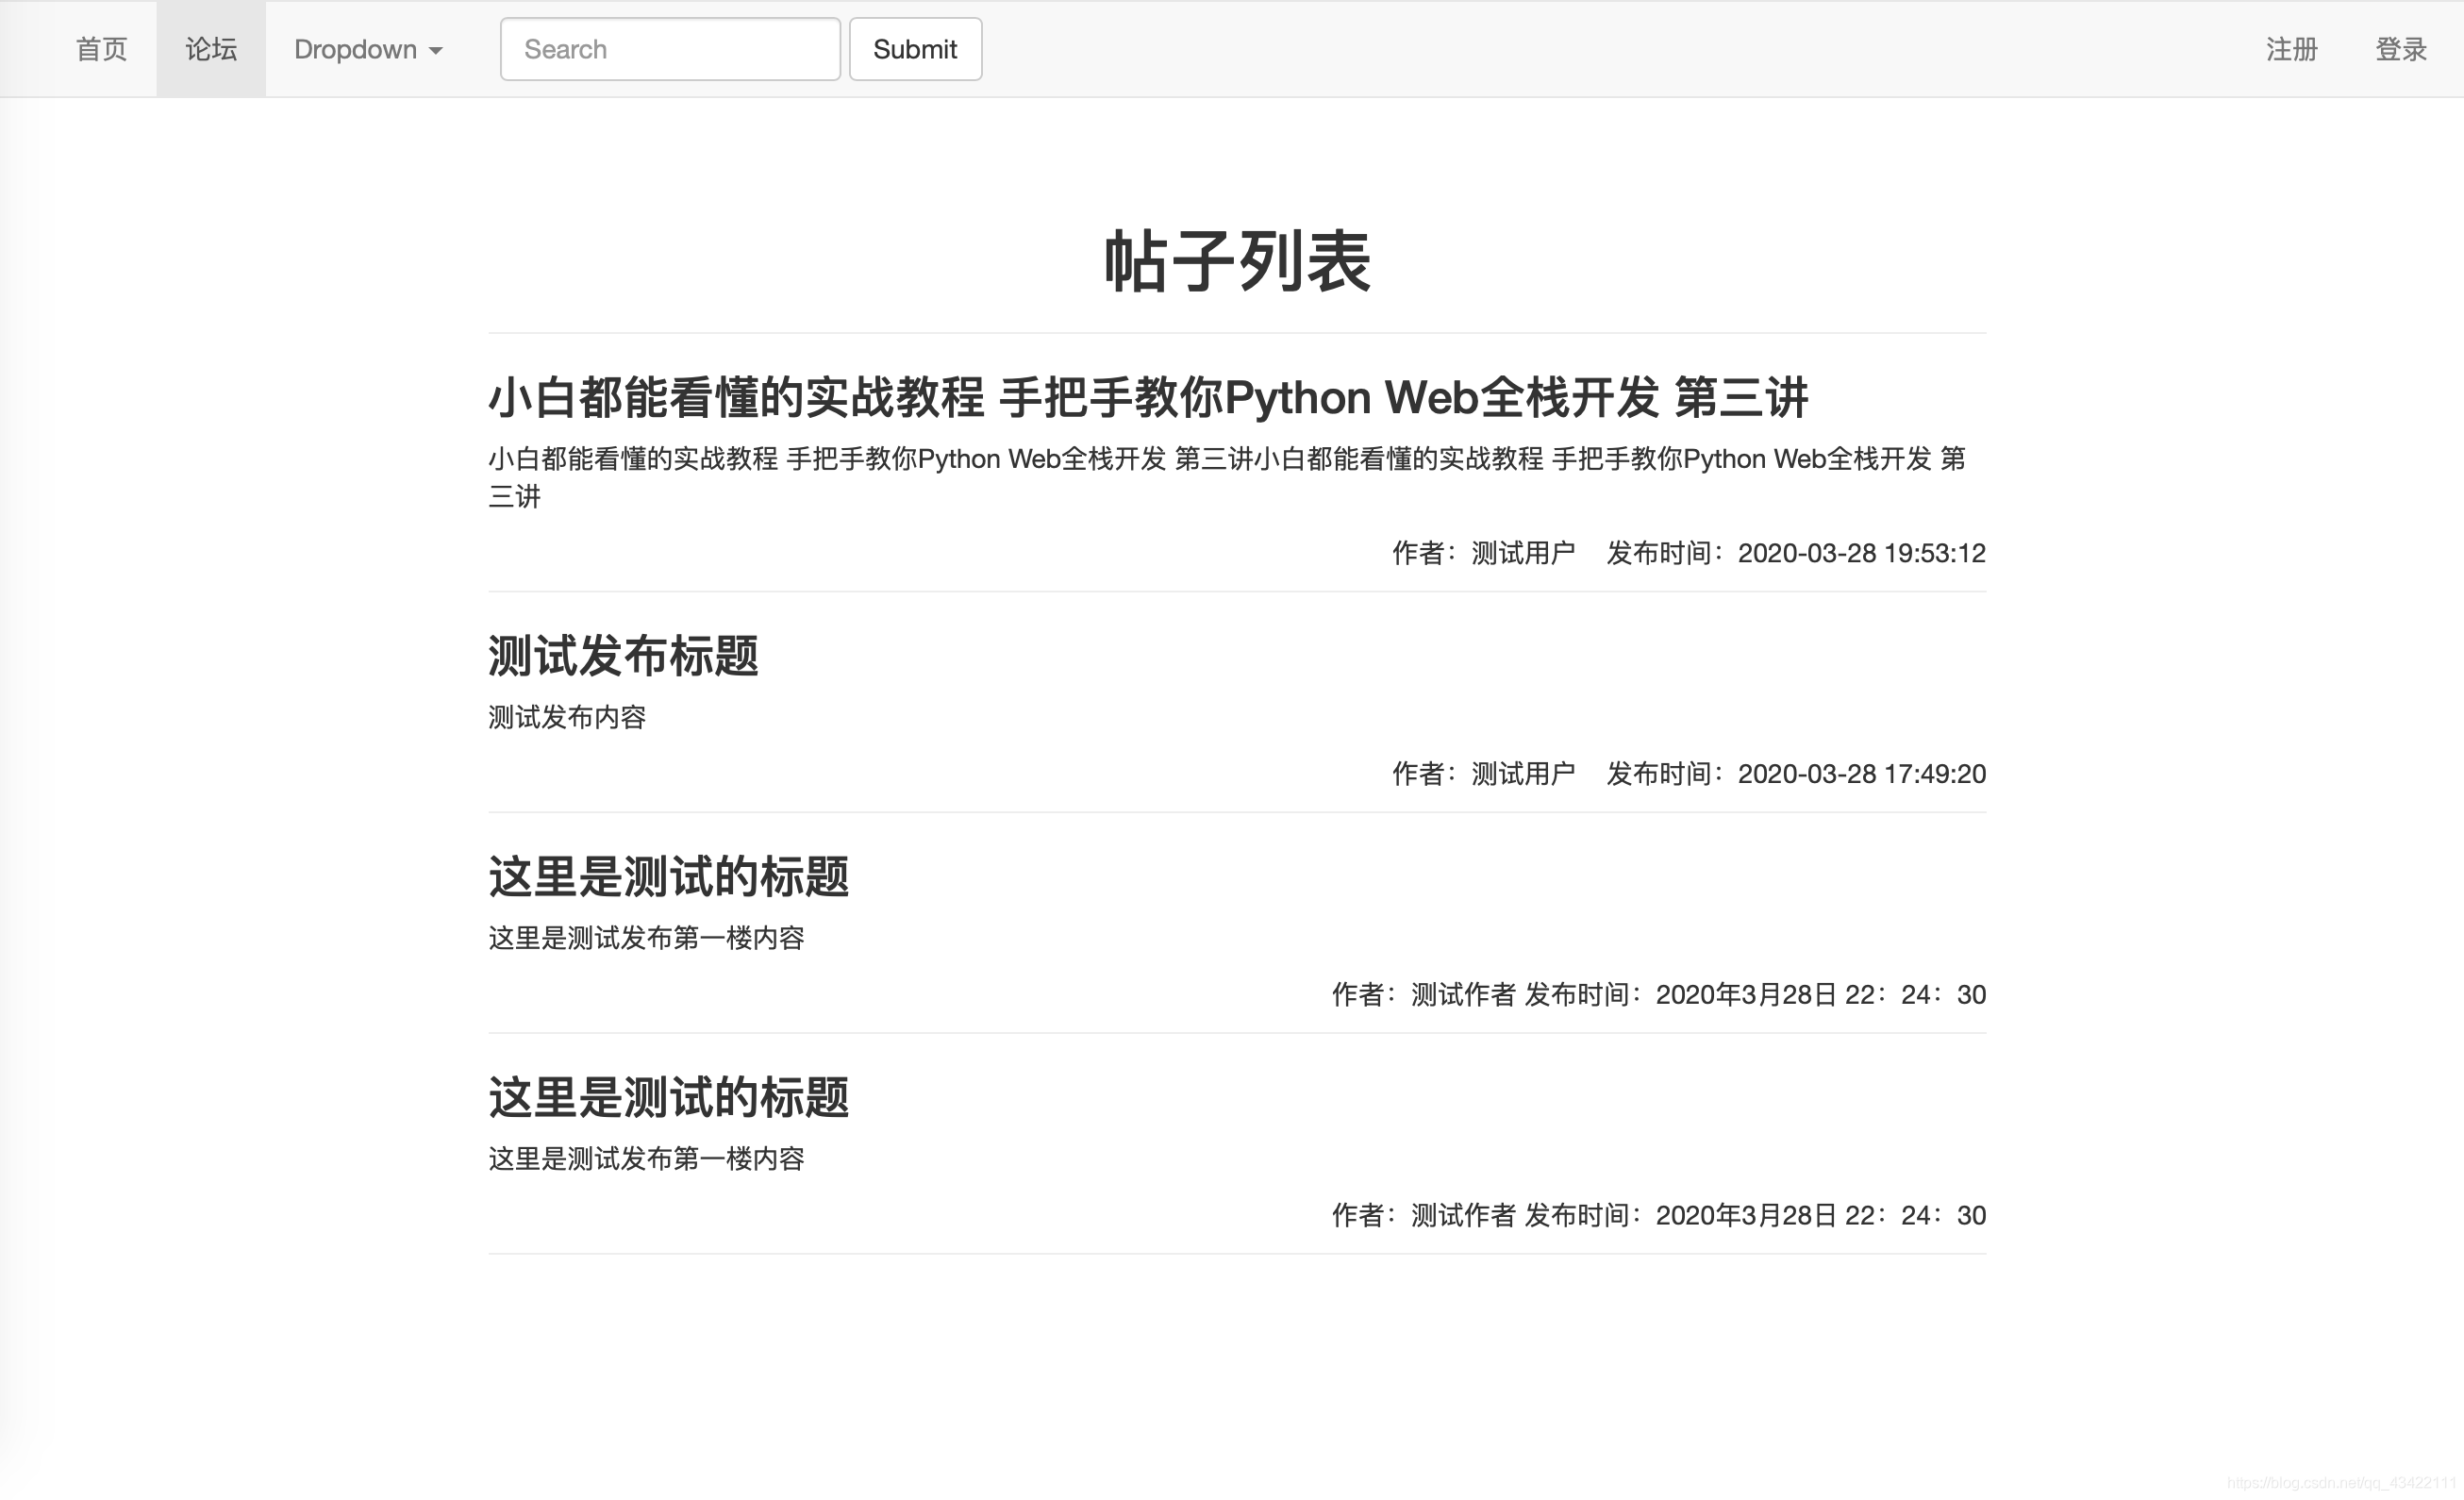
好了,现在论坛页面也完成了,那么我们在发布完帖子之后,我们可以将页面跳转到帖子列表。
在app.py中修改发布帖子的函数,直接将发布成功的return修改为:return redirect(url_for('formula'))
修改之后的发布帖子的完整功能代码为:
# 发布帖子
@app.route('/post_issue', methods=['GET', 'POST'])
def post_issue():
    if request.method == 'GET':
        return render_template('post_issue.html')
    if request.method == 'POST':
        title = request.form.get('title')
        comment = request.form.get('editorValue')
        email = session.get('email')
        issue_time = time.strftime("%Y-%m-%d %H:%M:%S")
        try:
            cur = db.cursor()
            Ino = gengenerateID()
            sql = "select * from Issue where Ino = '%s'" % Ino
            db.ping(reconnect=True)
            cur.execute(sql)
            result = cur.fetchone()
            # 如果result不为空,即存在该ID,就一直生成128位随机ID,直到不重复位置
            while result is not None:
                Ino = gengenerateID()
                sql = "select * from Issue where Ino = '%s'" % Ino
                db.ping(reconnect=True)
                cur.execute(sql)
                result = cur.fetchone()
            sql = "insert into Issue(Ino, email, title, issue_time) VALUES ('%s','%s','%s','%s')" % (
            Ino, email, title, issue_time)
            db.ping(reconnect=True)
            cur.execute(sql)
            db.commit()
            sql = "insert into Comment(Cno, Ino, comment, comment_time, email) VALUES ('%s','%s','%s','%s','%s')" % (
            '1', Ino, comment, issue_time, email)
            db.ping(reconnect=True)
            cur.execute(sql)
            db.commit()
            cur.close()
            return redirect(url_for('formula'))
        except Exception as e:
            raise e
好了,现在小伙伴们可以去测试自己的论坛系统啦!现在已经完成了一半了,我们可以发布问题并且显示出来了。第五部分的内容到这里结束啦~小伙伴们都顺利实现了吗?如果有问题可以在评论区里进行问哦,如果喜欢这篇文章,可以点赞关注支持下博主。
博主的更多文章导航可以查看我的栈内导航文章,里有各个文章的超链接,实时更新。博客文章内容导航(实时更新)
博主的站内博客导航:博客文章内容导航(实时更新)
更多精彩博客文章推荐
- 一本教你如何在前端实现富文本编辑器
- 小白都能看得懂的教程 一本教你如何在前端实现markdown编辑器
- 一文教会你Bootstrap,让你也可以快速建站
- 一文教你如何白嫖JetBrains全家桶(IDEA/PtChram/CLion)免费正版
本项目所有源码在GitHub开源,GitHub地址为:OnlineForumPlatform有需要源码可以前去查看,喜欢的话可以star一下
六、帖子详情、回复帖子、访问过滤功能实现
在前面的几个部分中,我们完成了项目的创建,导航条、注册、登录、论坛页面、发布帖子等功能的实现,目前我们的系统已经可以发布和查看我们的帖子了,并且可以登录我们的账号。下面我们就来继续完善我们的系统,让他看查看每个帖子的详情,并且能够回复帖子等功能。
6.1 帖子详情页面、帖子回复实现
帖子详情页面的数据库我们已经在第三讲中实现了,就是我们的Issue和Comment表,下面我们来一起实现以下帖子详情页面的前端和后端功能,让它能够展示各个帖子的一个详情页面。
6.1.1 帖子详情页面实现-后端
这里我们先实现帖子详情页面的后端,因为我们发现如果先做前端的话,在做后端的话,还需要对前端进行一定的修改,这样不利于我们这样文章式的进行表述。所以我们在这里先做后端的功能,这里先创建一个issue_detail.html页面,留作后面的前端使用。
如果要进入我们的帖子详情页面,那么首先我们需要一个参数,就是我们Ino(Issue的编号),因为这个编号是唯一表示我们的帖子的。所以在这里我们写帖子详情的路由的时候就和前面不太一样了,我们需要使用一个带参数的路由,用来接收这个Ino,跳转到我们相对应的帖子详情。
# 问题详情
@app.route('/issue/<Ino>')
def issue_detail(Ino):
    return render_template('issue_detail.html')
在有了Ino之后,我们就可以根据Ino来对数据库中的文章数据进行查找了。下面我们来思考我们需要返回到前端的数据由哪些呢?我们主要需要下面这项数据:
- 文章标题
- 每章每层楼的内容,包括:
- 评论内容
- 作者昵称
- 评论发布时间
- 楼号(Cno)
我们主要就是需要这几项数据,数据里面的文章标题的每个问题详情页面固定的一个标题,每层楼的内容的每层楼不一样的,所以两个我们分别进行查询。
# 问题详情
@app.route('/issue/<Ino>')
def issue_detail(Ino):
    try:
        if request.method == 'GET':
            cur = db.cursor()
            sql = "select Issue.title from Issue where Ino = '%s'" % Ino
            db.ping(reconnect=True)
            cur.execute(sql)
            # 这里返回的是一个列表,即使只有一个数据,所以这里使用cur.fetchone()[0]
            issue_title = cur.fetchone()[0]
            sql = "select UserInformation.nickname,Comment.comment,Comment.comment_time,Comment.Cno from Comment,UserInformation where Comment.email = UserInformation.email and Ino = '%s'" % Ino
            db.ping(reconnect=True)
            cur.execute(sql)
            comment = cur.fetchall()
            cur.close()
            # 返回视图,同时传递参数
            return render_template('issue_detail.html',Ino=Ino,issue_title=issue_title,comment=comment)
    except Exception as e:
        raise e
这就是目前简单的后端逻辑,虽说我们目前只有get请求方式,这里也限定一下,为了安全起见。
6.1.2 帖子详情页面实现-前端
前端的话,我们这里为了便于理解,前端还是精简布局(博主直男审美,写不出漂亮的UI)即可。我们需要一个页头来显示我们的标题,然后下面使用一个<ul></ul>显示我们的帖子详情即可,在<li></li>中固定一个div,每层楼的结构固定,然后再在中间填充上我们从后端获取到的数据即可。前端的文件这里我们使用issue_detail.html和issue_detail.css。详细的结构可以去看我的GitHub,每一次博客更新之后我都会把源代码push到GitHub中。本项目的GitHub地址为:OnlineForumPlatform
这里直接上代码吧,前端的代码和前面基本一样,前面已经各个步骤都仔细讲解过了,如果前端部分的还有不清楚的可以看看前面的。
issue_detail.html:
{% extends 'base.html' %}
{% block title %}
{{ issue_title }}
{% endblock %}
{% block css %}
<link rel="stylesheet" href="/static/css/issue_detail.css">
{% endblock %}
{% block content %}
<div class="formula_content">
<div class="page-header" id="page_header">
<h1>{{ issue_title }}</h1>
</div>
<div class="issue_list_div">
<ul class="issue_list_ul">
{% for comm in comment %}
<li class="issue_list_li">
<div class="issue_div">
<div class="issue_content">
<article>
{{ comm[1]|safe }}
</article>
</div>
<div class="author_info">
{# <p class="cno_info">{{ comm[3] }}</p>#}
<p class="info">
<span class="cno_info">{{ comm[3] }}楼</span> 
<span>
<span>作者:{{ comm[0] }}</span>  
<span>发布时间:{{ comm[2] }}</span>
</span>
</p>
</div>
</div>
</li>
{% endfor %}
</ul>
</div>
</div>
{% endblock %}
issue_detail.css:
.formula_content{
    margin: 5% 20%;
}

#page_header{
    text-align: center;
}

.issue_list_ul{
    list-style-type: none;
    margin-left: 0;
    padding-left: 0;
}
.author_info{
    text-align: right;
}

.issue_div{
    border-bottom:1px solid #eee;
}

.issue_content{
    min-height: 88px;
}

.post-info{
    text-align: right;
}

.cno_info{
    text-align: left;
}
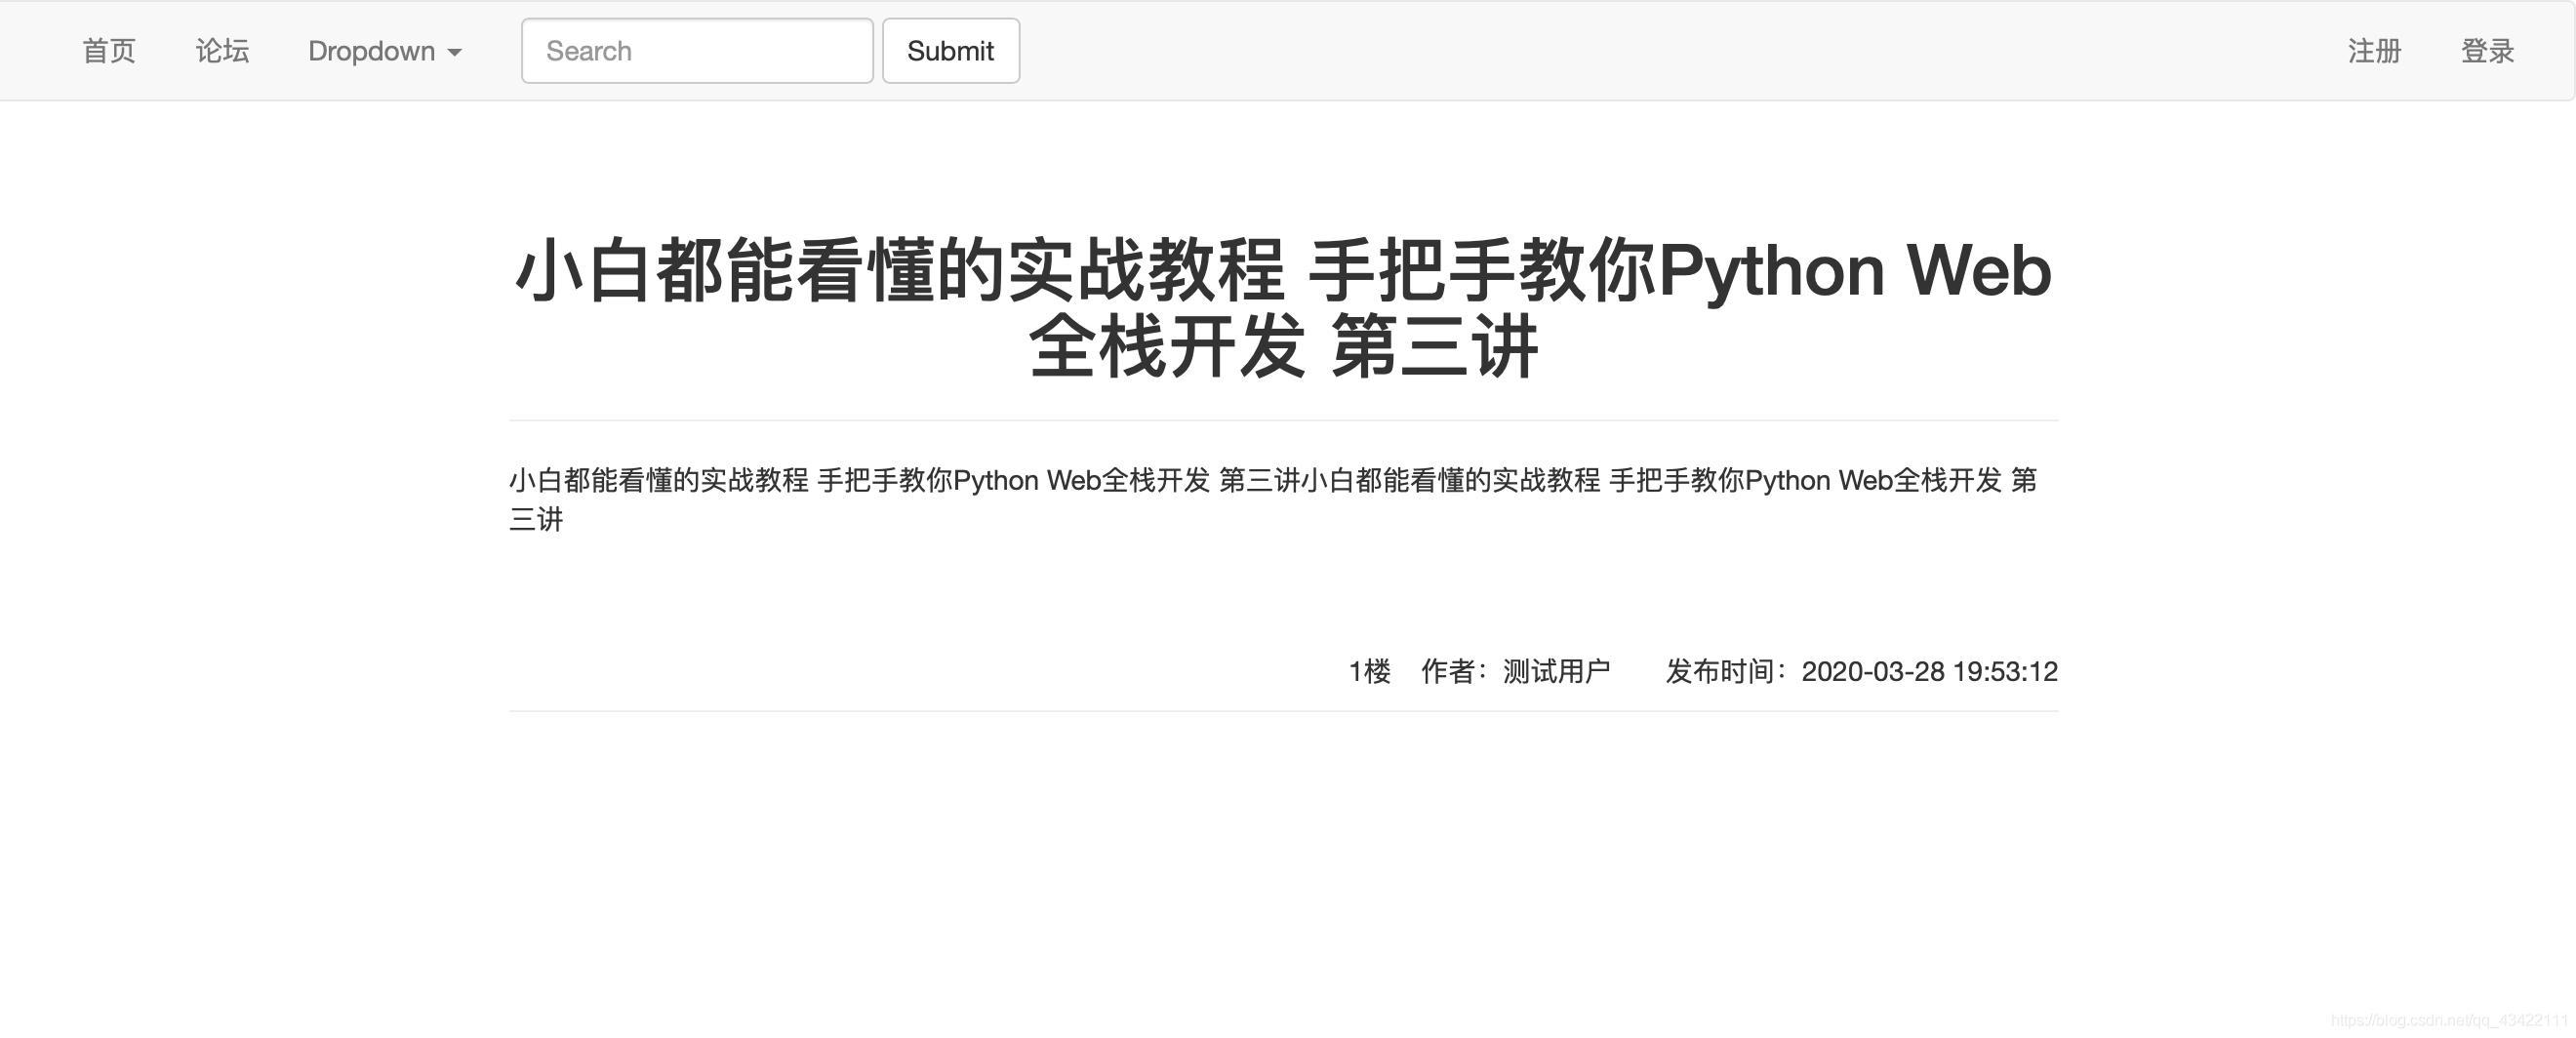
有仔细的小伙伴是不是发现了,这里前端的部分和论坛页面的前端基本类似,只不过改掉了其中显示的内容而已。页面效果为:
6.1.3 帖子回复实现-前端
这里其实有点纠结放在哪里的,直接放在帖子详情的下面也可以,单独一个页面也可以,原本是打算单独一个页面的,因为那样的话,会比较放富文本编辑器和Markdown编辑器的双编辑器。不过又想了想,使用Markdown回复帖子的人应该不多,所以这里就放在下面的吧,使用富文本编辑器。如果想做双编辑器的话也可以自己稍作修改。
这里只需要在最后添加一个<li></li>然后再嵌套一个div,然后添加一个富文本编辑器的实例即可,还不会在前端实现富文本编辑器的可以去看看博主之前的文章:一本教你如何在前端实现富文本编辑器如果需要实现Markdown文本编辑器也可以查看博主之前的文章:小白都能看得懂的教程 一本教你如何在前端实现markdown编辑器
这里就直接上修改完的代码和效果图吧:
issue_detail.html:
{% extends 'base.html' %}
{% block title %}
{{ issue_title }}
{% endblock %}
{% block css %}
<link rel="stylesheet" href="/static/css/issue_detail.css">
<!-- 引入配置文件 -->
<script src="/static/ueditor/ueditor.config.js"}></script>
<!-- 引入编辑器源码文件 -->
<script src="/static/ueditor/ueditor.all.min.js"}></script>
{% endblock %}
{% block content %}
<div class="formula_content">
<div class="page-header" id="page_header">
<h1>{{ issue_title }}</h1>
</div>
<div class="issue_list_div">
<ul class="issue_list_ul">
{% for comm in comment %}
<li class="issue_list_li">
<div class="issue_div">
<div class="issue_content">
<article>
{{ comm[1]|safe }}
</article>
</div>
<div class="author_info">
{# <p class="cno_info">{{ comm[3] }}</p>#}
<p class="info">
<span class="cno_info">{{ comm[3] }}楼</span> 
<span>
<span>作者:{{ comm[0] }}</span>  
<span>发布时间:{{ comm[2] }}</span>
</span>
</p>
</div>
</div>
</li>
{% endfor %}
<li>
<div>
<form class="post_issue_form" method="post">
<input type="hidden" name="Ino" value="{{ Ino }}">
<div class="ueditor_div">
<script id="editor" type="text/plain">
请输入回复的内容!
</script>
</div>
<div id="post_issue_butt">
<button type="submit" class="btn btn-default">回复</button>
</div>
</form>
</div>
</li>
</ul>
</div>
<!-- 实例化编辑器 -->
<script type="text/javascript">
var editor = UE.getEditor('editor');
</script>
</div>
{% endblock %}
效果图:

效果还是不错的,这样我们就完成了我们前端的富文本编辑器的输入啦,是不是很有成就感~
6.1.3 帖子回复实现-后端
后端的话,我们需要做的就是将回复人的email、回复时间、回复楼号、回复内容存储进数据库中,并显示。这里由于我们是在同一个页面中进行回复,所以我们要使用到POST方法进行传输数据。下面我们首先将这些需要存储的数据在服务器端获取到:
Ino = request.values.get('Ino')
email = session.get('email')
comment = request.form.get('editorValue')
comment_time = time.strftime("%Y-%m-%d %H:%M:%S")
这里的Cno需要来查找数据库中的最大Cno,然后进行+1所得。问题详情完整代码为:帖子回复实现的代码主要为POST请求部分:
# 问题详情
@app.route('/issue/<Ino>', methods=['GET', 'POST'])
def issue_detail(Ino):
    if request.method == 'GET':
        try:
            if request.method == 'GET':
                cur = db.cursor()
                sql = "select Issue.title from Issue where Ino = '%s'" % Ino
                db.ping(reconnect=True)
                cur.execute(sql)
                # 这里返回的是一个列表,即使只有一个数据,所以这里使用cur.fetchone()[0]
                issue_title = cur.fetchone()[0]
                sql = "select UserInformation.nickname,Comment.comment,Comment.comment_time,Comment.Cno from Comment,UserInformation where Comment.email = UserInformation.email and Ino = '%s'" % Ino
                db.ping(reconnect=True)
                cur.execute(sql)
                comment = cur.fetchall()
                cur.close()
                # 返回视图,同时传递参数
                return render_template('issue_detail.html', Ino=Ino, issue_title=issue_title, comment=comment)
        except Exception as e:
            raise e

    if request.method == 'POST':
        Ino = request.values.get('Ino')
        email = session.get('email')
        comment = request.values.get('editorValue')
        comment_time = time.strftime("%Y-%m-%d %H:%M:%S")
        try:
            cur = db.cursor()
            sql = "select max(Cno) from Comment where Ino = '%s' " % Ino
            db.ping(reconnect=True)
            cur.execute(sql)
            result = cur.fetchone()
            Cno = int(result[0]) + 1
            Cno = str(Cno)
            sql = "insert into Comment(Cno, Ino, comment, comment_time, email) VALUES ('%s','%s','%s','%s','%s')" % (
            Cno, Ino, comment, comment_time, email)
            cur.execute(sql)
            db.commit()
            cur.close()
            return redirect(url_for('issue_detail',Ino = Ino))
        except Exception as e:
            raise e
页面效果: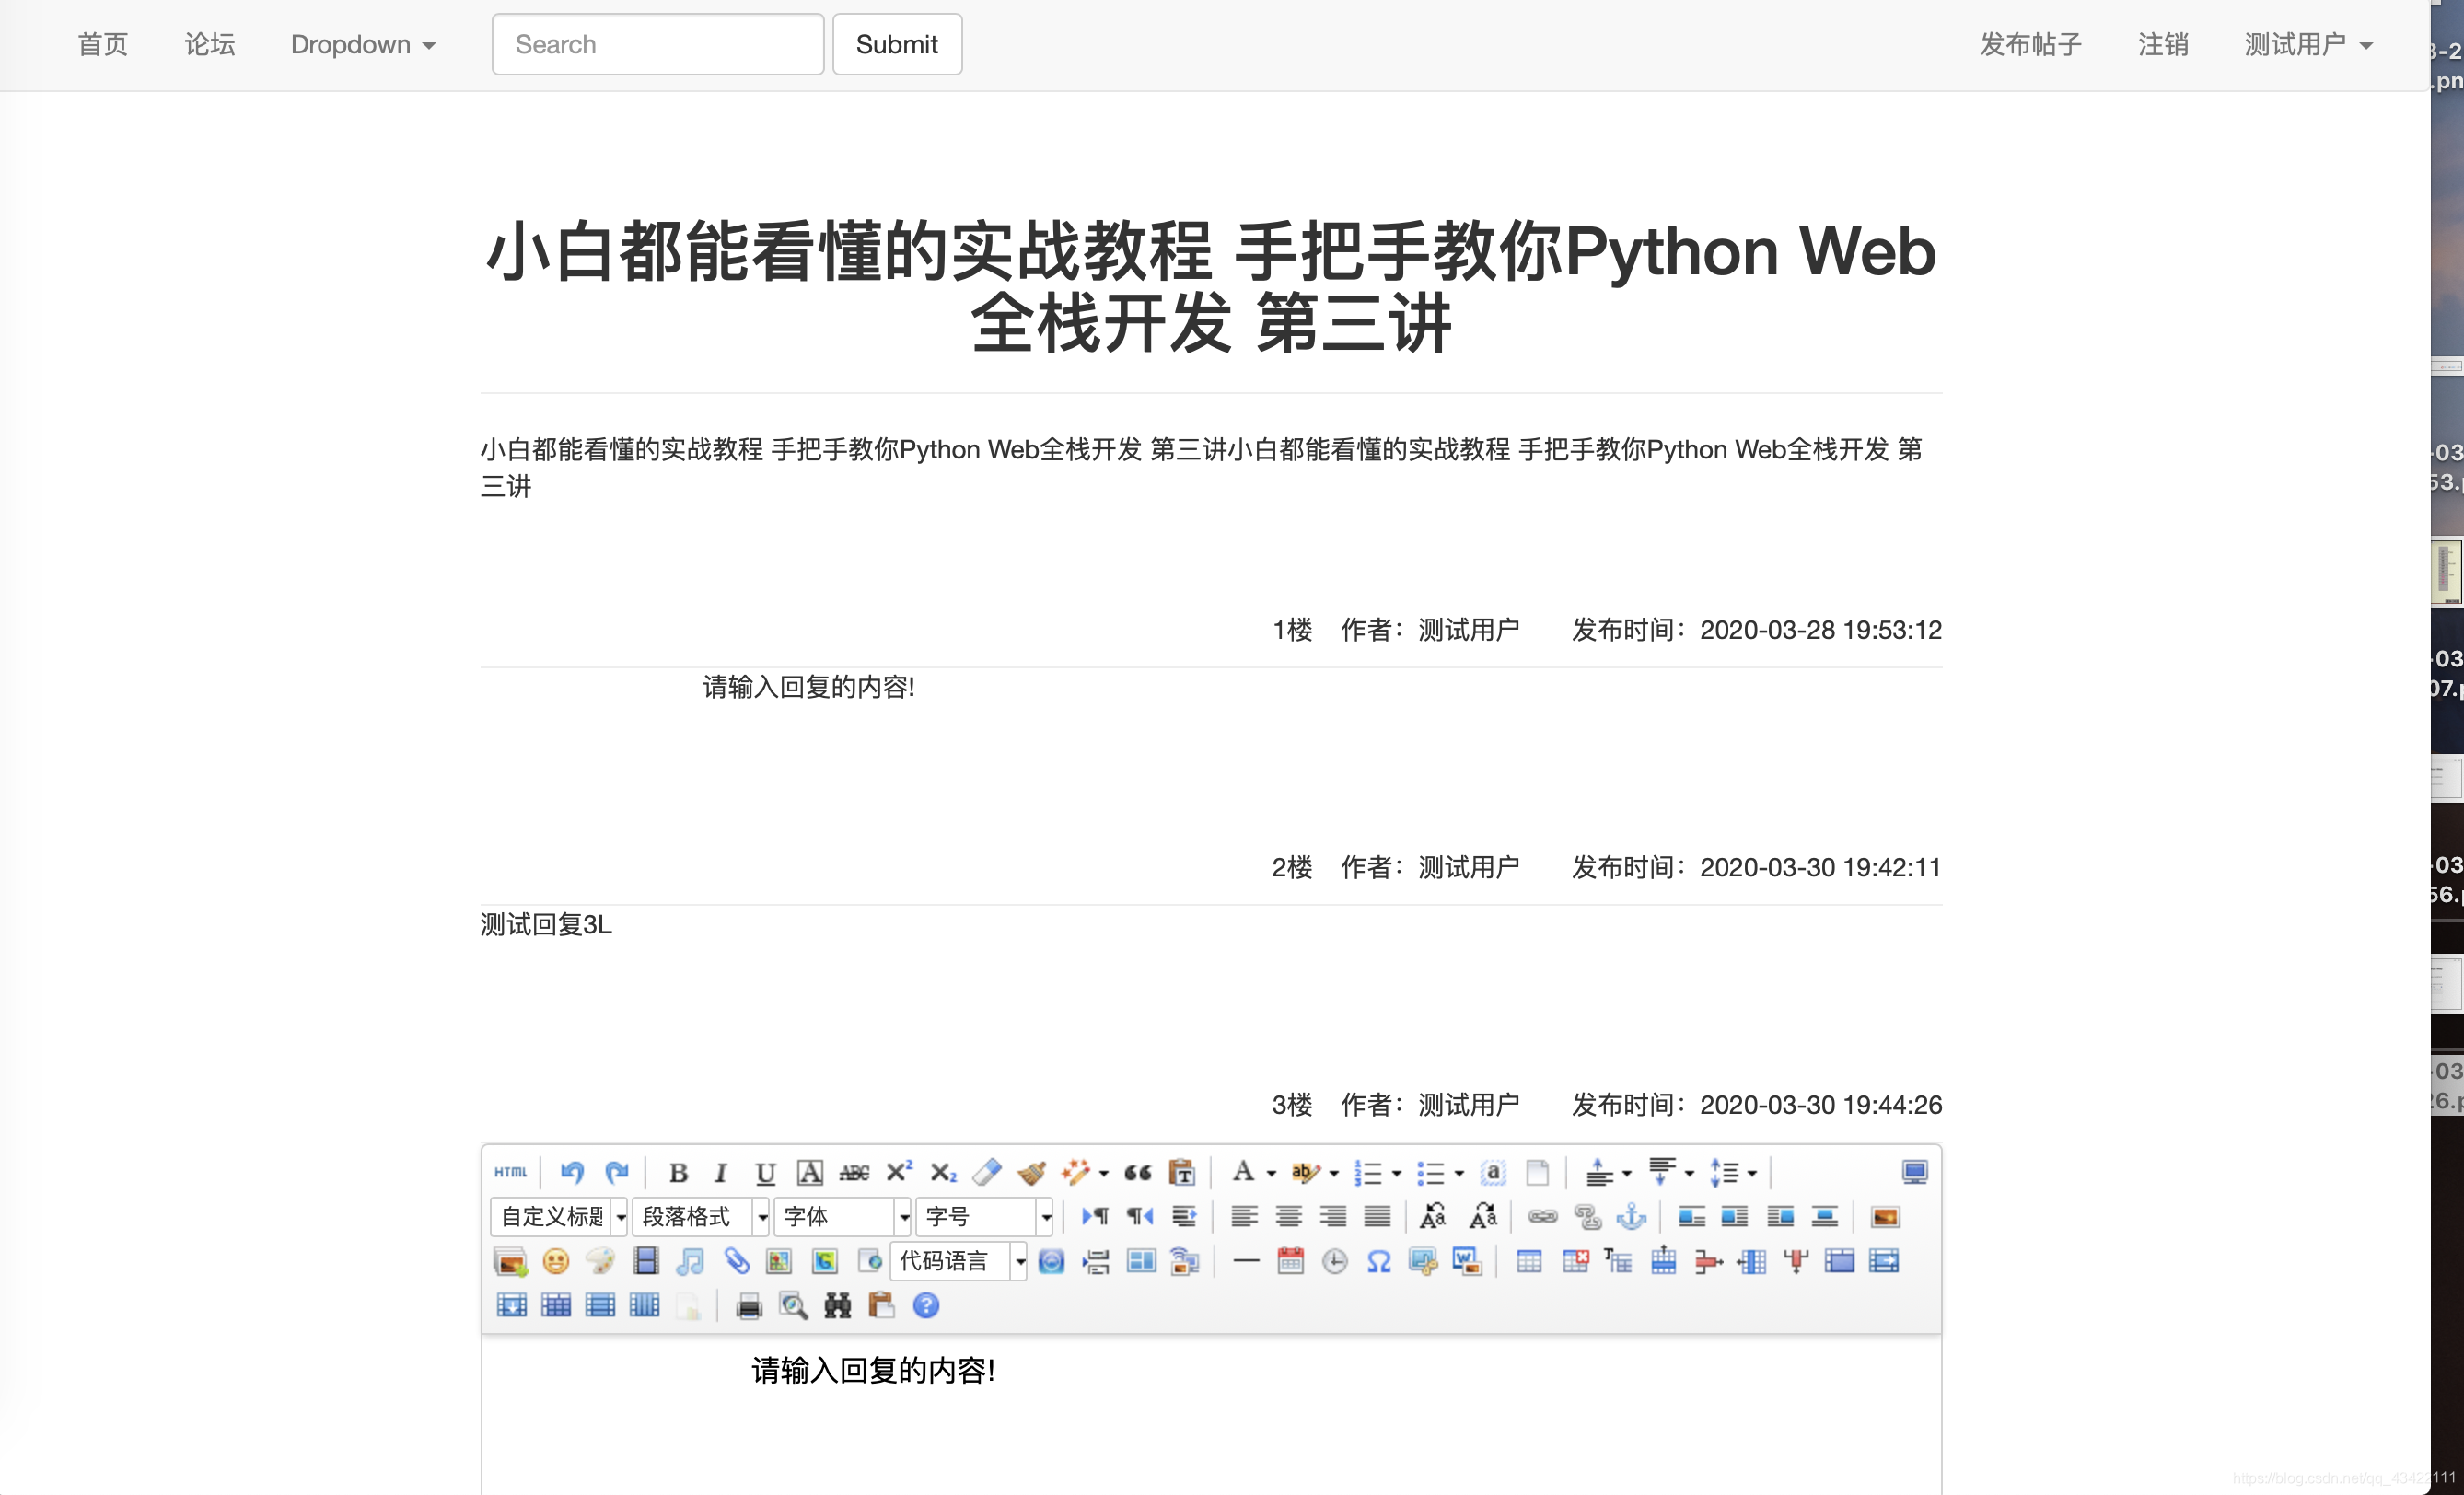
这里提醒一下各位,在测试回复和发布帖子的时候一定要登录账号,这里还没有完善过滤器功能,下面进行完善
6.2访问过滤功能实现
在上面发布帖子和回复帖子的时候是不是有很多小伙伴都都发现在未登录的时候进行发布会报错?是因为我们的email是函数依赖于UerInformation表的,如果未登录的话则没有,也就无法插入到数据库中。同时还有很多功能页面我们是针对不同用户的,比如有的管理员功能页面,我们就不能让普通用户和访客进入,有些页面我们只想让登陆的用户进行查看,那我们就要让访客无法访问。
下面我们就来实现这个功能,要使用这个功能,我们就需要使用Python的装饰器功能。如果对装饰器这个功能不太了解也没关系,我们这边只需要一些简单的功能即可。我会在代码中进行详细的进行注释。我们将装饰器放在decorators.py文件中。我们这里先简单的写一个限制登录的装饰器,如下。
from functools import wraps
from flask import session, url_for, redirect


# 登录限制的装饰器 用于某些只让登录用户查看的网页
def login_limit(func):
    @wraps(func)
    def wrapper(*args, **kwargs):
        # 我们这里用来区分是否登录的方法很简答,就是查看session中是否赋值了email,如果赋值了,说明已经登录了
        if session.get('email'):
            # 如果登录了,我们就正常的访问函数的功能
            return func(*args, **kwargs)
        else:
            # 如果没登录,我们就将它重定向到登录页面,这里大家也可以写一个权限错误的提示页面进行跳转
            return redirect(url_for('login'))

    return wrapper
写完之后,我们在app.py中导入它from decorators import login_limit 然后再每一个我们需要进行登录限制的路由之后加上我们的装饰器@login_limit即可,此时我们需要进行限制登录的两个页面就是我们的发布帖子页面和我们的帖子详情页面需要进行一个限制。进行限制之后,如果我们没登录的时候进行发布帖子就会自动的跳转到登录页面,提醒你进行登录啦~
这里在贴一下到目前为止app.py的完整文件代码吧:
from flask import *
from werkzeug.security import generate_password_hash, check_password_hash
from config import db
import random
import time
import config
from decorators import login_limit

app = Flask(__name__)

# 从对象中导入config
app.config.from_object(config)


# 登录状态保持
@app.context_processor
def login_status():
    # 从session中获取email
    email = session.get('email')
    # 如果有email信息,则证明已经登录了,我们从数据库中获取登陆者的昵称和用户类型,来返回到全局
    if email:
        try:
            cur = db.cursor()
            sql = "select nickname,type from UserInformation where email = '%s'" % email
            db.ping(reconnect=True)
            cur.execute(sql)
            result = cur.fetchone()
            if result:
                return {'email': email, 'nickname': result[0], 'user_type': result[1]}
        except Exception as e:
            raise e
    # 如果email信息不存在,则未登录,返回空
    return {}

# 主页
@app.route('/')
def index():
    return render_template('index.html')


# 注册页面
@app.route('/register', methods=['GET', 'POST'])
def register():
    if request.method == 'GET':
        return render_template('register.html')
    if request.method == 'POST':
        email = request.form.get('email')
        nickname = request.form.get('nickname')
        password_1 = request.form.get('password_1')
        password_2 = request.form.get('password_2')
        phone = request.form.get('phone')
        if not all([email, nickname, password_1, password_2, phone]):
            flash("信息填写不全,请将信息填写完整")
            return render_template('register.html')
        if password_1 != password_2:
            flash("两次密码填写不一致!")
            return render_template('register.html')
        password = generate_password_hash(password_1, method="pbkdf2:sha256", salt_length=8)
        try:
            cur = db.cursor()
            sql = "select * from UserInformation where email = '%s'" % email
            db.ping(reconnect=True)
            cur.execute(sql)
            result = cur.fetchone()
            if result is not None:
                flash("该Email已存在!")
                return render_template('register.html')
            else:
                create_time = time.strftime("%Y-%m-%d %H:%M:%S")
                sql = "insert into UserInformation(email, nickname, password, type, create_time, phone) VALUES ('%s','%s','%s','0','%s','%s')" % (
                    email, nickname, password, create_time, phone)
                db.ping(reconnect=True)
                cur.execute(sql)
                db.commit()
                cur.close()
                return redirect(url_for('index'))
        except Exception as e:
            raise e


# 登录页面
@app.route('/login', methods=['GET', 'POST'])
def login():
    if request.method == 'GET':
        return render_template('login.html')
    if request.method == 'POST':
        email = request.form.get('email')
        password = request.form.get('password')
        if not all([email, password]):
            flash("请将信息填写完整!")
            return render_template('login.html')
        try:
            cur = db.cursor()
            sql = "select password from UserInformation where email = '%s'" % email
            db.ping(reconnect=True)
            cur.execute(sql)
            result = cur.fetchone()
            if result is None:
                flash("该用户不存在")
                return render_template('login.html')
            if check_password_hash(result[0], password):
                session['email'] = email
                session.permanent = True
                cur.close()
                return redirect(url_for('index'))
            else:
                flash("密码错误!")
                return render_template('login.html')
        except Exception as e:
            raise e


# 用户注销
@app.route('/logout')
def logout():
    session.clear()
    return redirect(url_for(('index')))


# 生成128随机id
def gengenerateID():
    re = ""
    for i in range(128):
        re += chr(random.randint(65, 90))
    return re


# 发布帖子
@app.route('/post_issue', methods=['GET', 'POST'])
@login_limit
def post_issue():
    if request.method == 'GET':
        return render_template('post_issue.html')
    if request.method == 'POST':
        title = request.form.get('title')
        comment = request.form.get('editorValue')
        email = session.get('email')
        issue_time = time.strftime("%Y-%m-%d %H:%M:%S")
        try:
            cur = db.cursor()
            Ino = gengenerateID()
            sql = "select * from Issue where Ino = '%s'" % Ino
            db.ping(reconnect=True)
            cur.execute(sql)
            result = cur.fetchone()
            # 如果result不为空,即存在该ID,就一直生成128位随机ID,直到不重复位置
            while result is not None:
                Ino = gengenerateID()
                sql = "select * from Issue where Ino = '%s'" % Ino
                db.ping(reconnect=True)
                cur.execute(sql)
                result = cur.fetchone()
            sql = "insert into Issue(Ino, email, title, issue_time) VALUES ('%s','%s','%s','%s')" % (
                Ino, email, title, issue_time)
            db.ping(reconnect=True)
            cur.execute(sql)
            db.commit()
            sql = "insert into Comment(Cno, Ino, comment, comment_time, email) VALUES ('%s','%s','%s','%s','%s')" % (
                '1', Ino, comment, issue_time, email)
            db.ping(reconnect=True)
            cur.execute(sql)
            db.commit()
            cur.close()
            return redirect(url_for('formula'))
        except Exception as e:
            raise e


# 论坛页面
@app.route('/formula')
def formula():
    if request.method == 'GET':
        try:
            cur = db.cursor()
            sql = "select Issue.Ino, Issue.email,UserInformation.nickname,issue_time,Issue.title,Comment.comment from Issue,UserInformation,Comment where Issue.email = UserInformation.email and Issue.Ino = Comment.Ino order by issue_time DESC "
            db.ping(reconnect=True)
            cur.execute(sql)
            issue_information = cur.fetchall()
            cur.close()
            return render_template('formula.html', issue_information=issue_information)
        except Exception as e:
            raise e


# 问题详情
@app.route('/issue/<Ino>', methods=['GET', 'POST'])
@login_limit
def issue_detail(Ino):
    if request.method == 'GET':
        try:
            if request.method == 'GET':
                cur = db.cursor()
                sql = "select Issue.title from Issue where Ino = '%s'" % Ino
                db.ping(reconnect=True)
                cur.execute(sql)
                # 这里返回的是一个列表,即使只有一个数据,所以这里使用cur.fetchone()[0]
                issue_title = cur.fetchone()[0]
                sql = "select UserInformation.nickname,Comment.comment,Comment.comment_time,Comment.Cno from Comment,UserInformation where Comment.email = UserInformation.email and Ino = '%s'" % Ino
                db.ping(reconnect=True)
                cur.execute(sql)
                comment = cur.fetchall()
                cur.close()
                # 返回视图,同时传递参数
                return render_template('issue_detail.html', Ino=Ino, issue_title=issue_title, comment=comment)
        except Exception as e:
            raise e

    if request.method == 'POST':
        Ino = request.values.get('Ino')
        email = session.get('email')
        comment = request.values.get('editorValue')
        comment_time = time.strftime("%Y-%m-%d %H:%M:%S")
        try:
            cur = db.cursor()
            sql = "select max(Cno) from Comment where Ino = '%s' " % Ino
            db.ping(reconnect=True)
            cur.execute(sql)
            result = cur.fetchone()
            Cno = int(result[0]) + 1
            Cno = str(Cno)
            sql = "insert into Comment(Cno, Ino, comment, comment_time, email) VALUES ('%s','%s','%s','%s','%s')" % (
            Cno, Ino, comment, comment_time, email)
            cur.execute(sql)
            db.commit()
            cur.close()
            return redirect(url_for('issue_detail',Ino = Ino))
        except Exception as e:
            raise e


if __name__ == '__main__':
    app.run()
好了,现在小伙伴们可以去测试自己的论坛系统啦!现在已经完成了一大半了,我们可以发布问题并且显示出来,还可以对帖子进行回复,查看帖子详情了,现在小小的在线论坛系统已经五脏俱全啦!(虽然设施简陋点点),同时我们还实现了我们的访问过滤功能,不然非法用户访问我们的页面。~小伙伴们都顺利实现了吗?如果有问题可以在评论区里进行问哦,如果喜欢这篇文章,可以点赞关注支持下博主。
博主的更多文章导航可以查看我的栈内导航文章,里有各个文章的超链接,实时更新。博客文章内容导航(实时更新)
博主的站内博客导航:博客文章内容导航(实时更新)
更多精彩博客文章推荐
- 一本教你如何在前端实现富文本编辑器
- 小白都能看得懂的教程 一本教你如何在前端实现markdown编辑器
- 一文教会你Bootstrap,让你也可以快速建站
- 一文教你如何白嫖JetBrains全家桶(IDEA/PtChram/CLion)免费正版
七、个人中心相关页面功能实现
本项目所有源码在GitHub开源,GitHub地址为:OnlineForumPlatform
今天来到我们实战系列的第七部分,在之前的六部分里,我们已经完成了在线论坛系统的导航条、登录、注册、论坛页面、帖子详情页面等的功能实现,目前我们的论坛已经可以进行帖子发布,查看帖子详情,并且进行回复信息了。在上一部分中,我们还是先了功能限制,对不同用户的访问进行过滤。下面我们继续来完善我们的这个在线论坛系统,今天我们来完善我们的在线论坛系统的个人中心。
7.1个人中心页面实现
今天我们就来实现我们的个人中心页面,这里本来是打算使用AJAX实现的,个人中心使用AJAX实现的话,可以使得整体不变,当我们点击各个分栏的时候只返回各个分栏的信息,是一个非常好的选择。但是由于这个系列打算让每一个看的人都能够看懂,实现这个功能,所以我们这简化一点,直接使用普通的一个请求页面。后面有兴趣的同学可以进行进一步的优化,后面有空的话,我也会将后面逐渐优化的教程发出来。
这里既然是小白的入门专场,我们就一起从简啦~主要是为了给大家练练手,带大家进入Python Web开发的大门。
7.1.1 个人中心页面-后端
那我们就开始实现我们我的个人中心了,这里我们的个人中心只显示我们的一些基础资料(我们也没设置多少),这里只做一个大致的样式展示,更多的功能我们后续慢慢的进行一个拓展。
我们去看了一下我们的数据库,发现我们个人中心能够进行展示的,也就只有我们的email、昵称、用户类型、创建时间和手机号码可以进行一个展示和修改。那我们就展示这么多吧,大家也可以添加一下个性签名,头像等一系列的个人标识进入数据库中。
那我们就开始获取我们的数据了,首先我们需要限制只有登录的用户才可以进入到我们的个人中心,限制的方法在上一讲中已经实现了。
# 个人中心
@app.route('/personal')
@login_limit
def personal():
    if request.method == 'GET':
        email = session.get('email')
        try:
            cur = db.close()
            sql = "select email, nickname, type, create_time, phone from UserInformation where email = '%s'" % email
            db.ping(reconnect=True)
            cur.execute(sql)
            personal_info = cur.fetchone()
        except Exception as e:
            raise e
        return render_template('personal.html',personal_info = personal_info)
7.1.2 个人中心页面-前端
在后端获取完数据之后,我们在前端对获取到的数据进行展示即可。所以我们先设计个勉强能够看得过去的架子,来展示我们的数据。先上个效果图吧:
确实是比较简陋的,但是功能齐全吧。我们这里使用的是<table>标签进行显示的,也可以使用<li>进行显示。这里时间上代码吧,personal.html的代码为:
{% extends 'base.html' %}

{% block title %}
个人中心
{% endblock %}

{% block css %}
<link rel="stylesheet" href="/static/css/personal.css">
{% endblock %}

{% block content %}
<div class="personal_content">
    <div class="page-header" id="page_header">
      <h1>个人中心<small>Personal center</small></h1>
    </div>
    <div class="personal_info">
        <table>
            <tr class="personal_tr">
                <td class="personal_td">
                    Email address:
                </td>
                <td class="personal_td">
                    {{ personal_info[0] }}
                </td>
            </tr>
            <tr class="personal_tr">
                <td class="personal_td">
                    昵称:
                </td>
                <td class="personal_td">
                    {{ personal_info[1] }}
                </td>
            </tr>
            <tr class="personal_tr">
                <td class="personal_td">
                    注册时间:
                </td>
                <td class="personal_td">
                    {{ personal_info[3] }}
                </td>
            </tr>
            <tr class="personal_tr">
                <td class="personal_td">
                    手机号:
                </td>
                <td class="personal_td">
                    {{ personal_info[4] }}
                </td>
            </tr>
            <tr class="personal_tr">
                <td class="personal_td">
                    用户类型:
                </td>
                <td class="personal_td">
                    {% if personal_info[2] == 0 %}
                        普通用户
                    {% else %}
                        管理员
                    {% endif %}
                </td>
            </tr>
        </table>
    </div>
</div>
{% endblock %}
personal.css代码为:
.personal_content{
    margin-left: 20%;
    margin-right: 20%;
    margin-top: 5%;
}
#page_header{
    text-align: center;
}

.personal_info{
    font-size: 24px;
    margin-left: 10%
;
}

.personal_td{
    width: 300px;
}

.personal_tr{
    height: 50px;
}
同时这里也修改了base.html的内容,我们让个人中心在下拉列表中进行显示,我们修改了下拉列表中第一个值和链接,效果图为:
这里的修改的代码为:
<li class="dropdown">
                      <a href="#" class="dropdown-toggle" data-toggle="dropdown" role="button" aria-haspopup="true" aria-expanded="false">{{ nickname }} <span class="caret"></span></a>
                      <ul class="dropdown-menu">
                        <li><a href="{{ url_for('personal') }}">个人中心</a></li>
                        <li><a href="#">Another action</a></li>
                        <li><a href="#">Something else here</a></li>
                        <li role="separator" class="divider"></li>
                        <li><a href="#">Separated link</a></li>
                      </ul>
                    </li>
5.2 修改密码功能实现
到这里我们来实现我们的修改密码功能,其实如果使用AJAX实现的话,这一讲的所有功能都应该在个人中心一个页面中进行体现的,我们这里就先这样分开实现吧。大家可以自行改进~
在这里我们就先从前端开始实现了。
7.2.1 修改密码功能实现-前端
我们修改密码的话,这里采用一个简单的验证,就是知道我们当前的密码就可以进行一个修改密码。我们设计一个表单,分别输入旧密码,新密码,确认新密码即可。先上个效果图再说实现:
这效果图还是大家熟悉的味道,有没有!我们这里还是一个简单的div,里面加个页头,下面3个input。这里和前面的原理一样,这里我们预留了一个flash传输消息的地方,用于等会后端向前面传递消息提示,我们就直接上代码吧:
change_password.html:
{% extends 'base.html' %}

{% block title %}
修改密码
{% endblock %}

{% block css %}
<link rel="stylesheet" href="/static/css/change_password.css">
{% endblock %}

{% block content %}
<div class="change_password_content">
    <div class="page-header" id="page_header">
      <h1>修改密码<small>Change Password</small></h1>
    </div>
    <div class="change_password_div">
        <form method="post">
            <span style=" font-size:20px;color: red" >
                {% for item in get_flashed_messages() %}
                {{ item }}
                {% endfor %}
            </span>
            <div class="form-group">
                <label for="exampleInputPassword1">旧密码:</label>
                <input type="password" class="form-control" name="old_password" id="exampleInputPassword1" placeholder="密码">
            </div>
            <div class="form-group">
                <label for="exampleInputPassword1">新密码:</label>
                <input type="password" class="form-control" name="new_password1" id="exampleInputPassword1" placeholder="密码">
            </div>
            <div class="form-group">
                <label for="exampleInputPassword1">确认密码:</label>
                <input type="password" class="form-control" name="new_password2" id="exampleInputPassword1" placeholder="密码">
            </div>
            <div id="password_butt">
              <button type="submit" class="btn btn-default">修改密码</button>
          </div>
        </form>
    </div>
</div>
{% endblock %}
change_paasword.css:
#page_header{
    text-align: center;
}
.change_password_content{
    margin-left: 20%;
    margin-right: 20%;
    margin-top: 8%;
}
#password_butt{
    text-align: center;
}
7.2.1 修改密码功能实现-后端
下面我们来实现修改密码的后端功能,使他能够正确的修改密码。我们首先获取我们的当前登录用户的用户名,这里我们的修改密码的功能也是只有我们登录的用户才可以访问的功能。首先我们判断是不是3个数据都获取到了,并且2个密码一致,如果有错误,我们返回提示。如果数据都正确的话,我们开始处理,先获取我们的email。我们获取到email之后去数据库中查找我们的密码,这里的密码是加密的,所以我们要使用check_password_hash()来进行验证,如果旧密码是正确的,我们就进行修改新密码,如果不正确,则返回。完整的后端代码为:
# 修改密码
@app.route('/change_password',methods=['GET','POST'])
@login_limit
def change_password():
    if request.method == 'GET':
        return render_template('change_password.html')
    if request.method == 'POST':
        old_password = request.form.get('old_password')
        new_password1 = request.form.get('new_password1')
        new_password2 = request.form.get('new_password2')
        if not all([old_password,new_password1,new_password2]):
            flash("信息填写不全!")
            return render_template('change_password.html')
        if new_password1 != new_password2:
            flash("两次新密码不一致!")
            return render_template('change_password.html')
        email = session.get('email')
        try:
            cur = db.cursor()
            sql = "select password from UserInformation where email = '%s'" % email
            db.ping(reconnect=True)
            cur.execute(sql)
            password = cur.fetchone()[0]
            if check_password_hash(password,old_password):
                password = generate_password_hash(new_password1, method="pbkdf2:sha256", salt_length=8)
                sql = "update UserInformation set password = '%s' where email = '%s'" % (password,email)
                db.ping(reconnect=True)
                cur.execute(sql)
                db.commit()
                cur.close()
                return render_template('index.html')
            else:
                flash("旧密码错误!")
                return render_template('change_password.html')
        except Exception as e:
            raise e
在实现后端功能之后,我们可以再导航栏中加入修改密码的导航,我们还是加载下来列表中,将第二个修改为修改密码。
<li class="dropdown">
  <a href="#" class="dropdown-toggle" data-toggle="dropdown" role="button" aria-haspopup="true" aria-expanded="false">{{ nickname }} <span class="caret"></span></a>
  <ul class="dropdown-menu">
    <li><a href="{{ url_for('personal') }}">个人中心</a></li>
    <li><a href="{{ url_for('change_password') }}">修改密码</a></li>
    <li><a href="#">Something else here</a></li>
    <li role="separator" class="divider"></li>
    <li><a href="#">Separated link</a></li>
  </ul>
</li>
效果为: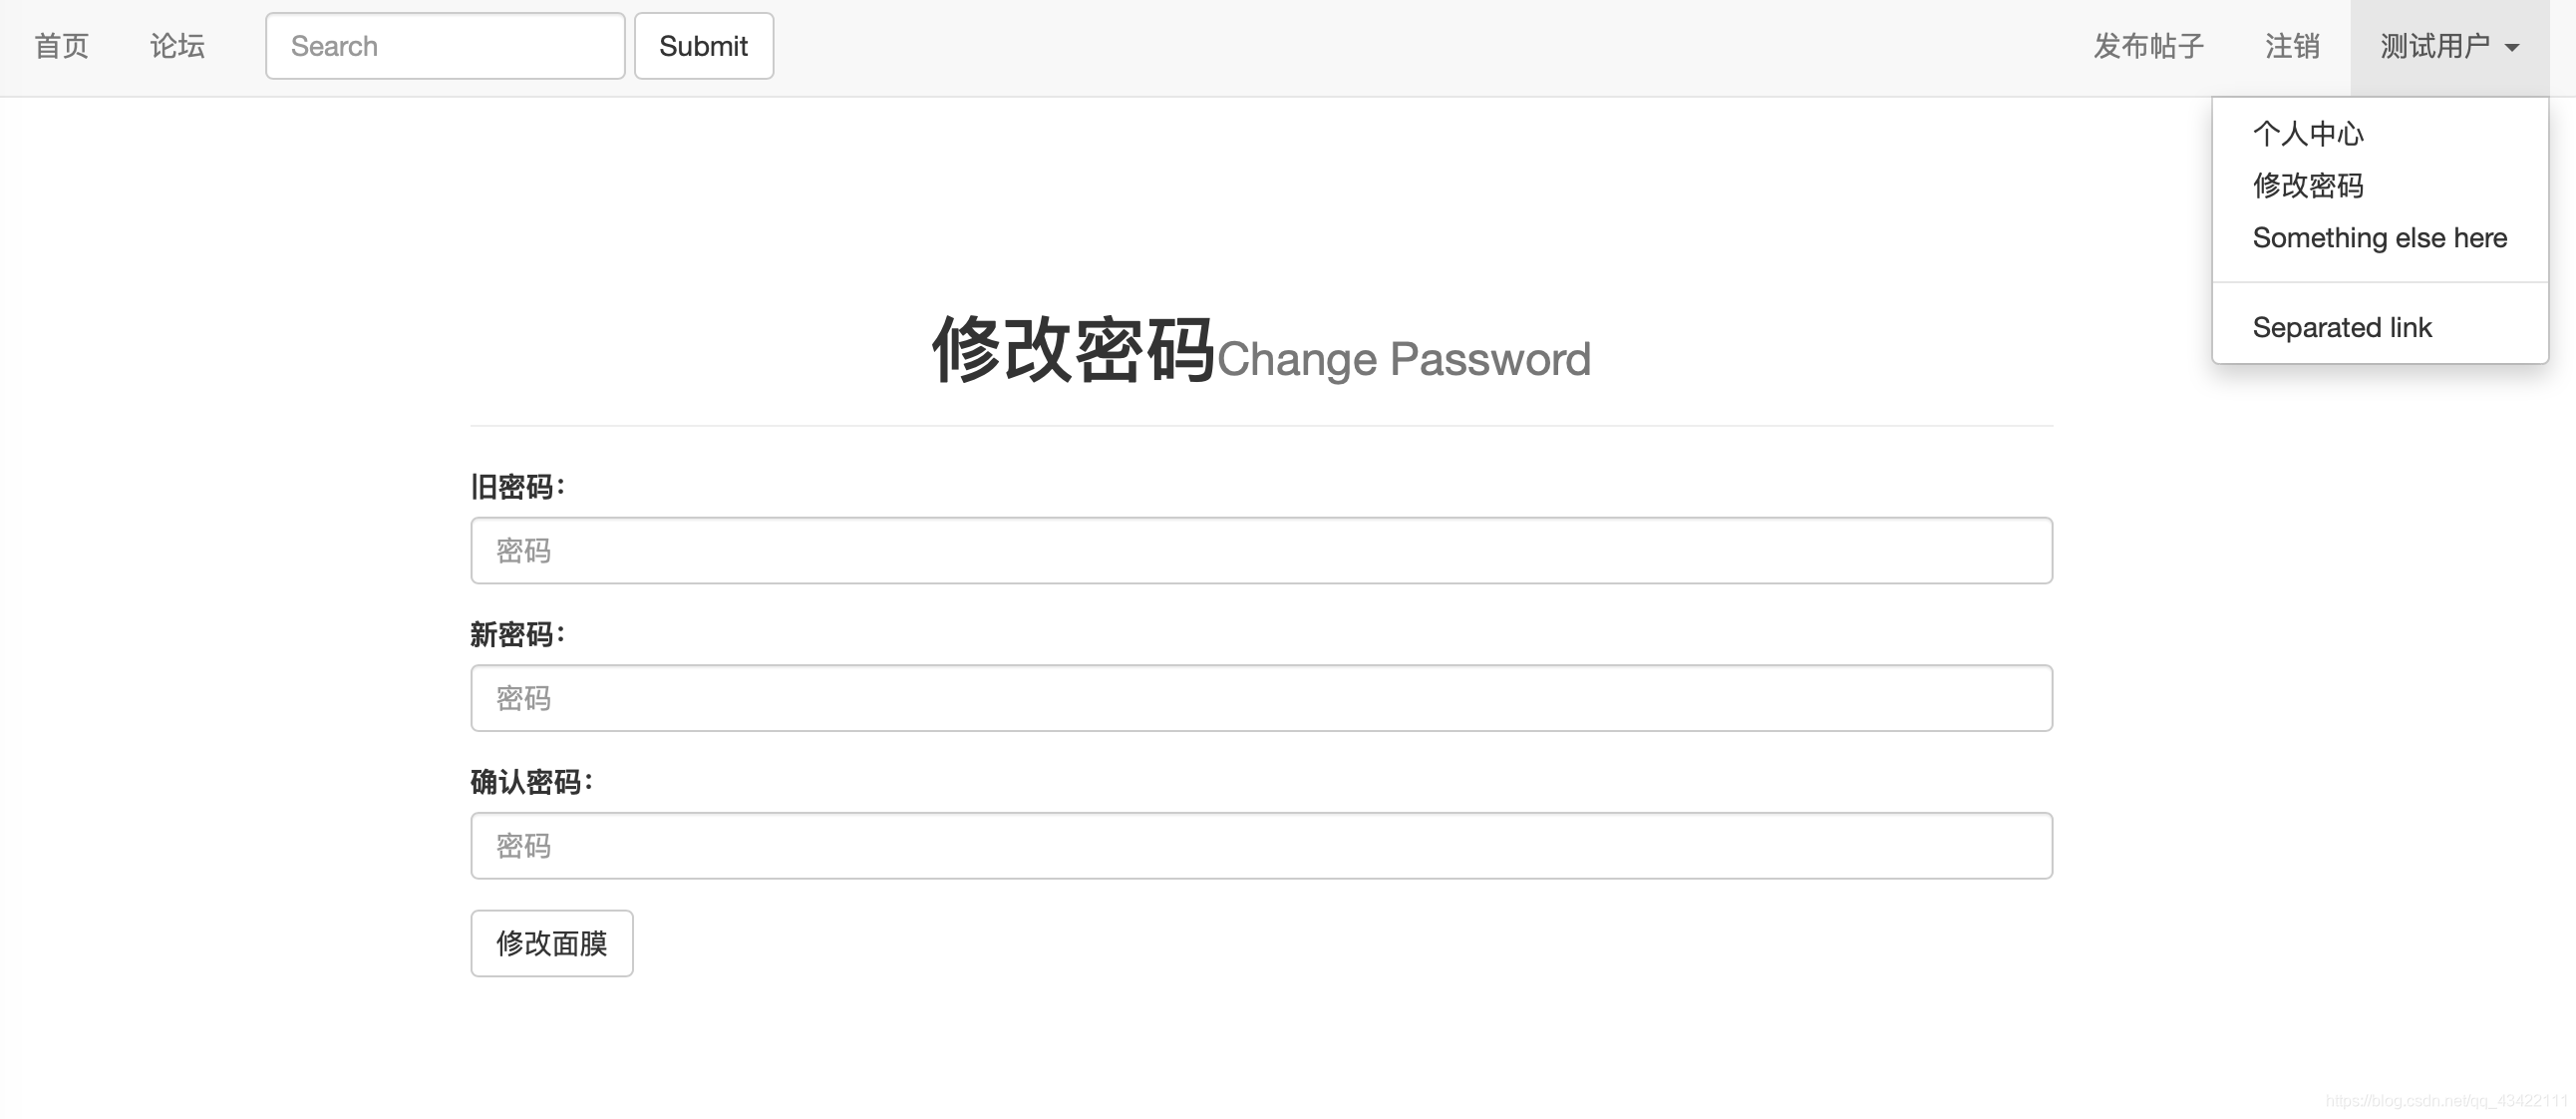
7.3 查看发布帖子功能实现-后端
7.3.1 查看发布帖子功能实现-后端
下面我们来实现个人中心的另一个功能,就是查看我们自己所发布的所有的帖子信息,并且可以在此页面进入到我们所发布的帖子中去。这里我们还是先写后端,向前端去传输我们的数据。这个页面是也是需要我们登录才可以查看的,因为查看的是我们所登录的这个账号所发布的帖子列表。
所以这里我们先获取我们需要的数据,然后把它返回到前端即可,这里先创建一个前端的html文件,这里使用show_issue.html,我们后端的代码为:
# 查看已发布的帖子
# 查看已发布的帖子
@app.route('/show_issue')
@login_limit
def show_issue():
    if request.method == 'GET':
        email = session.get('email')
        try:
            cur = db.cursor()
            sql = "select ino, email, title, issue_time from Issue where email = '%s' order by issue_time desc" % email
            db.ping(reconnect=True)
            cur.execute(sql)
            issue_detail = cur.fetchall()
        except Exception as e:
            raise e
        return render_template('show_issue.html',issue_detail=issue_detail)
7.3.2 查看发布帖子功能实现-前端
下面我们开始实现前端的一个功能,我们这里使用和论坛列表相似的功能,我们这里只需要显示帖子的标题即可。这里先上效果图: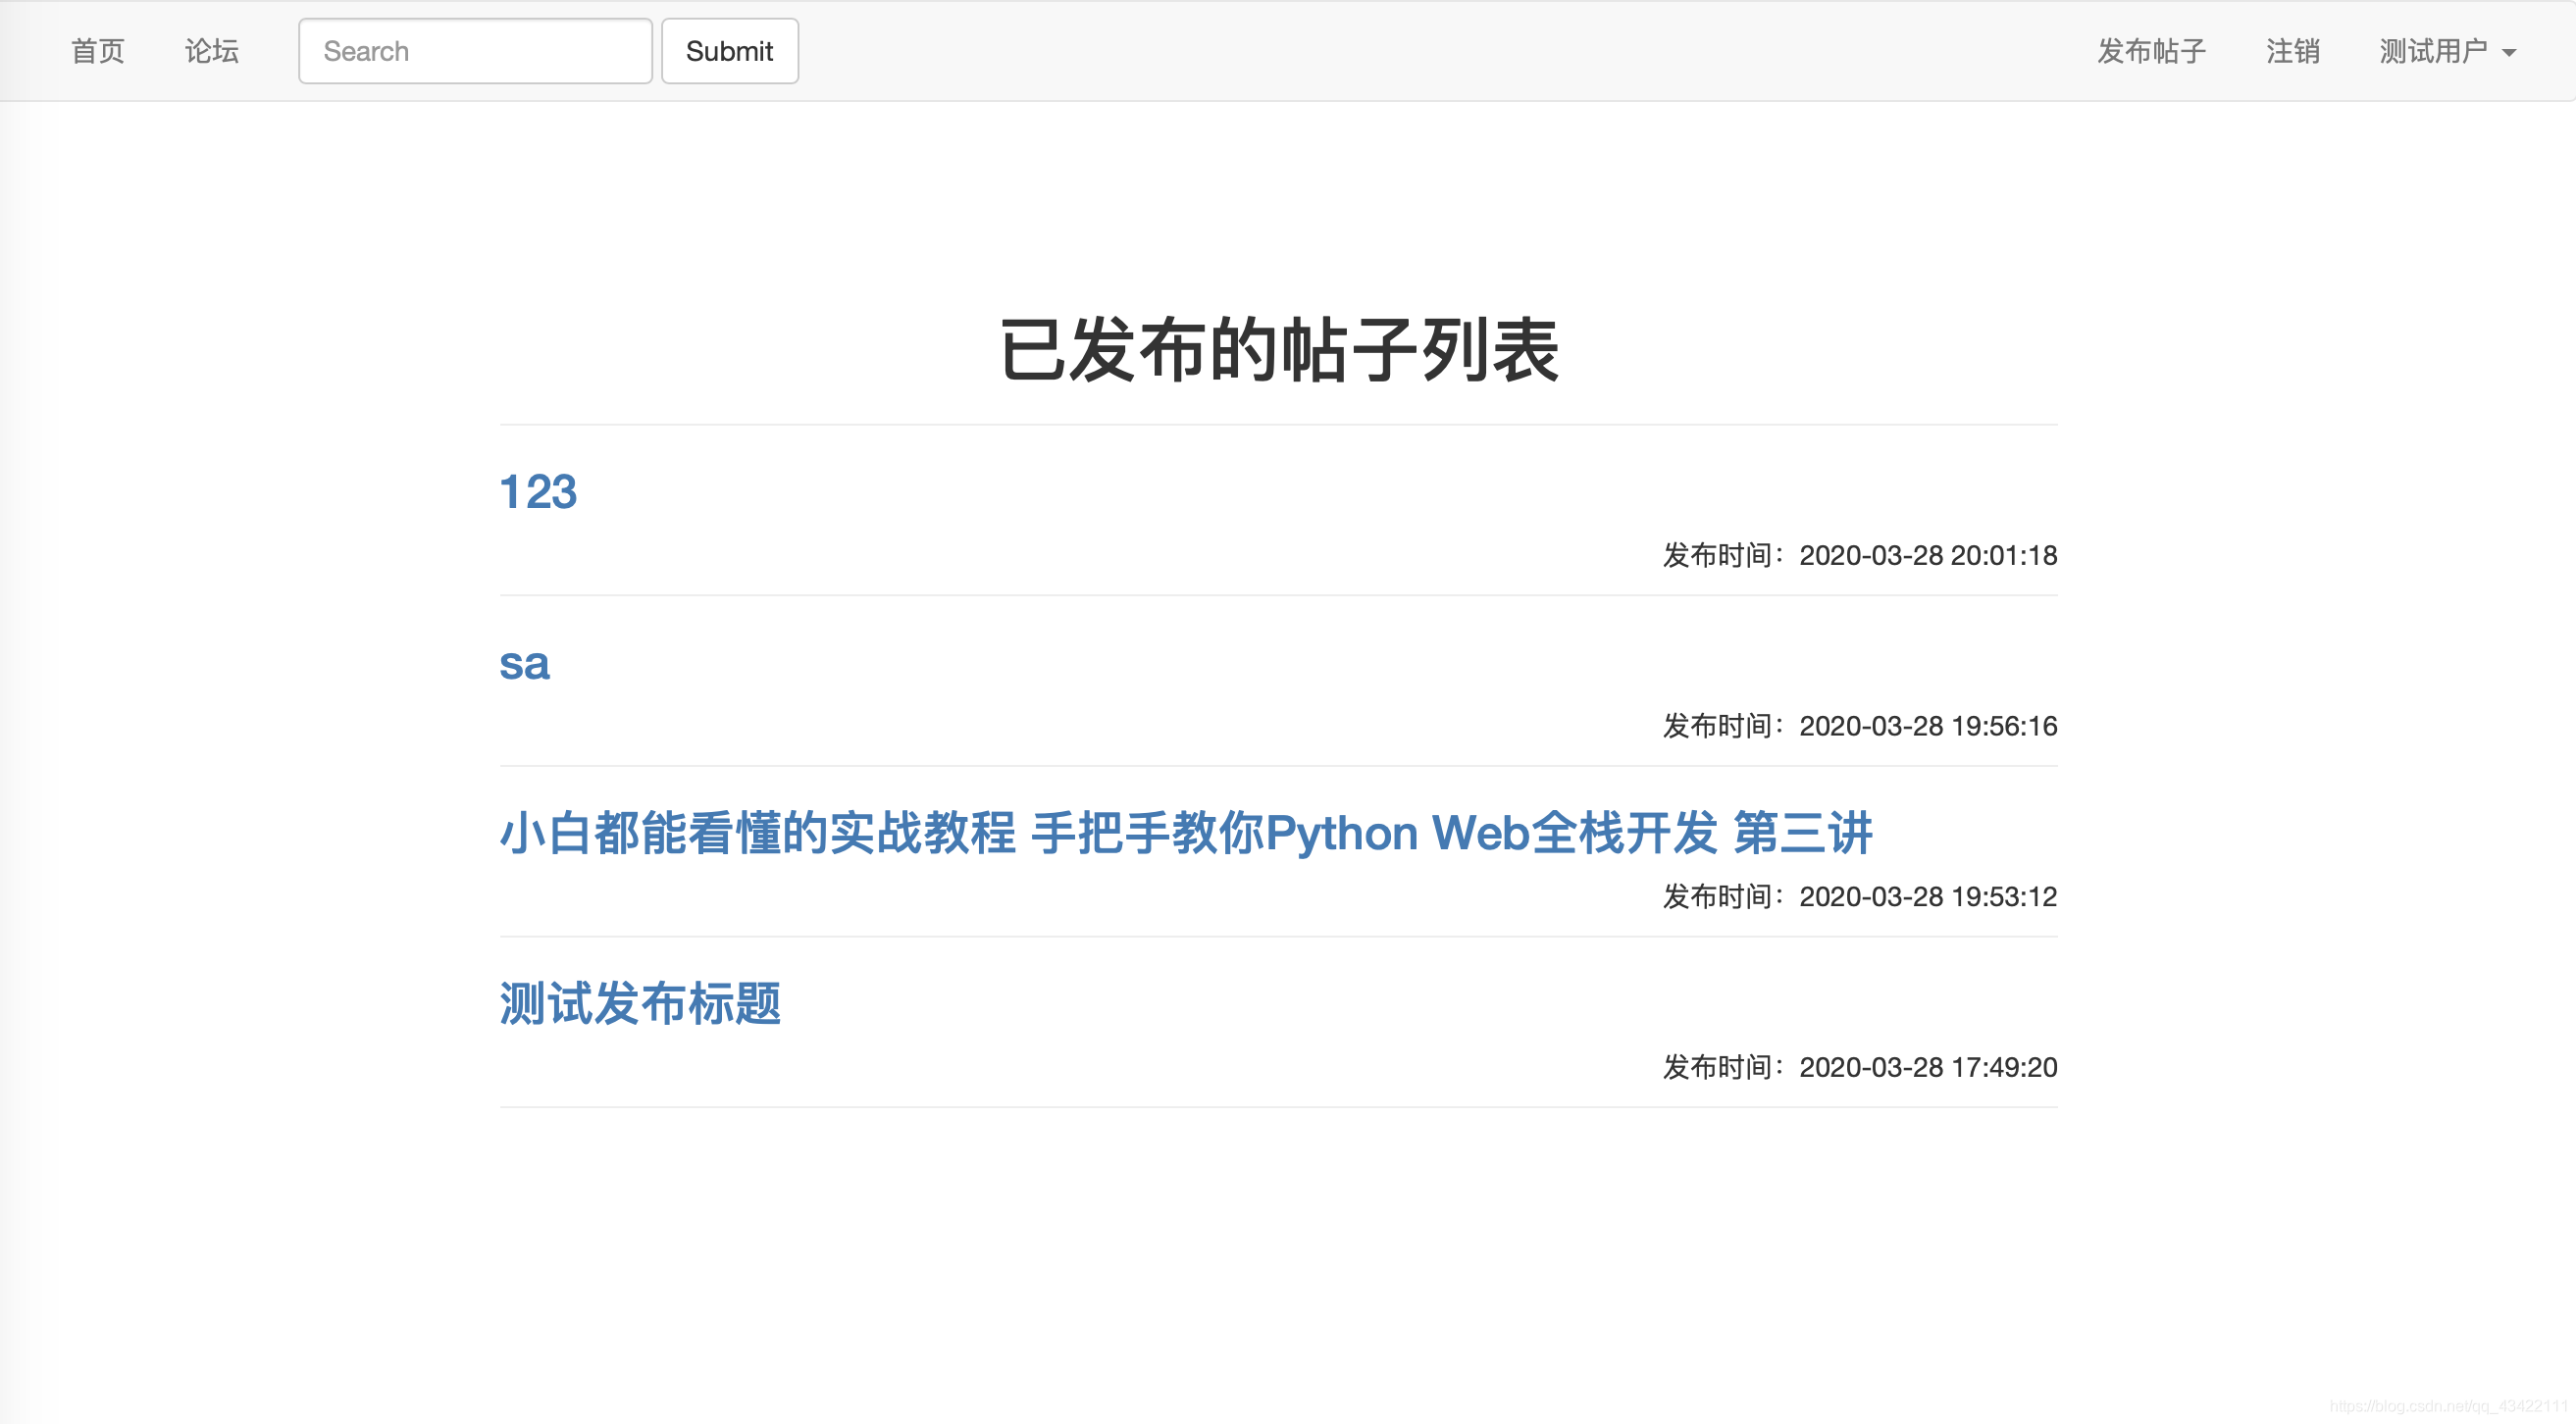
我们这里只需要设计一个<li>将我们后端发送的数据仅显示出来即可。show_issue.html:
{% extends 'base.html' %}

{% block title %}
已发布的帖子
{% endblock %}

{% block css %}
<link rel="stylesheet" href="/static/css/show_issue.css">
{% endblock %}

{% block content %}
<div class="show_issue_content">
    <div class="page-header" id="page_header">
        <h1>已发布的帖子列表</h1>
    </div>
    <div class="issue_list_div">
        <ul class="issue_list_ul">
            {% for issue in issue_detail %}
                <li class="issue_list_li">
                    <div class="issue_div">
                        <div class="issue_content">
                            <h3>
                                <a href="{{ url_for('issue_detail',Ino = issue[0]) }}">
                                    {{ issue[2] }}
                                </a>
                            </h3>
                        </div>
                        <div class="author_info">
                            <p class="post-info">
                                <span>发布时间:{{ issue[3] }}</span>
                            </p>
                        </div>
                    </div>
                </li>
            {% endfor %}
        </ul>
    </div>
</div>
{% endblock %}
show_issue.css:
#page_header{
    text-align: center;
}

.issue_list_ul{
    list-style-type: none;
    margin-left: 0;
    padding-left: 0;
}
.author_info{
    text-align: right;
}

.issue_div{
    border-bottom:1px solid #eee;
}

.issue_content{
    max-height: 200px;
}
.show_issue_content{
    margin-right: 20%;
    margin-left: 20%;
    margin-top: 8%;
}
这里我们也修改一下base.html文件,设置下来列表。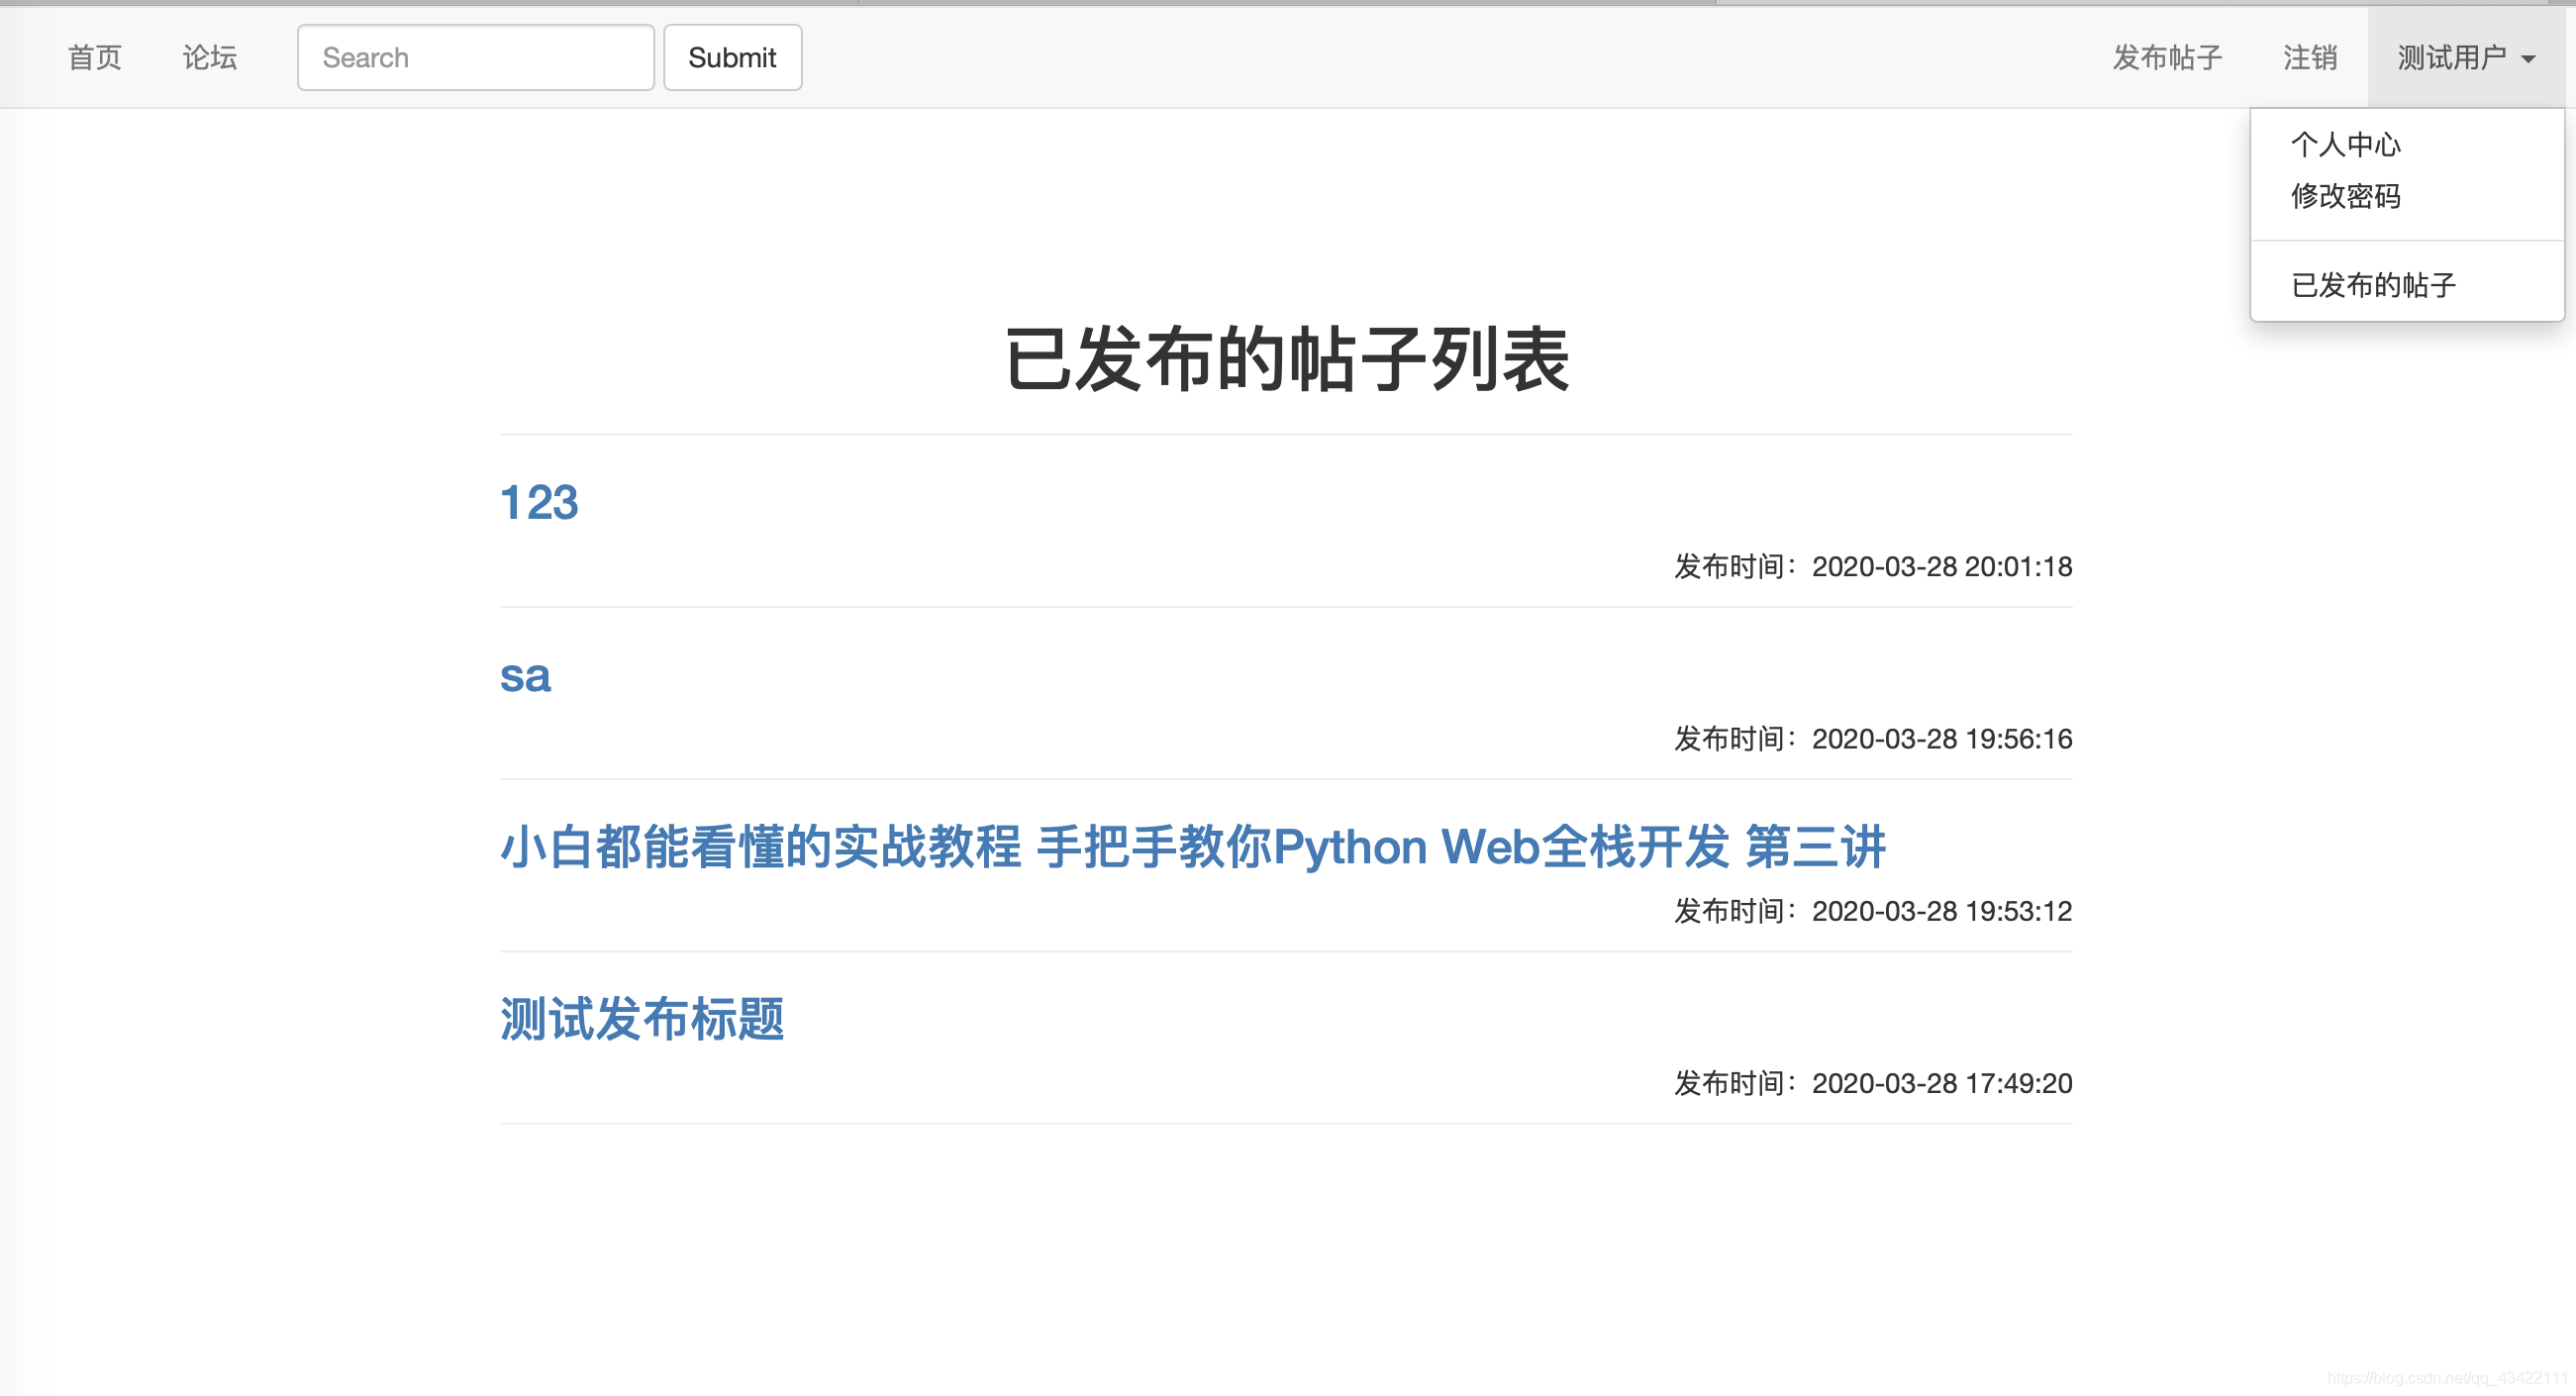
我们在导航栏的下拉列表中添加我们这章个人中心的三个页面,这里贴一下目前base.html的全部代码,防止有的小伙伴找不到修改的地方。
<!DOCTYPE html>
<html lang="en">
<head>
    <meta charset="UTF-8">
    <title>
        {% block title %}
{#        其他页面重写标题的地方#}
        {% endblock %}
    </title>
    {% block css %}
{#    其他页面引用样式或者js的地方#}
    {% endblock %}
    <link rel="stylesheet" href="/static/css/base.css">
    <script src="https://cdn.bootcss.com/jquery/3.4.1/jquery.js"></script>
    <script src="https://cdn.bootcss.com/twitter-bootstrap/3.4.0/js/bootstrap.min.js"></script>
    <link href="https://cdn.bootcss.com/twitter-bootstrap/3.4.0/css/bootstrap.min.css" rel="stylesheet">
</head>
<body>
    <div class="navigation_bar">
        <nav class="navbar navbar-default">
          <div class="container-fluid">
{#              由于这里我们不需要使用商标,所以对Bran部分进行了删除#}
            <!-- Collect the nav links, forms, and other content for toggling -->
            <div class="collapse navbar-collapse" id="bs-example-navbar-collapse-1">
              <ul class="nav navbar-nav">
                <li class="{% block index_class %}{% endblock %}"><a href="{{ url_for('index') }}">首页<span class="sr-only">(current)</span></a></li>
                <li class="{% block formula_class %}{% endblock %}"><a href="{{ url_for('formula') }}">论坛</a></li>
              </ul>
              <form class="navbar-form navbar-left">
                <div class="form-group">
                  <input type="text" class="form-control" placeholder="Search">
                </div>
                <button type="submit" class="btn btn-default">Submit</button>
              </form>
              <ul class="nav navbar-nav navbar-right">
                {% if email %}
                    <li class="{% block post_issue_class %}{% endblock %}"><a href="{{ url_for('post_issue') }}">发布帖子</a></li>
                    <li class=""><a href="{{ url_for('register') }}">注销</a></li>
                    <li class="dropdown">
                      <a href="#" class="dropdown-toggle" data-toggle="dropdown" role="button" aria-haspopup="true" aria-expanded="false">{{ nickname }} <span class="caret"></span></a>
                      <ul class="dropdown-menu">
                        <li><a href="{{ url_for('personal') }}">个人中心</a></li>
                        <li><a href="{{ url_for('change_password') }}">修改密码</a></li>
                        <li role="separator" class="divider"></li>
                        <li><a href="{{ url_for('show_issue') }}">已发布的帖子</a></li>
                      </ul>
                    </li>
                {% else %}
                    <li class="{% block register_class %}{% endblock %}"><a href="{{ url_for('register') }}">注册</a></li>
                    <li class="{% block login_class %} {% endblock %}"><a href="{{ url_for('login') }}">登录</a></li>
                {% endif %}
              </ul>
            </div><!-- /.navbar-collapse -->
          </div><!-- /.container-fluid -->
        </nav>
    </div>
    <div class="content" style="padding: 0;margin: 0;">
        {% block content %}
{#        其他页面重写页面内容的地方#}
        {% endblock %}
    </div>
</body>
</html>
好了,现在小伙伴们可以去测试自己的论坛系统啦!现在已经基本完成了了,我们可以发布问题并且显示出来,还可以对帖子进行回复,查看帖子详情了,现在小小的在线论坛系统已经五脏俱全啦!(虽然设施简陋点点),同时我们还实现了我们的访问过滤功能,不然非法用户访问我们的页面,在这一讲中我们实现了我们个人中心页面的各个功能~小伙伴们都顺利实现了吗?如果有问题可以在评论区里进行问哦,如果喜欢这篇文章,可以点赞关注支持下博主。
博主的更多文章导航可以查看我的栈内导航文章,里有各个文章的超链接,实时更新。博客文章内容导航(实时更新)
博主的站内博客导航:博客文章内容导航(实时更新)
更多精彩博客文章推荐
- 一本教你如何在前端实现富文本编辑器
- 小白都能看得懂的教程 一本教你如何在前端实现markdown编辑器
- 一文教会你Bootstrap,让你也可以快速建站
- 一文教你如何白嫖JetBrains全家桶(IDEA/PtChram/CLion)免费正版
八、资源专区相关功能实现
本项目所有源码在GitHub开源,GitHub地址为:OnlineForumPlatform
今天来到我们实战系列的第八部分,资源专区相关功能实现,在之前的七个部分里,我们已经完成了在线论坛系统的导航条、登录、注册、论坛页面、帖子详情页面、个人页面、修改密码、查看已发布帖子,个人中心页面,修改密码,查看已发布帖子等的功能实现,目前我们的论坛已经可以进行帖子发布,查看帖子详情,并且进行回复信息了。在上一讲中,我们还是实现了功能限制,对不同用户的访问进行过滤。下面我们继续来完善我们的这个在线论坛系统,今天我们来为这个系统添加资源专区,这里我们主要分为资源上传,资源列表(查看资源列表),在线查看资源文件、资源文件下载的功能。
8.1资源上传功能实现
这里我们来开始实现资源上传功能,我们先从前端开始实现,然后到后端进行存储。之前写过一篇如何实现文件上传下载的博文,如果对这方面还不太了解的同学,可以先去看一下博文:Python Flask文件上传下载,这篇博文简单的介绍了如何实现文件的上传与下载,这里我们来进行一个详细的实现。
8.1资源上传功能实现-前端
资源文件上传,我们这里设计一个<div>,然后里面放一个<form>,进行文件的上传,和文件描述。这里先创建一个post_file.html文件用来当前的前端的文件,post_file.css文件用来记录样式。我们这个页面还是继承自base.html。还是先上个效果图,然后我们给一个源码,因为这里前端的话,我们就是一个<table>然后里面放3行的信息。
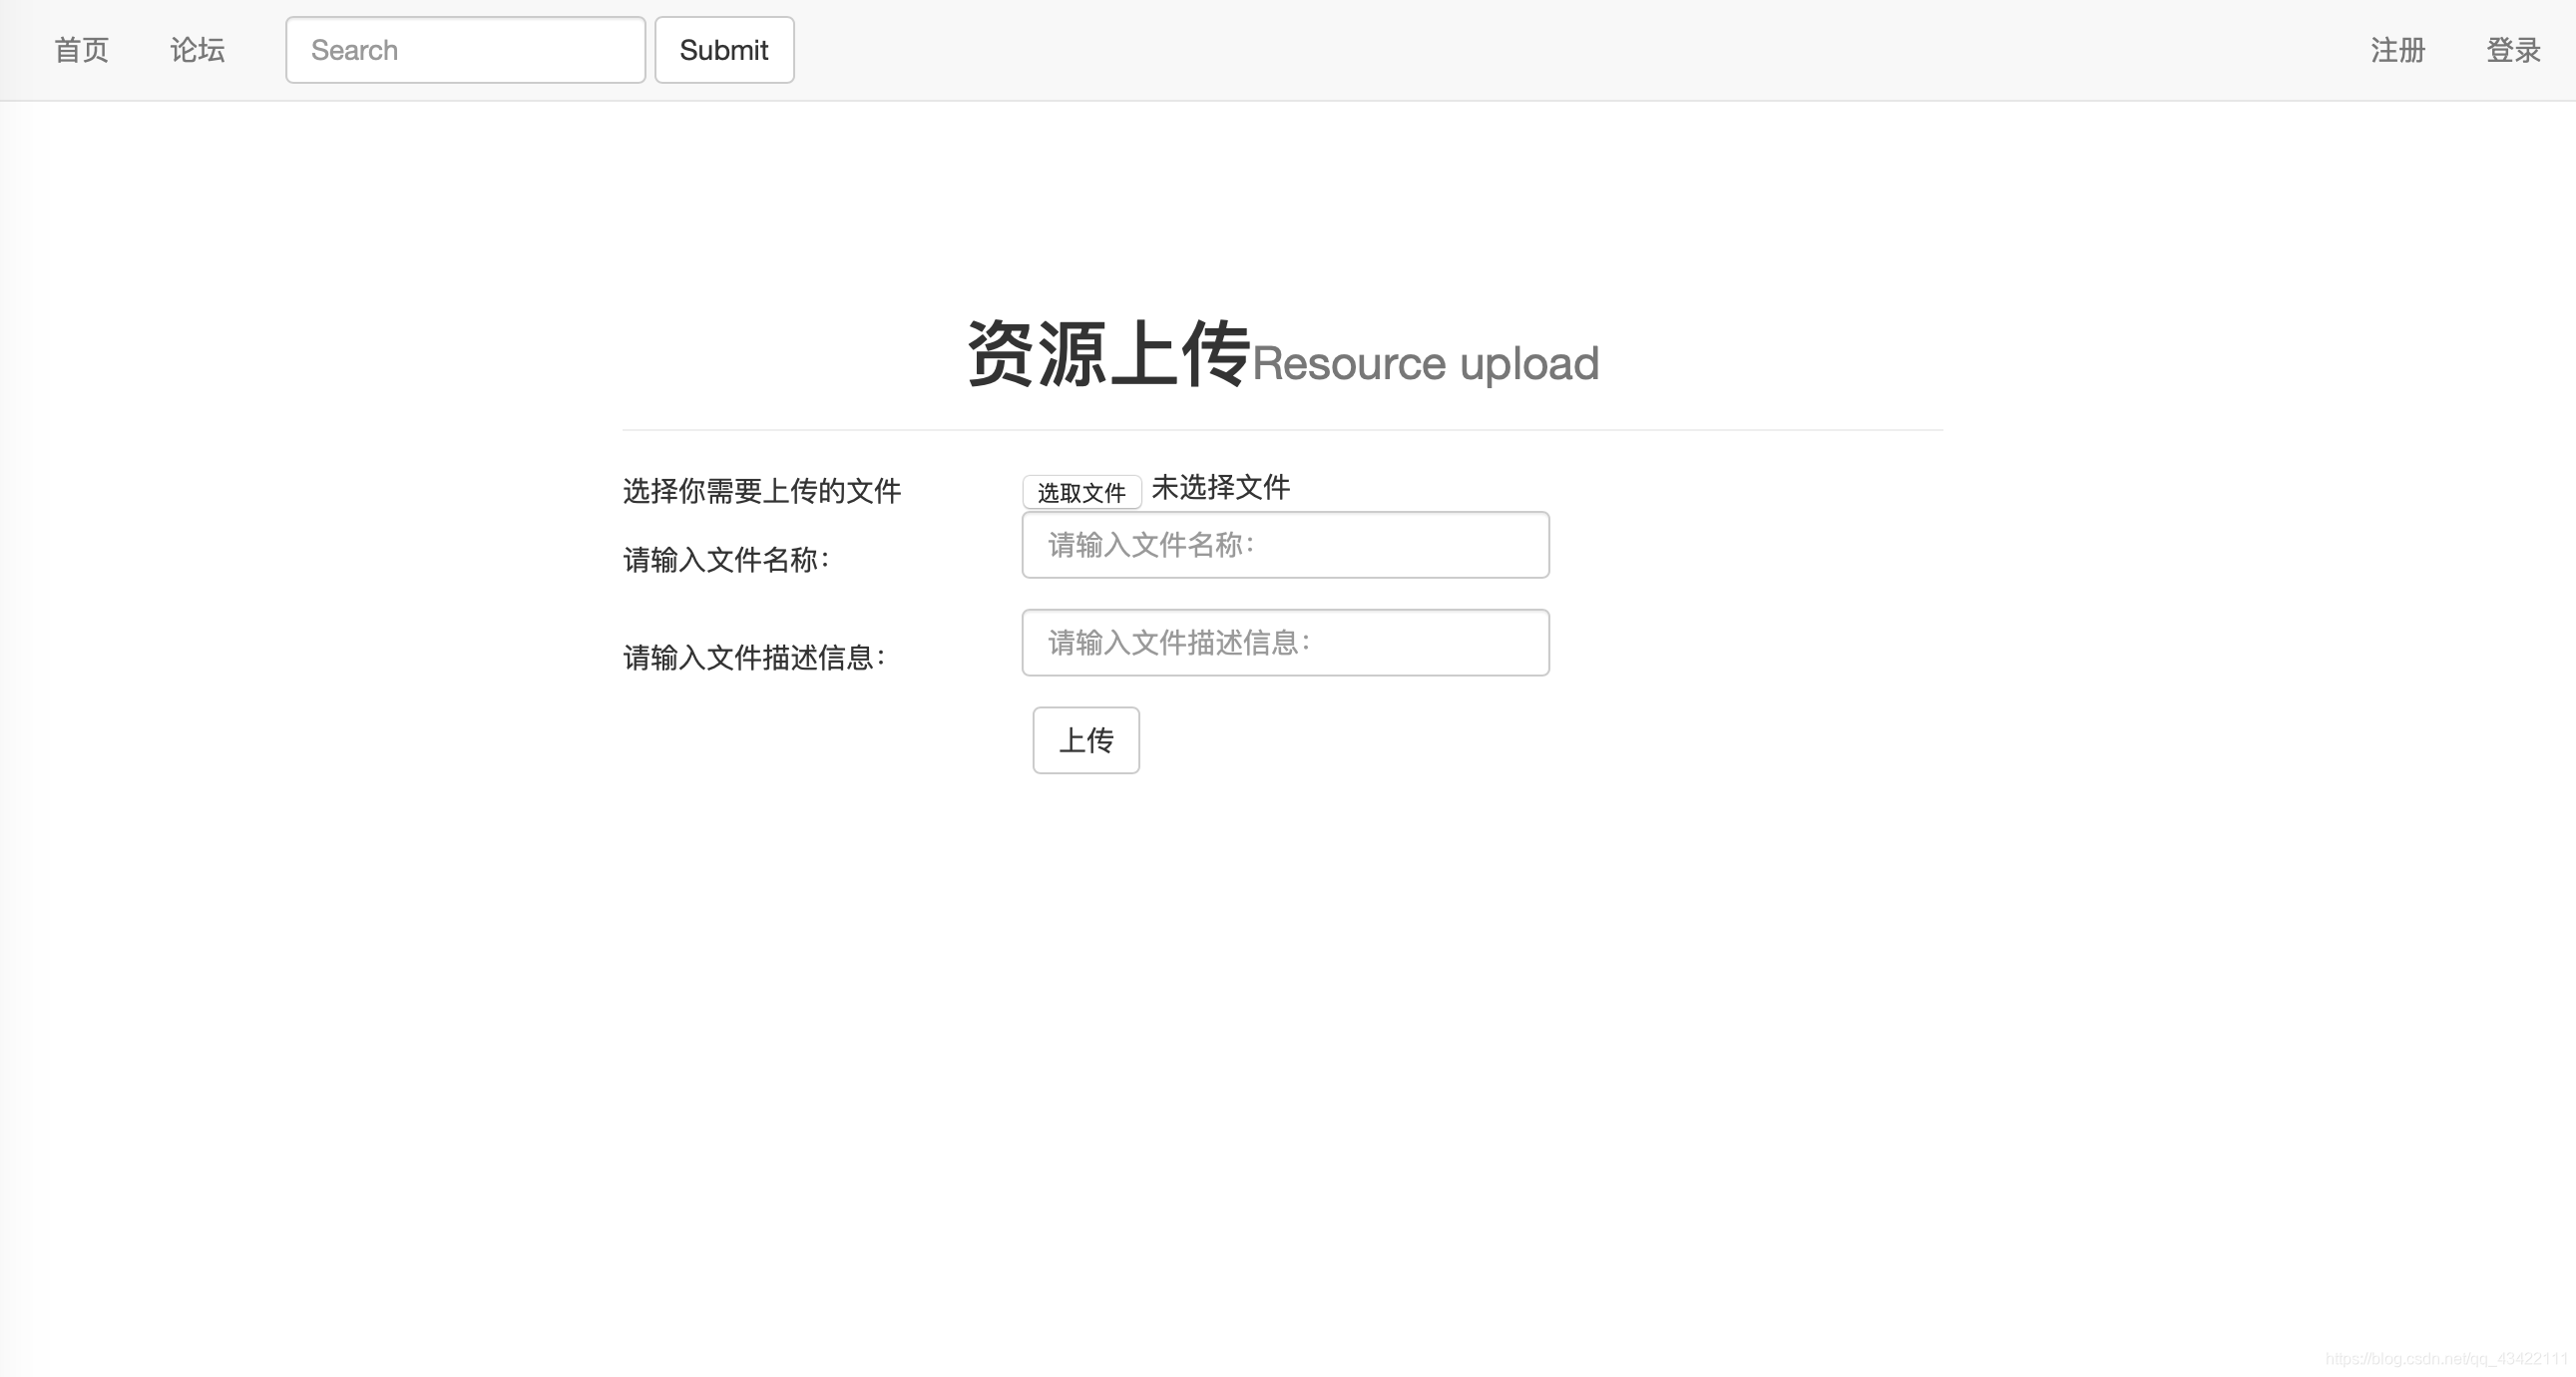
这里我们需要注意的就是,在我们的form中,不要忘记设置enctype,需要把这个属性设置为multipart/form-data。
post_file.html:
{% extends 'base.html' %}

{% block title %}
资源上传
{% endblock %}

{% block css %}
<link rel="stylesheet" href="/static/css/post_file.css">
{% endblock %}

{% block content %}
<div class="post_file_content">
    <div class="page-header" id="page_header">
      <h1>资源上传<small>Resource upload</small></h1>
    </div>
    <div class="post_file_div">
        <form action="" method="post" enctype="multipart/form-data">
            <table id="file_table">
                <tr>
                    <td>
                        选择你需要上传的文件
                    </td>
                    <td>
                        <input id="file_butt" type="file" name="file">
                    </td>
                </tr>
                <tr>
                    <td>
                        请输入文件名称:
                    </td>
                    <td>
                        <div class="form-group">
                            <input type="text" class="form-control" name="filename" id="exampleInputEmail1" placeholder="请输入文件名称:">
                        </div>
                    </td>
                </tr>
                <tr>
                    <td>
                        请输入文件描述信息:
                    </td>
                    <td>
                        <div class="form-group">
                            <input type="text" class="form-control" name="file_info" id="exampleInputEmail1" placeholder="请输入文件描述信息:">
                        </div>
                    </td>
                </tr>
                <tr>
                    <td colspan="2">
                        <div id="login_butt">
                          <button type="submit" class="btn btn-default">上传</button>
                      </div>
                    </td>
                </tr>
            </table>
        </form>
    </div>
</div>
{% endblock %}
post_file.css
.post_file_content{
    margin-top: 8%;;
    margin-left: 25%;
    margin-right: 25%;
}

#page_header{
    text-align: center;
}

#file_table td{
    width: 200px;
}
#login_butt{
    text-align: center;
}
8.1.2资源上传功能实现-数据库端
这里我们又需要新增一个表了,用来存储我们的一个文件的存储信息,我们主要存储的信息有:Fno(用来唯一标识我们的文件)、文件名称、文件描述信息、文件上传时间。
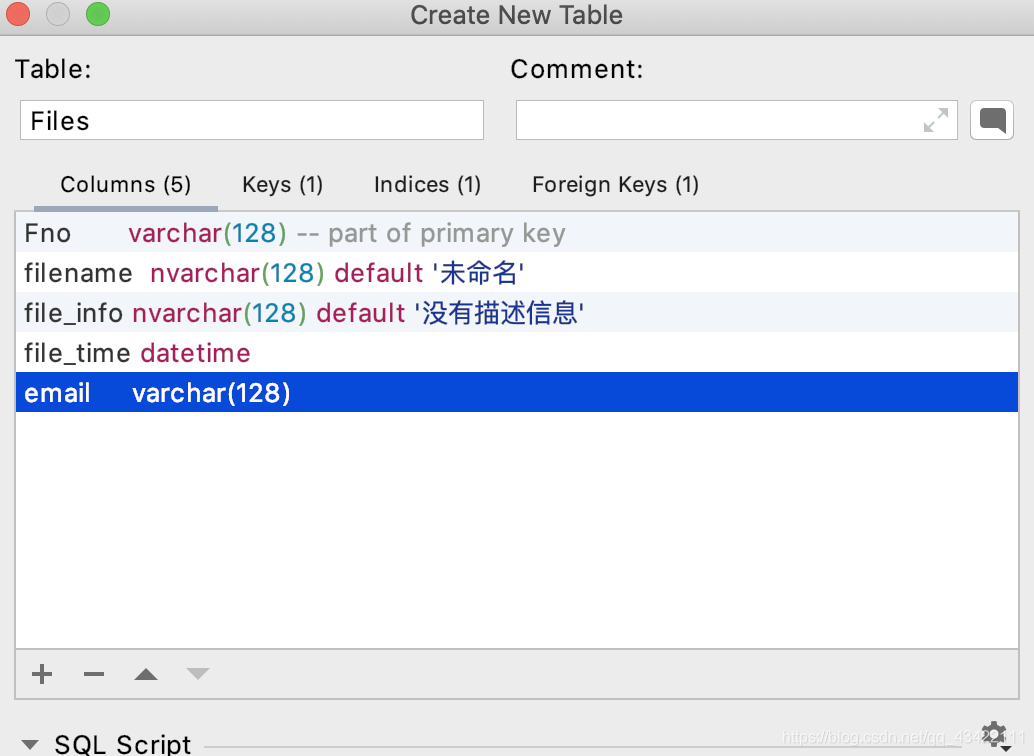
SQL语句为:
create table Files
(
	Fno varchar(128) not null,
	filename nvarchar(128) default '未命名' null,
	file_info nvarchar(128) default '没有描述信息' null,
	file_time datetime null,
	email varchar(128) null,
	constraint Files_UserInformation_email_fk
		foreign key (email) references UserInformation (email)
);

create unique index Files_Fno_uindex
	on Files (Fno);

alter table Files
	add constraint Files_pk
		primary key (Fno);
8.1.3资源上传实现-后端
下面我们来实现我们资源上传的数据库端,首先我们需要在我们的项目文件中创建一个文件夹用来存放我们上传的文件。这里创建了一个store文件夹用于存放上传的文件。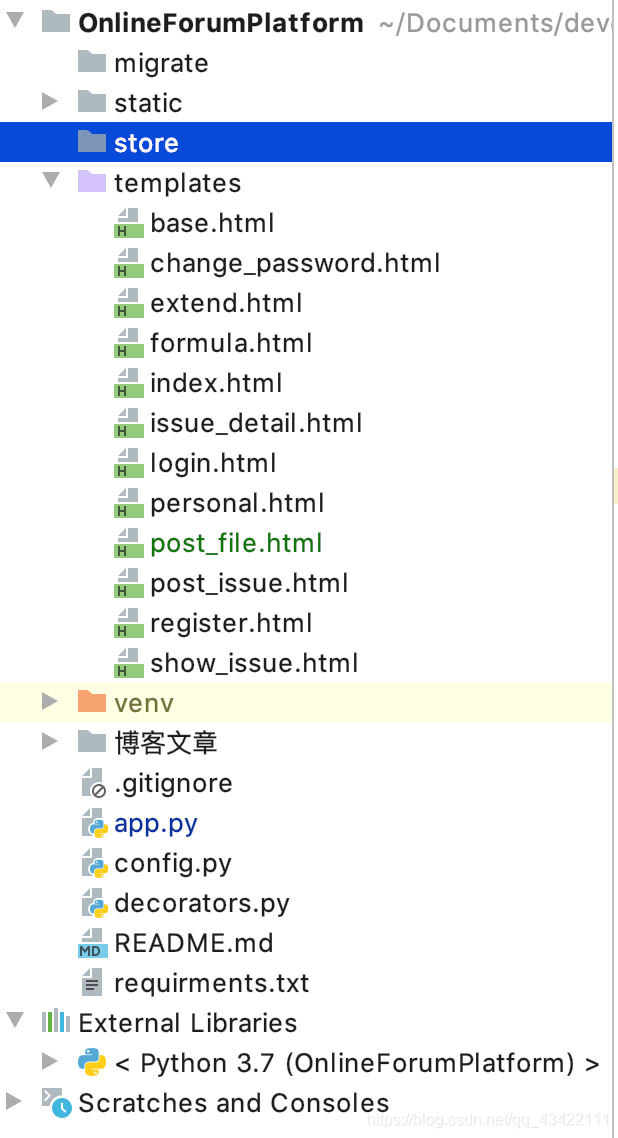
下面我们就来讲从前端发送的文件保存到我们的服务器的文件夹中。这里为了服务器文件的安全性,我们这里文件的名称采用再次命名,一来可以防止重复的文件名,二来可以防止文件名称中有一些特殊的字符。我们这里的文件名称采用随机的120字符,然后加上原本文件的后缀组成,这里可以防止本地存储位置的文件有重复。在代码中有各个步骤的详细注解,大家可以查看代码中的信息:
# 生成120位随机id
def gengenerateFno():
    re = ""
    for i in range(120):
        re += chr(random.randint(65, 90))
    return re

# 资源上传页面
@app.route('/post_file',methods=['GET','POST'])
@login_limit
def post_file():
    if request.method == 'GET':
        return render_template('post_file.html')
    if request.method == 'POST':
        email = session.get('email')
        upload_file = request.files.get('file')
        filename = request.form.get('filename')
        file_info = request.form.get('file_info')
        file_path = 'store'
        file_time = time.strftime("%Y-%m-%d %H:%M:%S")
        Fno = gengenerateFno()
        try:
            cur = db.cursor()
            sql = "select * from Files where Fno = '%s'" % Fno
            db.ping(reconnect=True)
            cur.execute(sql)
            result = cur.fetchone()
            # 如果result不为空,即该Fno已存在时,一直生成随机的Fno,只到该数据库中不存在
            while result is not None:
                Fno = gengenerateFno()
                sql = "select * from Files where Fno = '%s'" % Fno
                db.ping(reconnect=True)
                cur.execute(sql)
                result = cur.fetchone()
            # 获取文件的后缀
            upload_name = str(upload_file.filename)
            houzhui = upload_name.split('.')[-1]
            # 保存在本地的名字为生成的Fno+文件后缀,同时修改Fno的值
            Fno = Fno+"."+houzhui
            # 保存文件到我们的服务器中
            upload_file.save(os.path.join(file_path,Fno))
            # 将文件信息存储到数据库中
            sql = "insert into Files(Fno, filename, file_info, file_time,email) VALUES ('%s','%s','%s','%s','%s')" % (Fno,filename,file_info,file_time,email)
            db.ping(reconnect=True)
            cur.execute(sql)
            db.commit()
            cur.close()
            return render_template('index.html')
        except Exception as e:
            raise e
这样我们就可以将我们的文件上传到我们是服务器端,并且保存到我们制定的文件夹中了。
8.2 资源专区功能实现
下面我们开始来实现我们的资源专区,这里的资源专区我们用来显示我们的所有的资源的一个列表,并且可以进行在线查看资源和下载资源。
8.2.1 资源专区功能实现-后端
资源专区的话,我们还是先实现后端,发送数据到前端,然后我们前端将接收到的数据进行一个排版,然后显示。大家有没有发现一个问题,我们刚刚先实现了资源的上传,但是我们并没有导航,那为什么我们要先实现资源上传呢?因为如果我们先实现资源专区的话,没有东西显示,用于测试啊~所以我们先实现资源上传,可以先上传文件,便于资源专区的实现。
这里我们需要返回到前端的数据有Fno、文件名、文件描述、创建时间和创建人的昵称。
# 资源专区
@app.route('/source')
def source():
    if request.method == 'GET':
        try:
            cur = db.cursor()
            sql = "select Fno,filename,file_info,file_time,nickname from Files,UserInformation where Files.email = UserInformation.email"
            db.ping(reconnect=True)
            cur.execute(sql)
            files = cur.fetchall()
            cur.close()
            return render_template('source.html',files = files)
        except Exception as e:
            raise e
8.2.2资源专区功能实现-前端
资源专区的前端我们首先需要一个列表用来展示我们的服务器中已上传的文件的信息,并且导航到我们的文件在线查看,文件下载等功能。这里使用source.html用来实现我们的前端功能,使用source.css存放样式的描述信息。页面效果为:
在这里由于我们的在线查看文件和下载文件还没有实现,所有我们这里的超链接的地址是#,等下我们来进行实现。目前的前端的页面代码为:
{% extends 'base.html' %}
{% block title %}
资源专区
{% endblock %}
{% block css %}
<link rel="stylesheet" href="/static/css/source.css">
{% endblock %}
{% block content %}
<div class="source_content">
<div class="page-header" id="page_header">
<h1>资源专区<small>Resources Zone</small></h1>
</div>
<div class="source_div">
<ul class="source_ul">
{% for file in files %}
<li class="issue_list_li">
<div class="issue_div">
<div class="issue_content">
<h3>
<a href="#">
{{ file[1] }}
</a>
</h3>
<article>
{{ file[2] }}
</article>
</div>
<div class="author_info">
<p class="post-info">
<span>上传者:{{ file[4] }}</span>  
<span>上传时间:{{ file[3] }}</span> 
<span><a href="#">在线查看</a></span> 
<span><a href="#">下载文件</a></span>
</p>
</div>
</div>
</li>
{% endfor %}
</ul>
</div>
</div>
{% endblock %}
{% block source_class %}
active
{% endblock %}
source.css:
.source_content{
    margin-right: 20%;
    margin-left: 20%;
    margin-top: 8%;
}

.author_info{
    text-align: right;
}

.source_ul{
    list-style-type: none;
    margin-left: 0;
    padding-left: 0;
}
#page_header{
    text-align: center;
}
我们在base.html中添加了资源专区的导航,并且添加了source_class的block,如果不修改base.html的话,需要将source.html的最后3行删除,不然会报错。base中插入的代码为<li class="{% block source_class %}{% endblock %}"><a href="{{ url_for('source') }}">资源专区</a></li>插入在论坛导航的下面一行。
8.2.3 实现文件在线查看功能
其实这里面要想实现文件的在线查看功能非常的容易实现,我们只需要返回这个文件即可。我们这里需要在路由处传递一个参数Fno,用来寻找我们的文件。
# 在线查看文件
@app.route('/online_file/<Fno>')
def online_file(Fno):
    return send_from_directory(os.path.join('store'), Fno)
8.2.4 实现文件下载功能
我们再来实现我们的文件下载功能,这个也是非常简单的,我们直接返回一个send_file即可实现文件的下载。
# 文件下载功能
@app.route('/download/<Fno')
def download(Fno):
    return send_file(os.path.join('store') + "/" + Fno, as_attachment=True)
在实现完我们的文件在线查看和文件下载之后,我们就可以修改我们的资源专区的前端,为其超链接添加一个正确的链接,让他能够实现正确的功能了。修改后的souce.html页面为:
{% extends 'base.html' %}
{% block title %}
资源专区
{% endblock %}
{% block css %}
<link rel="stylesheet" href="/static/css/source.css">
{% endblock %}
{% block content %}
<div class="source_content">
<div class="page-header" id="page_header">
<h1>资源专区<small>Resources Zone</small></h1>
</div>
<div class="source_div">
<ul class="source_ul">
{% for file in files %}
<li class="issue_list_li">
<div class="issue_div">
<div class="issue_content">
<h3>
<a href="{{ url_for('online_file',Fno = file[0]) }}">
{{ file[1] }}
</a>
</h3>
<article>
{{ file[2] }}
</article>
</div>
<div class="author_info">
<p class="post-info">
<span>上传者:{{ file[4] }}</span>  
<span>上传时间:{{ file[3] }}</span> 
<span><a href="{{ url_for('online_file',Fno = file[0]) }}">在线查看</a></span> 
<span><a href="{{ url_for('download',Fno = file[0]) }}">下载文件</a></span>
</p>
</div>
</div>
</li>
{% endfor %}
</ul>
</div>
</div>
{% endblock %}
{% block source_class %}
active
{% endblock %}
&emps;然后我们这里再为我们上传资源的页面添加一个导航,由于我们上传资源的功能只有登录的用户才可以进行使用,所以我们在导航栏中添加,当我们登录时,显示上传资源的导航,我们在base.html中添加:(加在资源专区后面即可)
{% if email %}
	<li class="{% block post_file_class %}{% endblock %}"><a href="{{ url_for('post_file') }}">上传资源</a></li>
{% endif %}
为了防止我们有的小伙伴不知道插入到哪里,我们这里再贴一下目前base.html整体的代码
<!DOCTYPE html>
<html lang="en">
<head>
    <meta charset="UTF-8">
    <title>
        {% block title %}
{#        其他页面重写标题的地方#}
        {% endblock %}
    </title>
    {% block css %}
{#    其他页面引用样式或者js的地方#}
    {% endblock %}
    <link rel="stylesheet" href="/static/css/base.css">
    <script src="https://cdn.bootcss.com/jquery/3.4.1/jquery.js"></script>
    <script src="https://cdn.bootcss.com/twitter-bootstrap/3.4.0/js/bootstrap.min.js"></script>
    <link href="https://cdn.bootcss.com/twitter-bootstrap/3.4.0/css/bootstrap.min.css" rel="stylesheet">
</head>
<body>
    <div class="navigation_bar">
        <nav class="navbar navbar-default">
          <div class="container-fluid">
{#              由于这里我们不需要使用商标,所以对Bran部分进行了删除#}
            <!-- Collect the nav links, forms, and other content for toggling -->
            <div class="collapse navbar-collapse" id="bs-example-navbar-collapse-1">
              <ul class="nav navbar-nav">
                <li class="{% block index_class %}{% endblock %}"><a href="{{ url_for('index') }}">首页<span class="sr-only">(current)</span></a></li>
                <li class="{% block formula_class %}{% endblock %}"><a href="{{ url_for('formula') }}">论坛</a></li>
                <li class="{% block source_class %}{% endblock %}"><a href="{{ url_for('source') }}">资源专区</a></li>
                {% if email %}
                    <li class="{% block post_file_class %}{% endblock %}"><a href="{{ url_for('post_file') }}">上传资源</a></li>
                {% endif %}
              </ul>
              <form class="navbar-form navbar-left">
                <div class="form-group">
                  <input type="text" class="form-control" placeholder="Search">
                </div>
                <button type="submit" class="btn btn-default">Submit</button>
              </form>
              <ul class="nav navbar-nav navbar-right">
                {% if email %}
                    <li class="{% block post_issue_class %}{% endblock %}"><a href="{{ url_for('post_issue') }}">发布帖子</a></li>
                    <li class=""><a href="{{ url_for('register') }}">注销</a></li>
                    <li class="dropdown">
                      <a href="#" class="dropdown-toggle" data-toggle="dropdown" role="button" aria-haspopup="true" aria-expanded="false">{{ nickname }} <span class="caret"></span></a>
                      <ul class="dropdown-menu">
                        <li><a href="{{ url_for('personal') }}">个人中心</a></li>
                        <li><a href="{{ url_for('change_password') }}">修改密码</a></li>
                        <li role="separator" class="divider"></li>
                        <li><a href="{{ url_for('show_issue') }}">已发布的帖子</a></li>
                      </ul>
                    </li>
                {% else %}
                    <li class="{% block register_class %}{% endblock %}"><a href="{{ url_for('register') }}">注册</a></li>
                    <li class="{% block login_class %} {% endblock %}"><a href="{{ url_for('login') }}">登录</a></li>
                {% endif %}
              </ul>
            </div><!-- /.navbar-collapse -->
          </div><!-- /.container-fluid -->
        </nav>
    </div>
    <div class="content" style="padding: 0;margin: 0;">
        {% block content %}
{#        其他页面重写页面内容的地方#}
        {% endblock %}
    </div>
</body>
</html>
然后我们app.py中的返回值也可以进行一个适当的优化,例如我们上传完资源之后可以重定向到我们的资源专区,而不是一开始的index(因为当时还没有资源专区)。所以这里也贴一下我们app.py的全部代码,给小伙伴们进行一个参考
from flask import *
from werkzeug.security import generate_password_hash, check_password_hash
from werkzeug.utils import secure_filename
from config import db
import random
import time
import config
import os
import re
from decorators import login_limit

app = Flask(__name__)

# 从对象中导入config
app.config.from_object(config)


# 登录状态保持
@app.context_processor
def login_status():
    # 从session中获取email
    email = session.get('email')
    # 如果有email信息,则证明已经登录了,我们从数据库中获取登陆者的昵称和用户类型,来返回到全局
    if email:
        try:
            cur = db.cursor()
            sql = "select nickname,type from UserInformation where email = '%s'" % email
            db.ping(reconnect=True)
            cur.execute(sql)
            result = cur.fetchone()
            if result:
                return {'email': email, 'nickname': result[0], 'user_type': result[1]}
        except Exception as e:
            raise e
    # 如果email信息不存在,则未登录,返回空
    return {}


# 主页
@app.route('/')
def index():
    return render_template('index.html')


# 注册页面
@app.route('/register', methods=['GET', 'POST'])
def register():
    if request.method == 'GET':
        return render_template('register.html')
    if request.method == 'POST':
        email = request.form.get('email')
        nickname = request.form.get('nickname')
        password_1 = request.form.get('password_1')
        password_2 = request.form.get('password_2')
        phone = request.form.get('phone')
        if not all([email, nickname, password_1, password_2, phone]):
            flash("信息填写不全,请将信息填写完整")
            return render_template('register.html')
        if password_1 != password_2:
            flash("两次密码填写不一致!")
            return render_template('register.html')
        password = generate_password_hash(password_1, method="pbkdf2:sha256", salt_length=8)
        try:
            cur = db.cursor()
            sql = "select * from UserInformation where email = '%s'" % email
            db.ping(reconnect=True)
            cur.execute(sql)
            result = cur.fetchone()
            if result is not None:
                flash("该Email已存在!")
                return render_template('register.html')
            else:
                create_time = time.strftime("%Y-%m-%d %H:%M:%S")
                sql = "insert into UserInformation(email, nickname, password, type, create_time, phone) VALUES ('%s','%s','%s','0','%s','%s')" % (
                    email, nickname, password, create_time, phone)
                db.ping(reconnect=True)
                cur.execute(sql)
                db.commit()
                cur.close()
                return redirect(url_for('index'))
        except Exception as e:
            raise e


# 登录页面
@app.route('/login', methods=['GET', 'POST'])
def login():
    if request.method == 'GET':
        return render_template('login.html')
    if request.method == 'POST':
        email = request.form.get('email')
        password = request.form.get('password')
        if not all([email, password]):
            flash("请将信息填写完整!")
            return render_template('login.html')
        try:
            cur = db.cursor()
            sql = "select password from UserInformation where email = '%s'" % email
            db.ping(reconnect=True)
            cur.execute(sql)
            result = cur.fetchone()
            if result is None:
                flash("该用户不存在")
                return render_template('login.html')
            if check_password_hash(result[0], password):
                session['email'] = email
                session.permanent = True
                cur.close()
                return redirect(url_for('index'))
            else:
                flash("密码错误!")
                return render_template('login.html')
        except Exception as e:
            raise e


# 用户注销
@app.route('/logout')
def logout():
    session.clear()
    return redirect(url_for(('index')))


# 生成128随机id
def gengenerateID():
    re = ""
    for i in range(128):
        re += chr(random.randint(65, 90))
    return re


# 发布帖子
@app.route('/post_issue', methods=['GET', 'POST'])
@login_limit
def post_issue():
    if request.method == 'GET':
        return render_template('post_issue.html')
    if request.method == 'POST':
        title = request.form.get('title')
        comment = request.form.get('editorValue')
        email = session.get('email')
        issue_time = time.strftime("%Y-%m-%d %H:%M:%S")
        try:
            cur = db.cursor()
            Ino = gengenerateID()
            sql = "select * from Issue where Ino = '%s'" % Ino
            db.ping(reconnect=True)
            cur.execute(sql)
            result = cur.fetchone()
            # 如果result不为空,即存在该ID,就一直生成128位随机ID,直到不重复位置
            while result is not None:
                Ino = gengenerateID()
                sql = "select * from Issue where Ino = '%s'" % Ino
                db.ping(reconnect=True)
                cur.execute(sql)
                result = cur.fetchone()
            sql = "insert into Issue(Ino, email, title, issue_time) VALUES ('%s','%s','%s','%s')" % (
                Ino, email, title, issue_time)
            db.ping(reconnect=True)
            cur.execute(sql)
            db.commit()
            sql = "insert into Comment(Cno, Ino, comment, comment_time, email) VALUES ('%s','%s','%s','%s','%s')" % (
                '1', Ino, comment, issue_time, email)
            db.ping(reconnect=True)
            cur.execute(sql)
            db.commit()
            cur.close()
            return redirect(url_for('formula'))
        except Exception as e:
            raise e


# 论坛页面
@app.route('/formula')
def formula():
    if request.method == 'GET':
        try:
            cur = db.cursor()
            sql = "select Issue.Ino, Issue.email,UserInformation.nickname,issue_time,Issue.title,Comment.comment from Issue,UserInformation,Comment where Issue.email = UserInformation.email and Issue.Ino = Comment.Ino and Cno = '1' order by issue_time DESC "
            db.ping(reconnect=True)
            cur.execute(sql)
            issue_information = cur.fetchall()
            cur.close()
            return render_template('formula.html', issue_information=issue_information)
        except Exception as e:
            raise e


# 问题详情
@app.route('/issue/<Ino>', methods=['GET', 'POST'])
@login_limit
def issue_detail(Ino):
    if request.method == 'GET':
        try:
            if request.method == 'GET':
                cur = db.cursor()
                sql = "select Issue.title from Issue where Ino = '%s'" % Ino
                db.ping(reconnect=True)
                cur.execute(sql)
                # 这里返回的是一个列表,即使只有一个数据,所以这里使用cur.fetchone()[0]
                issue_title = cur.fetchone()[0]
                sql = "select UserInformation.nickname,Comment.comment,Comment.comment_time,Comment.Cno from Comment,UserInformation where Comment.email = UserInformation.email and Ino = '%s'" % Ino
                db.ping(reconnect=True)
                cur.execute(sql)
                comment = cur.fetchall()
                cur.close()
                # 返回视图,同时传递参数
                return render_template('issue_detail.html', Ino=Ino, issue_title=issue_title, comment=comment)
        except Exception as e:
            raise e

    if request.method == 'POST':
        Ino = request.values.get('Ino')
        email = session.get('email')
        comment = request.values.get('editorValue')
        comment_time = time.strftime("%Y-%m-%d %H:%M:%S")
        try:
            cur = db.cursor()
            sql = "select max(Cno) from Comment where Ino = '%s' " % Ino
            db.ping(reconnect=True)
            cur.execute(sql)
            result = cur.fetchone()
            Cno = int(result[0]) + 1
            Cno = str(Cno)
            sql = "insert into Comment(Cno, Ino, comment, comment_time, email) VALUES ('%s','%s','%s','%s','%s')" % (
            Cno, Ino, comment, comment_time, email)
            cur.execute(sql)
            db.commit()
            cur.close()
            return redirect(url_for('issue_detail',Ino = Ino))
        except Exception as e:
            raise e


# 个人中心
@app.route('/personal')
@login_limit
def personal():
    if request.method == 'GET':
        email = session.get('email')
        try:
            cur = db.cursor()
            sql = "select email, nickname, type, create_time, phone from UserInformation where email = '%s'" % email
            db.ping(reconnect=True)
            cur.execute(sql)
            personal_info = cur.fetchone()
        except Exception as e:
            raise e
        return render_template('personal.html',personal_info = personal_info)


# 修改密码
@app.route('/change_password',methods=['GET','POST'])
@login_limit
def change_password():
    if request.method == 'GET':
        return render_template('change_password.html')
    if request.method == 'POST':
        old_password = request.form.get('old_password')
        new_password1 = request.form.get('new_password1')
        new_password2 = request.form.get('new_password2')
        if not all([old_password,new_password1,new_password2]):
            flash("信息填写不全!")
            return render_template('change_password.html')
        if new_password1 != new_password2:
            flash("两次新密码不一致!")
            return render_template('change_password.html')
        email = session.get('email')
        try:
            cur = db.cursor()
            sql = "select password from UserInformation where email = '%s'" % email
            db.ping(reconnect=True)
            cur.execute(sql)
            password = cur.fetchone()[0]
            if check_password_hash(password,old_password):
                password = generate_password_hash(new_password1, method="pbkdf2:sha256", salt_length=8)
                sql = "update UserInformation set password = '%s' where email = '%s'" % (password,email)
                db.ping(reconnect=True)
                cur.execute(sql)
                db.commit()
                cur.close()
                return render_template('index.html')
            else:
                flash("旧密码错误!")
                return render_template('change_password.html')
        except Exception as e:
            raise e

# 查看已发布的帖子
@app.route('/show_issue')
@login_limit
def show_issue():
    if request.method == 'GET':
        email = session.get('email')
        try:
            cur = db.cursor()
            sql = "select ino, email, title, issue_time from Issue where email = '%s' order by issue_time desc" % email
            db.ping(reconnect=True)
            cur.execute(sql)
            issue_detail = cur.fetchall()
        except Exception as e:
            raise e
        return render_template('show_issue.html',issue_detail=issue_detail)

# 生成120位随机id
def gengenerateFno():
    re = ""
    for i in range(120):
        re += chr(random.randint(65, 90))
    return re

# 资源上传页面
@app.route('/post_file',methods=['GET','POST'])
@login_limit
def post_file():
    if request.method == 'GET':
        return render_template('post_file.html')
    if request.method == 'POST':
        email = session.get('email')
        upload_file = request.files.get('file')
        filename = request.form.get('filename')
        file_info = request.form.get('file_info')
        file_path = 'store'
        file_time = time.strftime("%Y-%m-%d %H:%M:%S")
        Fno = gengenerateFno()
        try:
            cur = db.cursor()
            sql = "select * from Files where Fno = '%s'" % Fno
            db.ping(reconnect=True)
            cur.execute(sql)
            result = cur.fetchone()
            # 如果result不为空,即该Fno已存在时,一直生成随机的Fno,只到该数据库中不存在
            while result is not None:
                Fno = gengenerateFno()
                sql = "select * from Files where Fno = '%s'" % Fno
                db.ping(reconnect=True)
                cur.execute(sql)
                result = cur.fetchone()
            # 获取文件的后缀
            upload_name = str(upload_file.filename)
            houzhui = upload_name.split('.')[-1]
            # 保存在本地的名字为生成的Fno+文件后缀,同时修改Fno的值
            Fno = Fno+"."+houzhui
            # 保存文件到我们的服务器中
            upload_file.save(os.path.join(file_path,Fno))
            # 将文件信息存储到数据库中
            sql = "insert into Files(Fno, filename, file_info, file_time,email) VALUES ('%s','%s','%s','%s','%s')" % (Fno,filename,file_info,file_time,email)
            db.ping(reconnect=True)
            cur.execute(sql)
            db.commit()
            cur.close()
            return redirect(url_for('source'))
        except Exception as e:
            raise e

# 资源专区
@app.route('/source')
def source():
    if request.method == 'GET':
        try:
            cur = db.cursor()
            sql = "select Fno,filename,file_info,file_time,nickname from Files,UserInformation where Files.email = UserInformation.email"
            db.ping(reconnect=True)
            cur.execute(sql)
            files = cur.fetchall()
            cur.close()
            return render_template('source.html',files = files)
        except Exception as e:
            raise e

# 在线查看文件
@app.route('/online_file/<Fno>')
def online_file(Fno):
    return send_from_directory(os.path.join('store'), Fno)

# 文件下载功能
@app.route('/download/<Fno>')
def download(Fno):
    return send_file(os.path.join('store') + "/" + Fno, as_attachment=True)

if __name__ == '__main__':
    app.run()
目前我们的项目35583行代码了,这里面其实有很多代码是我们引入的插件的代码和我们富文本编辑器的代码,我们把它去掉,我们纯手动码的代码也有3982行代码了,也算一个五脏俱全的小项目了,(到这里,博主已经码字108256个字了)。
好了,现在小伙伴们可以去测试自己的论坛系统啦!现在已经完成了,我们可以发布问题并且显示出来,还可以对帖子进行回复,查看帖子详情,个人中心,资源专区了,现在小小的在线论坛系统已经五脏俱全啦!(虽然设施简陋了点),同时我们还实现了我们的访问过滤功能,不然非法用户访问我们的页面,在这一讲中我们实现了我们个人中心页面的各个功能~小伙伴们都顺利实现了吗?如果有问题可以在评论区里进行问哦,如果喜欢这篇文章,可以点赞关注支持下博主。
博主的更多文章导航可以查看我的栈内导航文章,里有各个文章的超链接,实时更新。博客文章内容导航(实时更新)
九、项目迁移
现在来到我们实战系列的最后一个部分了,项目迁移的一些内容,在之前的八个部分里,我们已经完成了在线论坛系统的导航条、登录、注册、论坛页面、帖子详情页面、个人页面、修改密码、查看已发布帖子、资源专区、文件上传下载等的功能实现,目前我们的论坛已经可以进行帖子发布,查看帖子详情,并且进行回复信息了、资源的上传下载,各个页面的流量过滤。下面我们继续来完善我们的这个在线论坛系统,今天我们来继续完善我们的系统,今天我们来实现一些我们如何保存我们系统的一些插件信息和数据库信息,如何对项目进行迁移。
9.1 生成插件文件版本
我们项目中一般都插入了很多不同的插件,我们如果要将项目部署到其他的机器上,我们就需要知道我们安装了哪些插件,并且在迁移的机器上进行安装这些插件,这里我们可以使用pip3将我们项目中使用的插件版本进行导出,可以导出到我们的requirments.txt文件中,也可以自行选择;
pip3 freeze >requirements.txt
这里导出的我们目前这个项目所使用的插件信息有:
click==7.1.1
Flask==1.1.1
itsdangerous==1.1.0
Jinja2==2.11.1
MarkupSafe==1.1.1
PyMySQL==0.9.3
Werkzeug==1.0.0
随着我们项目功能的增加,用的是插件也会逐渐的增加,手动安装费时费力。在导出到requirements.txt之后,我们就可以在迁移的机器上使用pip3进行安装相对应版本的插件,安装的命令为;
pip3 install -r requirements.txt
这样我们就可以在迁移的机器中安装和我们开发环境中一致的一个插件了。
9.2生成数据库表结构和数据库数据迁移
我们前面插件是完成迁移了,可是我们没数据库也没法运行我们的项目啊,我们项目的很多数据都在我们的数据库中,下面我们就来生成我们数据库的表结构,首先我们得创建一个数据库,和我们项目中的名称一致,然后我们可以是PyCharm中的Database的SQL Generate进行生成我们数据库的表结构: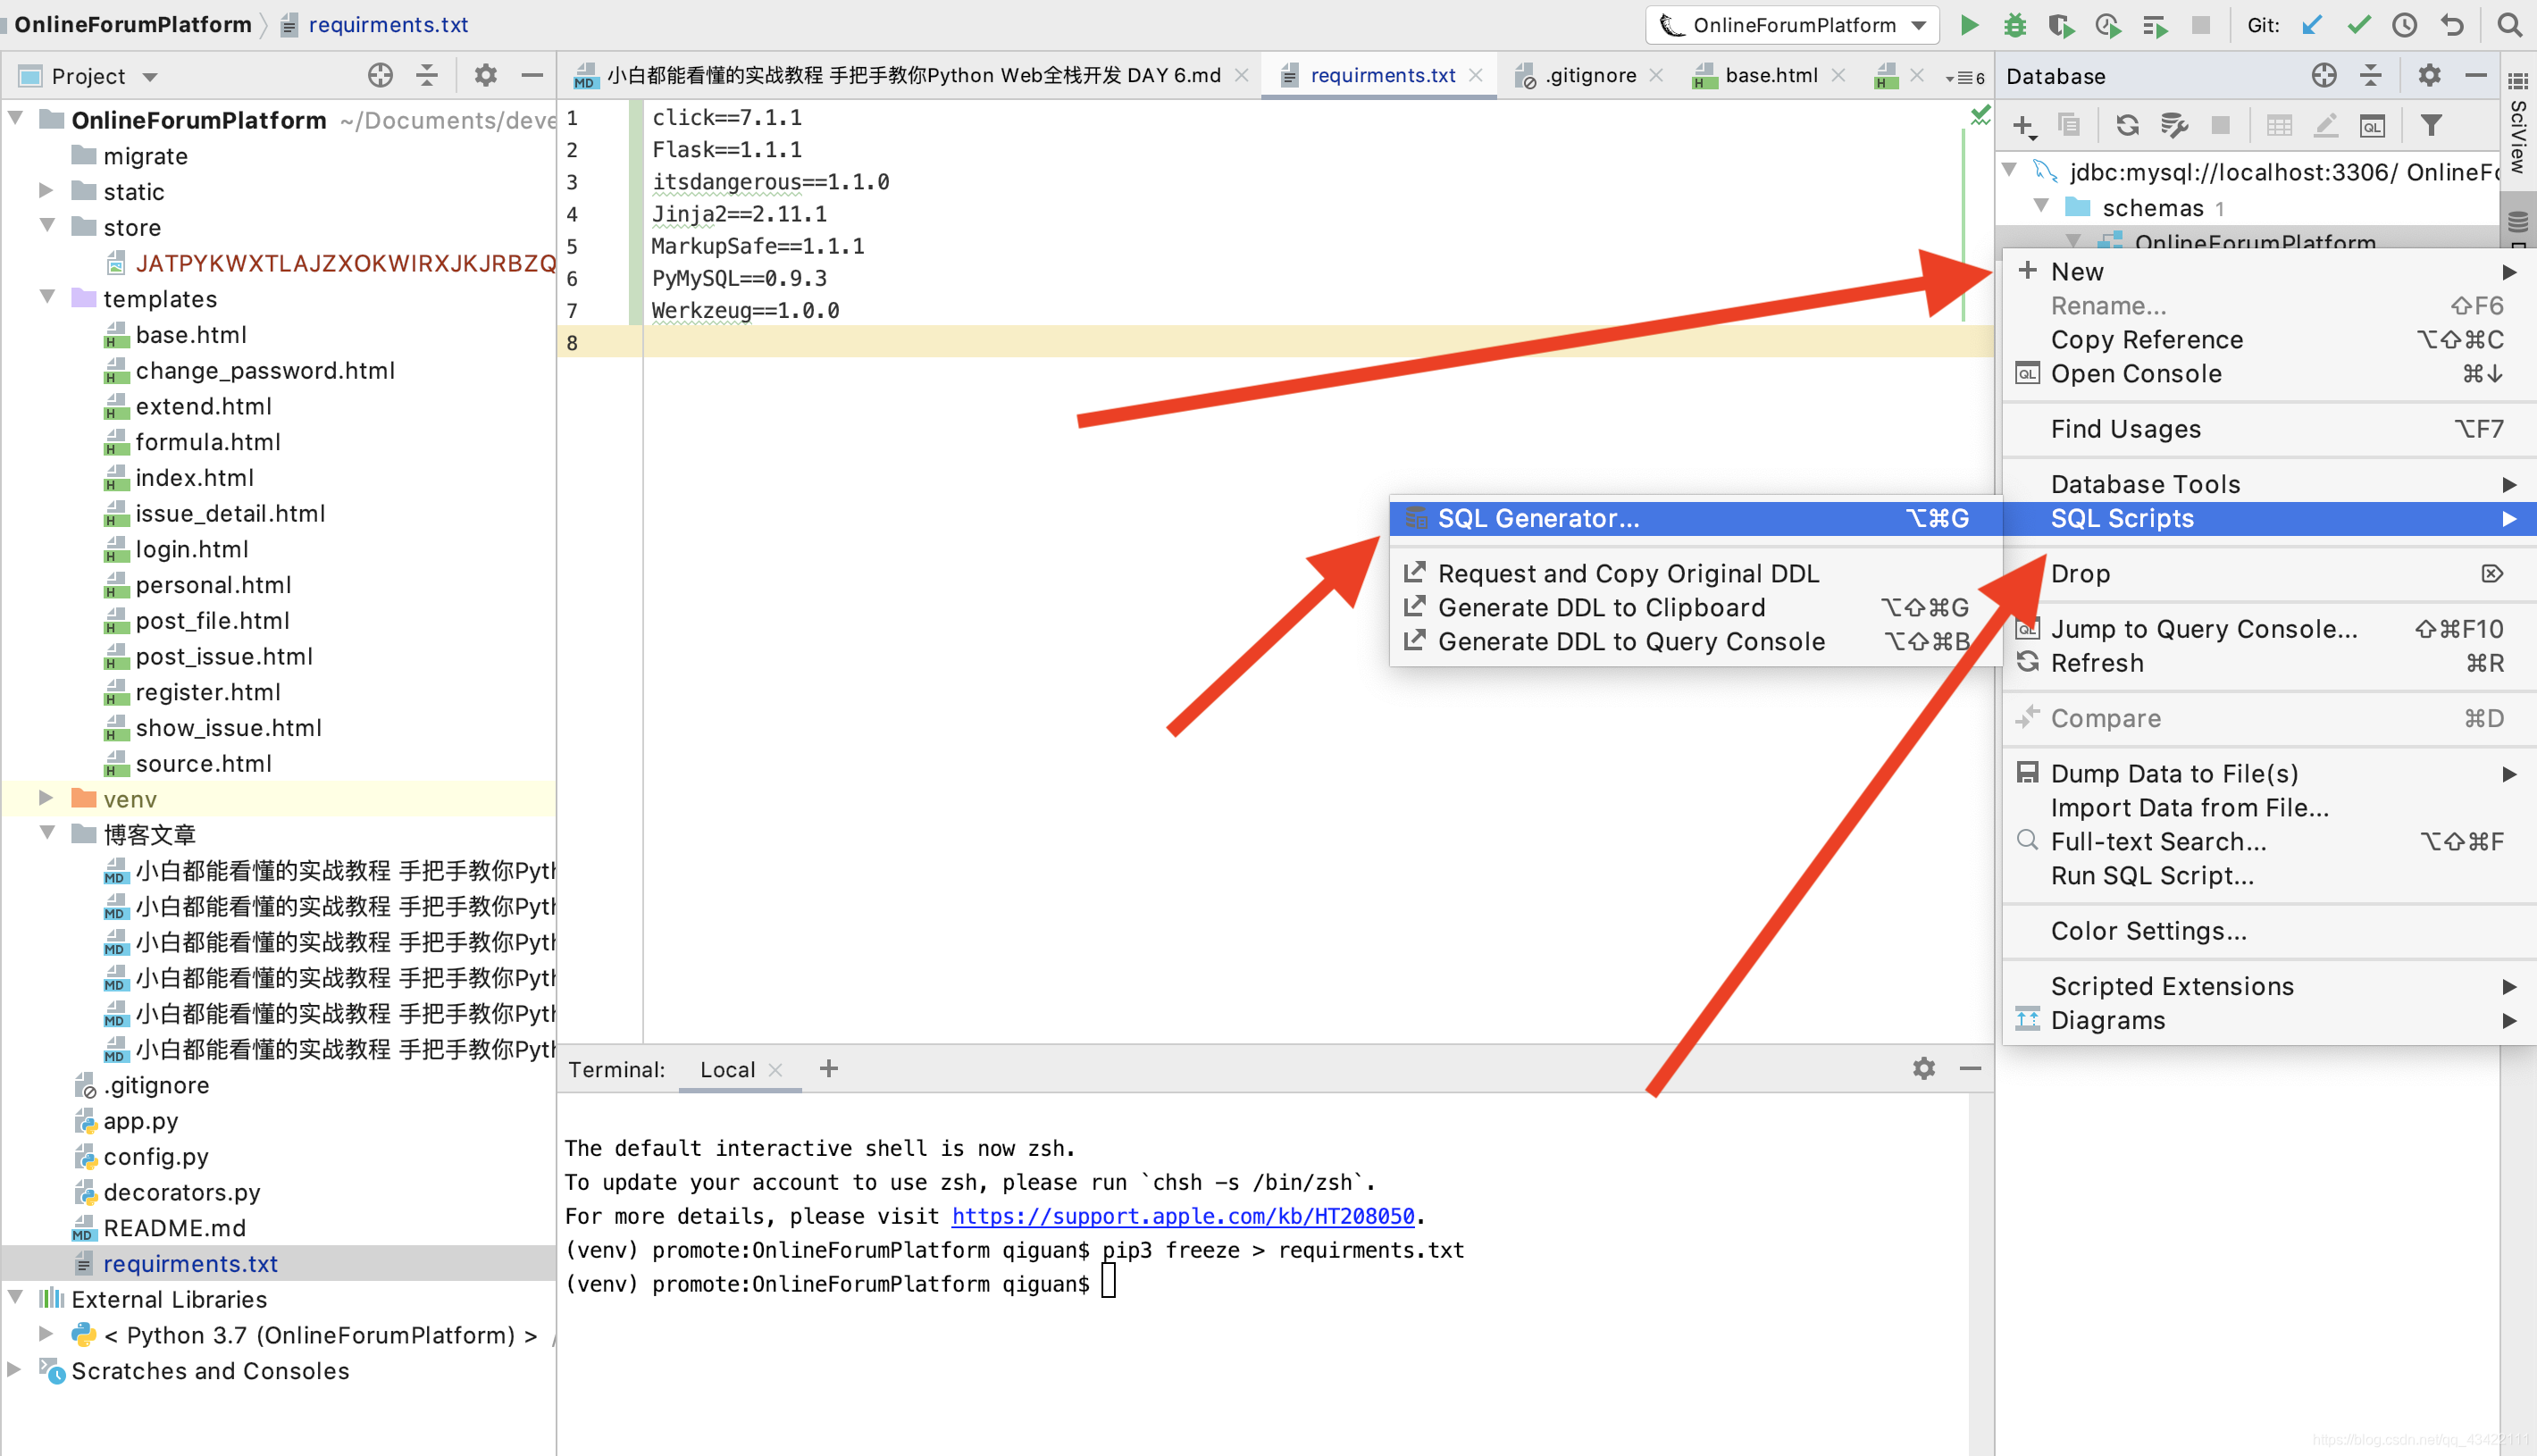
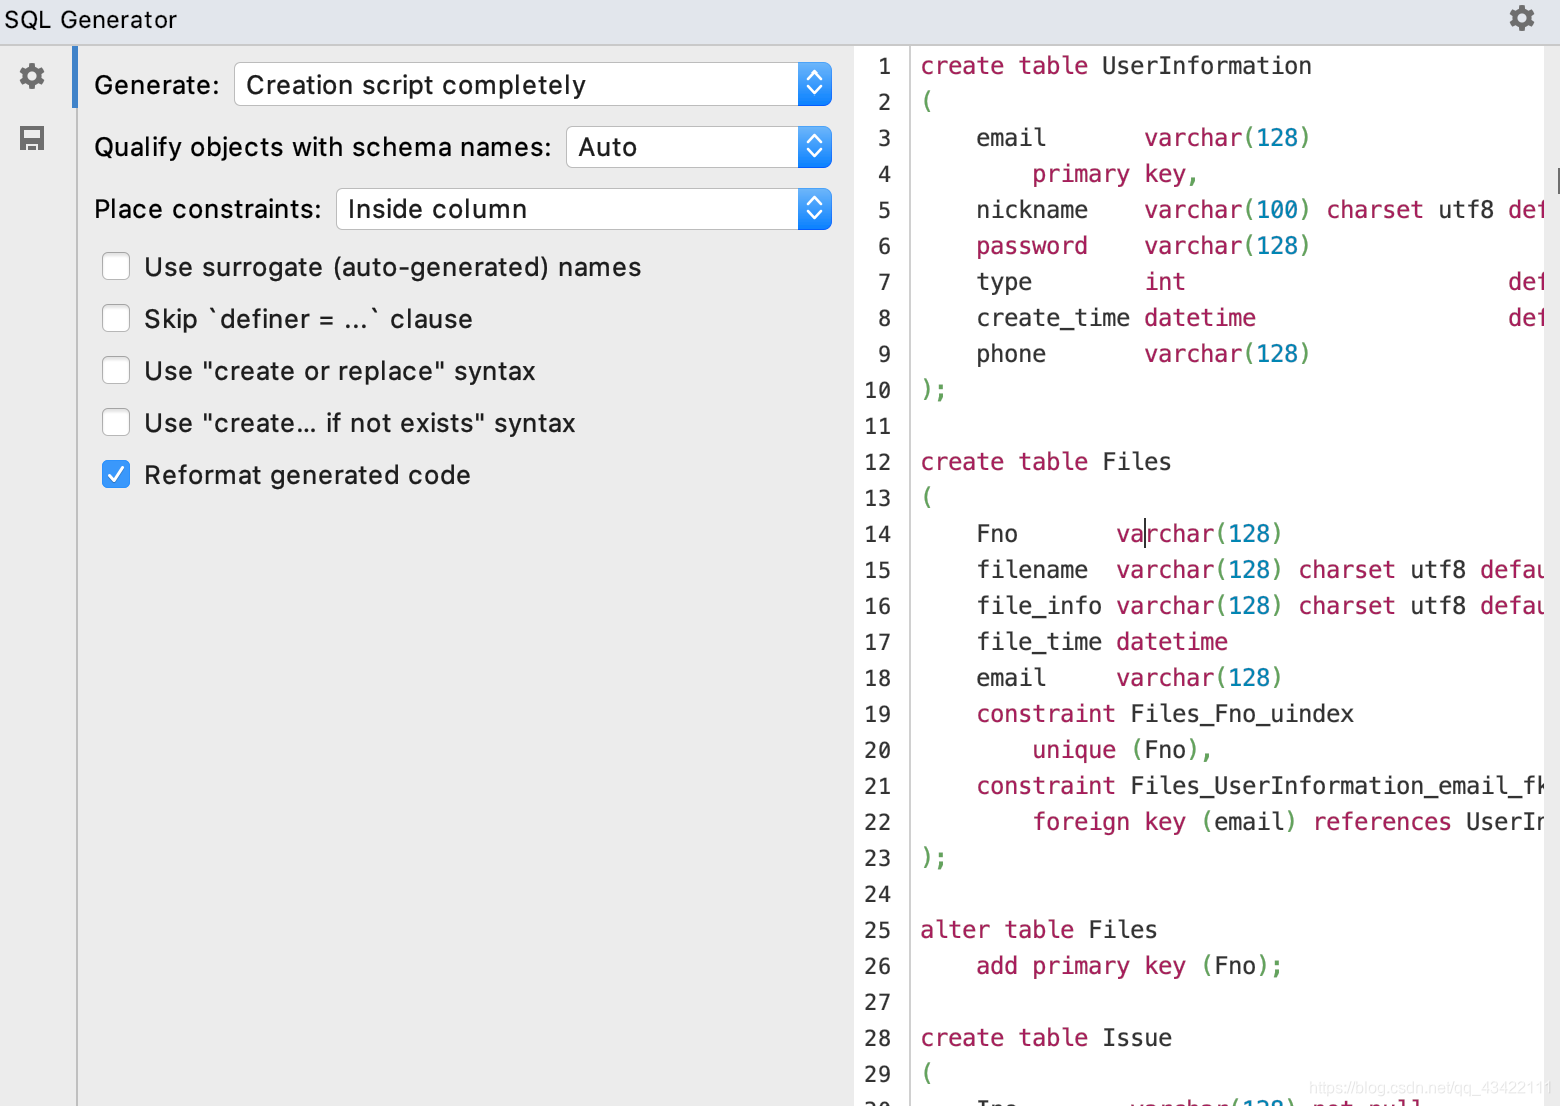
然后我们直接将右面的SQL语句进行保存就好啦,这里我们可以选择上面自带的保存为文件的功能,也可以在migrate中创建一个文件用来存储我们的SQL语句,这里我使用的db.sql用来存储,然后把右面的代码复制进去就好了。
现在我们数据库表的结构也建立完成了,下面我们就需要来生成我们数据库内数据的一个插入语句,将我们数据内的数据进行迁移啦。这里还是使用我们的PyCharm进行自动的生成Insert语句(强大的PyCharm):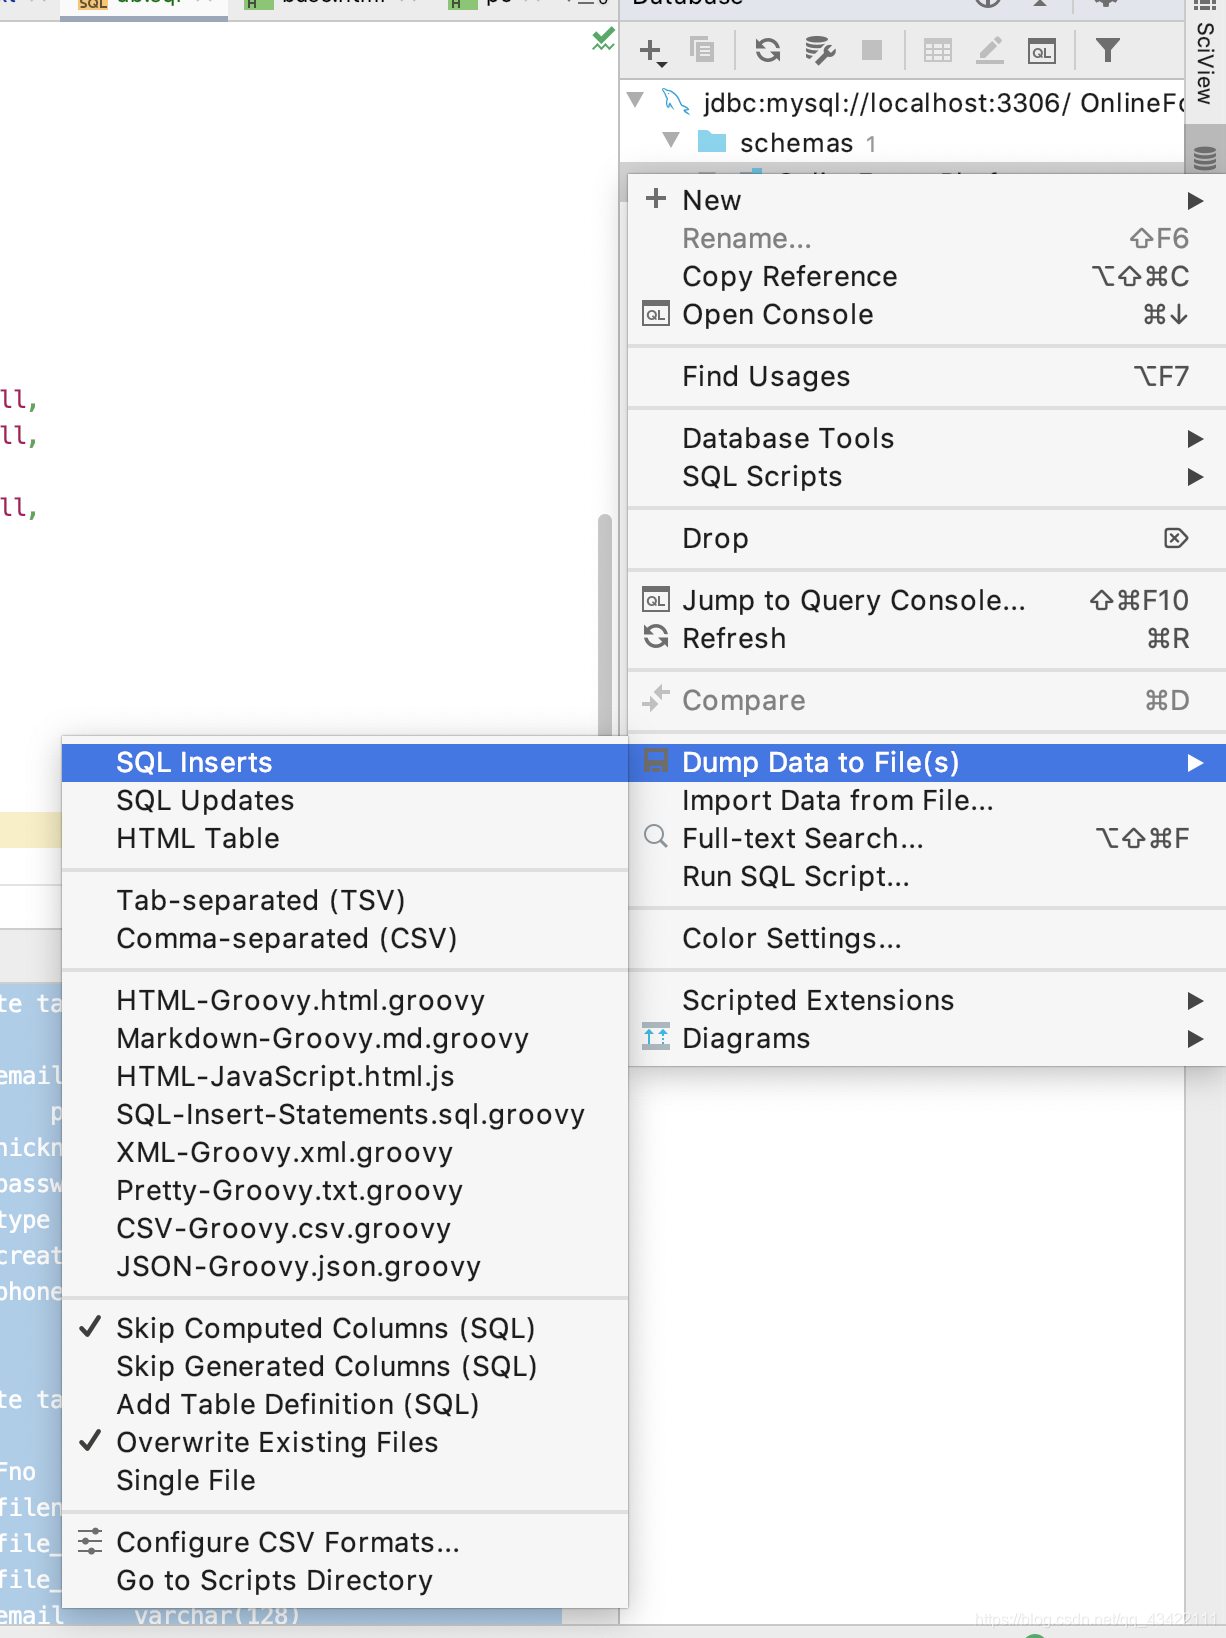
我们选择合适的一个文件夹生成,点击之后就会自动生成我们各个表数据的一个insert语句,我们到迁移的机器上将这些语句运行就好了。
到这里我们就已经生成了我们的项目中所有插件的版本信息和数据库的迁移语句啦。(这里如果使用Flask-SQLAlchemy进行使用数据库的话,也有其他的方法进行迁移)。
到这里为止,我们本系列《Python Web全栈开发入门实战教程教程》也就到此结束了,全文11万字多一点,本篇博文送给那些想入门Web开发而又不知所措的小伙伴们,希望对你们能够有所帮助,带你们打开Web开发的大门。进入大门之后的世界就需要你们自己去闯荡啦!
在最后再插播一次自己简介:
大家好,我叫亓官劼(qí guān jié ),在CSDN这个大家庭中写写博客,博主的更多文章导航可以查看我的栈内导航文章,里有各个文章的超链接,实时更新。博客文章内容导航(实时更新)
如果喜欢博主的话,可以点赞、关注,支持下博主
祝大家一切顺利!时光荏苒,未来可期!
