最近在刷编程题,在Windows系统下,使用visual studio,每道题都新建一个工程太过繁琐,所有使用一个轻量化的系统。
本文主要介绍在Windows系统和Ubuntu系统下如何配置VScode,实现c++工程编译及调试的配置。
Ubuntu系统下vscode的c++配置过程
1.环境配置
在Ubuntu系统下,首先要安装必要的编译系统。gcc,g++,cmake等。
sudo apt-get update
sudo apt-get install build-essential
sudo apt-get install cmake
sudo apt-get install cmake-gui
2.launch.json
新建一个cpp文件,写一个简单的hello world代码,会自动提示安装一个c/c++的插件。如果系统安装了gcc编译器(c++需要使用g++),可以直接F5运行,如果没有配置文件,
选择c++(GDB/LLDB)->选择期望使用的编译器。gcc编译c语言,g++编译c/c++语言。vscode会自动生成一个。
{
    "version": "0.2.0",
    "configurations": [
        {
            "name": "g++-7 build and debug active file",
            "type": "cppdbg",
            "request": "launch",
            "program": "${fileDirname}/${fileBasenameNoExtension}",
            "args": [],
            "stopAtEntry": false,
            "cwd": "${workspaceFolder}",
            "environment": [],
            "externalConsole": false,
            "MIMode": "gdb",
            "setupCommands": [
                {
                    "description": "Enable pretty-printing for gdb",
                    "text": "-enable-pretty-printing",
                    "ignoreFailures": true
                }
            ],
            "preLaunchTask": "g++-7 build active file",
            "miDebuggerPath": "/usr/bin/gdb"
        }
    ]
}
修改
"program": "${fileDirname}/${fileBasenameNoExtension}"
为
"program": "${fileDirname}/build/${fileBasenameNoExtension}"
这样生成的可执行文件会放到build子目录下。
增加一行
"preLaunchTask": "g++-7 build active file"
用来在调试前编译文件
修改完成后:
{
    // Use IntelliSense to learn about possible attributes.
    // Hover to view descriptions of existing attributes.
    // For more information, visit: https://go.microsoft.com/fwlink/?linkid=830387
    "version": "0.2.0",
    "configurations": [

        {
            "name": "g++-7 build and debug active file",
            "type": "cppdbg",
            "request": "launch",
            "program": "${fileDirname}/build/${fileBasenameNoExtension}",
            "args": [],
            "stopAtEntry": false,
            "cwd": "${workspaceFolder}",
            "environment": [],
            "externalConsole": false,
            "MIMode": "gdb",
            "setupCommands": [
                {
                    "description": "Enable pretty-printing for gdb",
                    "text": "-enable-pretty-printing",
                    "ignoreFailures": true
                }
            ],
            "preLaunchTask": "g++-7 build active file",
            "miDebuggerPath": "/usr/bin/gdb"
        }
    ]
}
3.task.json文件生成
Ctrl+Shift+P打开控制台,输入task,选择和launch文件中对应的preLaunchTask对应的任务。
{
    // See https://go.microsoft.com/fwlink/?LinkId=733558
    // for the documentation about the tasks.json format
    "version": "2.0.0",
    "tasks": [
        {
            "type": "shell",
            "label": "g++-7 build active file",
            "command": "/usr/bin/g++-7",
            "args": [
                "-g",
                "${file}",
                "-o",
                "${fileDirname}/${fileBasenameNoExtension}"
            ],
            "options": {
                "cwd": "/usr/bin"
            },
            "problemMatcher": [
                "$gcc"
            ],
            "group": {
                "kind": "build",
                "isDefault": true
            }
        }
    ]
}
修改args参数组下的
"${fileDirname}/${fileBasenameNoExtension}"
为
"${fileDirname}/build/${fileBasenameNoExtension}"
这个路径要和launch.json文件中对应。
修改完成后:
{
    // See https://go.microsoft.com/fwlink/?LinkId=733558
    // for the documentation about the tasks.json format
    "version": "2.0.0",
    "tasks": [
        {
            "type": "shell",
            "label": "g++-7 build active file",
            "command": "/usr/bin/g++-7",
            "args": [
                "-g",
                "${file}",
                "-o",
                "${fileDirname}/build/${fileBasenameNoExtension}"
            ],
            "options": {
                "cwd": "/usr/bin"
            },
            "problemMatcher": [
                "$gcc"
            ],
            "group": {
                "kind": "build",
                "isDefault": true
            }
        }
    ]
}
4.调试文件
在要调试的文件中设置断点,按F5,如果程序编译通过,则可以运行到断点处,进行调试。
5.总结:
这个方法只适用于简单的工程,对于复杂的工程,还是建议使用cmake来管理。
Windows系统下vscode的c++配置过程
在Windows系统下则比较复杂:
1.环境变量
INCLUED:
C:\Program Files (x86)\Microsoft Visual Studio\2019\Community\VC\Tools\MSVC\14.21.27702\include
C:\Program Files (x86)\Windows Kits\10\Include\10.0.17763.0\shared
C:\Program Files (x86)\Windows Kits\10\Include\10.0.17763.0\ucrt
C:\Program Files (x86)\Windows Kits\10\Include\10.0.17763.0\um
C:\Program Files (x86)\Windows Kits\10\Include\10.0.17763.0\winrt
LIB:
C:\Program Files (x86)\Windows Kits\10\Lib\10.0.17763.0\ucrt\x64
C:\Program Files (x86)\Windows Kits\10\Lib\10.0.17763.0\um\x64
C:\Program Files (x86)\Microsoft Visual Studio\2019\Community\VC\Tools\MSVC\14.21.27702\lib\x64
使用不同的msvc版本和winkit版本,路径的前缀略有不同,64位和32的LIB路径也不同。
2.新建c_cpp_properties.json
Ctrl+Shift+P打开控制台,输入 Edit Configurations,选择C/Cpp: Edit Configurations(json)选项。自动生成这个json文件。
{
    "configurations": [
        {
            "name": "Win32",
            "includePath": [
                "${workspaceFolder}/**"
            ],
            "defines": [
                "_DEBUG",
                "UNICODE",
                "_UNICODE"
            ],
            "windowsSdkVersion": "10.0.17763.0",
            "compilerPath": "C:/Program Files (x86)/Microsoft Visual Studio/2019/Community/VC/Tools/MSVC/14.21.27702/bin/Hostx64/x64/cl.exe",
            "cStandard": "c11",
            "cppStandard": "c++17",
            "intelliSenseMode": "msvc-x64"
        }
    ],
    "version": 4
}
可以直接使用默认生成的,也可以根据需要修改 “windowsSdkVersion”: “10.0.17763.0”,和环境变量中的INCLUDE下路径匹配即可。
3.新建launch.json
点击F5,选择c++(Windows)->default configuration。会自动生成launch.json文件。
{
    // Use IntelliSense to learn about possible attributes.
    // Hover to view descriptions of existing attributes.
    // For more information, visit: https://go.microsoft.com/fwlink/?linkid=830387
    "version": "0.2.0",
    "configurations": [
        {
            "name": "(Windows) Launch",
            "type": "cppvsdbg",
            "request": "launch",
            "program": "enter program name, for example ${workspaceFolder}/a.exe",
            "args": [],
            "stopAtEntry": false,
            "cwd": "${workspaceFolder}",
            "environment": [],
            "externalConsole": false
        }
    ]
}
修改
"program": "enter program name, for example ${workspaceFolder}/a.exe"
为
"program": "${workspaceFolder}/build/${fileBasenameNoExtension}.exe"
这样生成的中间文件和exe文件会放到当前目录下的build子目录下面。
"externalConsole": false
代表是使用vscode内置的命令行还是使用系统的cmd命令行。
增加一行:
"preLaunchTask": "msvc build"
这个task会在后面新建,在launch前执行build操作。
4.新建tasks.json
Ctrl+Shift+P打开控制台,输入task,选择tasks:cofigure default build task->从模板构建->其它。自动生成
tasks.json
{
    // See https://go.microsoft.com/fwlink/?LinkId=733558
    // for the documentation about the tasks.json format
    "version": "2.0.0",
    "tasks": [
        {
            "label": "echo",
            "type": "shell",
            "command": "echo Hello"
        }
    ]
}
其中,把
"label": "echo"
行改为:
"label": "msvc build"
把
"command": "echo Hello"
行改为:
"command": "cl.exe"
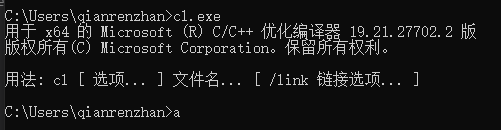
要确保cl.exe在环境变量PATH路径中,即可以在cmd中直接执行cl.exe而不报错。
其余改动:
{
    "version": "2.0.0",
    "tasks": [
        {
            "label": "msvc build",
            "type": "shell",
            "command": "cl.exe",
            "args": [
                "/EHsc",
                "/Zi",
                "/Fe:",
                "${fileDirname}/build/${fileBasenameNoExtension}.exe",
                "${file}",
            ],
            "group":  {
                "kind": "build",
                "isDefault": true
            },
            "presentation": {
                "reveal":"always"
            },
            "problemMatcher": "$msCompile"
        }
    ]
}
其中args选项设置编译参数,把生成的可执行文件放到build子目录下,这儿的目录要和launch.json中
"program": "${workspaceFolder}/build/${fileBasenameNoExtension}.exe"
的目录匹配。
fileBasenameNoExtension 关键字代表当前选择的文件,不带后缀,这样可以在一个vscode工程中新建多个cpp文件,每个cpp中都可以有main函数,F5按键会执行编译并调试当前打开的cpp文件。
5.调试程序
在要执行的文件打断点,按F5,如果没有报错,则可执行到断点处,进行调试。
