一. 原生iOS项目集成React Native
-
创建一个新的文件夹,如RNProject,然后新建一个/ios的子文件夹,将已有的iOS项目全部文件复制进去。
-
在RNProject根目录创建package.json文件,内容如下:
{
  "name": "RNProject",
  "version": "1.0.0",
  "private": true,
  "scripts": {
    "start": "yarn react-native start"
  }
}
- 打开终端,cd到项目根目录,执行以下命令集成React Native模块:
$ yarn add react-native
- 等待上一步完成后,注意红框内的提示,表示需要依赖指定版本的react。我们以下命令集成react,注意版本号需要严格按照提示的要求:
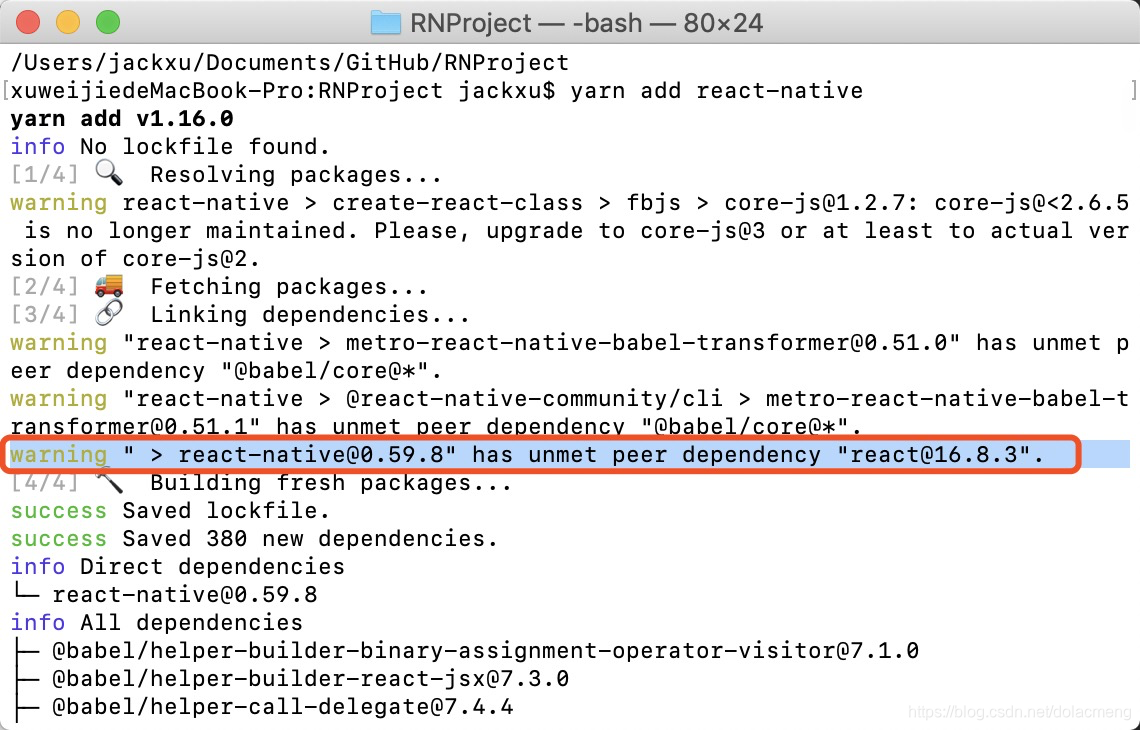
$ yarn add [email protected]
此时所有集成的依赖都在node_modules/目录下,做git版本控制时,不应该上传此文件夹的所有文件,而是让其他协作者也执 行以上命令来添加依赖。因此应该将node_modules/目录记录到.gitignore文件中。
- 通过cocoaPods将React Native集成到iOS项目中。默认你已经熟悉并安装了cocoaPods。在终端中,cd到/ios目录下,初始化cocoaPods:
$ pod init
打开Podfile文件,编辑为如下内容:
# The target name is most likely the name of your project.
target 'RNProject' do

  # Your 'node_modules' directory is probably in the root of your project,
  # but if not, adjust the `:path` accordingly
  pod 'React', :path => '../node_modules/react-native', :subspecs => [
    'Core',
    'CxxBridge', # Include this for RN >= 0.47
    'DevSupport', # Include this to enable In-App Devmenu if RN >= 0.43
    'RCTText',
    'RCTImage',
    'RCTNetwork',
    'RCTWebSocket', # Needed for debugging
    'RCTAnimation', # Needed for FlatList and animations running on native UI thread
    # Add any other subspecs you want to use in your project
  ]
  # Explicitly include Yoga if you are using RN >= 0.42.0
  pod 'yoga', :path => '../node_modules/react-native/ReactCommon/yoga'

  # Third party deps podspec link
  pod 'DoubleConversion', :podspec => '../node_modules/react-native/third-party-podspecs/DoubleConversion.podspec'
  pod 'glog', :podspec => '../node_modules/react-native/third-party-podspecs/glog.podspec'
  pod 'Folly', :podspec => '../node_modules/react-native/third-party-podspecs/Folly.podspec'

end
注意target ‘RNProject’ do中为iOS项目的名称,而不是根目录名称,只是这里我的根目录和iOS项目名称均为RNProject。
保存Podfile后,执行以下命令开始安装:
$ pod install
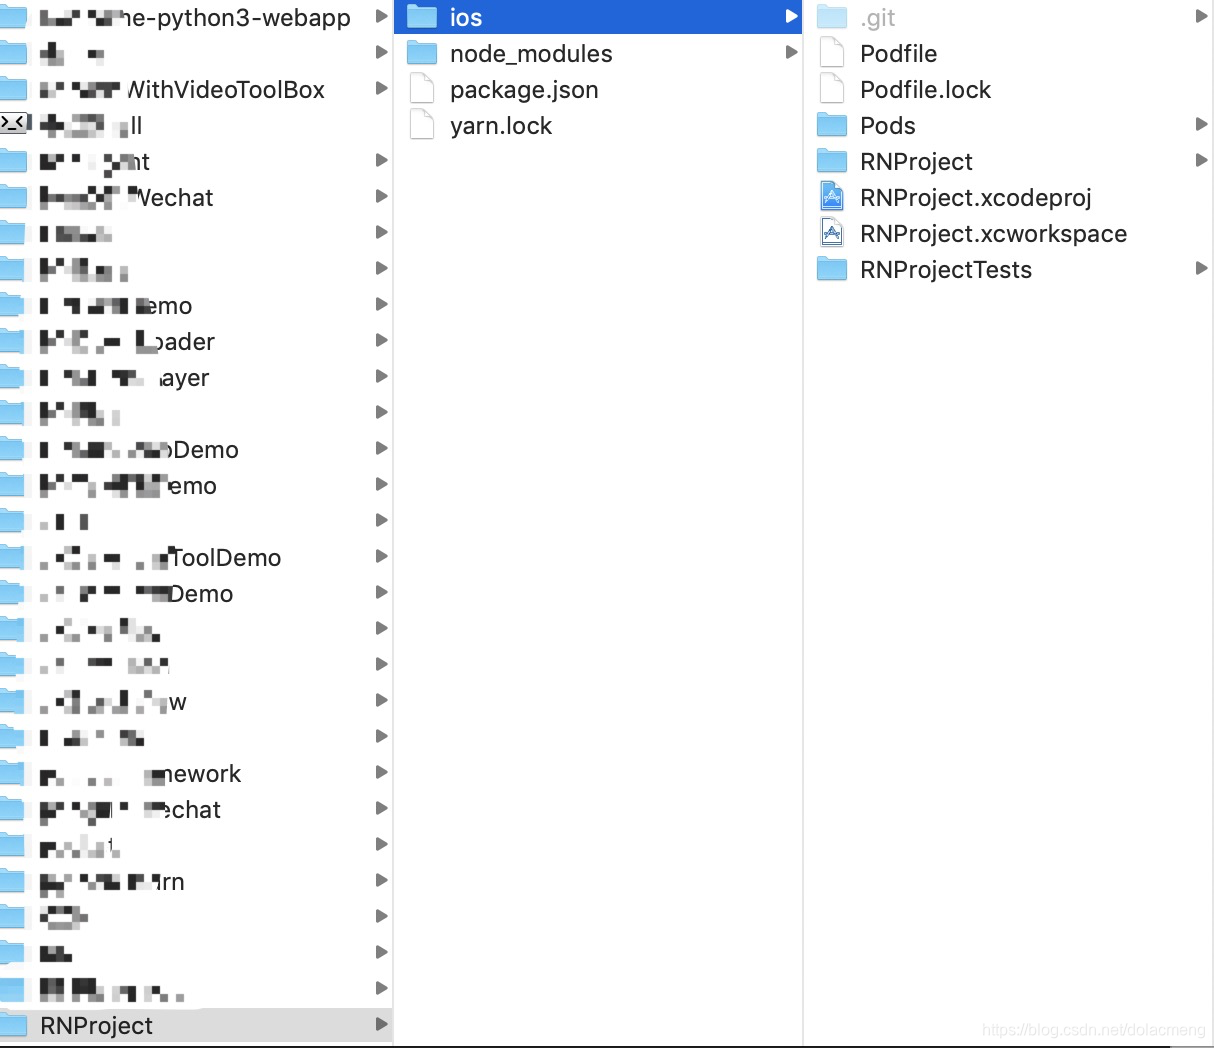
至此,就已经成功在已有iOS项目中集成了RN,项目文件结构如下:
二. 原生跳转RN页面
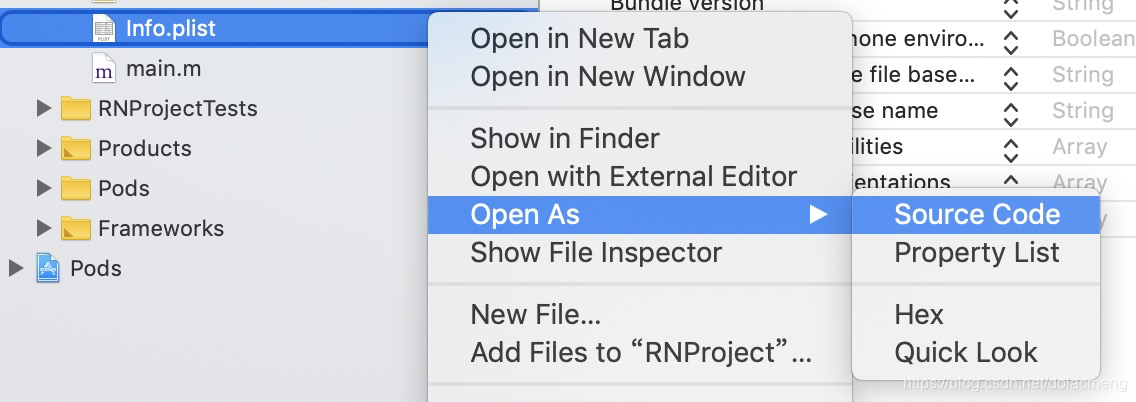
- 苹果会阻止访问不安全的HTTP链接。我们需要在iOS项目的Info.plist的中添加:
<key>NSAppTransportSecurity</key>
<dict>
    <key>NSExceptionDomains</key>
    <dict>
        <key>localhost</key>
        <dict>
            <key>NSTemporaryExceptionAllowsInsecureHTTPLoads</key>
            <true/>
        </dict>
    </dict>
</dict>
- 在根目录下创建index.js文件,作为React Native在iOS上的入口文件。并输入以下内容:
import React from 'react';
import {AppRegistry, StyleSheet, Text, View} from 'react-native';

class Hello extends React.Component {
  render() {
  	var {name} = this.props
    return (
      <View style={{flex: 1,justifyContent: 'center',alignItems: 'center'}}>
      	<Text>Hello {name}!</Text>
      </View>
    );
  }
}

AppRegistry.registerComponent('Hello', () => Hello);
- 在Xcode中,创建一个ViewController,并输入以下内容:
#import "ViewController.h"
#import <React/RCTRootView.h>

@implementation ViewController

- (void)viewDidLoad {
    [super viewDidLoad];
    UIButton *button = [[UIButton alloc] initWithFrame:CGRectMake(0, 0, 200, 50)];
    button.center = self.view.center;
    [button setTitle:@"跳转RN" forState:0];
    [button setTitleColor:[UIColor greenColor] forState:0];
    [button addTarget:self action:@selector(clickButton:) forControlEvents:UIControlEventTouchUpInside];
    [self.view addSubview:button];
}

- (void)clickButton:(UIButton*)button{
    NSURL *jsCodeLocation = [NSURL URLWithString:@"http://localhost:8081/index.bundle?platform=ios"];

    RCTRootView *rootView =
    [[RCTRootView alloc] initWithBundleURL: jsCodeLocation
                                moduleName: @"Hello"
                         initialProperties: @{@"name":@"React Native"}
                             launchOptions: nil];
    UIViewController *vc = [[UIViewController alloc] init];
    vc.view = rootView;
    [self presentViewController:vc animated:YES completion:nil];
}

@end
- 在根目录使用以下命令启动RN Packager
npm start
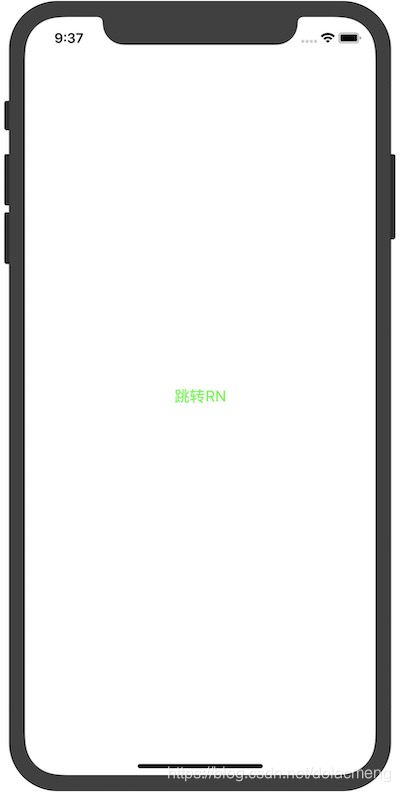
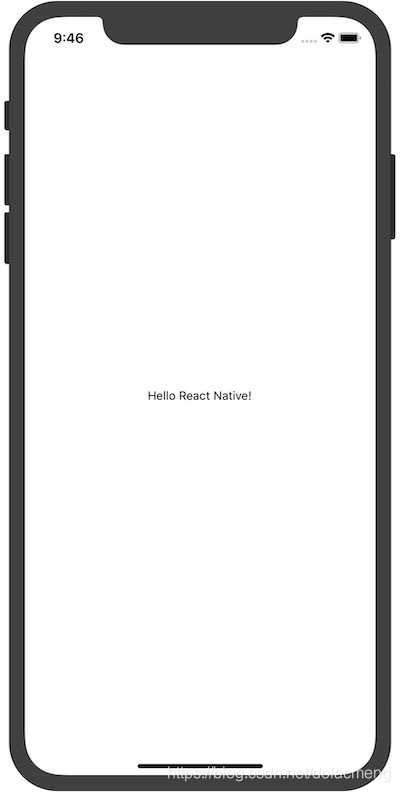
- 在Xcode中运行项目,运行后点击“跳转RN”后,既会跳转到RN实现的显示Hello React Native!的页面:
三. 显示豆瓣热门电影列表
每个页面应该对应独立的一个js文件,并且为了防止项目大了以后保持文件结构的清晰,我们为热门电影列表创建如下目录及文件:./src/page/HotMovie.js,在HotMovie.js中输入以下内容:
import React, {Component} from 'react';
import {StyleSheet, Image, Text, View, FlatList} from 'react-native';

var REQUEST_URL = "https://movie.douban.com/j/search_subjects?type=movie&tag=%E7%83%AD%E9%97%A8&sort=recommend&page_limit=20&page_start=0"

export default class HotMovie extends Component<Props> {

  constructor(props){
    super(props);
    this.state = {
      movies:null,
    }

    this.fetchData = this.fetchData.bind(this)
  }

  componentDidMount(){
    this.fetchData()
  }

  fetchData(){
    fetch(REQUEST_URL)
      .then((response) => response.json())
      .then((responseJson) => {
        this.setState({
          movies:responseJson.subjects
        });
      })
  }

  render() {
    if (!this.state.movies) {
      return this.renderLoadingView();
    }
    return (
      <FlatList
        data={this.state.movies}
        renderItem={this.renderMovie}
        style={styles.list}
        keyExtractor={item => item.id}
      />
    );
  }


  renderLoadingView(){
    return (
      <View style={styles.container}>
        <Text>
          正在加载...
        </Text>
      </View>
    )
  }


  renderMovie({item}){
    return(
      <View style={styles.item}>
        <Image source={{url:item.cover}} style={styles.thumbnail}/>
        <View style={styles.itemRight}>
          <Text>{item.title}</Text>
          <Text>{item.rate}</Text>
        </View>
      </View>
    )
  }


}

const styles = StyleSheet.create({
  container: {
    flex:1,
    flexDirection:'row',
    alignItems:'center',
    justifyContent: 'center',
    alignItems: 'center',
  },
  item:{
    marginTop:1,
    flexDirection:'row',
    alignItems:'center',
    justifyContent: 'center',
    height:100,
    backgroundColor:'lightgray'
  },
  thumbnail:{
    width:53,
    height:81,
    backgroundColor:'lightgray'
  },
  itemRight:{
    flex:1,
    height:100,
    justifyContent: 'center',
    alignItems:'center'
  },
  list: {
    paddingTop: 50,
    backgroundColor: "#F5FCFF"
  }
});
2、将index.js修改为如下:
import React from 'react';
import {AppRegistry, StyleSheet, Text, View} from 'react-native';
import HotMovie from './src/page/HotMovie';

AppRegistry.registerComponent('HotMovie', () => HotMovie);
3、原生将按钮点击事件改为:
- (void)clickButton:(UIButton*)button{
    NSURL *jsCodeLocation = [NSURL URLWithString:@"http://localhost:8081/index.bundle?platform=ios"];

    RCTRootView *rootView =
    [[RCTRootView alloc] initWithBundleURL: jsCodeLocation
                                moduleName: @"HotMovie"
                         initialProperties: nil
                             launchOptions: nil];
    UIViewController *vc = [[UIViewController alloc] init];
    vc.view = rootView;
    [self presentViewController:vc animated:YES completion:nil];
}
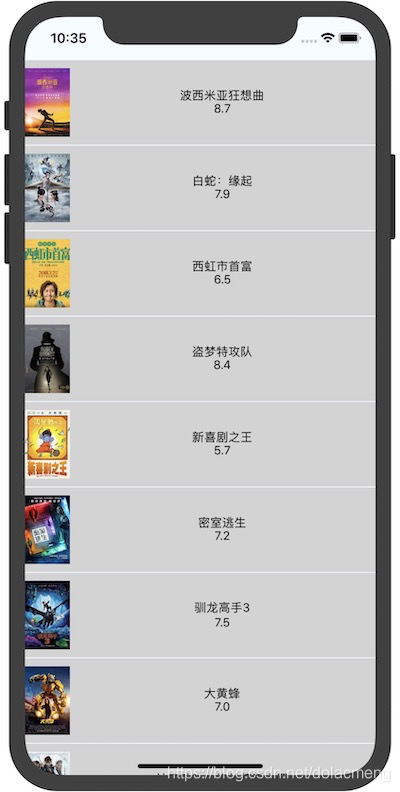
3、运行后的效果如图:
四. 改为导航
篇幅有点长啦,另开一篇继续 https://blog.csdn.net/dolacmeng/article/details/90414040
