一、创建Bintray账户及Maven仓库
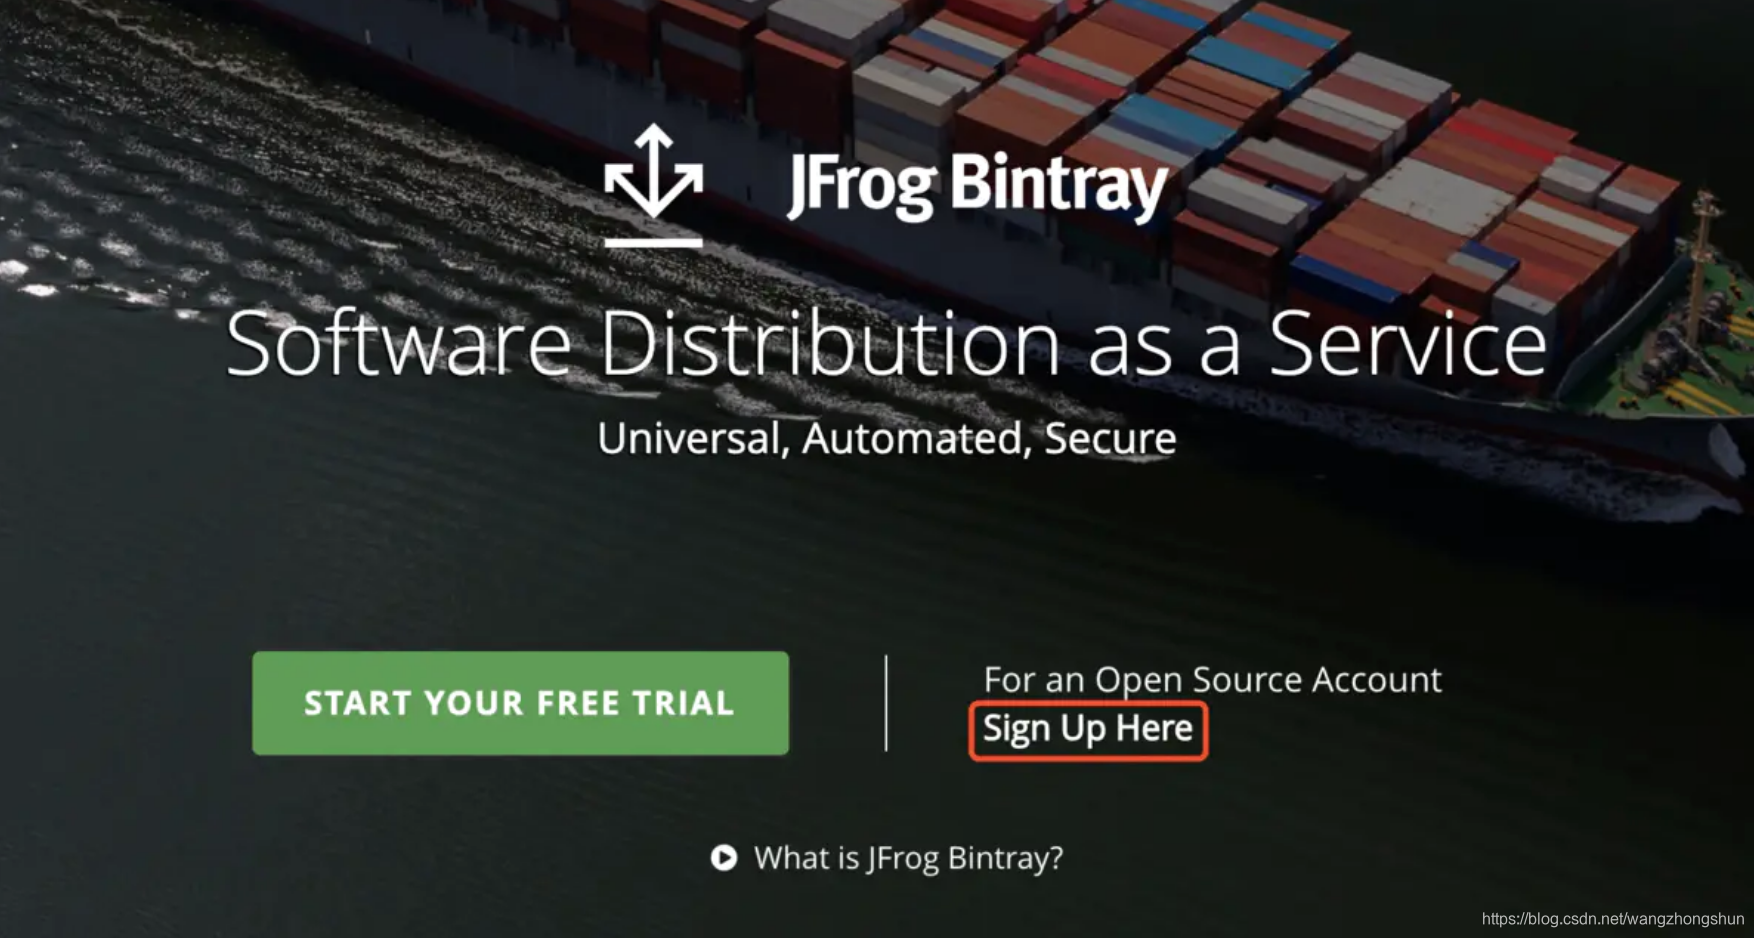
1、打开Bintray首页,点击 For an Open Source Account
,快速注册或者用第三方的账户登陆即可。
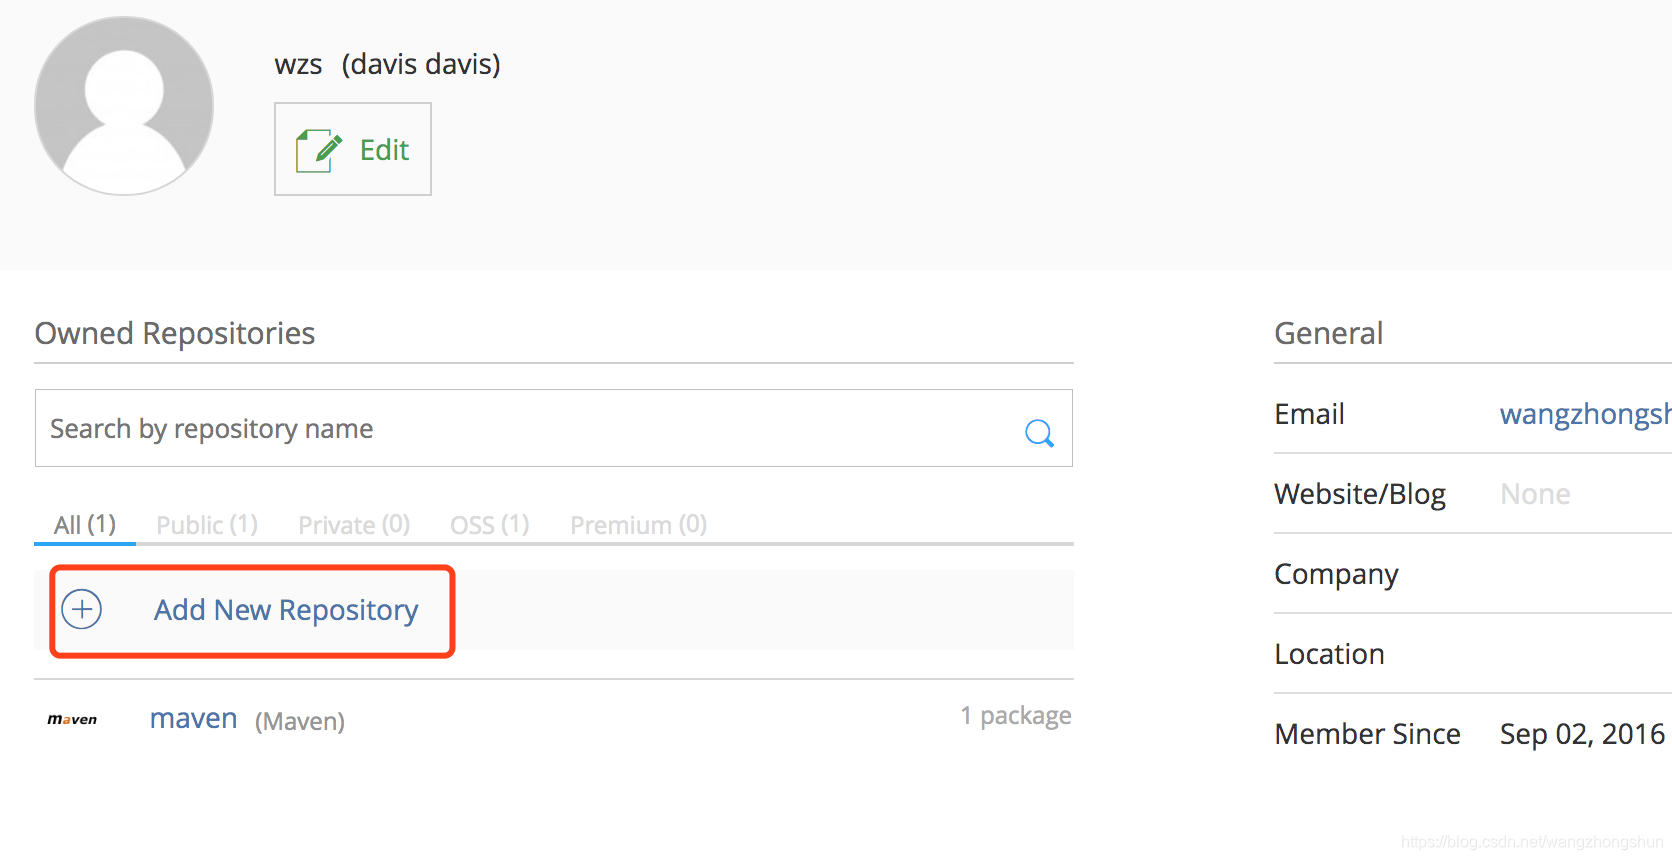
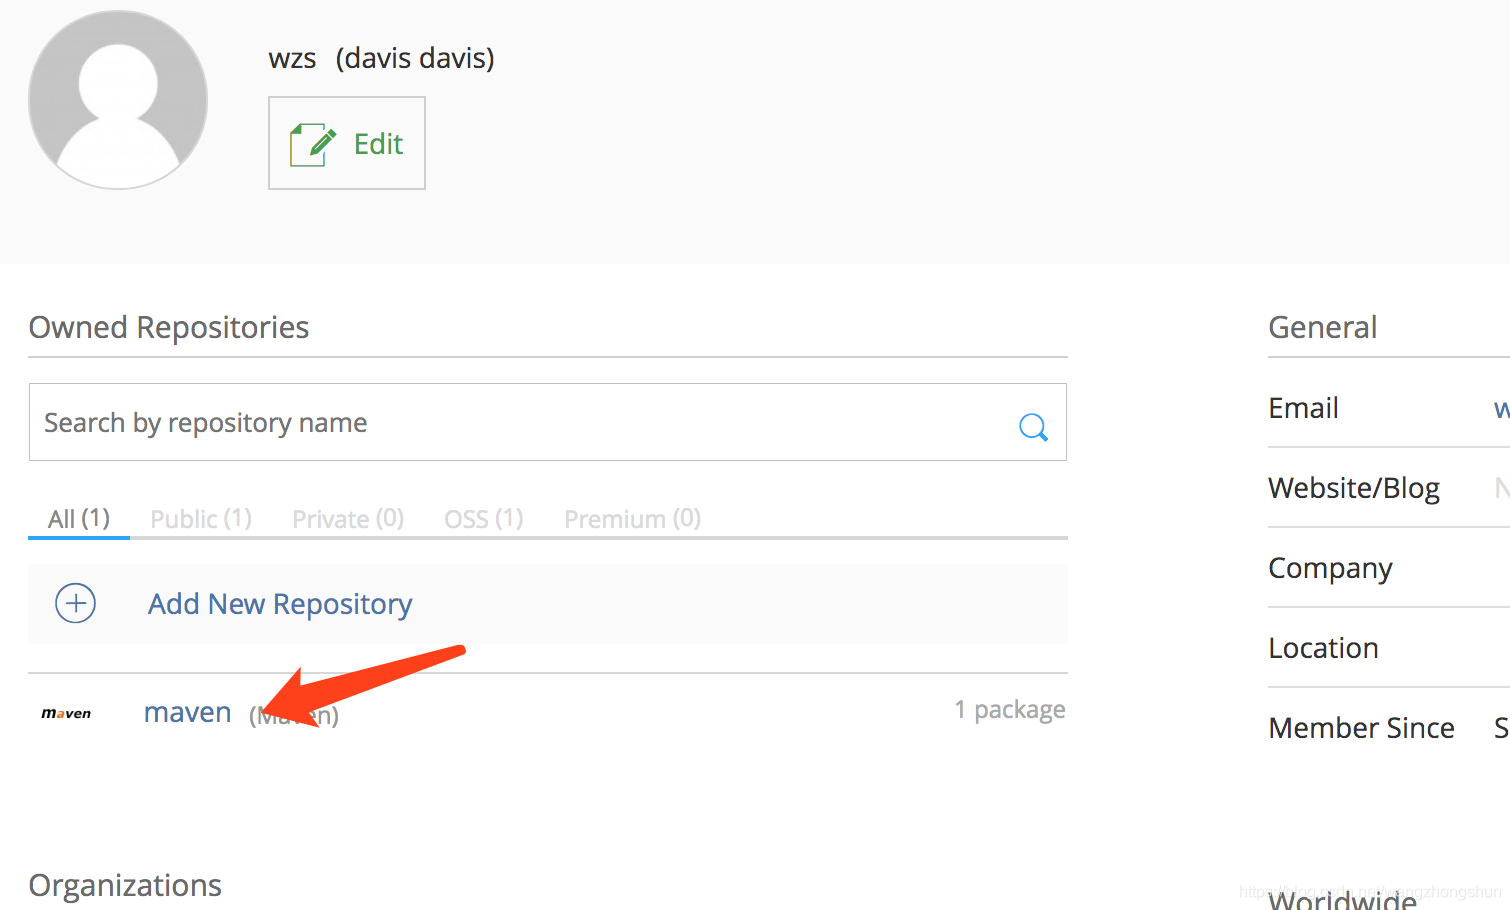
2、个人页面点击 Add New Repository 创建一个 Mavne 仓库
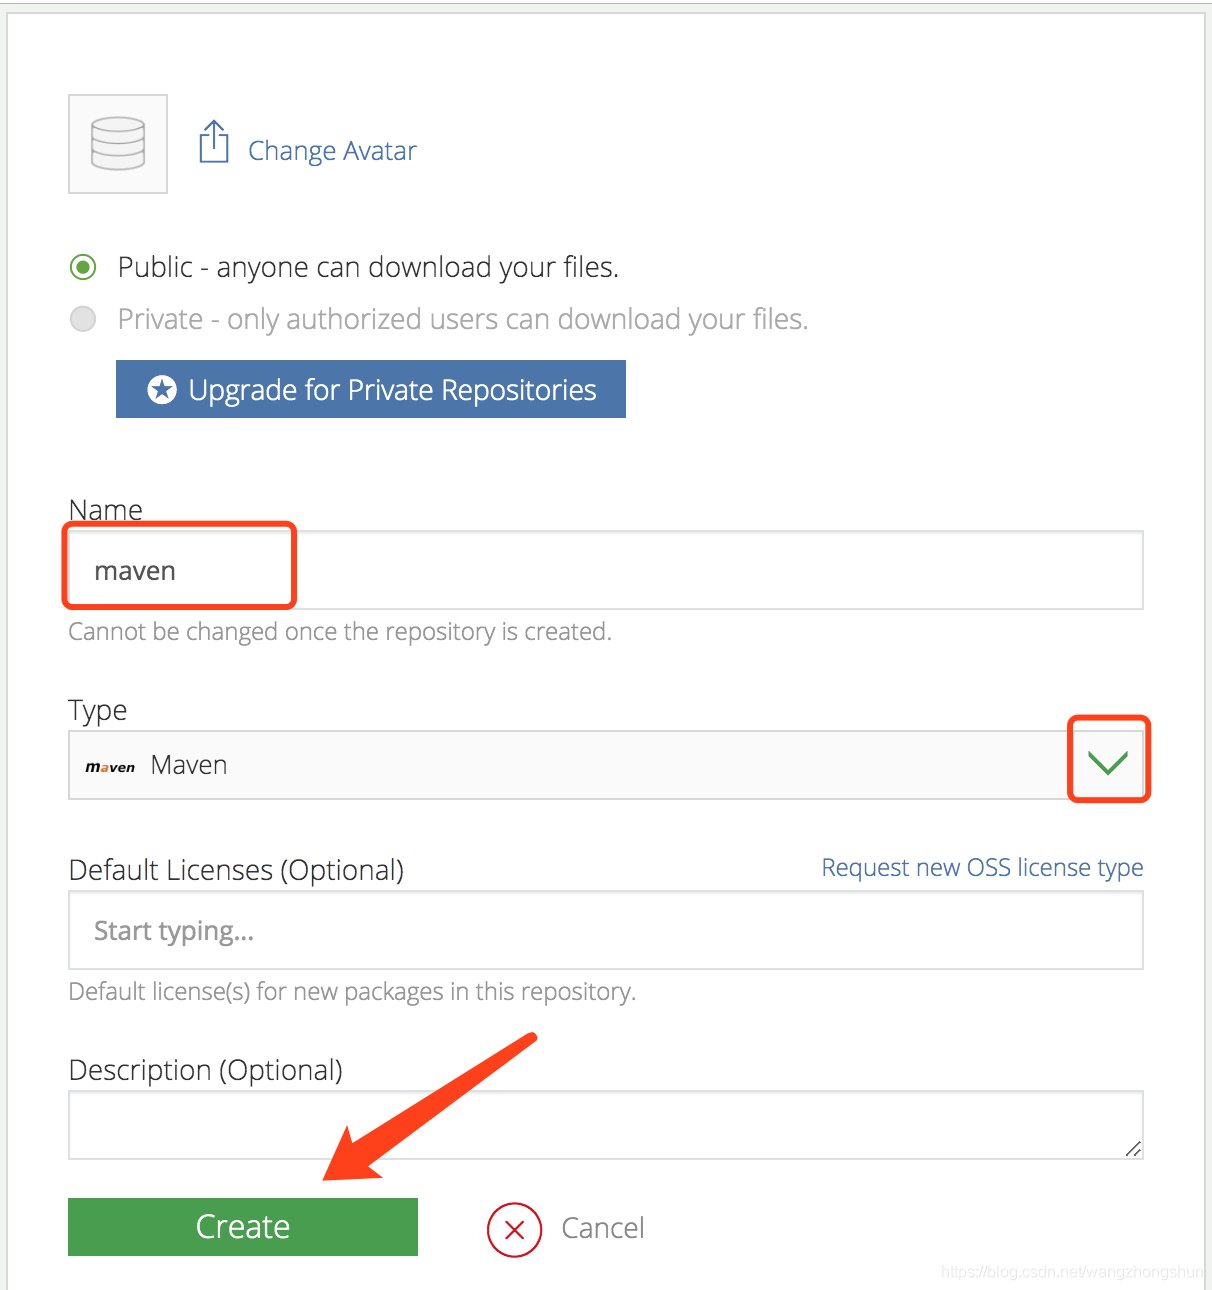
3、填写仓库信息,仓库名称记住,后面有用
二、上传项目到jcenter
1、配置Android项目
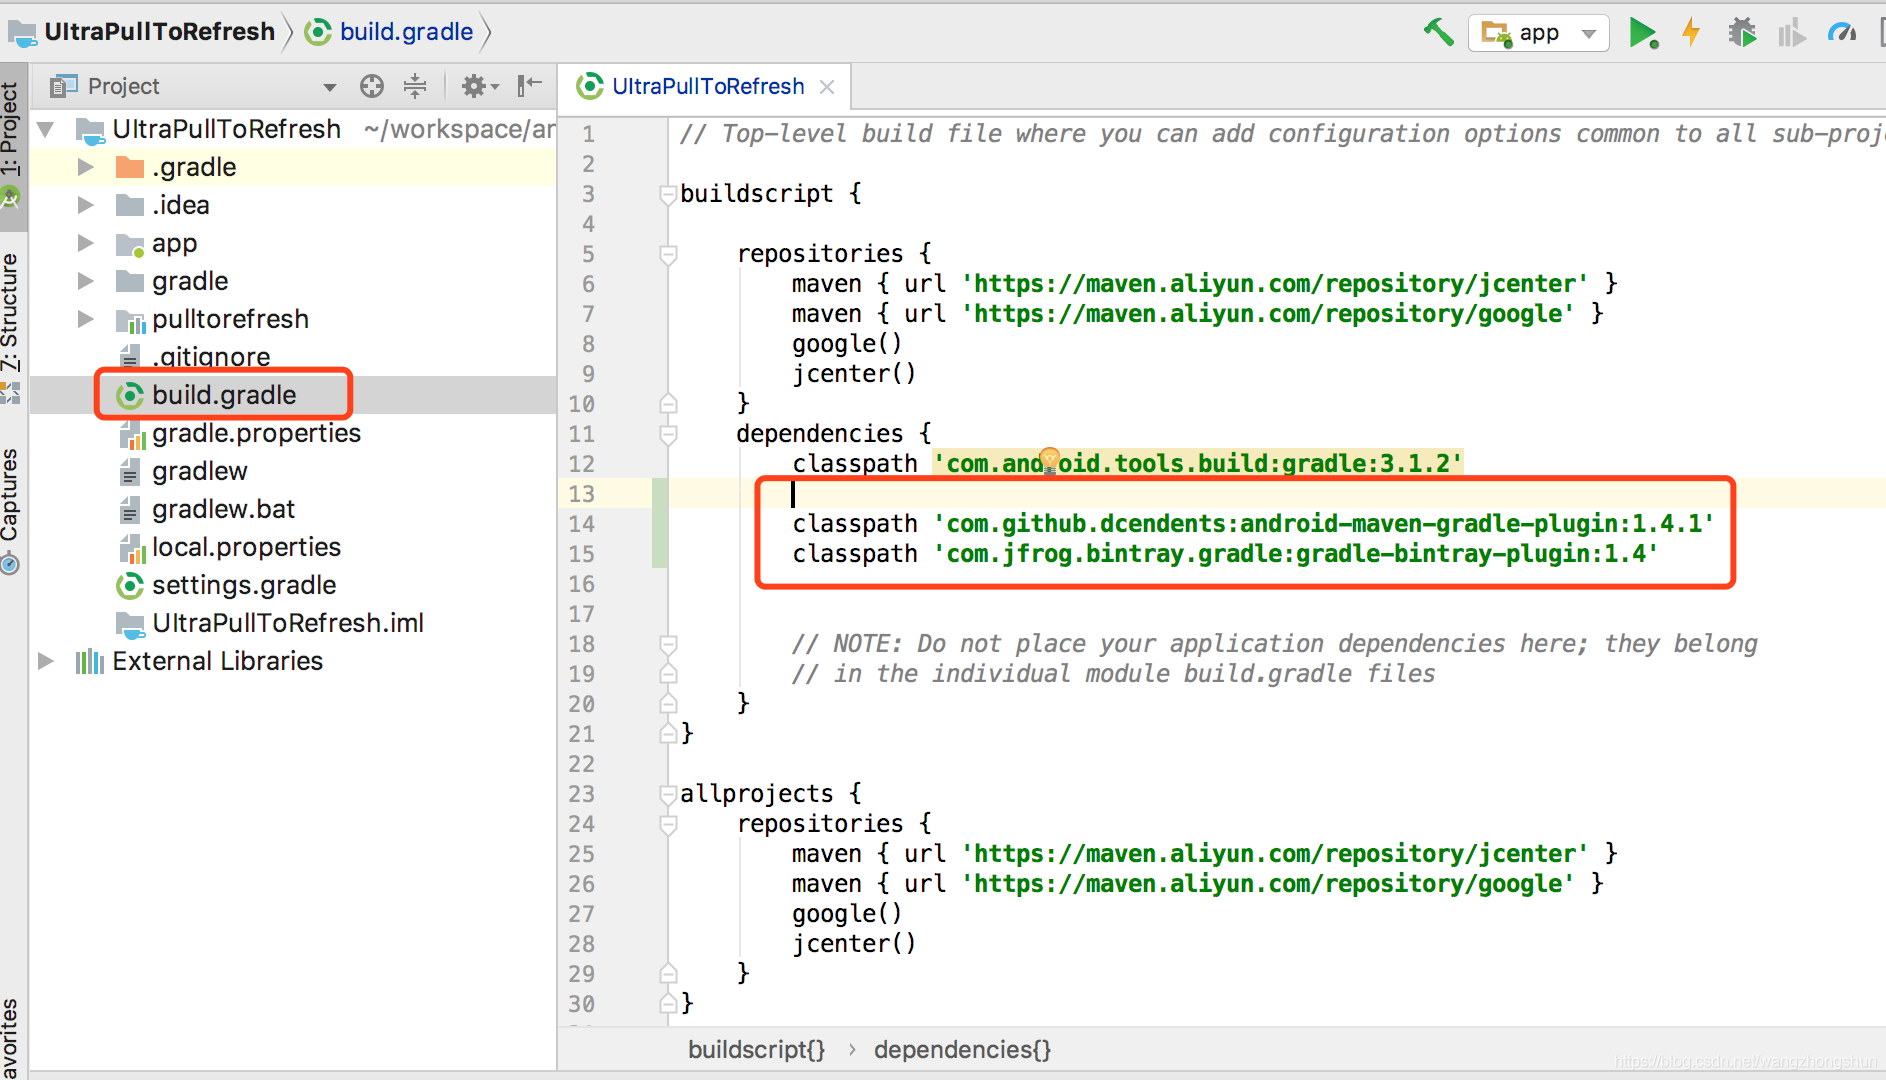
在项目的根目录的build.gradle中添加如下代码:
classpath 'com.github.dcendents:android-maven-gradle-plugin:1.4.1'
classpath 'com.jfrog.bintray.gradle:gradle-bintray-plugin:1.4'
在需要上传的module工程的根目录下创建j-build.gradle文件,文件内容如下:
// 这里添加下面两行代码。
apply plugin: 'com.github.dcendents.android-maven'
apply plugin: 'com.jfrog.bintray'

// 定义两个链接,下面会用到。
def siteUrl = 'https://github.com/881205wzs/UItraPullToRefresh' // 项目主页。
def gitUrl = 'https://github.com/881205wzs/UItraPullToRefresh.git' // Git仓库的url。

// 唯一包名,比如implementation 'com.davis.ui.pulltorefresh:pulltorefresh:2.1.0'中的com.davis.ui.pulltorefresh就是这里配置的。
group = "com.davis.ui.pulltorefresh"

//项目引用的版本号,比如implementation 'com.davis.ui.pulltorefresh:pulltorefresh:2.1.0'中的2.1.0就是这里配置的。
version = "2.1.0"

install {
    repositories.mavenInstaller {
        // 生成pom.xml和参数
        pom {
            project {
                packaging 'aar'
                // 项目描述,复制我的话,这里需要修改。
                name 'uitrapulltorefresh'// 可选,项目名称。
                description 'UItraPullToRefresh project describe'// 可选,项目描述。
                url siteUrl // 项目主页,这里是引用上面定义好。

                // 软件开源协议,现在一般都是Apache License2.0吧,复制我的,这里不需要修改。
                licenses {
                    license {
                        name 'The Apache Software License, Version 2.0'
                        url 'http://www.apache.org/licenses/LICENSE-2.0.txt'
                    }
                }

                //填写开发者基本信息,复制我的,这里需要修改。
                developers {
                    developer {
                        id 'wzs' // 开发者的id。
                        name 'daivs' // 开发者名字。
                        email '[email protected]' // 开发者邮箱。
                    }
                }

                // SCM,复制我的,这里不需要修改。
                scm {
                    connection gitUrl // Git仓库地址。
                    developerConnection gitUrl // Git仓库地址。
                    url siteUrl // 项目主页。
                }
            }
        }
    }
}

// 生成jar包的task,不需要修改。
task sourcesJar(type: Jar) {
    from android.sourceSets.main.java.srcDirs
    classifier = 'sources'
}

// 生成jarDoc的task,不需要修改。
task javadoc(type: Javadoc) {
    source = android.sourceSets.main.java.srcDirs
    classpath += project.files(android.getBootClasspath().join(File.pathSeparator))
    // destinationDir = file("../javadoc/")
    failOnError false // 忽略注释语法错误,如果用jdk1.8你的注释写的不规范就编译不过。
}

// 生成javaDoc的jar,不需要修改。
task javadocJar(type: Jar, dependsOn: javadoc) {
    classifier = 'javadoc'
    from javadoc.destinationDir
}
artifacts {
    archives javadocJar
    archives sourcesJar
}

// 这里是读取Bintray相关的信息,我们上传项目到github上的时候会把gradle文件传上去,所以不要把帐号密码的信息直接写在这里,写在local.properties中,这里动态读取。
Properties properties = new Properties()
properties.load(project.rootProject.file('local.properties').newDataInputStream())
bintray {
    user = properties.getProperty("bintray.user") // Bintray的用户名。
    key = properties.getProperty("bintray.apikey") // Bintray刚才保存的ApiKey。

    configurations = ['archives']
    pkg {
        repo = "maven"  //Repository名字 需要自己在bintray网站上先添加
        name = "UItraPullToRefresh"// 发布到Bintray上的项目名字,这里的名字不是implementation 'com.davis.ui.pulltorefresh:pulltorefresh:2.1.0'中的pulltorefresh。
        userOrg = 'wzs'//Bintray的组织id
        websiteUrl = siteUrl
        vcsUrl = gitUrl
        licenses = ["Apache-2.0"]
        publish = true // 是否是公开项目。
    }
}
注:在最后的bintray里面有从local.properties文件中获取用户名跟apikey。这是保密信息,我们不能暴露给别人,build.gradle文件我们会提交到git服务器上,但是local.properties文件不会提交。
local.properties文件,在尾部添加两行,这个key是我随便修改过的,是个错误的key,需要自己去替换:
bintray.user=wzs
bintray.apikey=ac8137c9138a8b49a18a323260041fcf1f75a6f
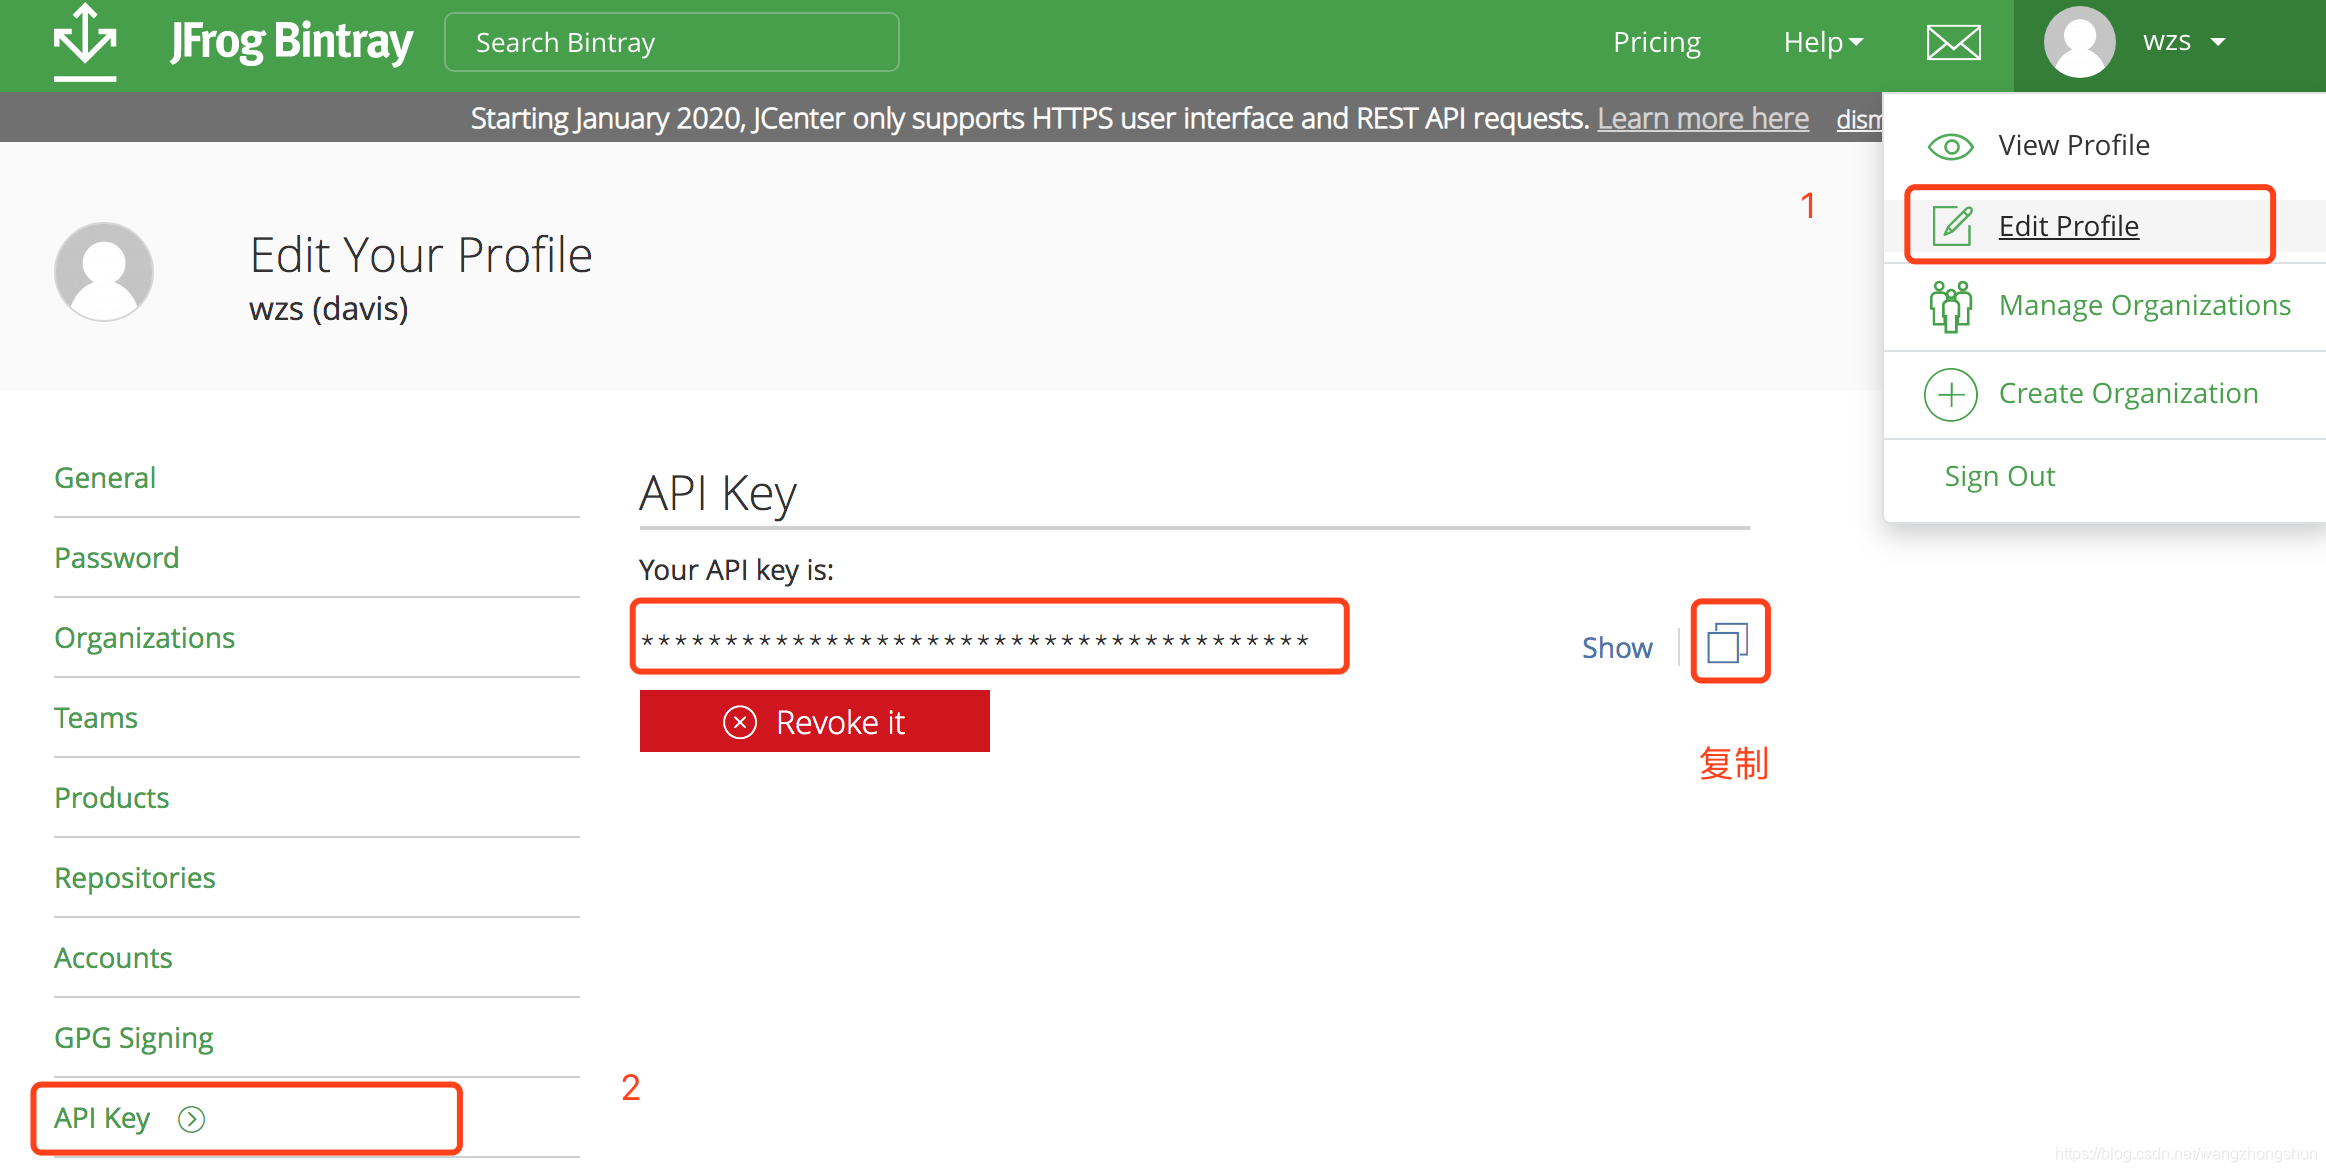
user是我们注册的名字,apikey需要去jcenter官网查看。进入修改用户界面,点击左侧apikey按钮,然后输入密码就能看到了。把这个key复制到local.properties中替换掉。
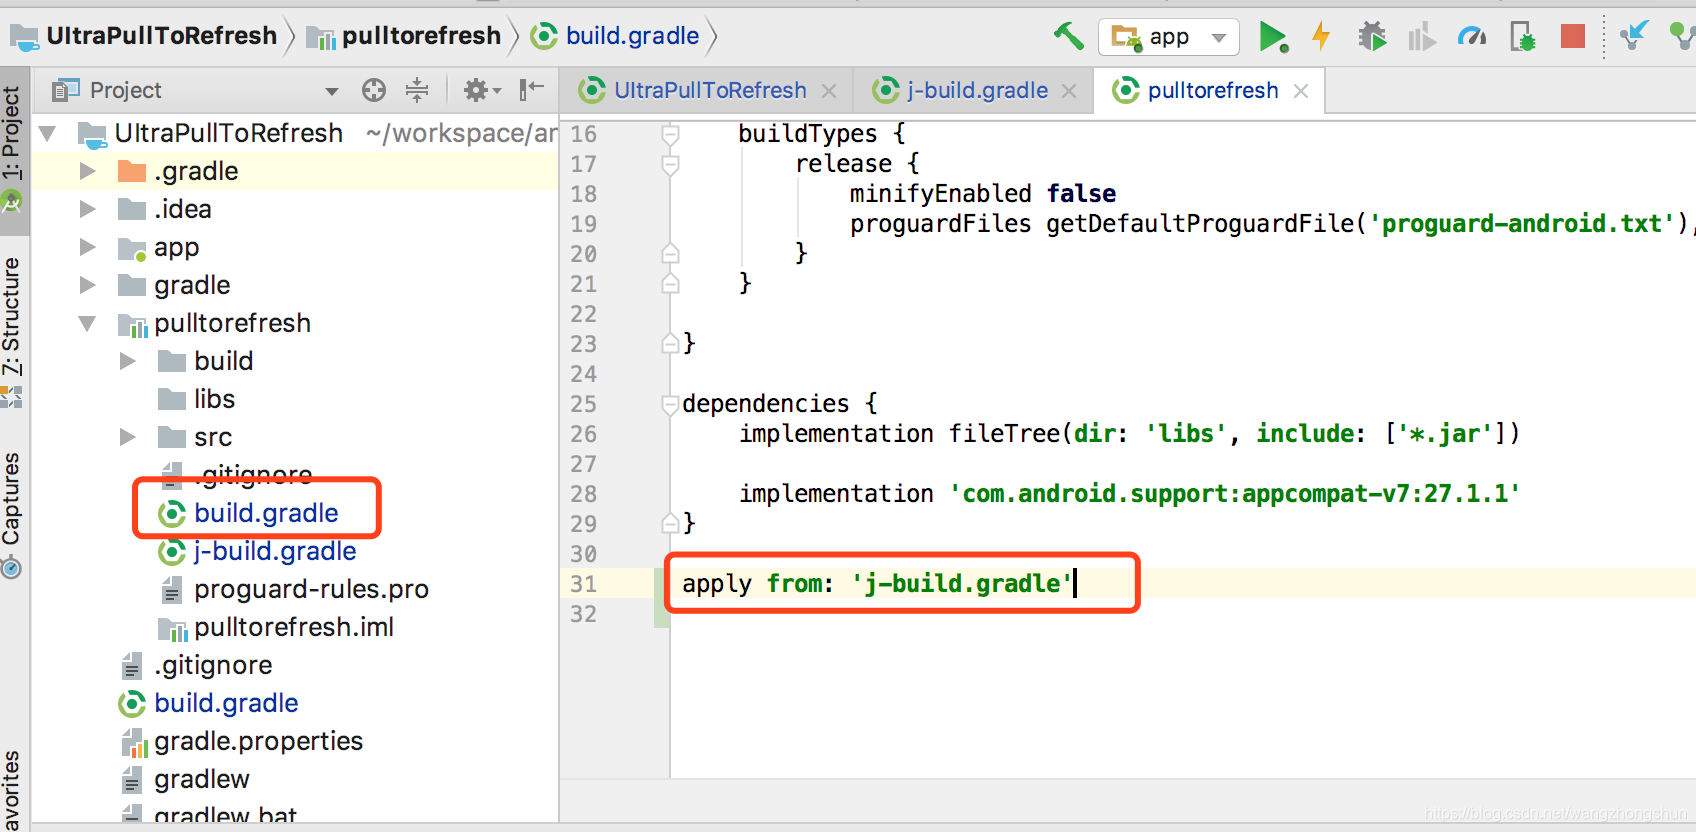
然后我们在module根目录的build.gradle文件末尾添加如下代码:
apply from: 'j-build.gradle'
Gradle命令上传
上传项目到jcenter需要用到gradle命令,首先把gralde加入到环境变量。如何配置环境变量这里就不在赘述。
在android studio底部有个Terminal的按钮。点击它进入Terminal界面。
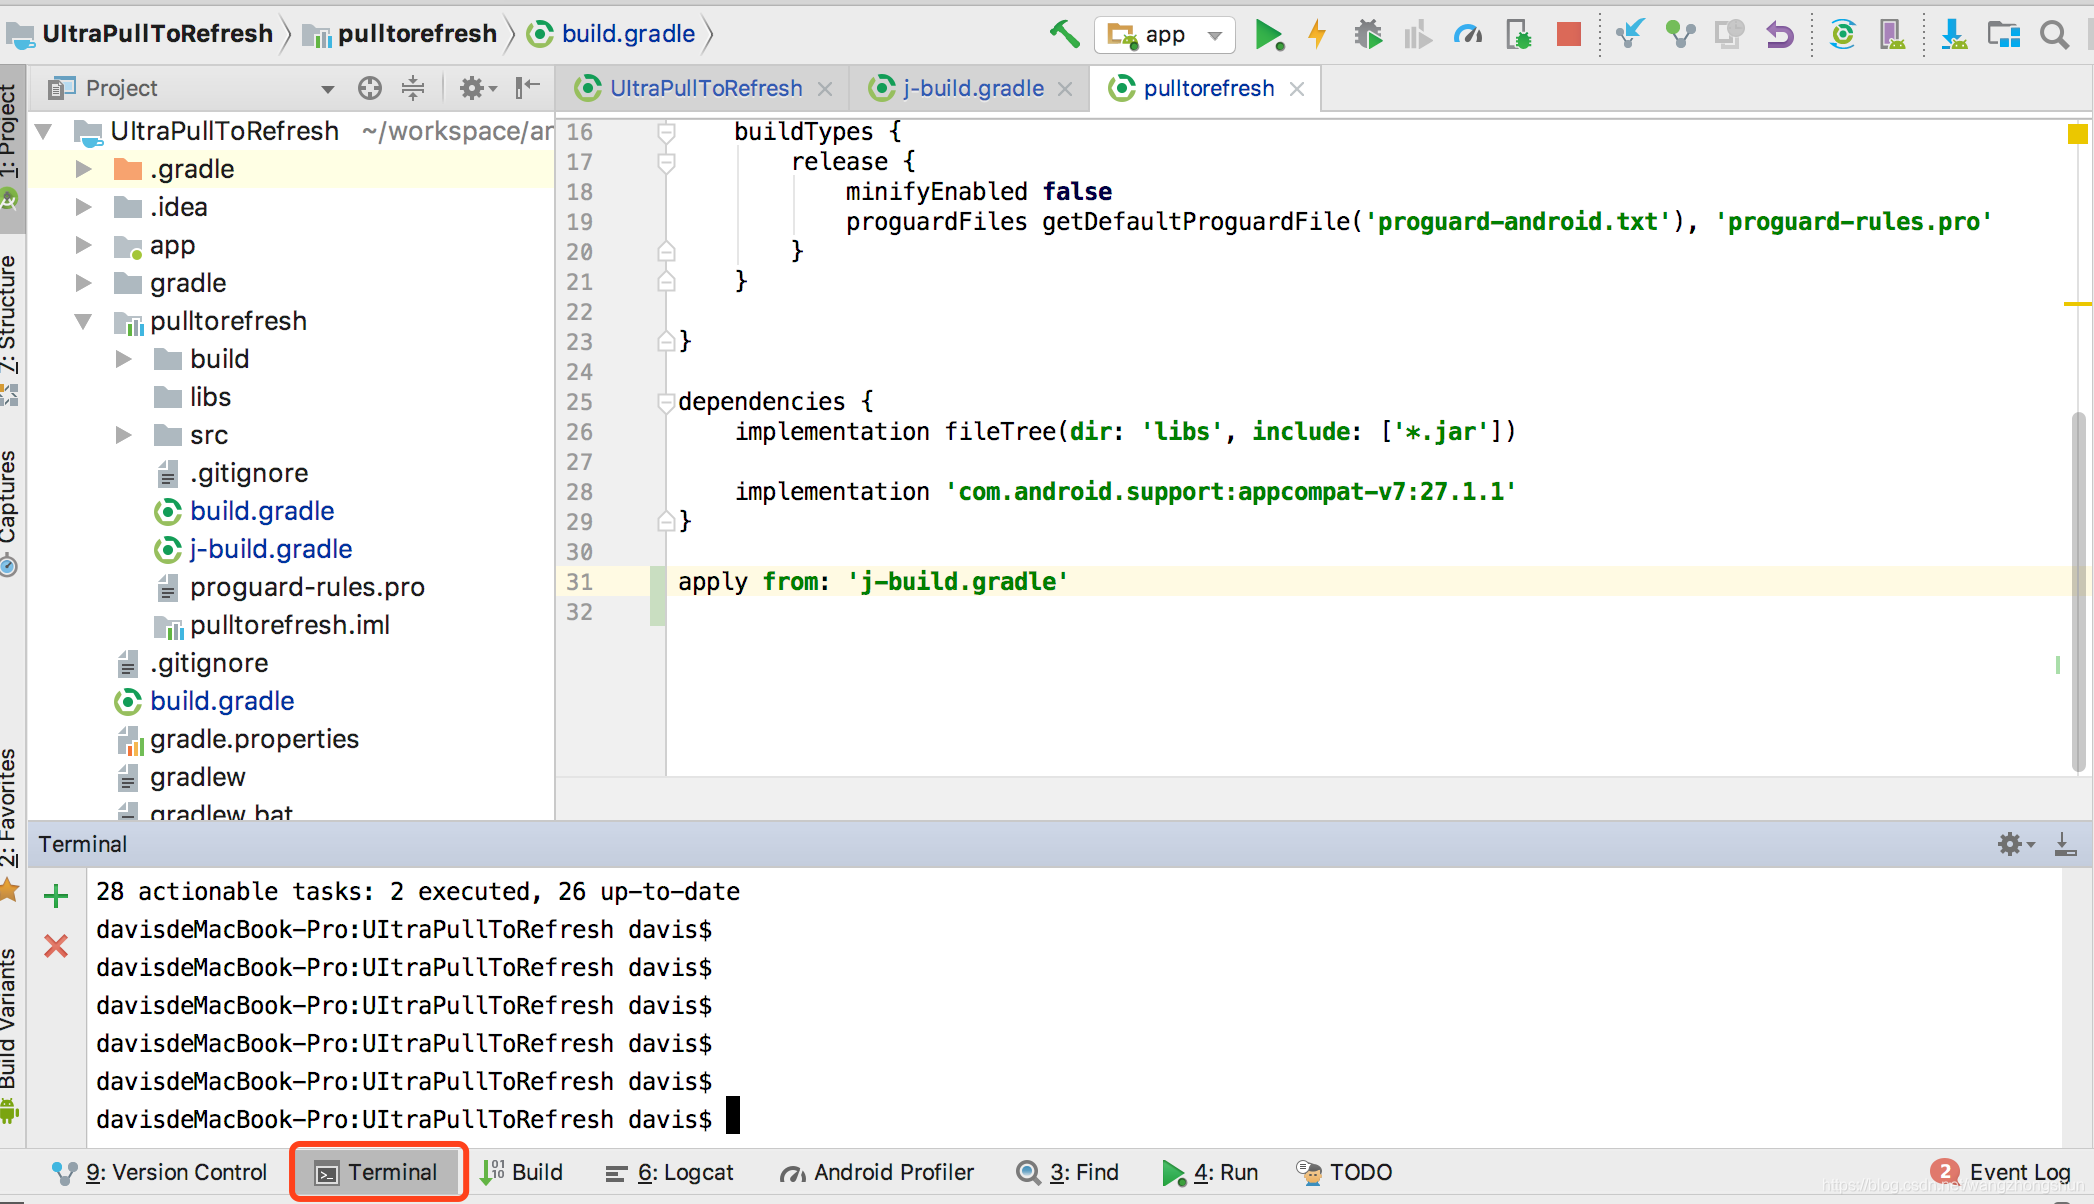
依次执行如下命令:
gradle clean
gradle install
出现BUILD SUCCESSFUL就表示成功了。
然后继续输入命令,提交项目到bintray:
gradle bintrayUpload
这个命令会提示上传进度,上传到100%就成功了最后也会出现BUILD SUCCESSFUL。到了这一步你的进度条已经到了90%了,就差最后一步了。
3、在项目中引用
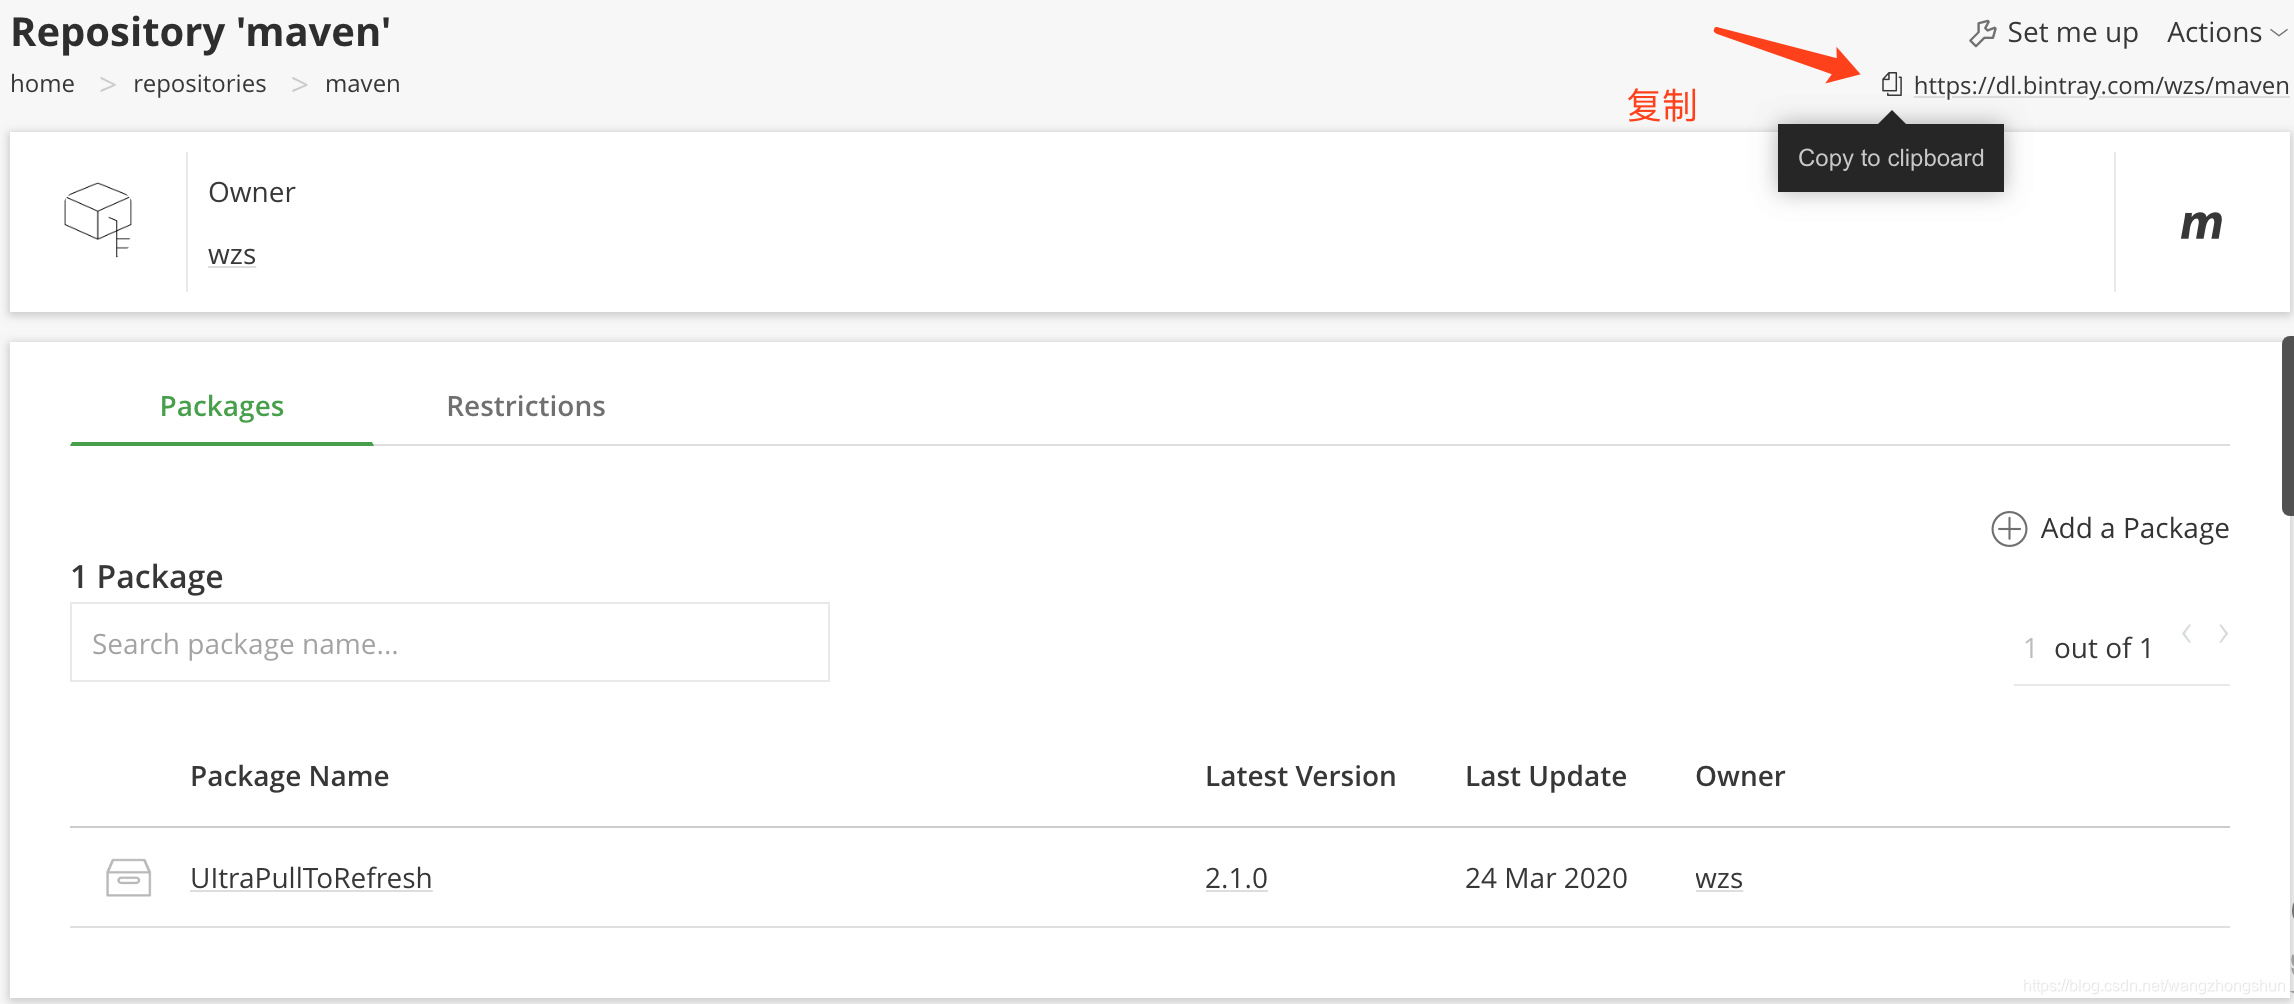
获取你的 Maven URL 并配置在需要使用的项目根目录的build.gradle 中。
maven { url 'https://dl.bintray.com/wzs/maven'}

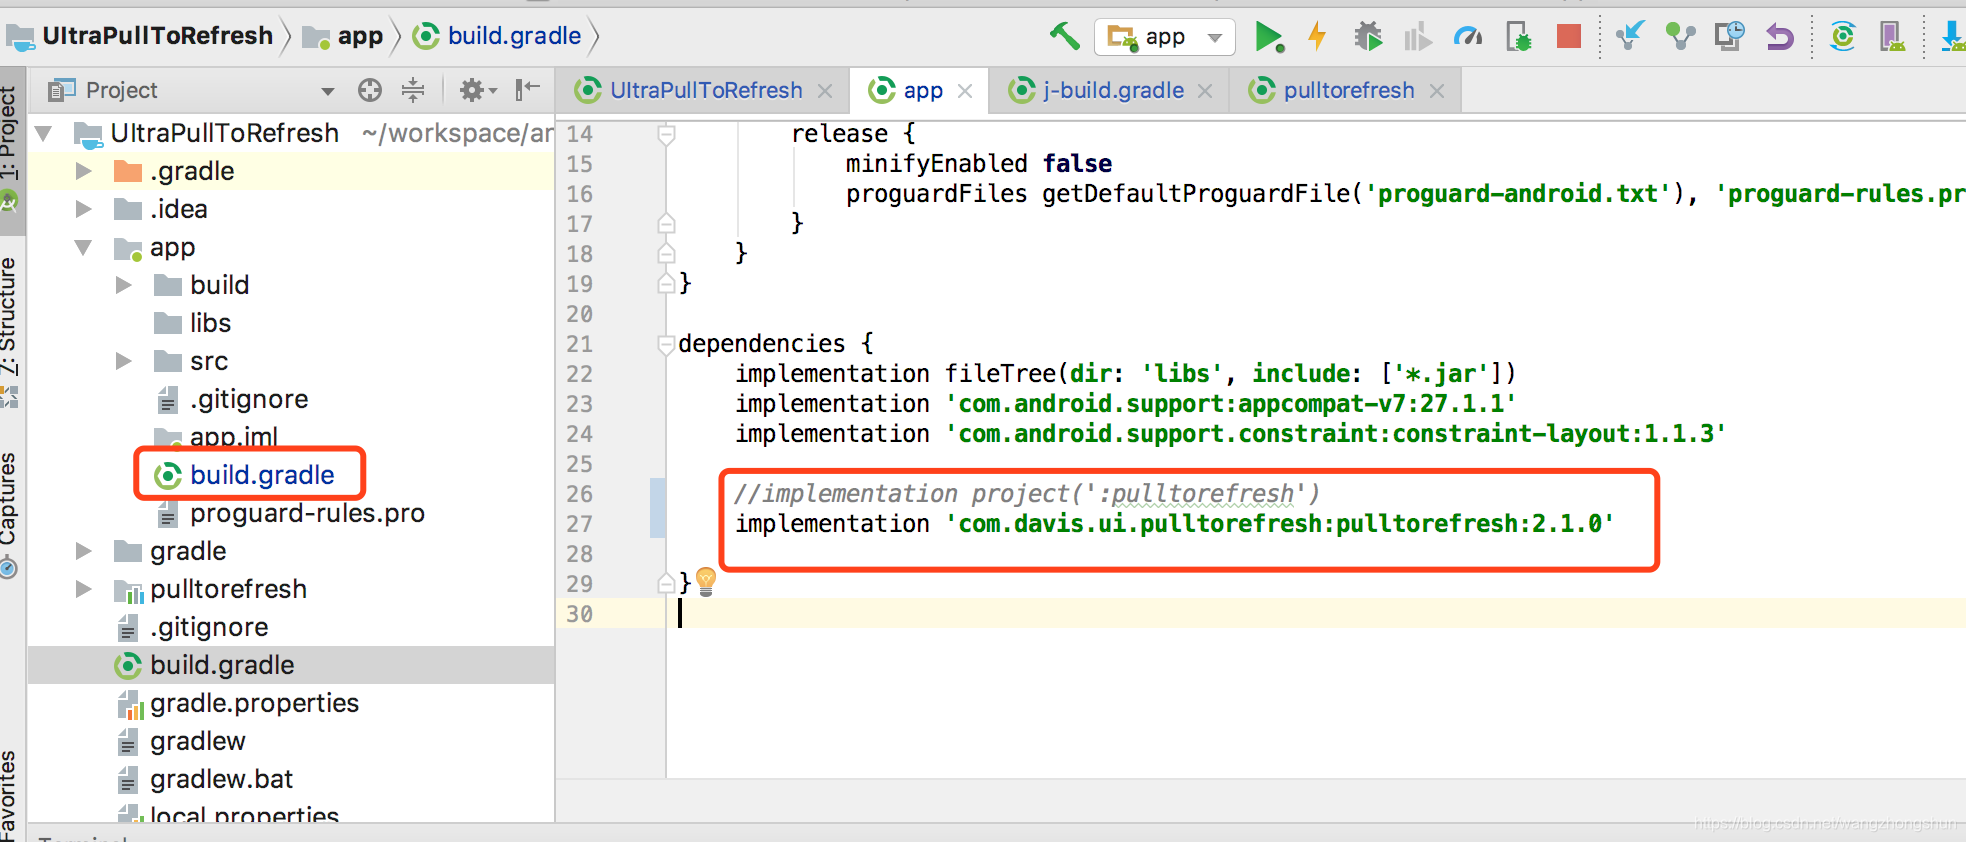
可以在 Moudle 的 build.gradle 文件中添加依赖引用了。
implementation 'com.davis.ui.pulltorefresh:pulltorefresh:2.1.0'
在 Bintray lib overview 中可以找到 maven、gradle、ivy 等配置引用方式

现在你的 lib 可以正常使用了,自己用还好,如果是分享给别人用,所有人都需要在各自的 Project 的 build.gradle 中添加 maven{url ‘https://dl.bintray.com/wzs/maven’} ,否则他们无法下载你的 lib,所以很有必要将你的 lib 同步到 Jcenter 库,因为 Jcenter 是一个标准托管库,几乎所有 build.gradle 中都会包含 jcenter() 以便访问。
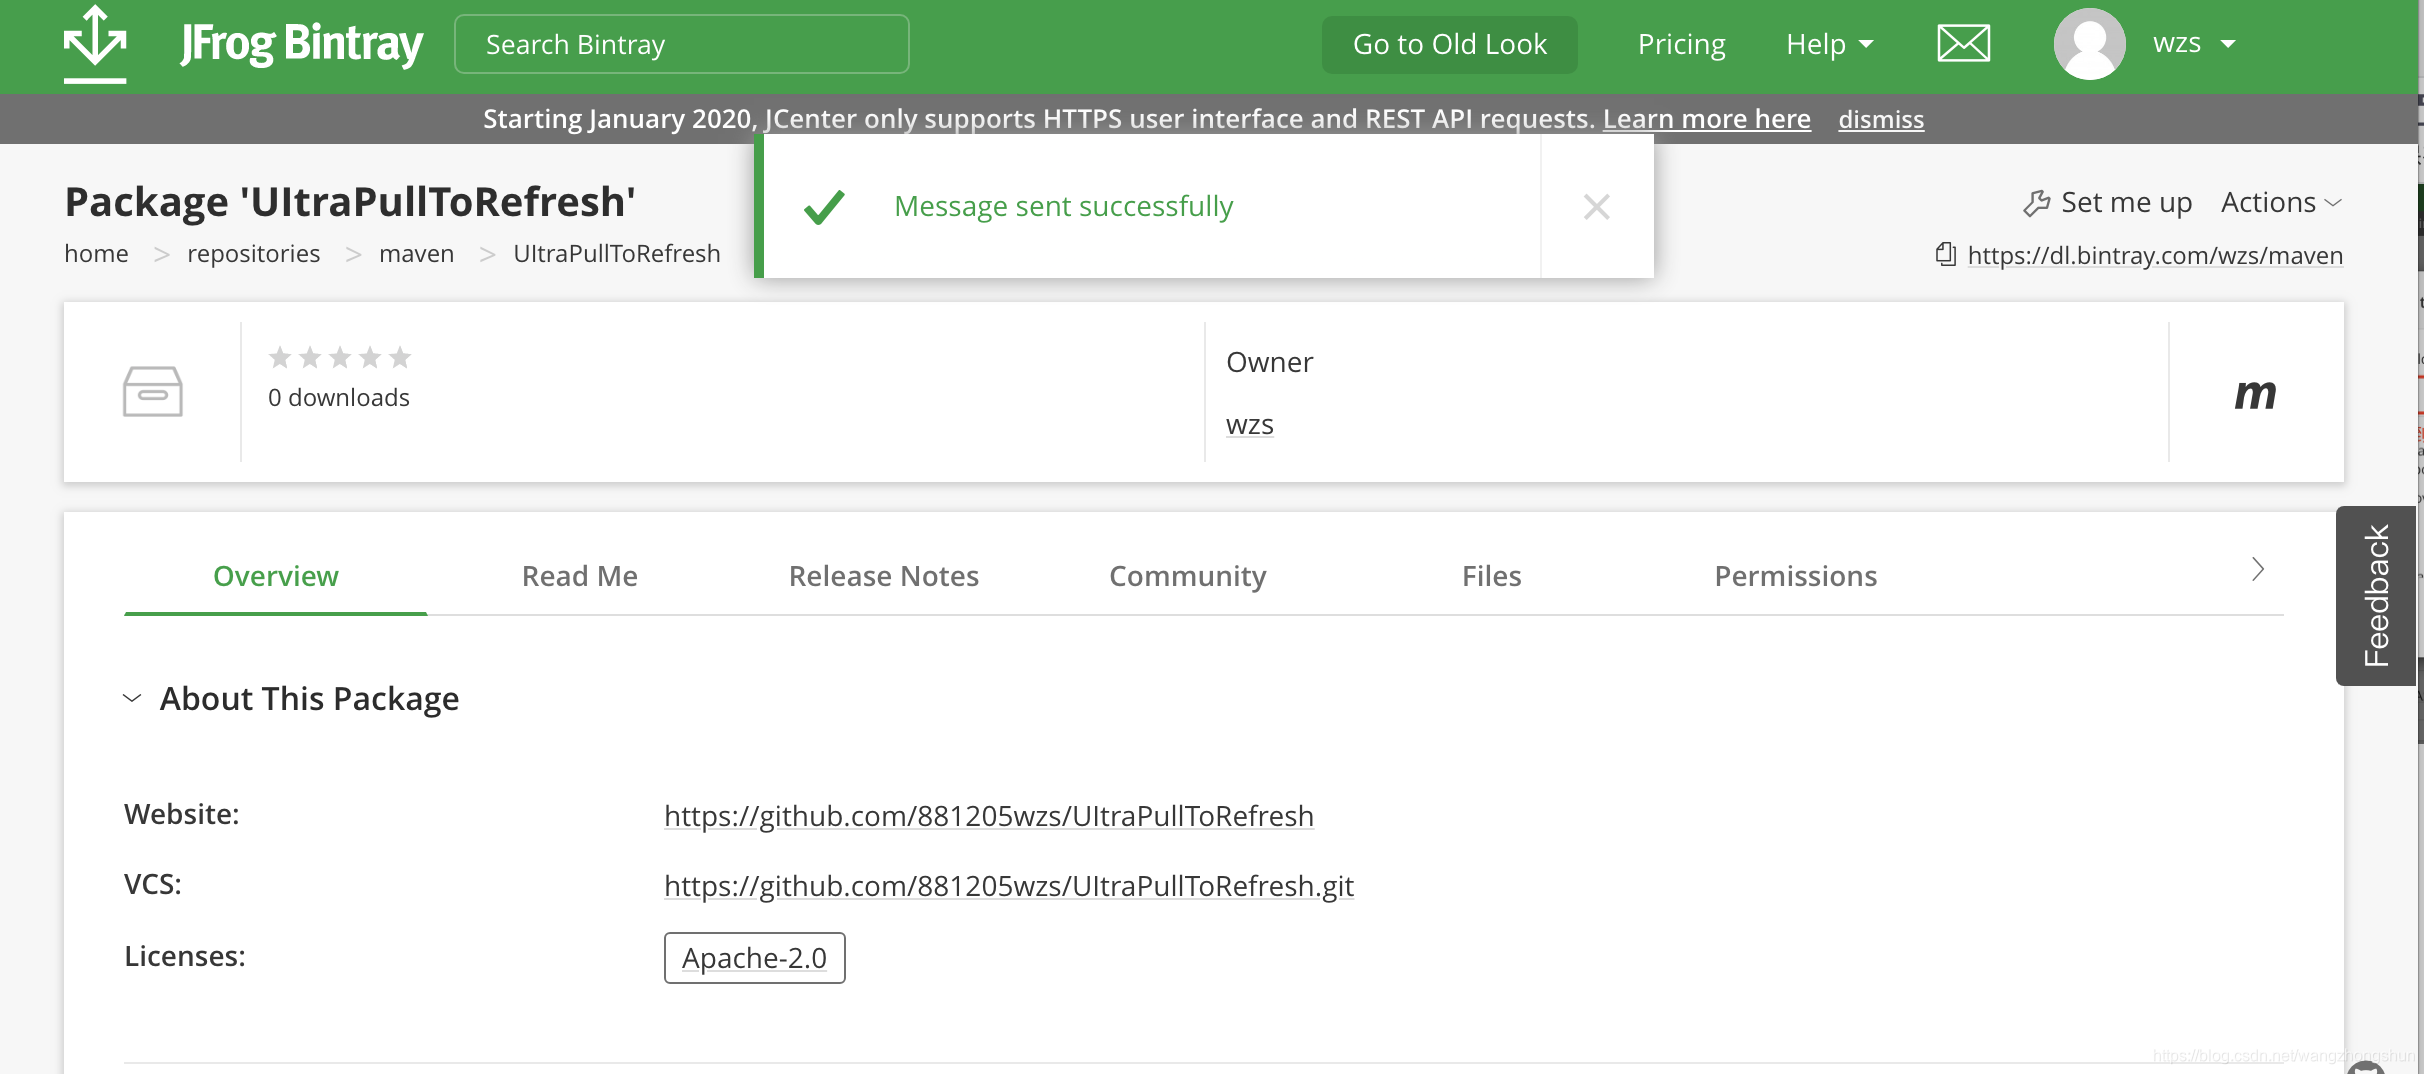
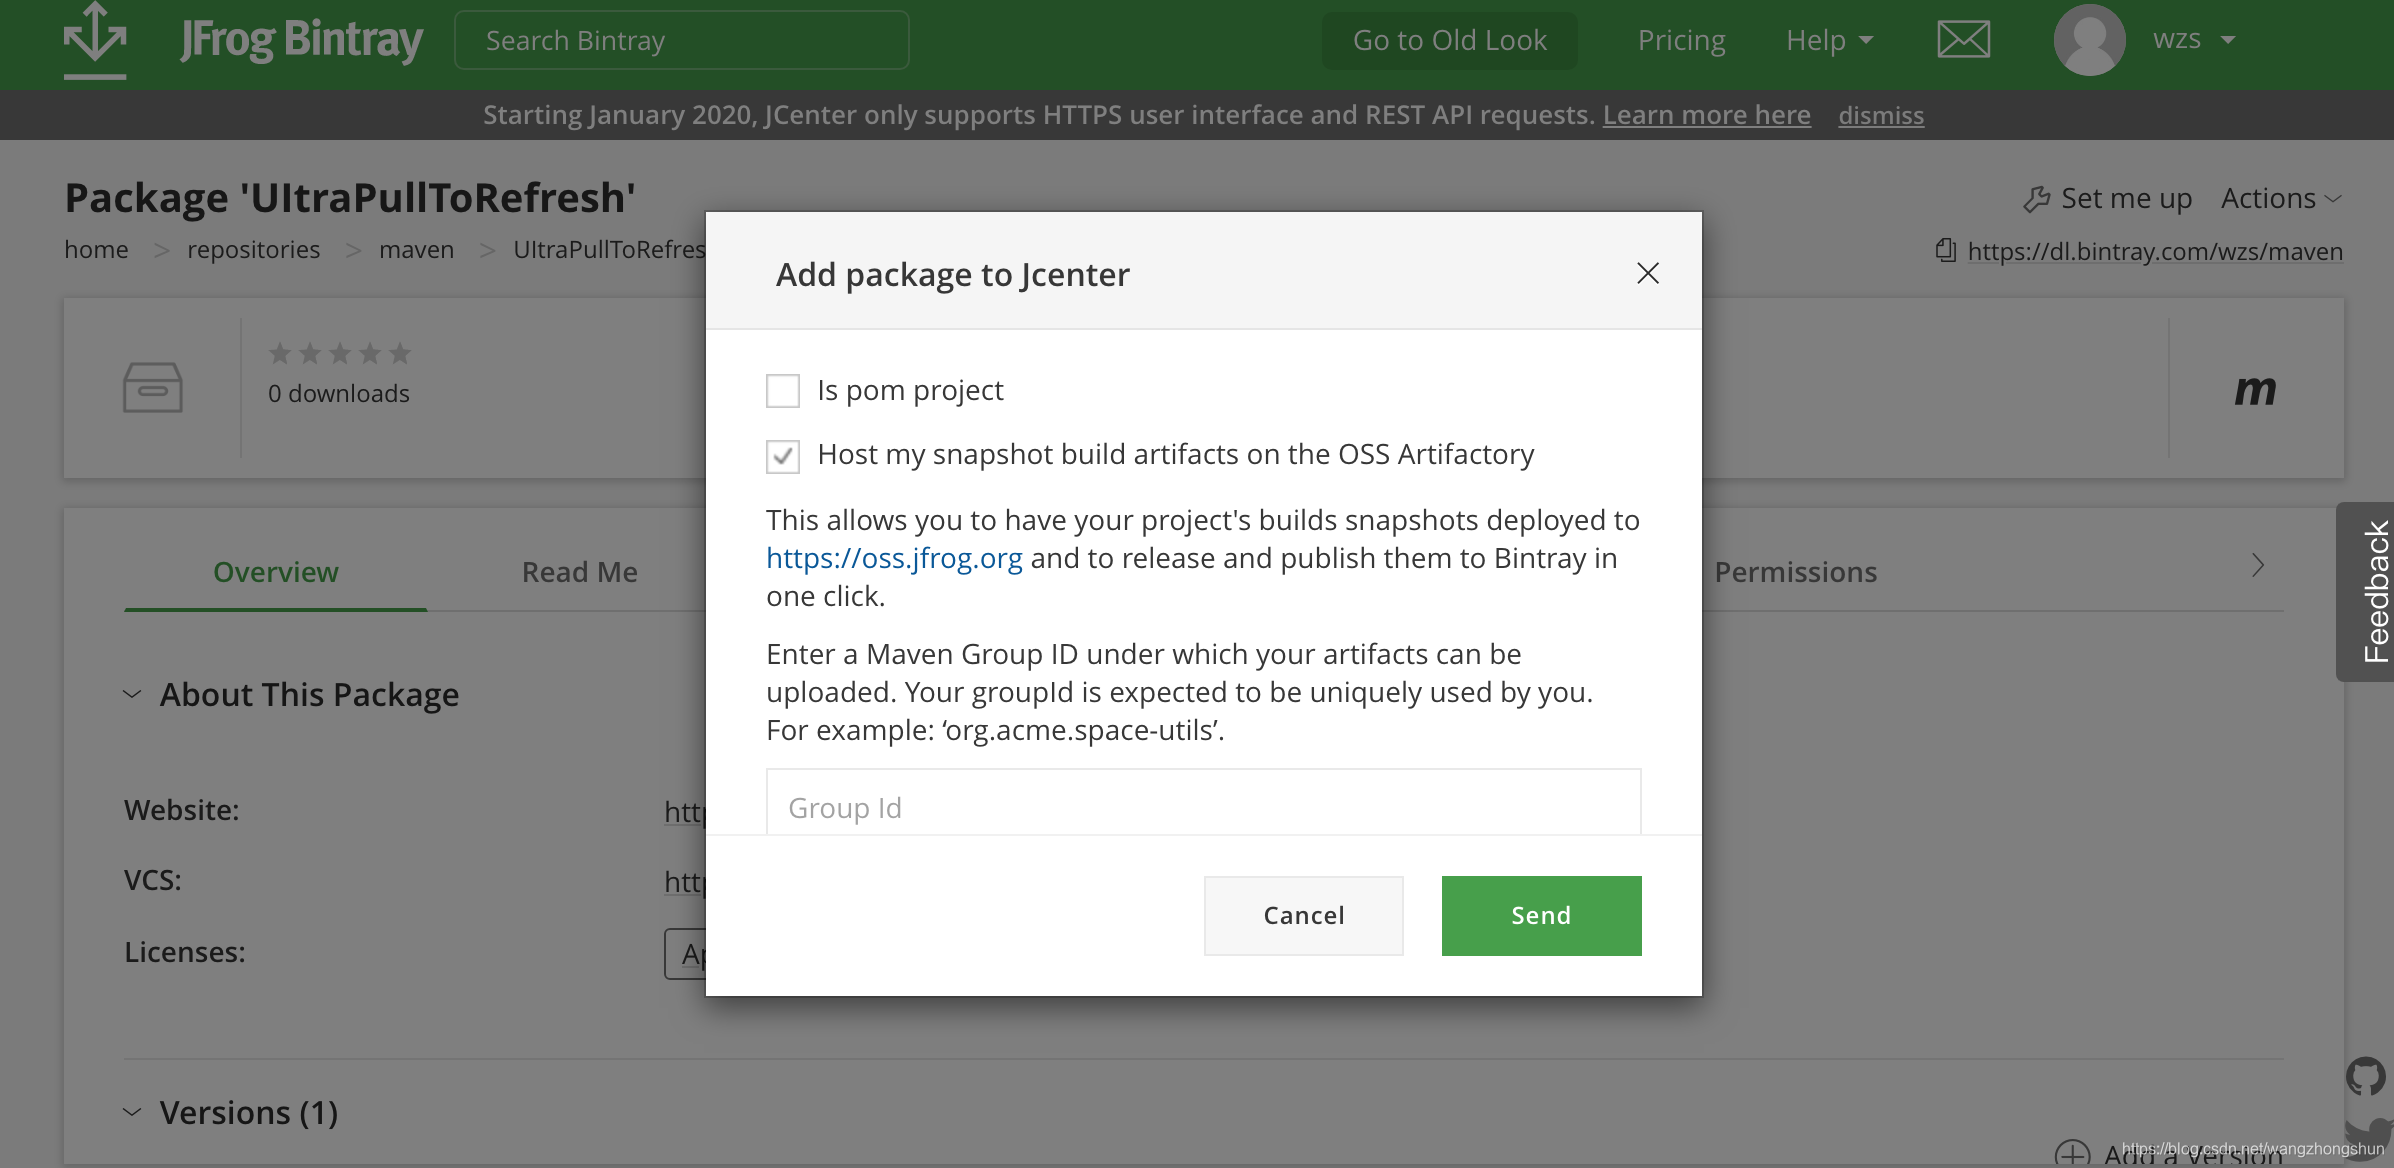
3、Add to JCenter
首先先进入到你上传的库的路径下,然后点击 Actions > Add to jcenter添加自己的lib。
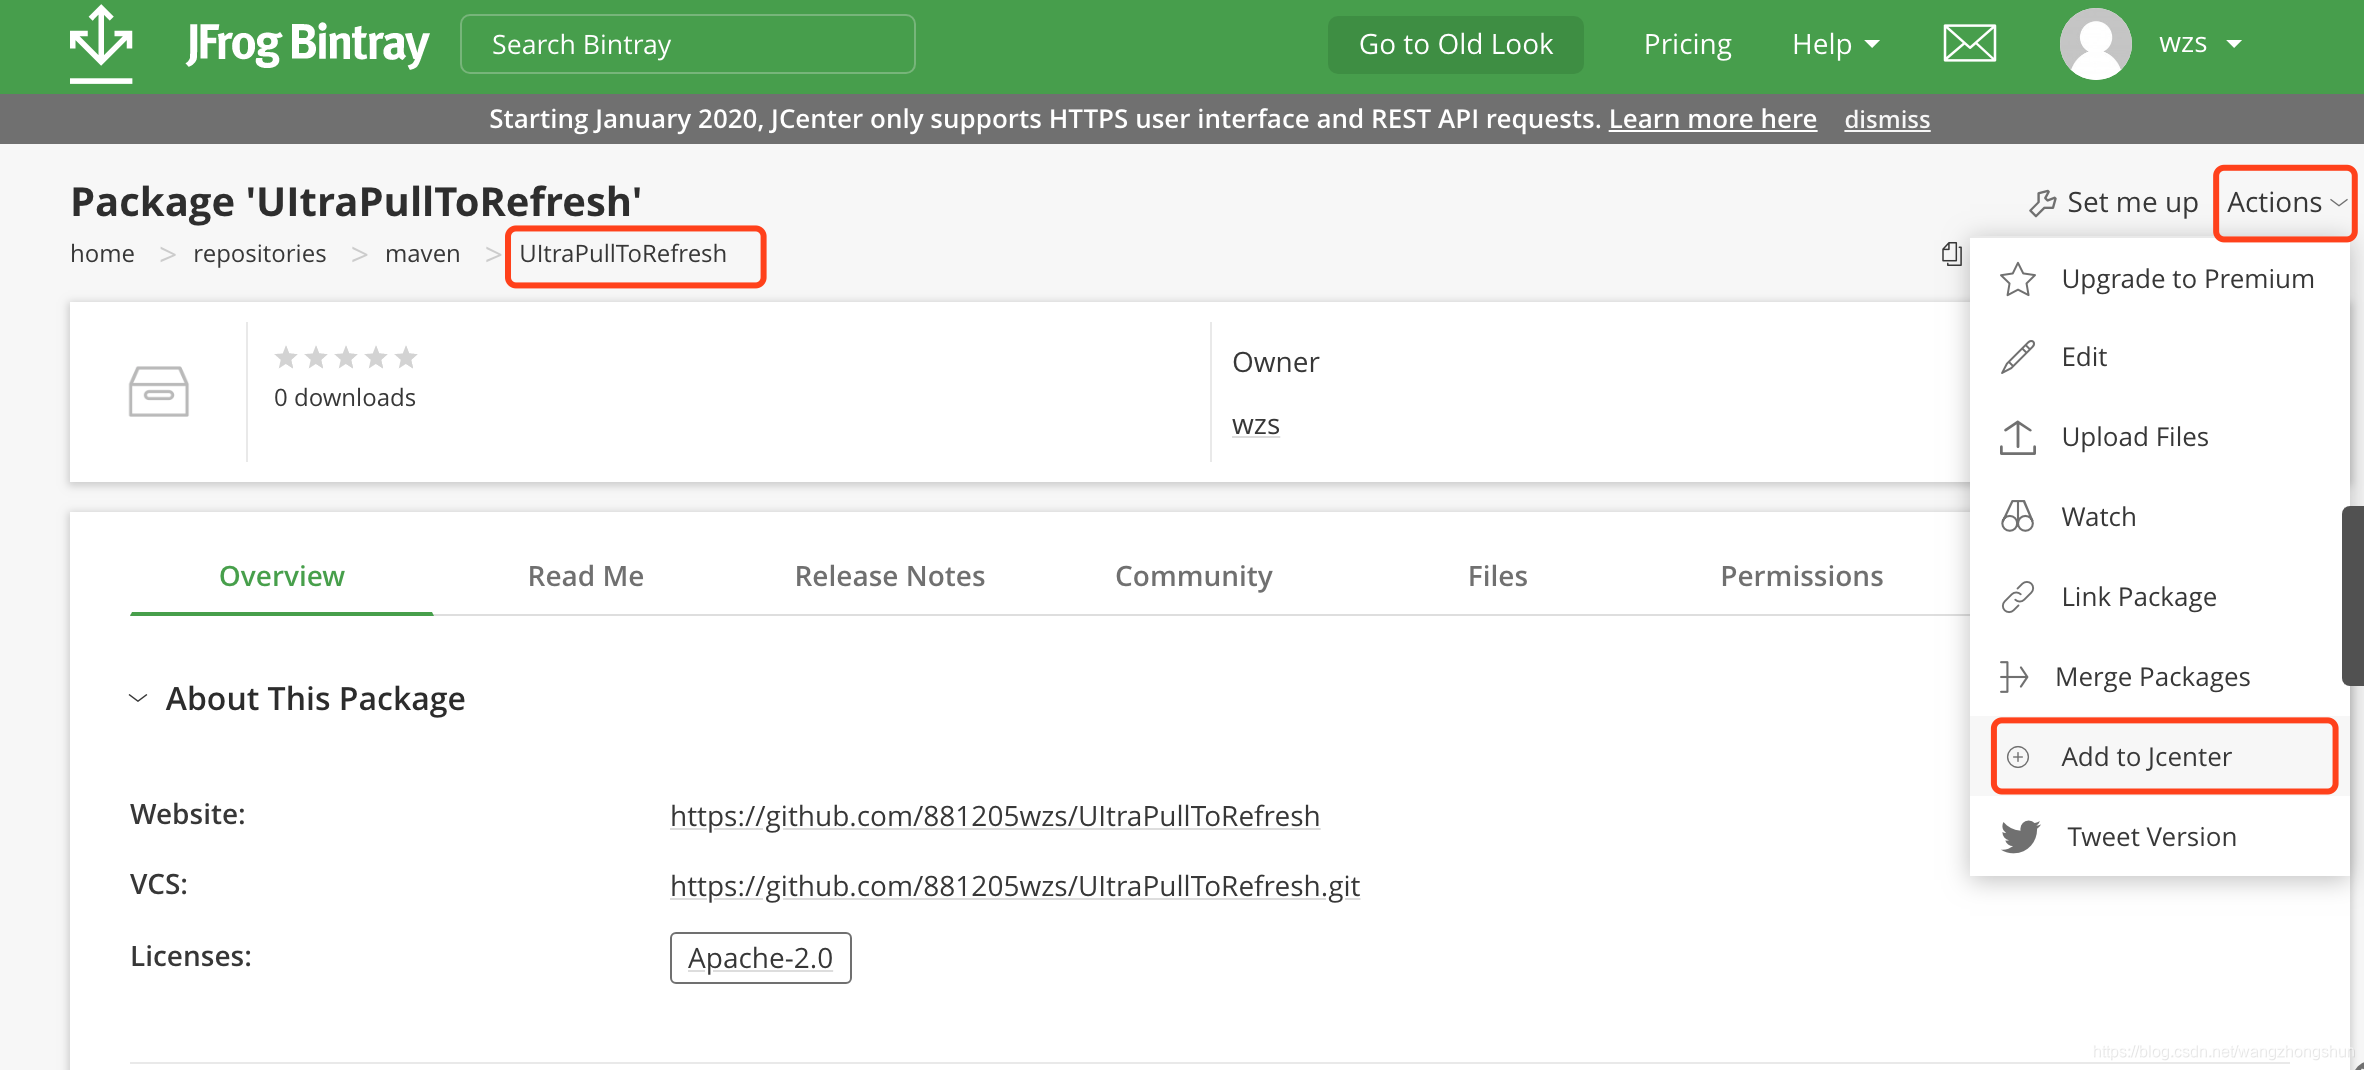
这里根据你的 lib 情况选择,如果不是 pom 项目,只勾选第二项即可。
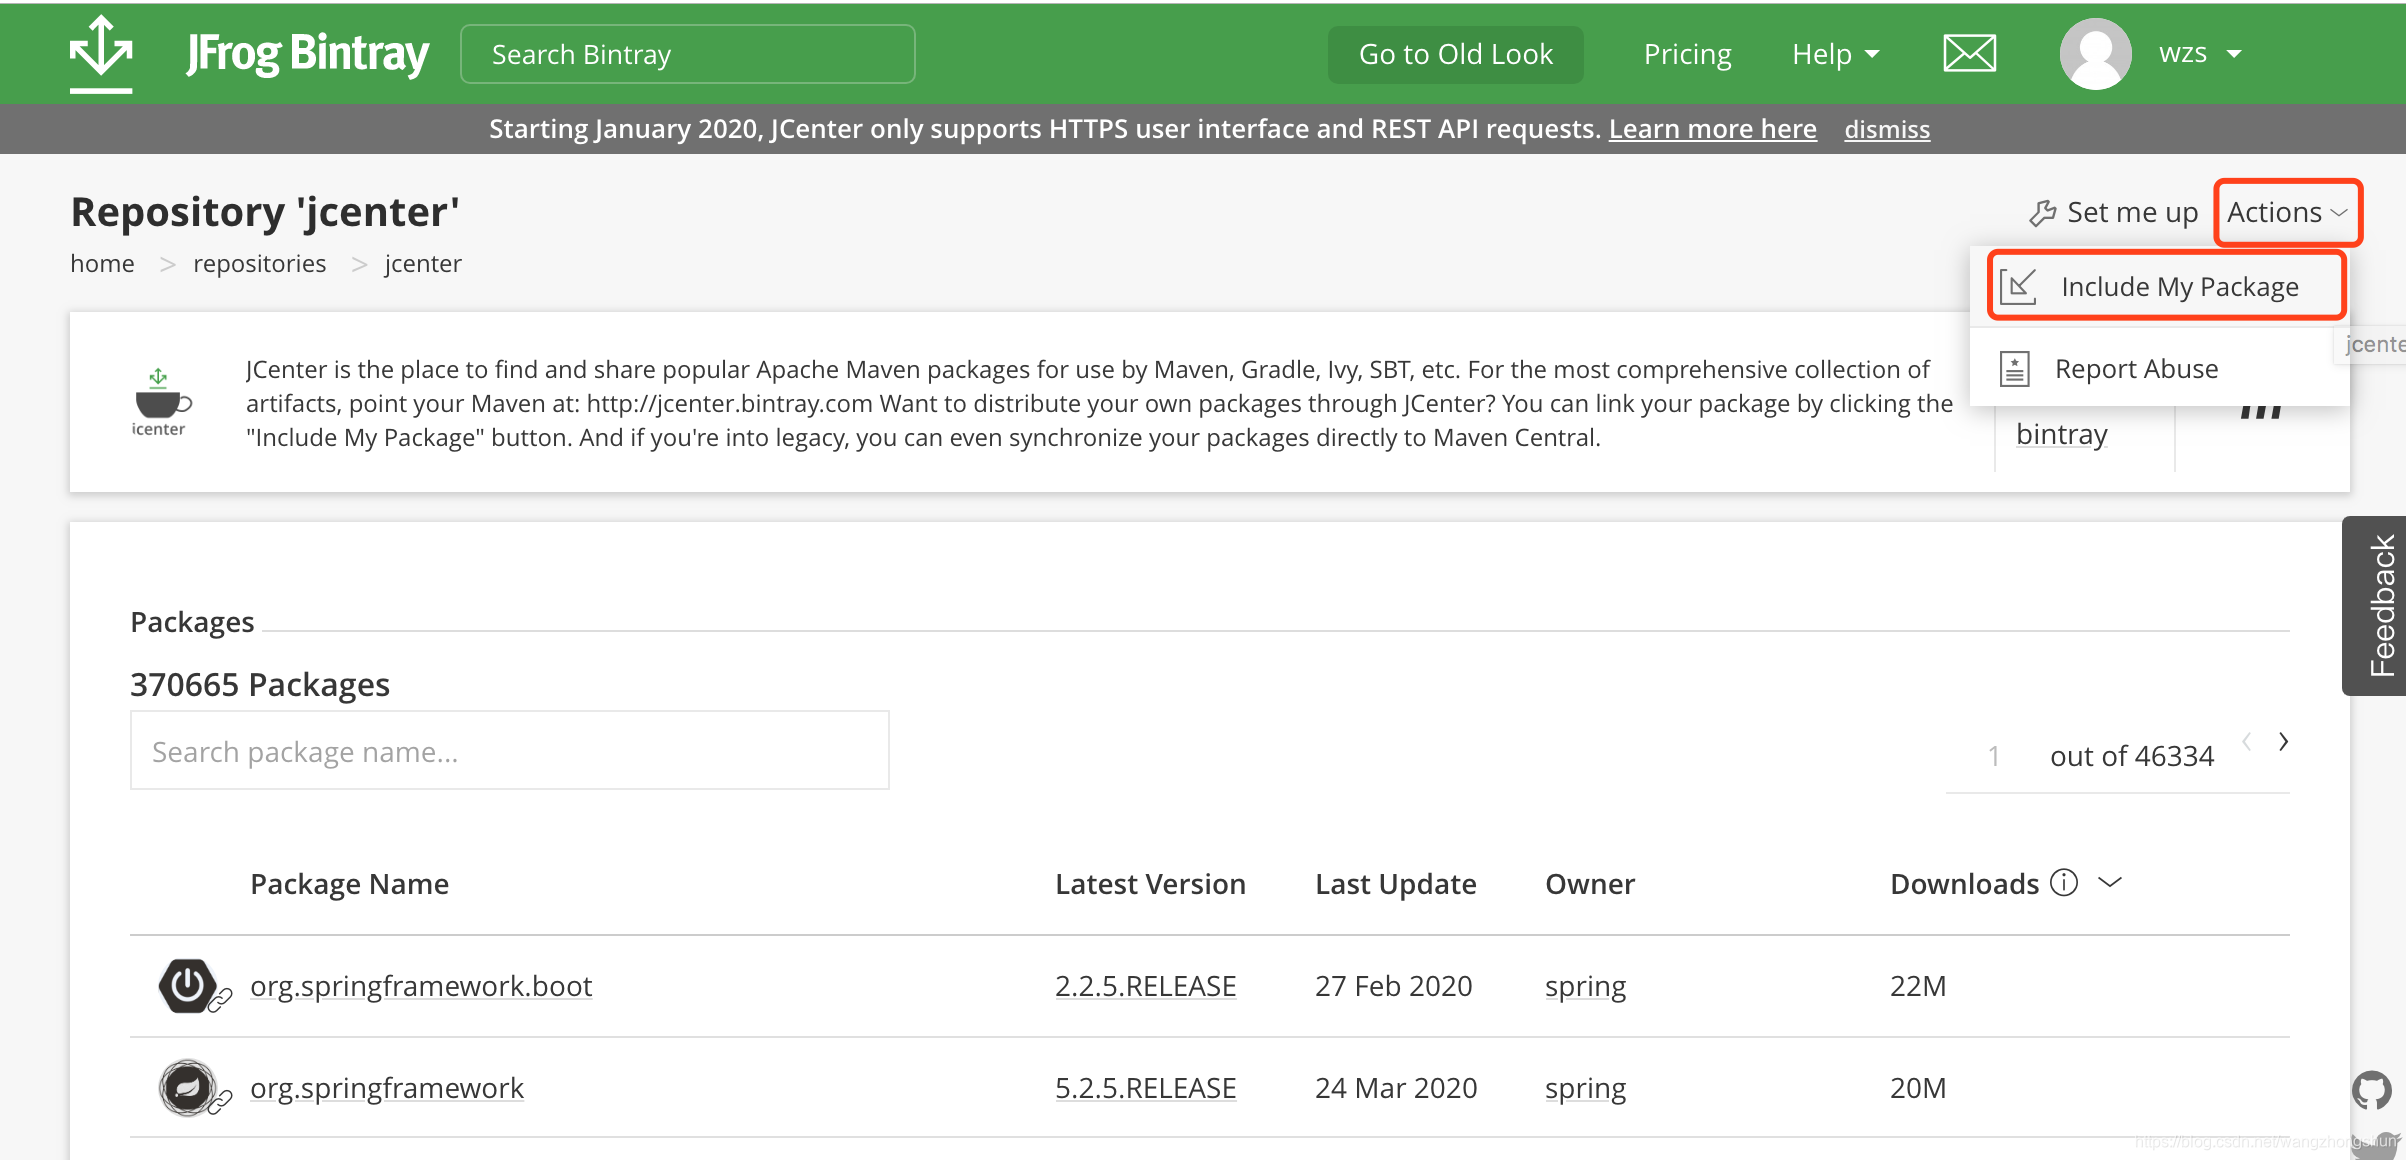
或者通过https://bintray.com/beta/#/bintray/jcenter
可以打开 jcenter 仓库,然后点击 Actions > Include My Package 添加你自己的 lib。
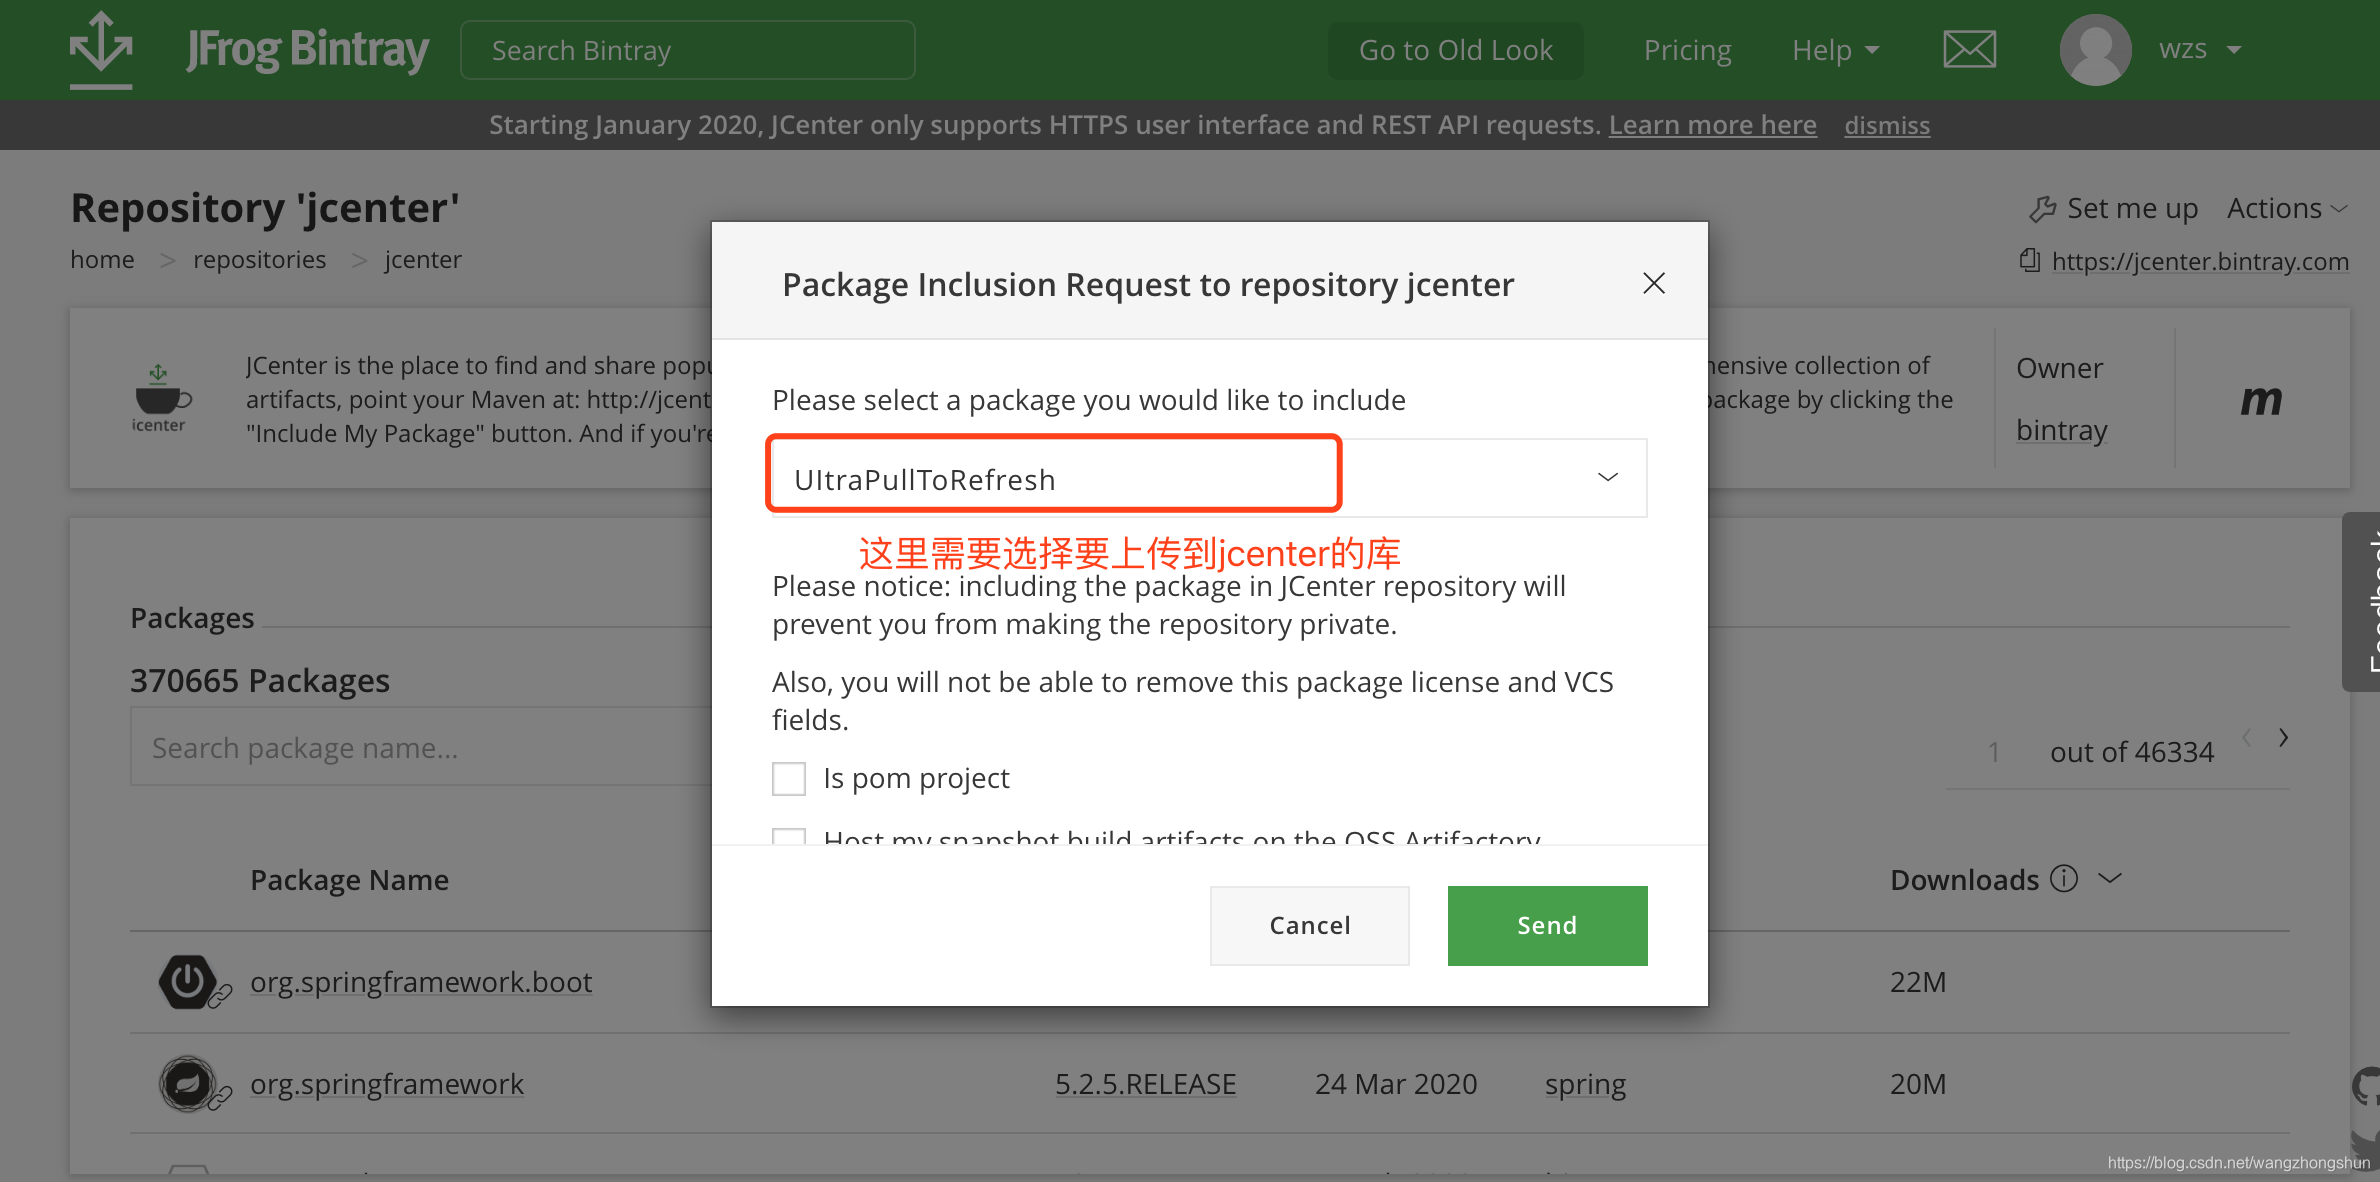
Send,然后等待审核通过吧。