redis是一款高性能的NOSQL系列的非关系型数据库
这里关于SSM的配置可参考Spring、SpringMVC、Mybatis的各项配置的整合详解,我是在其基础上进行配置的。当然,关于SSM+Redis的配置模板文件项目我也放在了GitHub中,可以对照着来看
- 在pom.xml中添加Redis的相关配置
<!-- redis客户端:Jedis -->
    <dependency>
      <groupId>redis.clients</groupId>
      <artifactId>jedis</artifactId>
      <version>2.9.0</version>
    </dependency>
    <dependency>
      <groupId>com.dyuproject.protostuff</groupId>
      <artifactId>protostuff-core</artifactId>
      <version>1.0.12</version>
    </dependency>
    <dependency>
      <groupId>com.dyuproject.protostuff</groupId>
      <artifactId>protostuff-runtime</artifactId>
      <version>1.0.12</version>
    </dependency>
- 在resource目录下创建redis.properties,里面包含redis连接池的相关配置信息
 redis.hostname=127.0.0.1
redis.port=6379
redis.database=0
redis.pool.maxActive=600
redis.pool.maxIdle=300
redis.pool.maxWait=3000
redis.pool.testOnBorrow=true
- 在spring-dao中将redis.properties和jdbc.properties进行整合
即将原来的<context:property-placeholder location="classpath:jdbc.properties"/>
修改为
<bean class="org.springframework.beans.factory.config.PropertyPlaceholderConfigurer">
		<property name="locations">
			<list>
				<value>classpath:jdbc.properties</value>
				<value>classpath:redis.properties</value>
			</list>
		</property>
	</bean>
- 在resource/spring目录下创建spring-redis.xml,该配置文件用于配置并创建Redis连接池、创建Redis工具类,封装好Redis的连接以进行相关的操作、配置redis的key操作
<beans xmlns="http://www.springframework.org/schema/beans"
       xmlns:xsi="http://www.w3.org/2001/XMLSchema-instance" xmlns:context="http://www.springframework.org/schema/context"
       xsi:schemaLocation="http://www.springframework.org/schema/beans
        http://www.springframework.org/schema/beans/spring-beans-3.2.xsd
        http://www.springframework.org/schema/context
        http://www.springframework.org/schema/context/spring-context-3.2.xsd">
    <!--Redis连接池的配置-->
    <bean id="jedisPoolConfig" class="redis.clients.jedis.JedisPoolConfig">
        <!--控制一个pool可分配多少个jedis实例-->
        <property name="maxTotal" value="${redis.pool.maxActive}"/>
        <!--连接池中最多可空闲maxIdle个连接,这里可以取值为20,表示即使没有数据库连接时依然可以保持20空闲的连接-->
        <property name="maxIdle" value="${redis.pool.maxIdle}"/>
        <!--最大等待时间:但没有可用连接时,连接池等待连接被归还的最大时间(以毫秒计数),超过时间则抛出异常-->
        <property name="maxWaitMillis" value="${redis.pool.maxWait}"/>
        <!--在获取连接的时候检查有效性-->
        <property name="testOnBorrow" value="${redis.pool.testOnBorrow}"/>
    </bean>

    <!--创建Redis连接池,并做相关的配置-->
    <bean id="jedisWritePool" class="com.sakura.myo2o.cache.JedisPoolWriper" depends-on="jedisPoolConfig">
        <constructor-arg index="0" ref="jedisPoolConfig"/>
        <constructor-arg index="1" value="${redis.hostname}"/>
        <constructor-arg index="2" value="${redis.port}" type="int"/>
    </bean>

    <!--创建Redis工具类,封装好Redis的连接以进行相关的操作-->
    <bean id="jedisUtil" class="com.sakura.myo2o.cache.JedisUtil" scope="singleton">
        <property name="jedisPool">
            <ref bean="jedisWritePool"/>
        </property>
    </bean>

    <!--redis的key操作-->
    <bean id="jedisKeys" class="com.sakura.myo2o.cache.JedisUtil$Keys" scope="singleton">
        <constructor-arg ref="jedisUtil"></constructor-arg>
    </bean>
    <bean id="jedisStrings" class="com.sakura.myo2o.cache.JedisUtil$Strings"
          scope="singleton">
        <constructor-arg ref="jedisUtil"></constructor-arg>
    </bean>
    <bean id="jedisLists" class="com.sakura.myo2o.cache.JedisUtil$Lists"
          scope="singleton">
        <constructor-arg ref="jedisUtil"></constructor-arg>
    </bean>
    <bean id="jedisSets" class="com.sakura.myo2o.cache.JedisUtil$Sets"
          scope="singleton">
        <constructor-arg ref="jedisUtil"></constructor-arg>
    </bean>
    <bean id="jedisHash" class="com.sakura.myo2o.cache.JedisUtil$Hash"
          scope="singleton">
        <constructor-arg ref="jedisUtil"></constructor-arg>
    </bean>
</beans>
- 在com/sakura/myo2o中再创建一个cache包,并在该包下分别创建两个类JedisPoolWriper.java(获取连接池对象)、JedisUtil.java(对Redis进行操作的相关方法,由于这里代码过长,只展示了几个常见的方法,完整的参考GitHub中),分别如下
//强指定redis的JedisPool接口构造函数,这样才能再centos成功创建jedispool
public class JedisPoolWriper {
    //Redis连接池对象
    private JedisPool jedisPool;

    public JedisPoolWriper(final JedisPoolConfig poolConfig,final String host,final int port){
        try {
            jedisPool = new JedisPool(poolConfig,host,port);
        } catch (Exception e) {
            e.printStackTrace();
        }
    }

    //获取redis连接池对象
    public JedisPool getJedisPool() {
        return jedisPool;
    }


    public void setJedisPool(JedisPool jedisPool) {
        this.jedisPool = jedisPool;
    }

}
public class JedisUtil {
	private final int expire = 60000;
	public Keys KEYS;
	public Strings STRINGS;

	private JedisPool jedisPool;

	public JedisPool getJedisPool() {
		return jedisPool;
	}

	public void setJedisPool(JedisPoolWriper jedisPoolWriper) {
		this.jedisPool = jedisPoolWriper.getJedisPool();
	}

	public Jedis getJedis() {
		return jedisPool.getResource();
	}


	public class Keys {

		public Keys(JedisUtil jedisUtil) {
		}

		public long del(String... keys) {
			Jedis jedis = getJedis();
			long count = jedis.del(keys);
			jedis.close();
			return count;
		}

		public boolean exists(String key) {
			// ShardedJedis sjedis = getShardedJedis();
			Jedis sjedis = getJedis();
			boolean exis = sjedis.exists(key);
			sjedis.close();
			return exis;
		}

		public String type(String key) {
			// ShardedJedis sjedis = getShardedJedis();
			Jedis sjedis = getJedis();
			String type = sjedis.type(key);
			sjedis.close();
			return type;
		}

		public Set<String> keys(String pattern) {
			Jedis jedis = getJedis();
			Set<String> set = jedis.keys(pattern);
			jedis.close();
			return set;
		}
	}


	public class Strings {
		public Strings(JedisUtil jedisUtil) {
		}


		public String get(String key) {
			Jedis sjedis = getJedis();
			String value = sjedis.get(key);
			sjedis.close();
			return value;
		}


		public String set(String key, String value) {
			return set(SafeEncoder.encode(key), SafeEncoder.encode(value));
		}


		public String set(byte[] key, byte[] value) {
			Jedis jedis = getJedis();
			String status = jedis.set(key, value);
			jedis.close();
			return status;
		}
	}
}
- 通过以上几个步骤,Redis就整合到SSM上了,不过我们还得验证下。下面我从com/sakura/service/impl中的accountserviceImpl.java方法中的getAccount方法进行修改,之前该方法是直接从mysql中读取信息的,这里我修改成第一次调用该方法时同样是从mysql中读取,但将第一次读取的数据存储在redis中,这样在第二次调用时,该方法会先判断redis中是否有该数据,如果有的话直接从redis中读取
@Service
public class accountserviceImpl implements accountservice {

    @Autowired
    private AccountDao dao;
    @Autowired
    private JedisUtil.Keys jedisKey;
    @Autowired
    private JedisUtil.Strings jedisStrings;

//    @Override
//    public Account getAccount(int id) {
//        //原来的方法
//        return dao.queryAccount(id);
//    }

    @Override
    public Account getAccount(int id) {
        //定义Redis的前缀
        String key = "Account";
        //定义接收的对象
        Account account = null;
        //定义jackson数据转换操作类
        ObjectMapper mapper = new ObjectMapper();
        //判断key是否存在
        if (!jedisKey.exists(key)){
            System.out.println("从mysql中取出.....");
            //如果不存在,则从mysql里面取出相应的数据
            account = dao.queryAccount(id);
            //将相关的实体类集合转换成String,存入redis里面相应的key中
            String jsonString;
            try {
                jsonString = mapper.writeValueAsString(account);
            } catch (JsonProcessingException e) {
                e.printStackTrace();
                throw new RuntimeException(e.getMessage());
            }
            jedisStrings.set(key,jsonString);
        }else {
            System.out.println("从Redis中取出......");
            //如果存在,则直接从redis里面取出相应的数据
            String jsonString = jedisStrings.get(key);
            try {
                account = mapper.readValue(jsonString,Account.class);
            } catch (IOException e) {
                e.printStackTrace();
                throw new RuntimeException(e.getMessage());
            }
        }
        return account;
    }

}
- 如果要运行service方法时不要忘记打开redis。
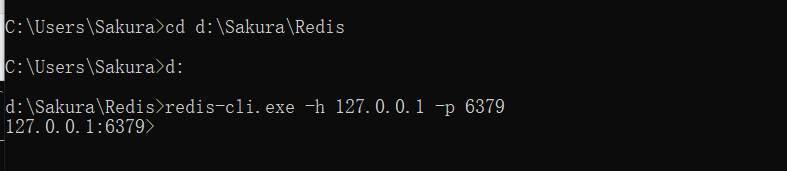
1)打开一个 cmd 窗口 使用 cd 命令切换到Redis安装目录运行:

2)这时候另启一个 cmd 窗口,原来的不要关闭,不然就无法访问服务端了。切换到 redis 目录下运行:
- 运行好Redis,接下来我们就可以进行redis的配置验证啦。可以直接运行在测试包下test/com/sakura/service下的AccountServiceTest.java中的queryAccountTest()方法
(注,这里要注意的是由于是在测试类中进行测试,因此需要在BaseTest.java中添加spring-redis.xml,如果不添加的话会报错)

第一次运行时控制显示从mysql中读取

第二次运行时显示从redis运行,表示redis配置成功啦

