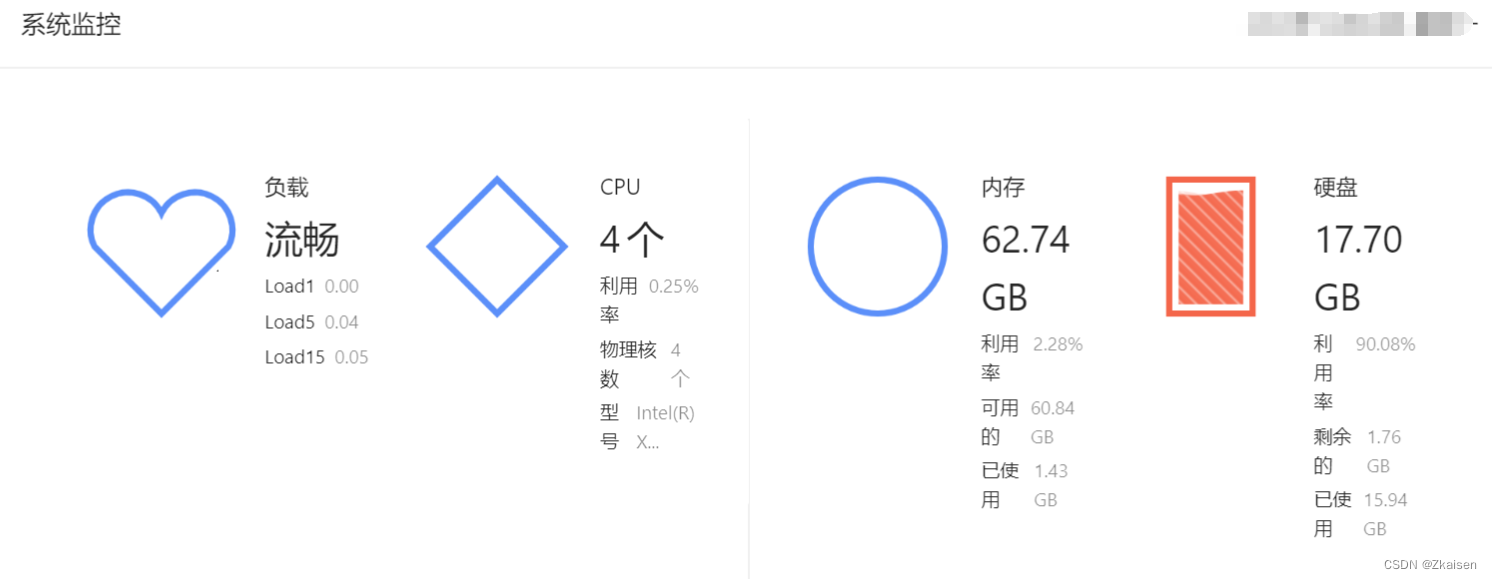
Solve the problem of insufficient disk capacity of vmware virtual machine encountered at work
1. Add a new disk and mount the disk to an empty directory
1. Shut down and add a hard drive
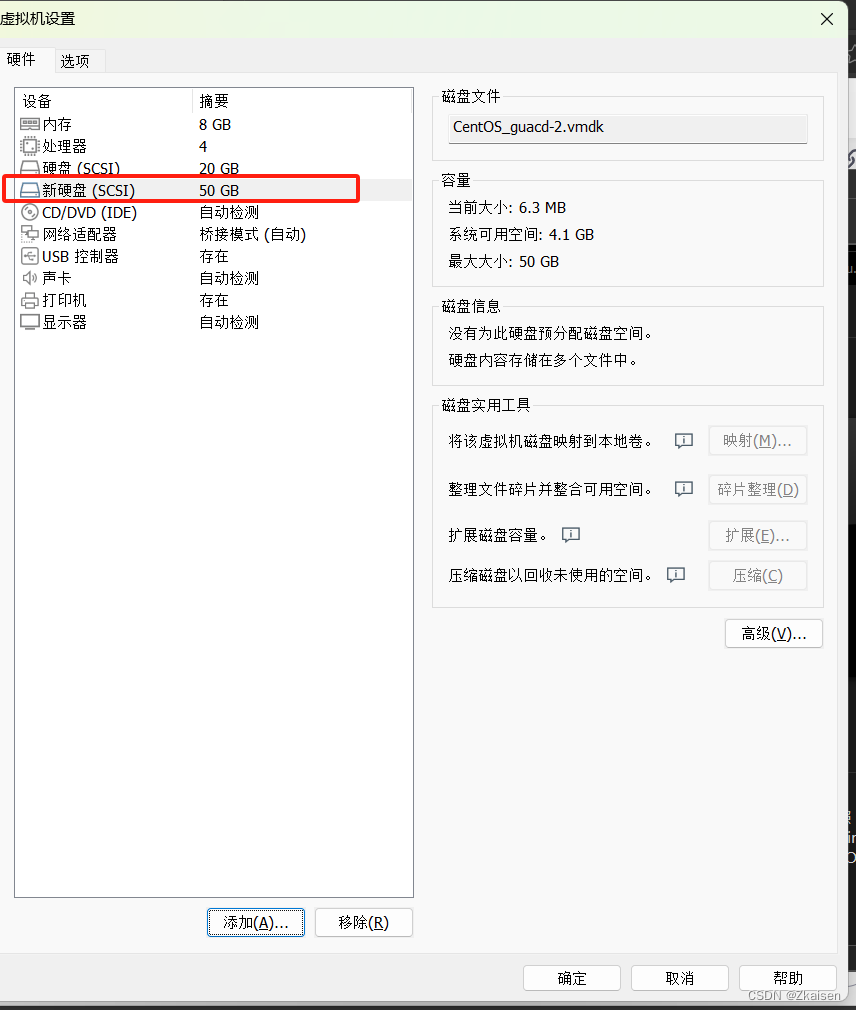
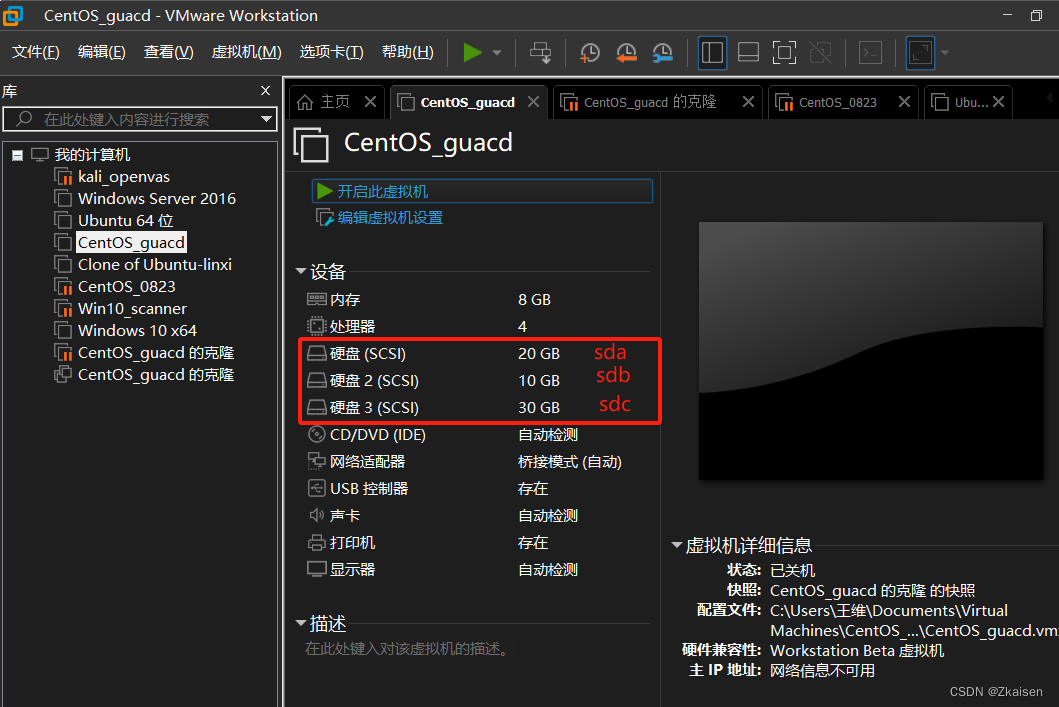
1) First, you need to shut down the virtual machine, and then add a hard disk on the virtual machine settings page
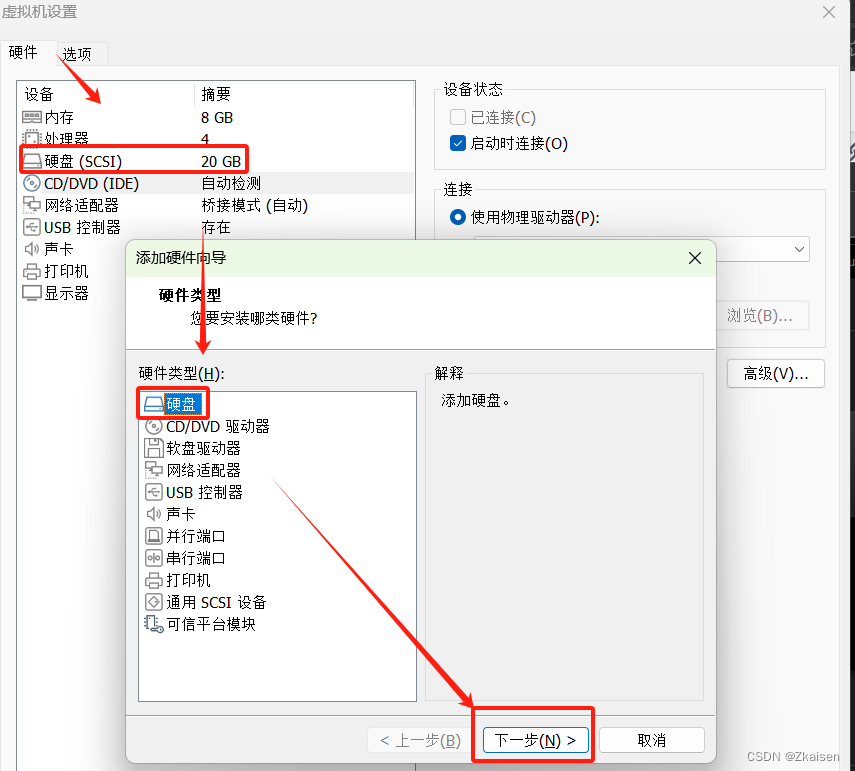
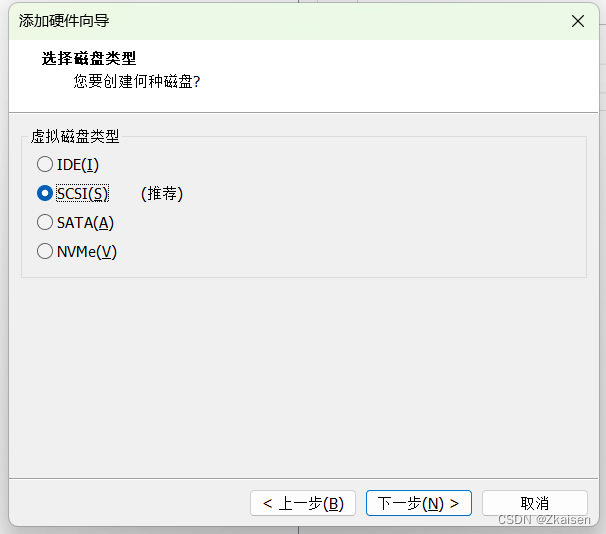
2) SCSI is selected by default, click Next
3) Keep the default and click Next

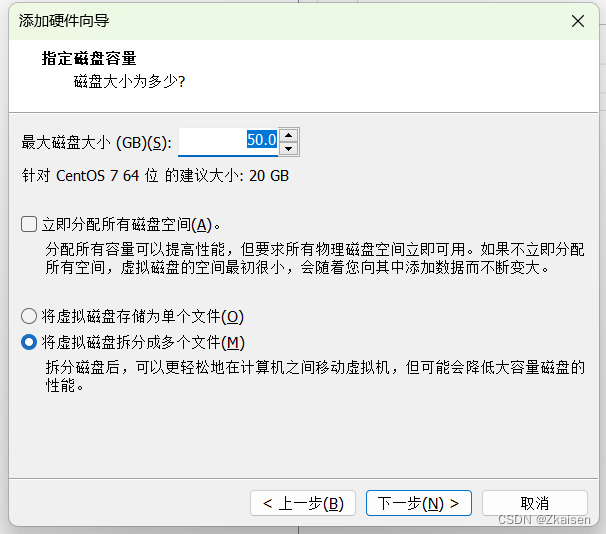

4) You can see the newly added 50G disk in the virtual machine settings.
Next, turn on the virtual machine, partition and mount the new disk
2. Check the disk partition status
1) First, open the terminal and switch to root privileges, then use the following command to check the hard disk partition status
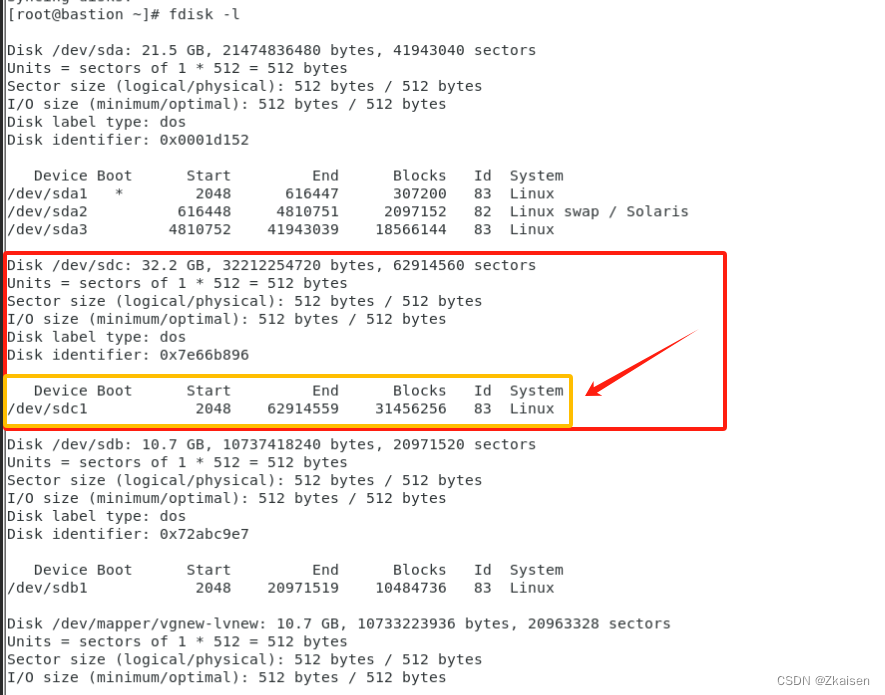
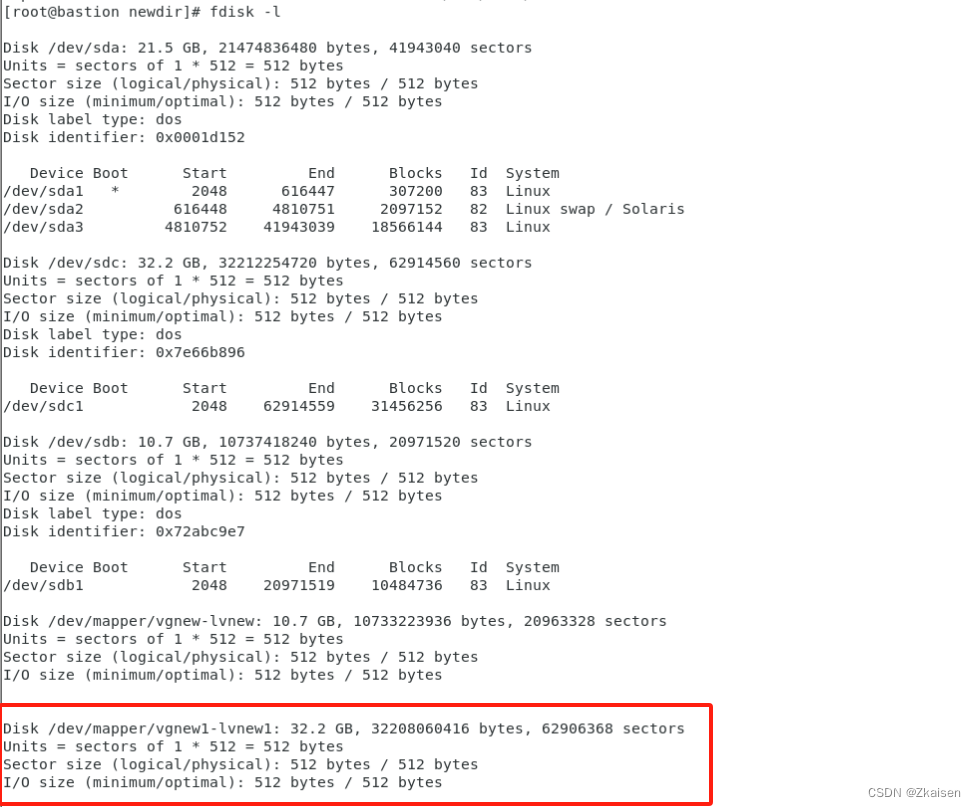
fdisk -l
The red box is my new 50G hard drive. Because I chose to split the hard drive into multiple files in the Add Disk Wizard, my 50G hard drive was split into 3 pieces. If you don't want to be split into multiple blocks, just choose to store the virtual disk as a single file when adding the disk earlier. (There is a misunderstanding here) For details, please refer to the XXX My Doubts and Thoughts section.
Knowledge points:
- How to know which disk is not partitioned?
As you can see from the picture above, there are/dev/sda, /dev/sdb, /dev/sdc/ and /dev/mapper/vgnew-lvnew four disks , there is an error here, there should be three disks: /dev/sda, /dev/sdb, and /dev/sdc, < a i=4>Different from /dev/sda and /dev/sdb, /dev/sdc/ and /dev/mapper/vgnew-lvnew There is no information such as /dev/sda1 when the disk is transferred, indicating that this disk has not been partitioned.
- Explanation of each line of newly added disk information:
Disk /dev/sdc: disk name
32.2 GB,: disk size, but this number is not precise
32212254720 bytes:32212254720/1024/1024/1024=30GB
62914560 sectors: 62914560 sectors
Units = sectors of 1 * 512 = 512 bytes: 512 bytes (one sector per cylinder here)
Sector size (logical/physical): 512 bytes / 512 bytes: One sector is 512 bytes
I/O size (minimum/optimal): 512 bytes / 512 bytes: Disk I The minimum/optimal unit for /O operations is 512 bytes
- For information on tracks, sectors, and cylinders, please refer to the following articles:
Learn the structure of a disk (disk, track, sector, cylinder) in 10 minutes - Zhihu (zhihu.com)
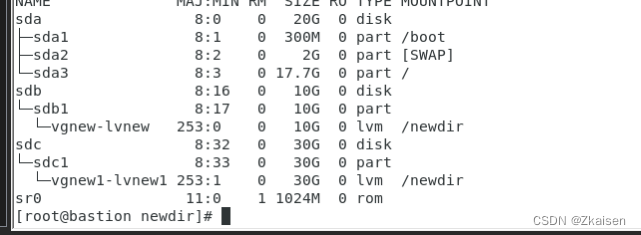
2) In addition to the fdisk -l command, you can also use the lsblk command to check the disk partition status:
lsblkAmong them, TYPE is disk, and the disk without branches below is a disk that has not been divided.
3. Create a mounting directory
1) Check disk usage:
df -h
2) Create a mounting directory (must be an empty directory)
mkdir /newdir4. Create a new partition
1) Partition the new 30G disk /dev/sdc:
fdisk /dev/sdc
n
p
回车(默认值)
回车(默认值)
回车(默认值)
w
Enter m here to view help:
n Add a new partition
p Print out this partition table
w Write the table to disk and exit

2) After creation, use the fdisk -l command again to see a new partition under /dev/sdc:
5. Create a new physical volume
1) Create a physical volume for the partition just now
PVcreate /dev/sdc12) View all current physical volumes (or use the pvdisplay command)

6. Create a new volume group
1) Create a volume group for the physical volume /dev/sdc1 (vgnew is the customized volume group name):
vgcreate vgnew1 /dev/sdc12) View the volume group (or use the command vgdisplay)
vgs

7. Create a new logical volume
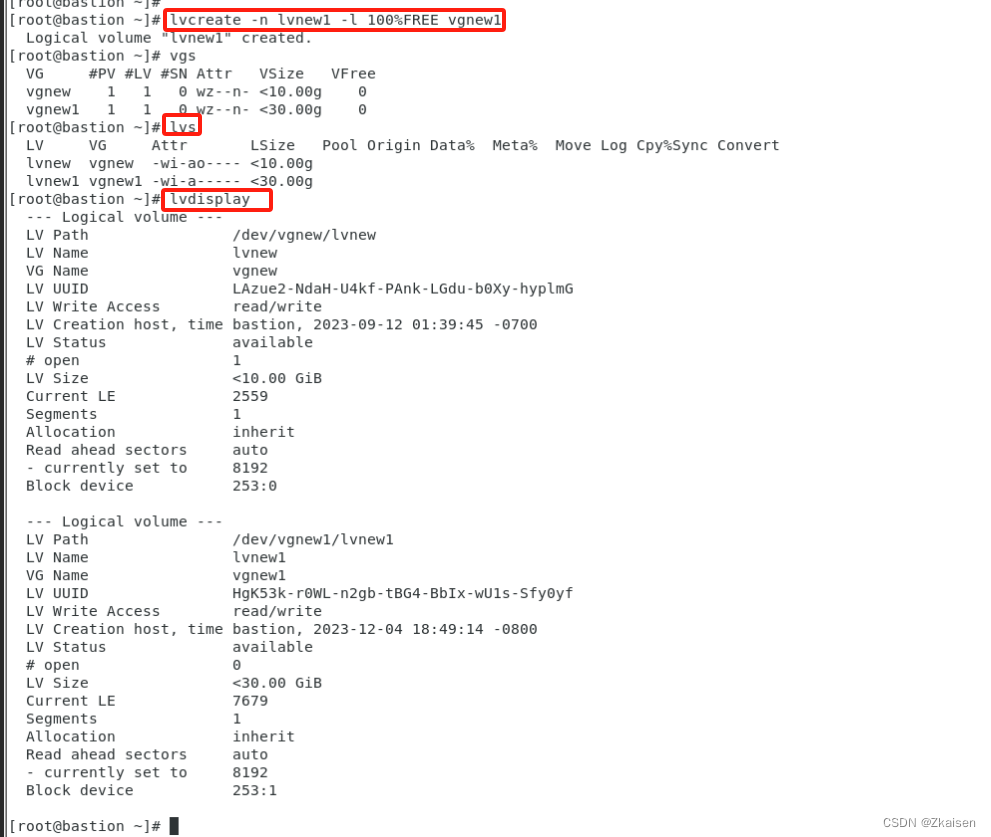
1) Create a logical volume using the entire volume group vgnew (lvnew1 is the customized logical volume name):
lvcreate -n lvnew1 -l 100%FREE vgnew12) When creating a logical volume, you can also use part of the volume group's space, such as 50% FREE, etc., or you can specify the storage capacity, such as the following command
lvcreate -n lvnew1 -L 5G vgnew3) View all current logical volumes (or use the vgdisplay command)
lvs
8. Mount to an empty directory
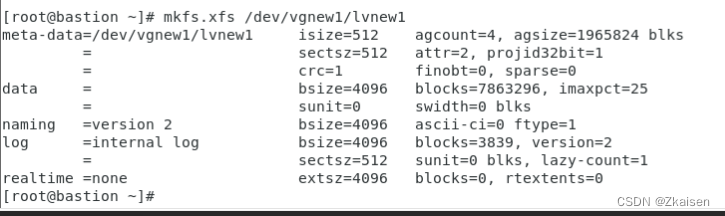
1) Format logical volume
mkfs.xfs /dev/vgnew1/lvnew1Note: The fixed format of logical volumes is /dev/volume group name/logical volume name, which can be determined through the lvdisplay command. Here we are talking about formatting the logical volume into xfs format. You can also choose to format it into ext4 or other formats. /dev/vgnew1/lvnew1 is the logical volume I created above.
2) Mount the logical volume to the empty directory created previously:
mount /dev/vgnew1/lvnew1 /newdir3) Then use the df -h command to view the disk mount
8.1 My doubts and thoughts:
This appeared after disk partitioning /dev/mapper/vgnew1-lvnew1
The first part may be misunderstood. /dev/mapper/vgnew-lvnew should be divided under the disk /dev/sdb.
So I think I may have misunderstood it at the beginning.
Check the partition status of the disk through lsblk. It can be seen that /dev/mapper/vgnew-lvnew should be divided under the disk /dev/sdb.
So here’s the problem?
I clearly added a 50GB hard drive, but the selection was split into multiple files. Why are there only /dev/sdb and dev/sdc? The total is only 40G. Where did the other 10G go?
After the disk is divided, it will be displayed as /dev/mapper/volume group name/logical volume name. What is going on with the /dev/mapper directory? Refer to the article below and you will have the answer.
4) Automatically mount when booting:
vi /etc/fstabAdd the following at the end of the file:
/dev/mapper/vgnew1-lvnew1 /newdir xfs defaults 0 0
5) Mount immediately
mount -a2. Mount to an existing directory (disk expansion)
1. Create a new disk and create a physical volume
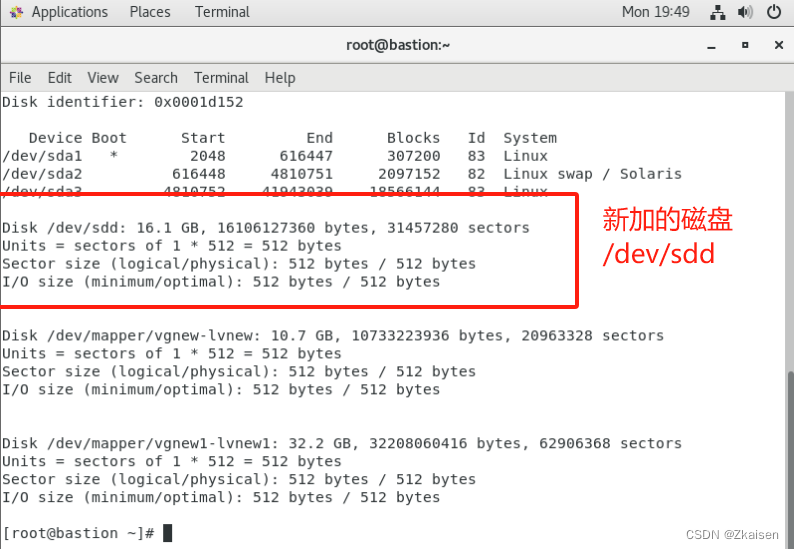
1.1. Shut down the computer and add a new disk
I added a 16G disk and you can see it is /dev/sdd
1.2. Create a physical volume:
Create a physical volume for partition /dev/sdd1:
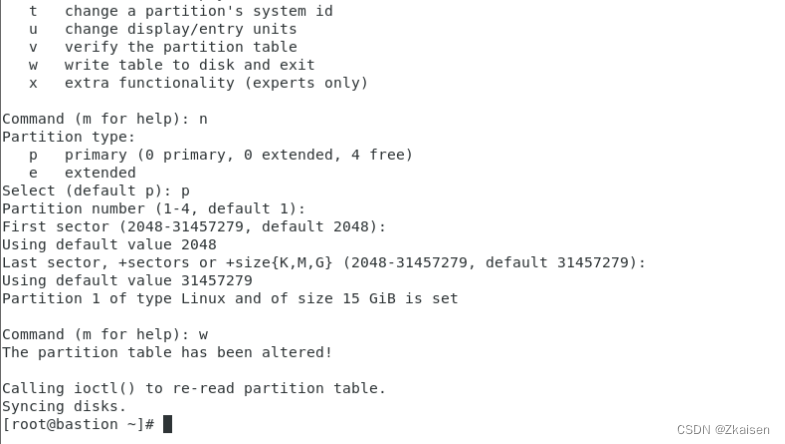
fdisk /dev/sdd
n
p
回车(默认值)
回车(默认值)
回车(默认值)
w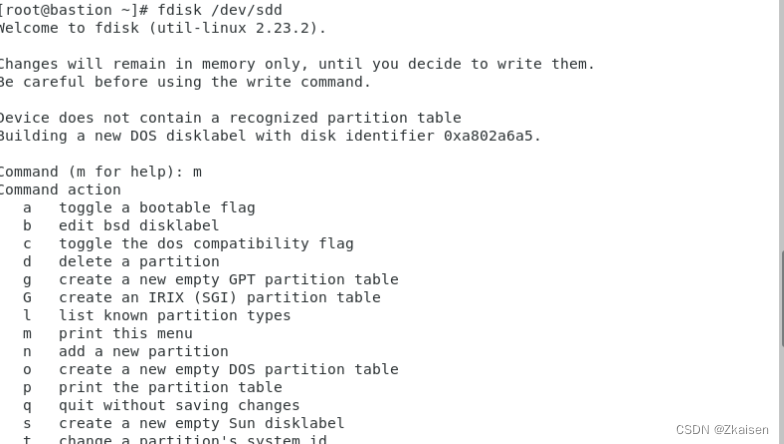
1.3. Create a new physical volume
Create a physical volume for partition /dev/sdd1:
pvcreate /dev/sdd1
2. Expand an existing volume group:
2.1 Add physical volumes to existing volume groups
vgextend vgnew1 /dev/sdd1
Before adding, vgnew1 was 30G, but after adding it, it became 44.99G. Of course, this number is not very accurate.

2.2. Expand the existing logical volume
Add the free storage space of the volume group to the logical volume:
lvextend -l +100%FREE /dev/vgnew1/lvnew1 Update file system:
xfs_growfs /dev/vgnew1/lvnew1
If you need to mount to the root directory or other paths, you only need to modify the specific volume groups and logical volumes of vgextend and lvextend according to the actual situation for flexible use.