Build a web server on a local computer and use cpolar to publish it to the public network for access
Article directory
Preface
With the rapid development of the Internet, the Internet has become an indispensable necessity in our lives. In order to have their own world in the Internet world, establishing a web page of their own has become the choice of many people. However, as the Internet industry is a capital-intensive industry, it costs a lot to entrust others to build a decent website. Not only does it require in-depth design and production of web pages, but it also requires renting server resources to host and publish web pages. But now, with the help of cpolar, we can use our own computers or other electronic devices as servers, use some web page production software to build our own websites, and then use the data tunnel created by cpolar to penetrate the intranet and publish the web pages to the public Internet. , thereby significantly saving the cost of creating your own web pages.
1. First install PHPStudy, WordPress, and cpolar on your computer
Taking the most commonly used Windows operating system as an example, we can use PHPStudy, WordPress and Cpolar to turn an ordinary computer into a small web server that can be accessed by public Internet users. First, we download and install the above three software on the computer:
- PHPStudy, the download address is ( https://www.xp.cn/download.html )
- WordPress, the download address is ( https://cn.wordpress.org/download/ )
- cpolar, the download address is ( https://www.cpolar.com/download )
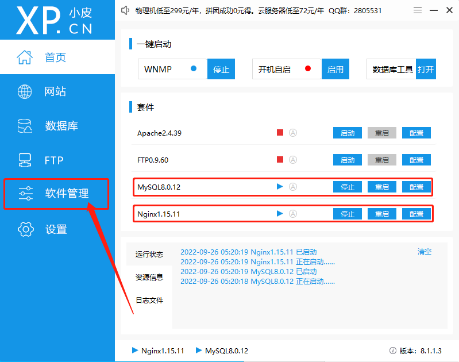
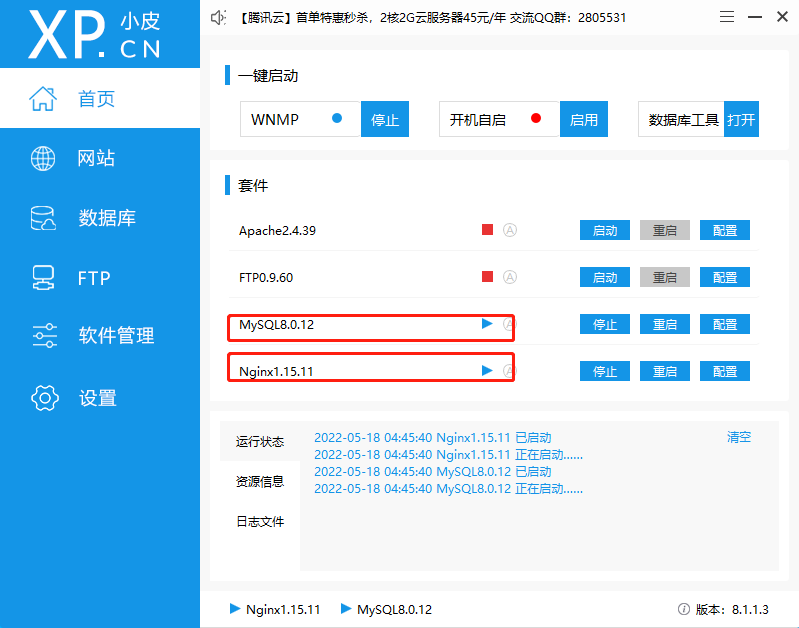
Like all software, these software also need to make necessary settings after the installation is completed. The first is PHPStudy. After the download is completed and double-clicked to install, you can find the following plug-ins directly on the "Software Management" page of the main page. Several plug-ins are environment software for running web pages, so they are indispensable.

2. Install cpolar and enter the Web-UI interface
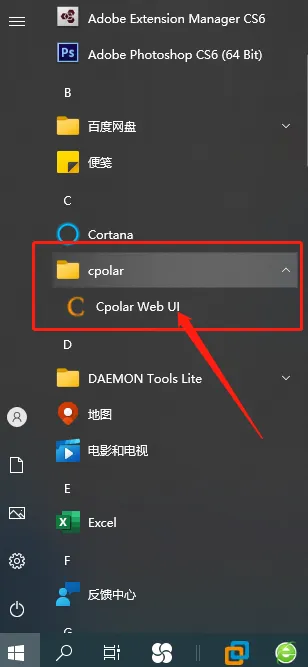
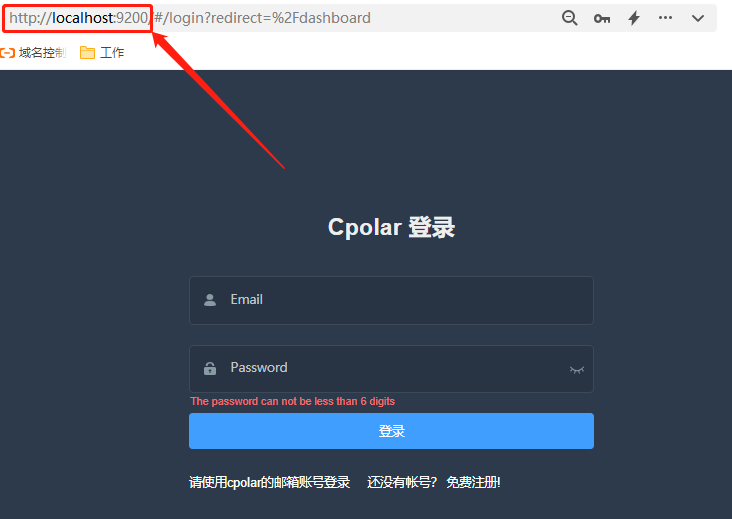
Next, we install Cpolar, the key software for intranet penetration and publishing of web pages (also double-click the installation package to install). After the installation is completed, it can be found in the start menu, or you can enter http://localhost:9200 in the browser address bar to open Cpolar's Web-UI interface.
3. Install wordpress
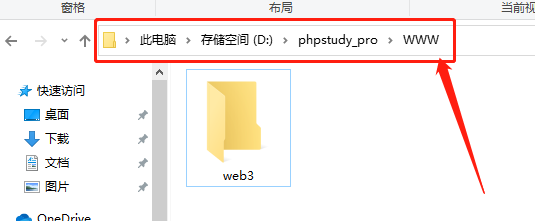
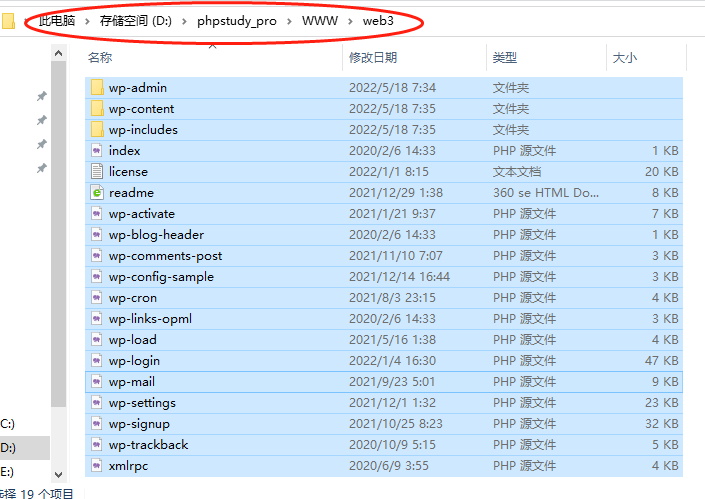
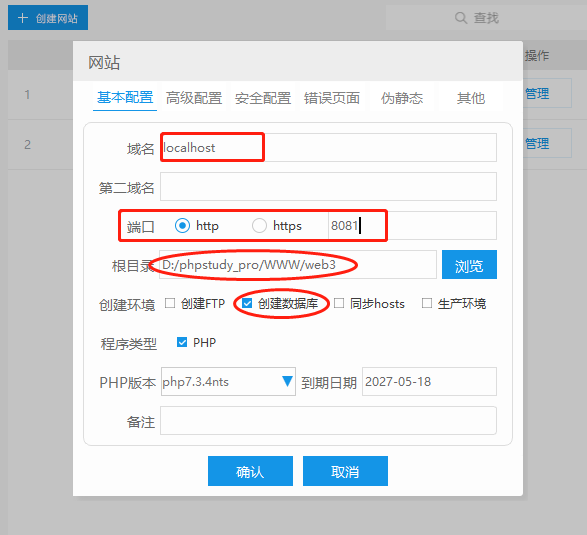
After cpolar is installed, we will not move it temporarily because there is no web page for us to publish at this time. So we continue to install wordpress and use it to generate a decent website. Since wordpress is not a software, but multiple software and collections required to run a web page, we cannot directly double-click to install it. Instead, we need to decompress wordpress and put all the decompressed files into the web page running environment ( That is, in the web page folder of PHPStudy) before you can continue to install wordpress. It should be noted that WordPress installed in this way allows multiple websites to coexist, so we can build multiple websites on one computer to make the best use of everything. Here, we put the wordpress file into the web3 folder under PHPStudy.
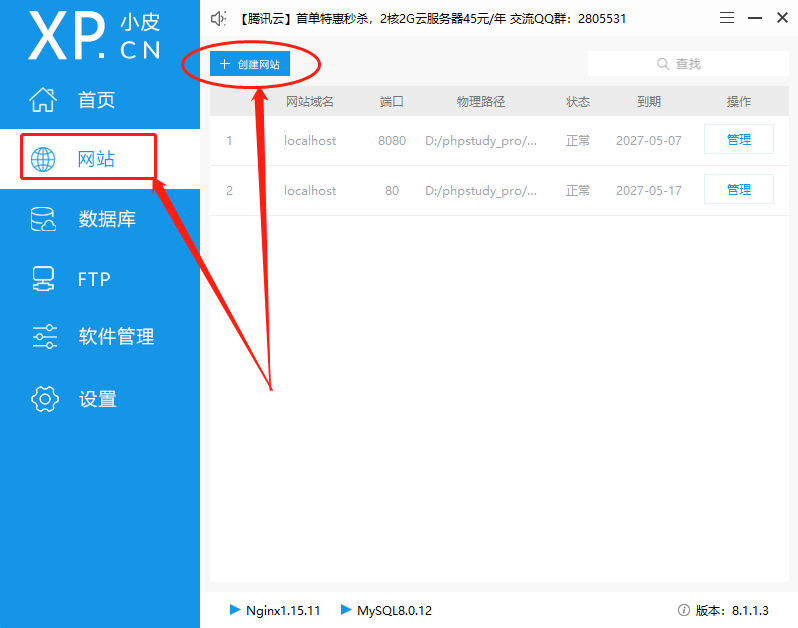
After copying all the files of wordpress to the corresponding folder, you can use PHPStudy to create a new web page (it should be noted that when creating a new web page, the software required to run the web page must be set to open), and perform basic operations on the web page environment. set up.
4. Enter the WordPress web installation program
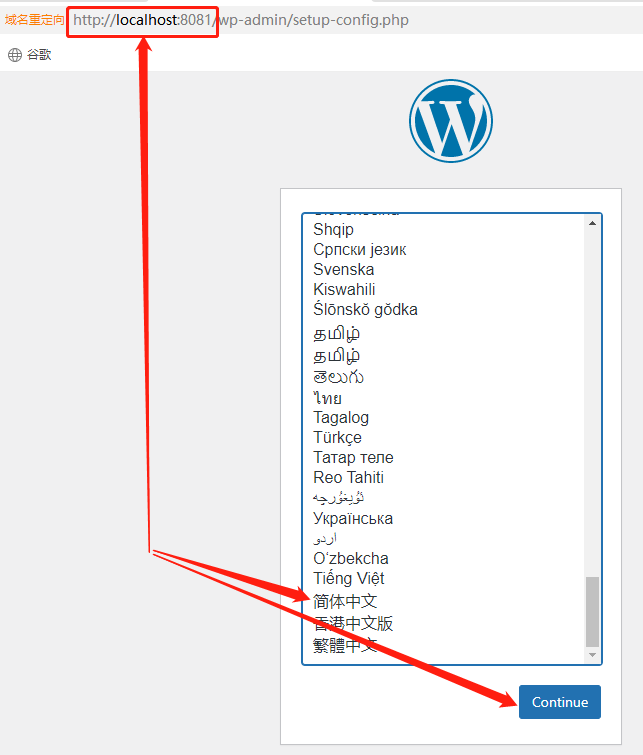
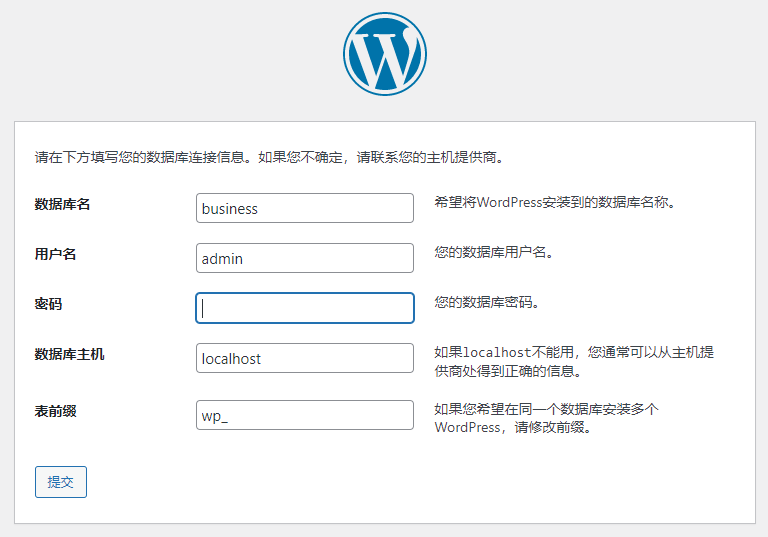
After all settings are completed, you can click "Confirm" below to create a new web page. Then enter the address of this new webpage to officially enter the WordPress webpage installation program. The installation program is also very simple. Just follow the webpage prompts and you can complete it quickly.


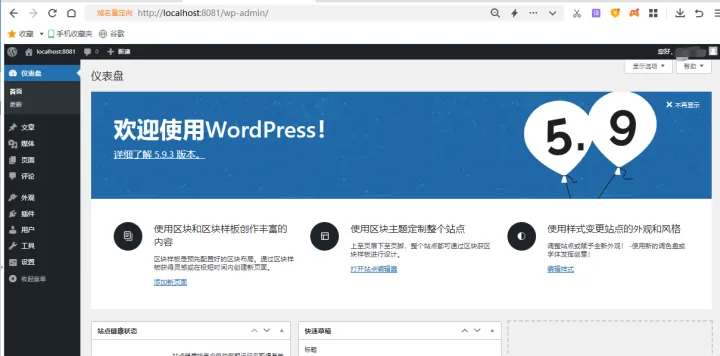
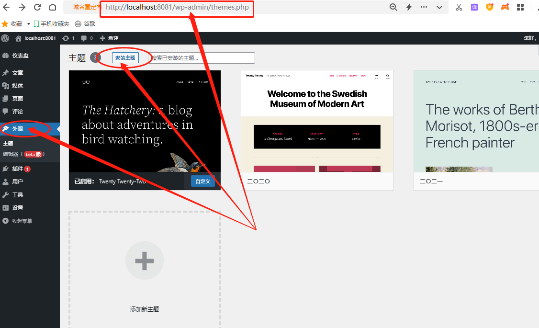
After WordPress is installed, we can choose the web page appearance we like through templates and apply it to our own web pages.
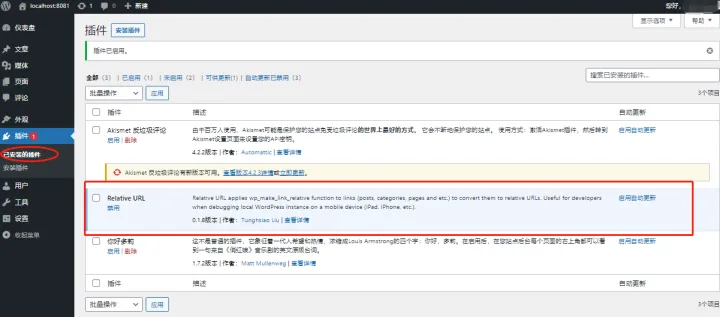
Next, we install a relative URL plug-in and make some modifications to the WordPress configuration file so that WordPress can correctly handle access requests from the public Internet and display the correct web page content to visitors. The relative URL software we use here is "relative-url", which we can find through the search on the "Plugins" page of the WordPress main interface.

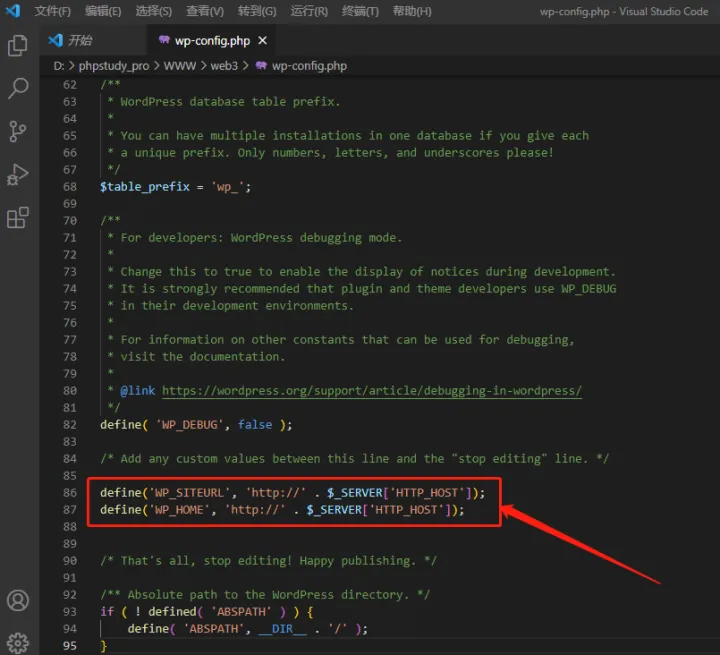
Next, we will make a small modification to the WordPress configuration file, mainly inserting two lines of commands into the configuration file. Since the command line is sensitive to characters, it is best to copy the following instructions directly to prevent input errors from causing WordPress to not run properly.
define('WP_SITEURL', 'http://' . $_SERVER['HTTP_HOST']);
define('WP_HOME', 'http://' . $_SERVER['HTTP_HOST']);
[The external link image transfer failed. The source site may have an anti-leeching mechanism. It is recommended to save the image and upload it directly (img-lpzLnJ7n-1689229562935) (data:image/gif;base64,R0lGODlhAQABAPABAP///wAAACH5BAEKAAAALAAAAAABAAEAAAICRAEAOw==)]
5. Use the intranet established by cpolar to penetrate and publish to the public network
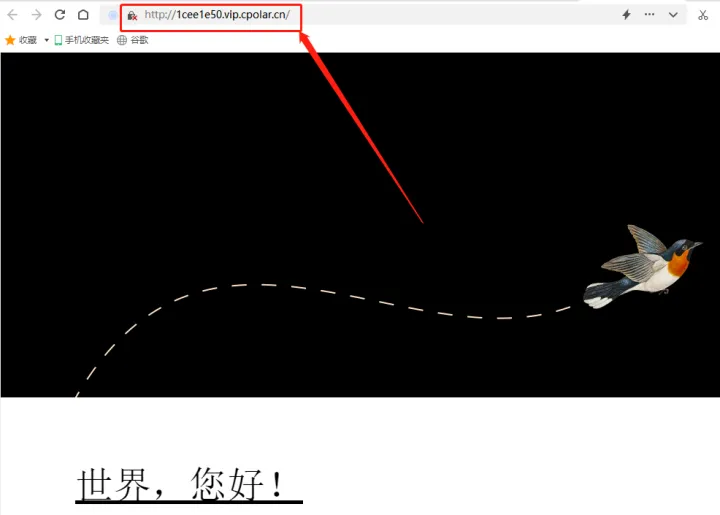
After completing these preparations, we have an environment suitable for running web pages and have established a decent website. The next step is to use the intranet penetration data tunnel established by cpolar to publish the local WordPress web page to the public Internet. Let us computers were officially converted into web servers.
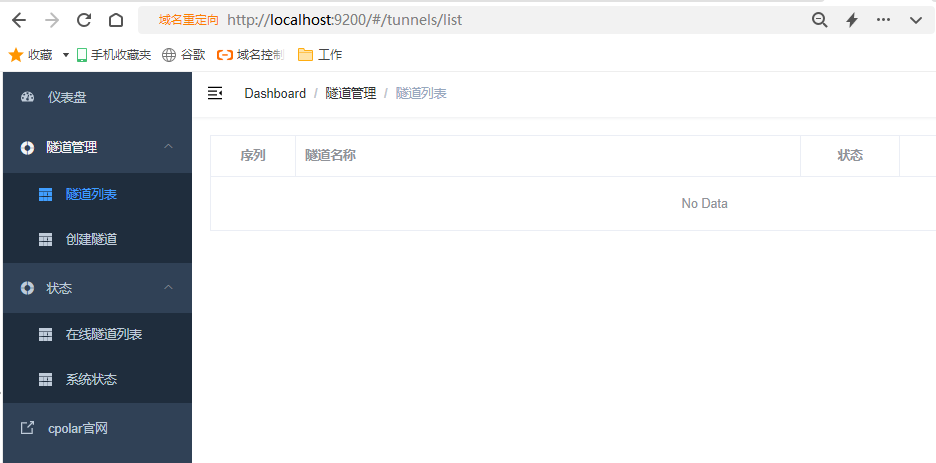
First open the cpolar software, click "Create Tunnel" under "Tunnel Management" on the left side of the main page, enter the settings page for the intranet penetration data tunnel, and set the tunnel name, local address (web page output port, in this example it is port 8081 ), domain name type, usage area and other basic information.
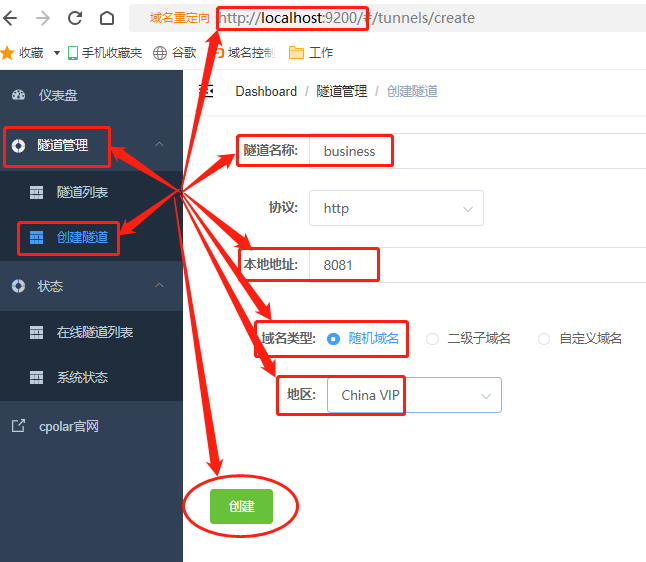
After completing the above settings, you can click the "Create" button below to establish a dedicated web publishing data tunnel. Visitors to the public Internet can access the WordPress web page located on the local computer through this data tunnel.
Summarize
The intranet penetration data tunnel established by cpolar can not only publish web pages located on the local computer, but also customize the URL of this web page and upgrade the https protocol. Of course, cpolar, as a powerful intranet penetration tool software, can also play an important role in many scenarios. If you have any questions about the use of cpolar, please contact us and we will provide you with the assistance we can. Of course, you are also welcome to join cpolar’s official VIP group and explore cpolar’s unlimited potential together.