Set up an SFTP server on a local computer and achieve public network access
Article directory
1. Set up SFTP server
1.1 Download freesshd server software
Download address: freeSSHd and freeFTPd
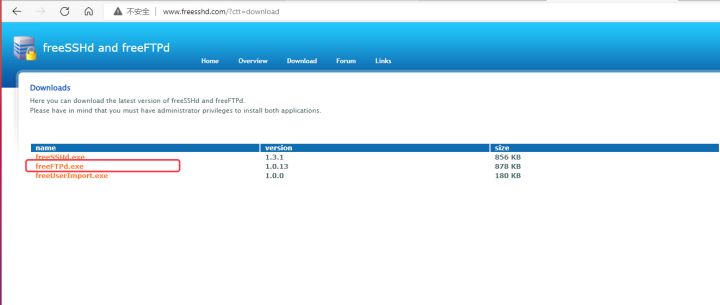
Select freeFTPD.exe to download
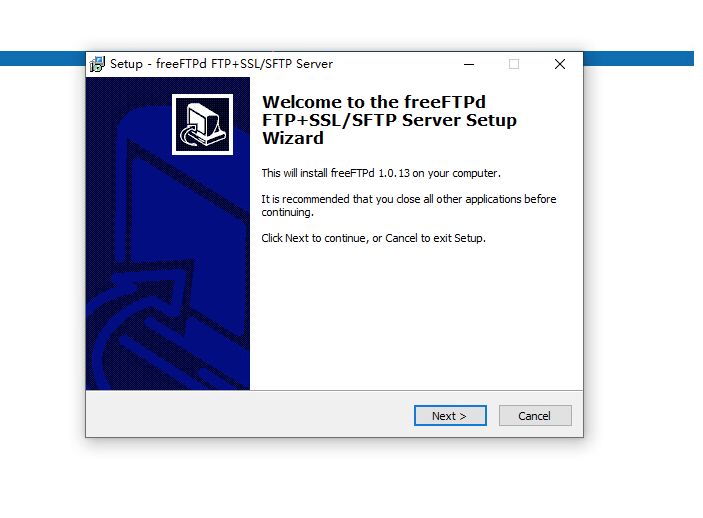
After downloading, click Install
After installation, it will prompt whether to start the background service, Yes
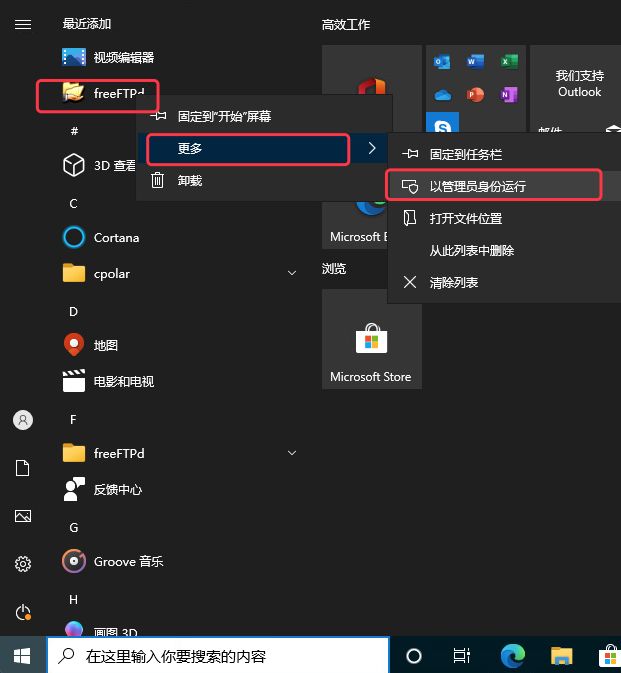
After installation, click Start Menu –> freeFTPd. Note : You need to right-click here 以管理员权限to open freeFTPd. If you open freeFTPd as a normal user, you will not be able to save the configuration .
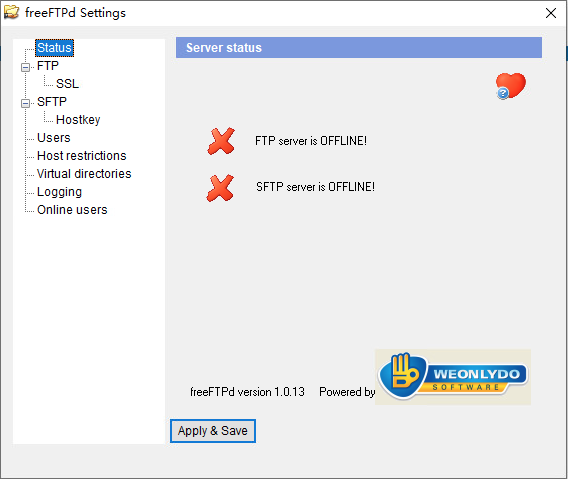
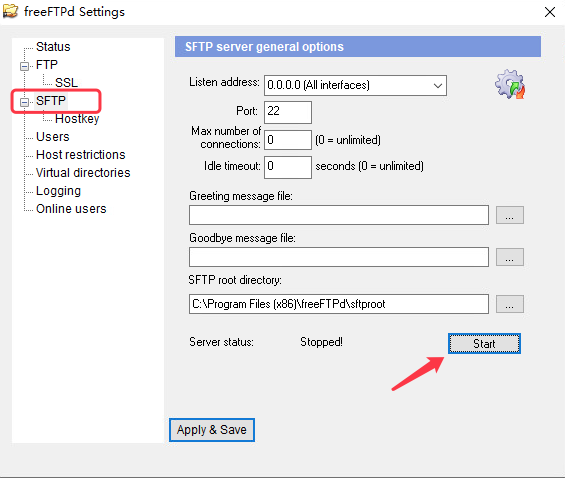
The main picture is as follows. We see that the SFTP status is not started.
1.3 Start SFTP service
Select SFTP, as shown below, we see that the current SFTP status is Stopping, we click startthe button.
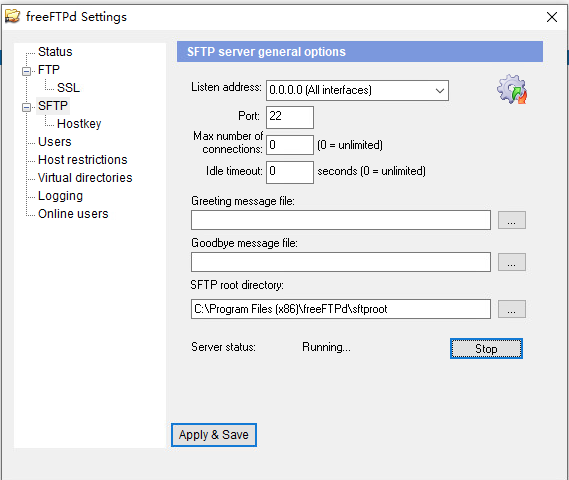
The status will change to Running..., as shown below.
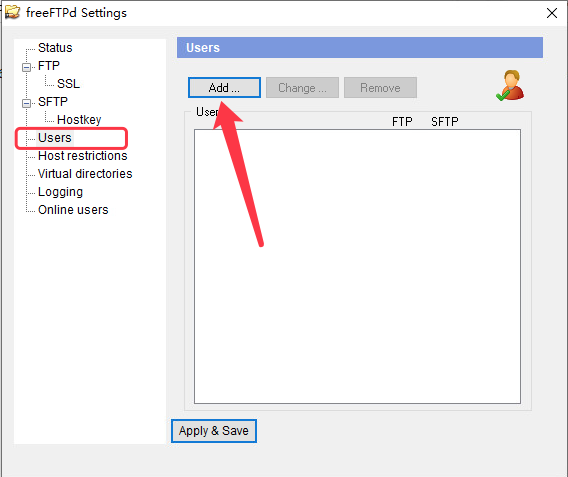
1.4 Add users
Select the Users option window and click the Add button to add a user.
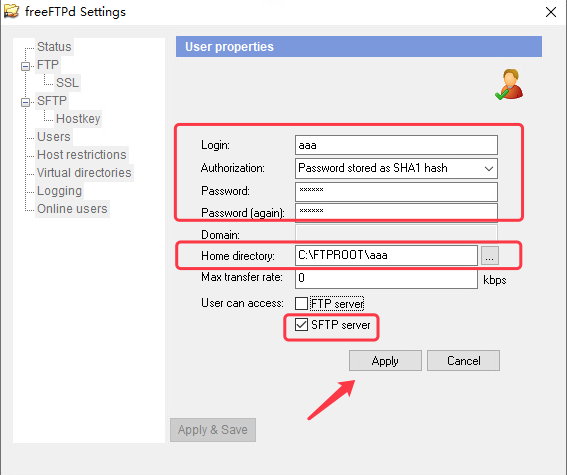
Add a test user aaa here. The authentication method can choose WINDOWS authentication and password authentication. In this example, independent password authentication is selected.
User directory, we create a separate SFTP root directory for the user.
After creating, click Applythe button to save
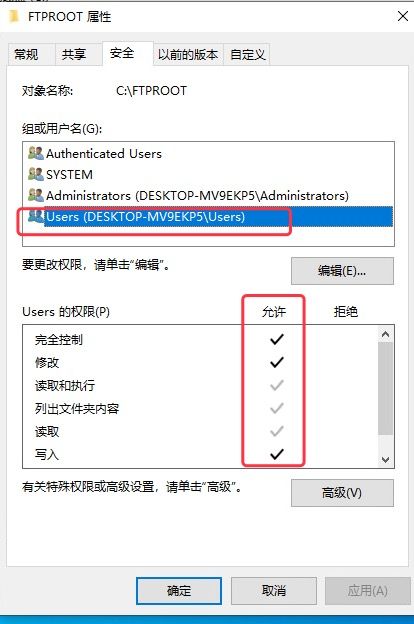
And don’t forget to configure the directory permissions of the SFTP root directory folder
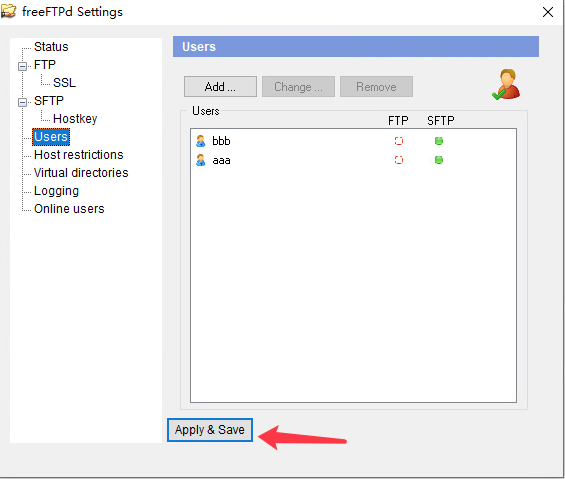
1.5 Save all configurations
Click Apply & Savethe button below. Save all configurations and write configuration files.
Note: If a configuration cannot be written error window pops up, it means that you have started freeFTPd as a normal user before and cannot save the configuration file. FreeFTPd needs to be reopened with administrator rights to write the configuration file normally. Perform step 1 again and save again.
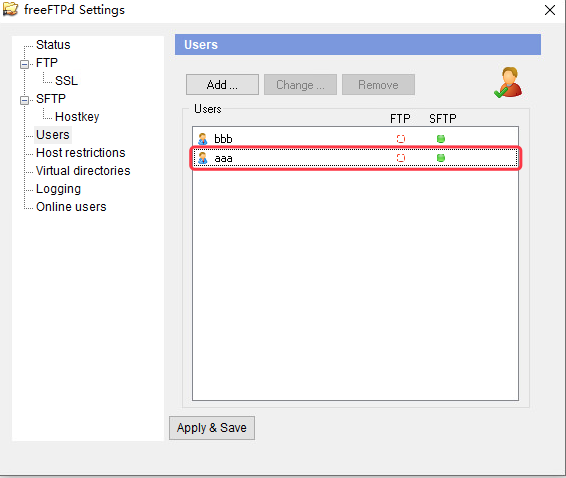
The saved result is as shown below.
2. Install the SFTP client FileZilla for testing
Download address: FileZilla Chinese website-free and open source FTP solution
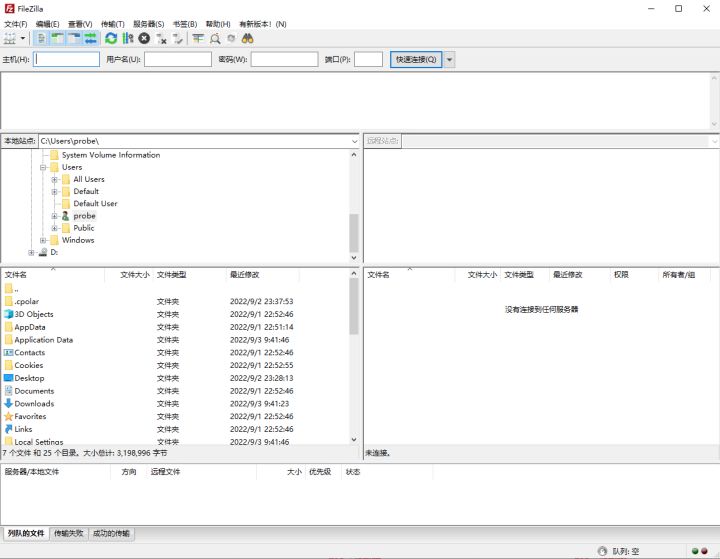
After installation, open it, as shown below
2.1 Configure a local SFTP site
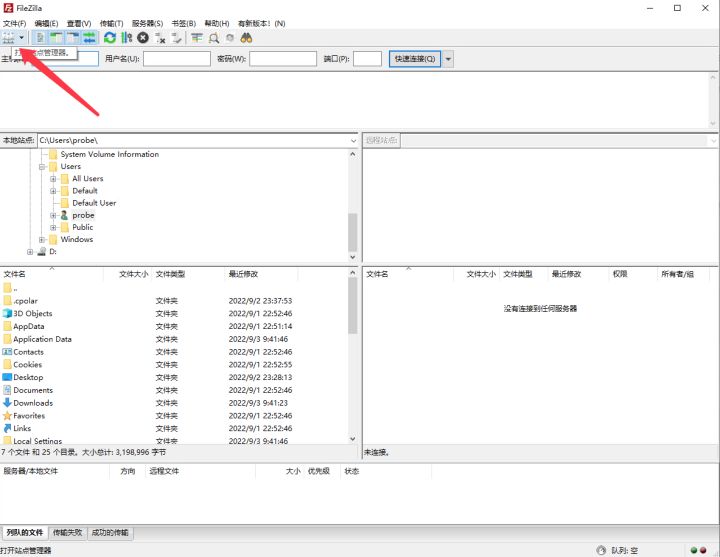
Click on the software toolbar 打开站点管理器, as shown below.
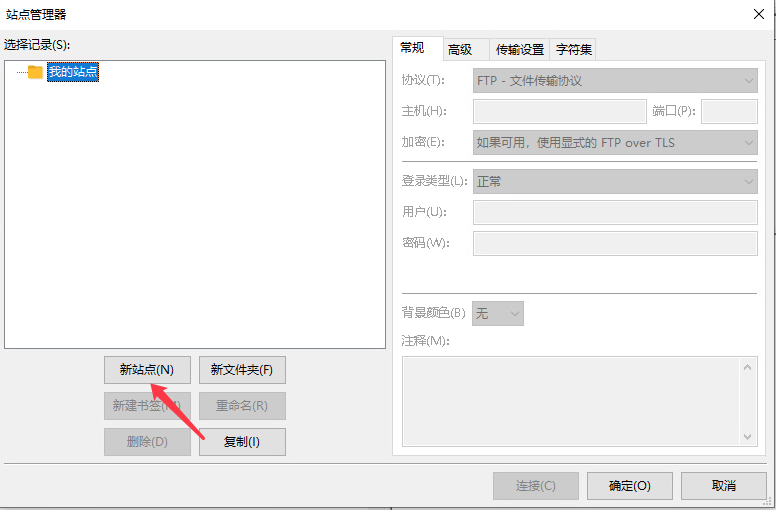
Click 新站点the button.
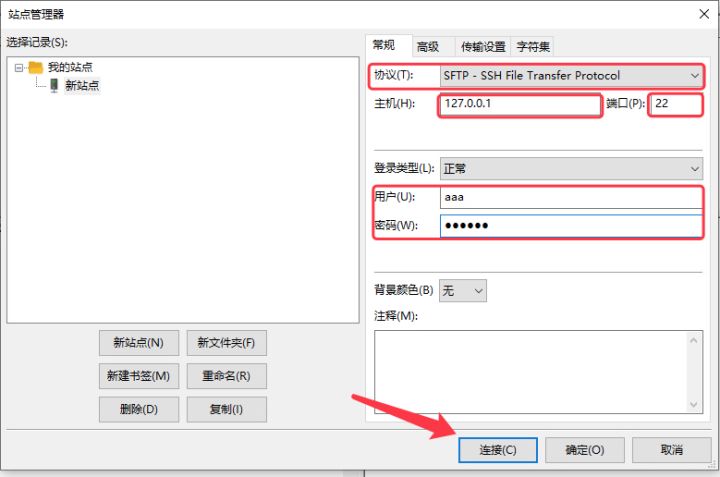
Let's create a new site with whatever name we want. Select protocol: SFTP Server IP: Because it is on the server, select 127.0.0.1 Port number: select 22 Username: When setting up the sftp server for us, create a user, in this case aaa Password: Enter the password of user aaa
After configuring, click 连接the button.
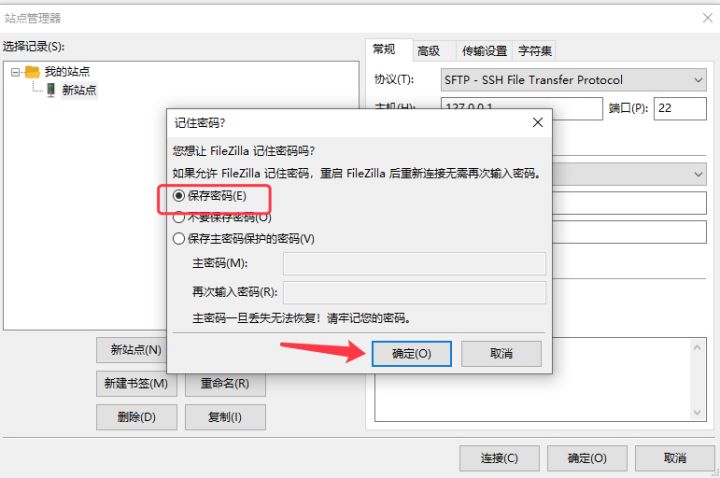
When prompted whether to save the password, click OK.
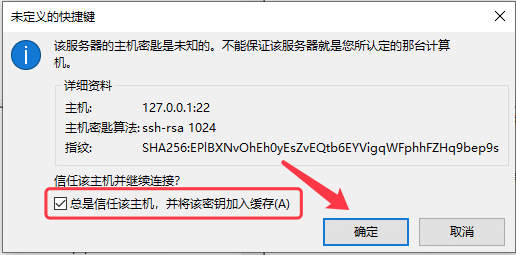
When connecting for the first time, you will be prompted whether to trust this host, check the box, and confirm.
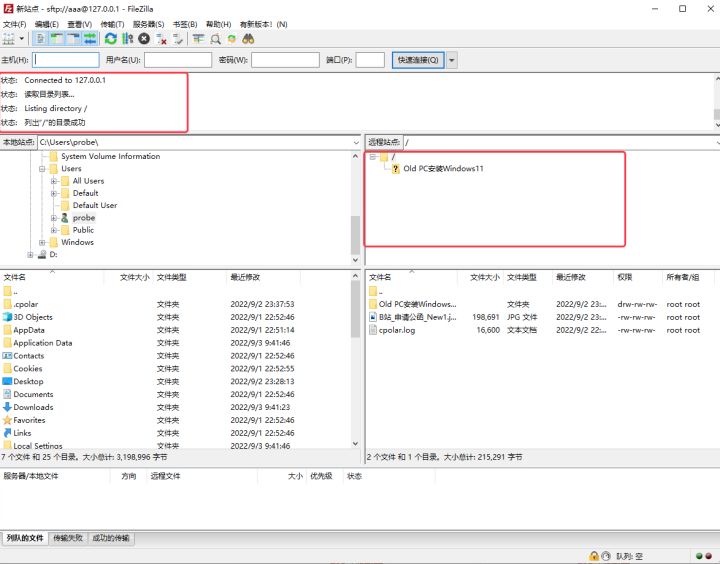
2.2 Intranet connection test successful
We can see that the directory list on the server side has been obtained, indicating that the connection is successful.
3. Use cpolar intranet penetration
The prerequisite is that you have installed cpolar . Let's open the browser: 127.0.0.1:9200
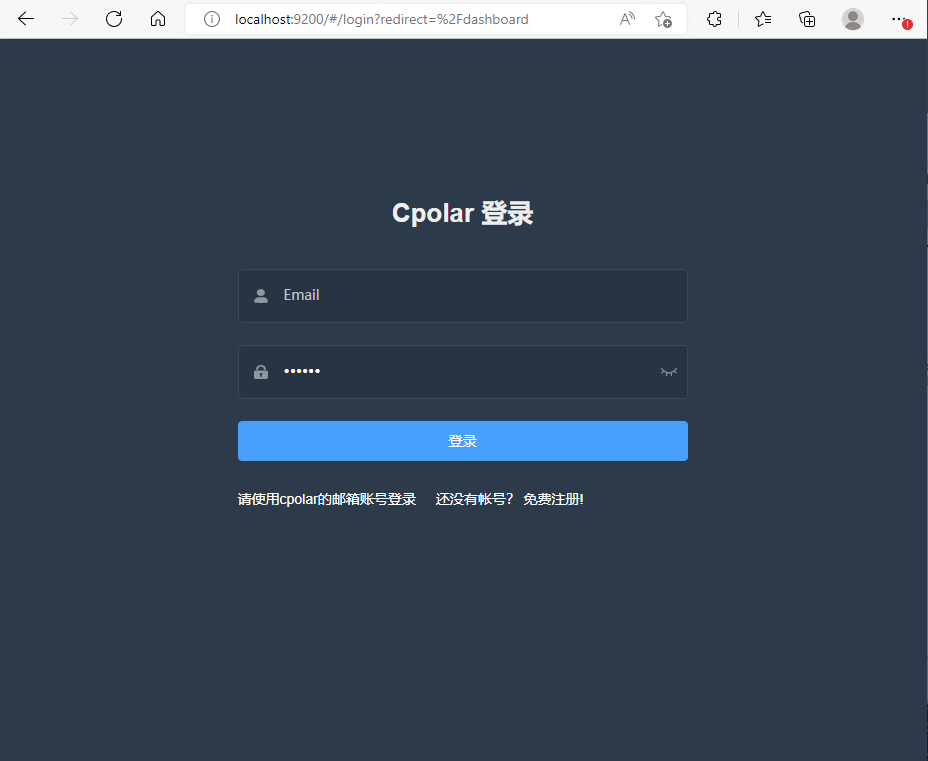
Log in using your cpolar email account.
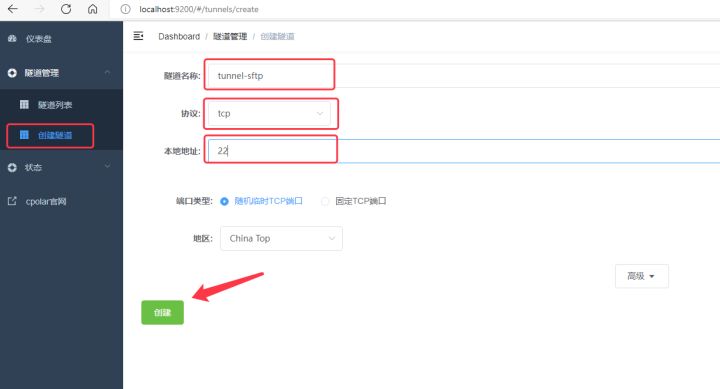
3.1 Create SFTP tunnel
隧道管理Select – from the left menu bar 创建隧道to add a new TCP tunnel.
- Tunnel name: tunnel-sftp (you can customize it, just don’t repeat it)
- Protocol: TCP
- Local address: 22
- Region: In this example, China Top is selected
Click 创建the button.
The tunnel list shows the tunnel we just created.

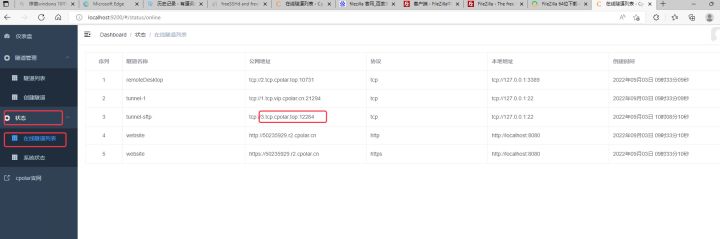
3.2 View the online tunnel list
In this example, the public network address we obtained is 3.tcp.cpolar.top:12284, where 3.tcp.cpolar.topis the public network address and 12284is the port number
4. Use SFTP client to connect to the public network address for testing
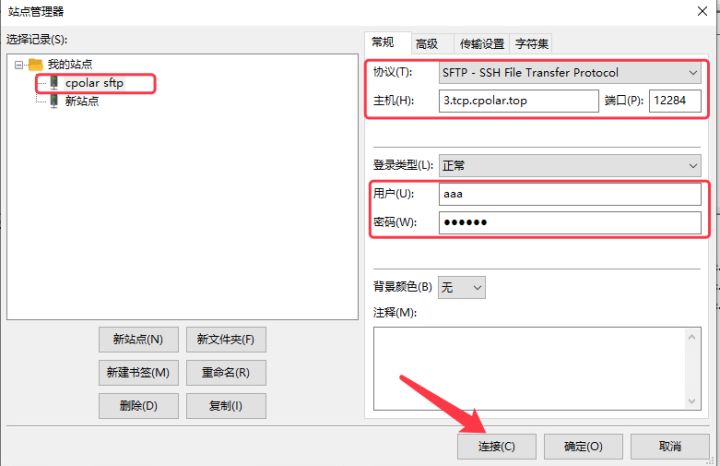
4.1 Add new site
We open filezilla, follow the operation method of step 2, re-add a new site in the toolbar, open the site manager, and add a new site.
This time we named the site cpoalr sftp protocol: SFTP host: 3.tcp.cpolar.top (This example may be different from yours, refer to the online tunnel list) Port: 12284 (This example may be different from yours) Same, please refer to your online tunnel list)
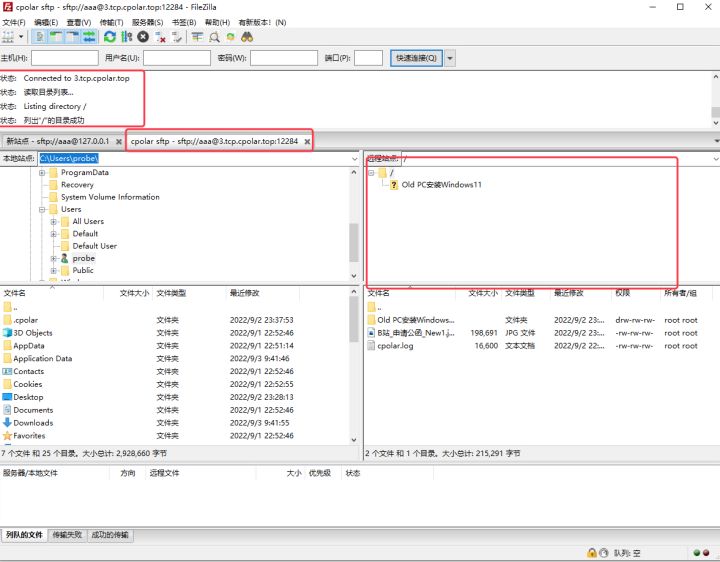
4.2 Successfully connected to the sftp server through the public network
You can see that the SFTP server has been successfully connected through the public domain name provided by cpolar.
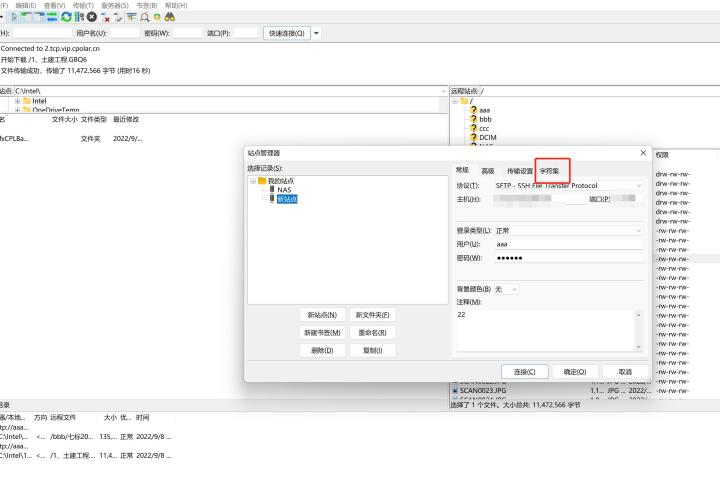
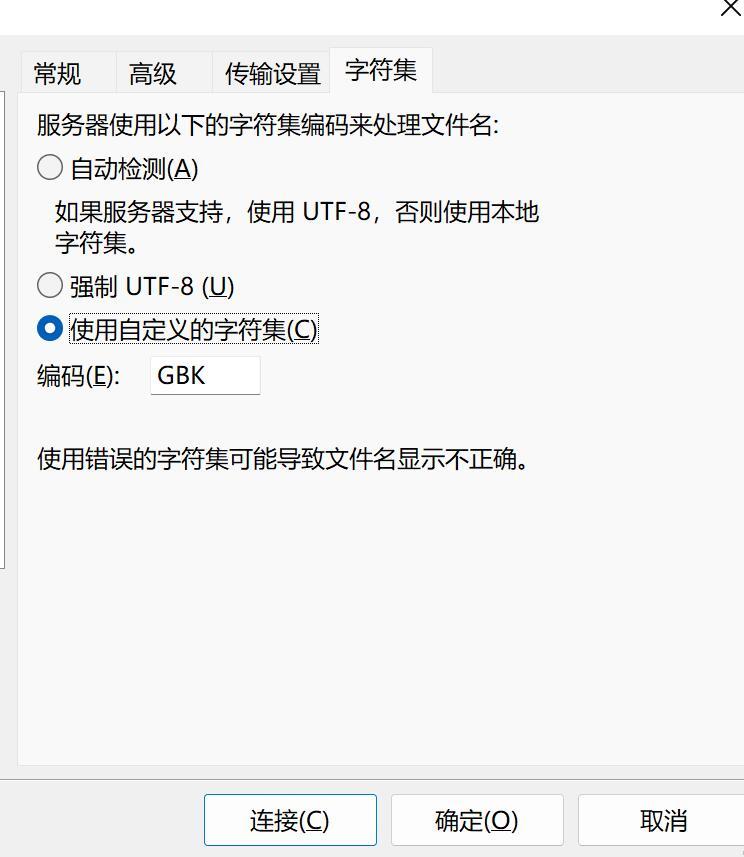
PS: If there is a problem with Chinese directory garbled characters, it can be solved by configuring the character set in the SFTP client:
- Set character set to
GBK - [Since most of the current Linux character sets have been changed to UTF-8 for universal use, and the default character set of Windows is GBK, you only need to set the character set to GBK, and there will be no garbled characters]
Summarize:
In this example, we built an SFTP site in Windows, and after the local network test was successful, we used the cpolar penetration tool to make the SFTP site available on the public network. Since the free package is used in this example, the public address and port of the sftp site will change within 24 hours, which will be very inconvenient for frequent use. It is recommended to upgrade to the professional package or above and configure it as a fixed TCP tunnel for a better experience. Note that the professional package has 3 times the bandwidth of the free package.
Reprinted from cpolar pole cloud article: Set up an SFTP server on a local computer and achieve public network access