Install remote service
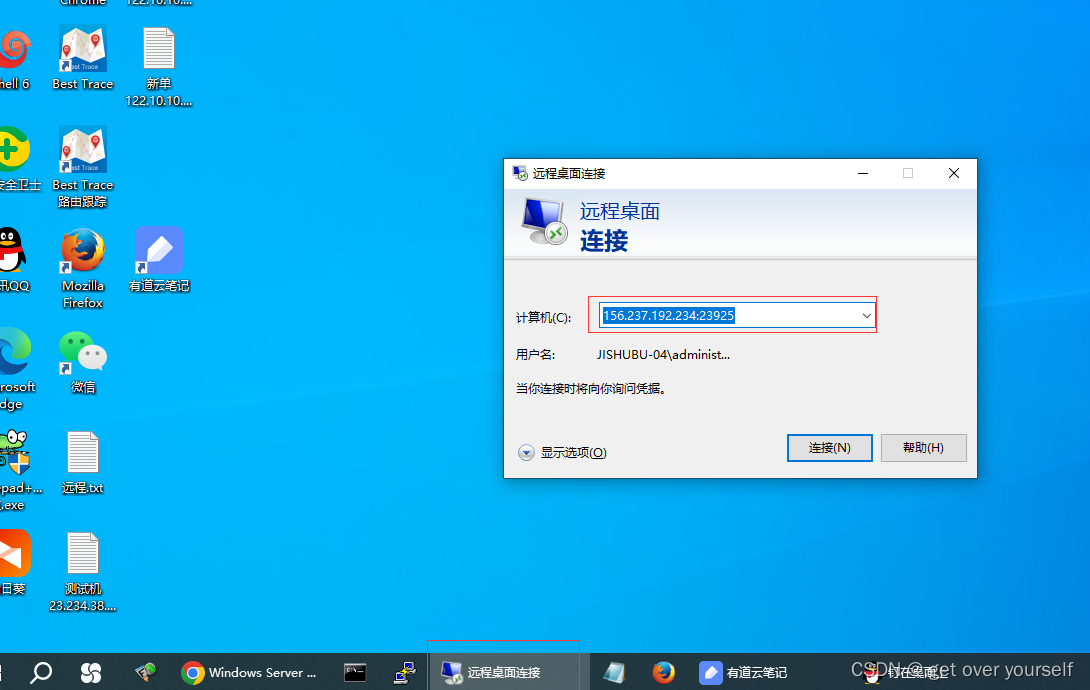
Step 1: Remote desktop connection, log in to the host IP and port, and then log in with the user name and password
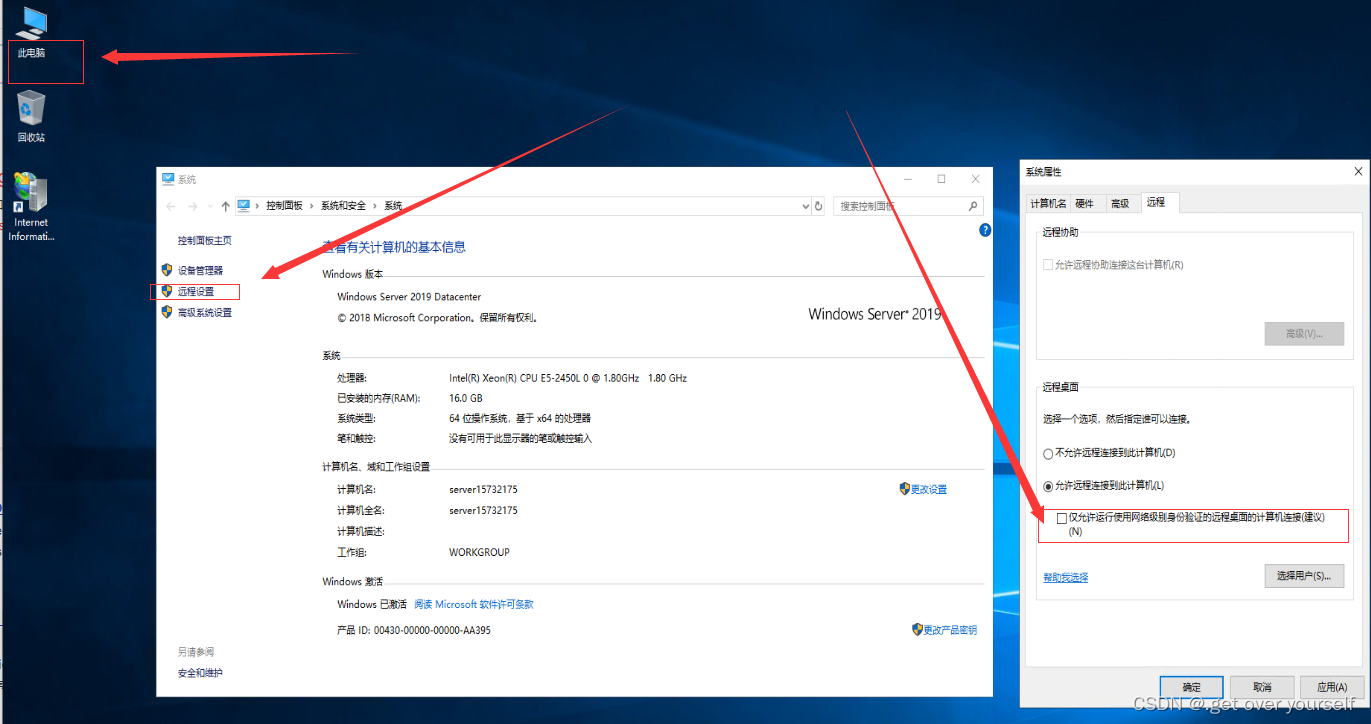
Step 2: In the remote desktop, right-click this computer, select Properties, and click Remote Settings
- Click on the Remote window and uncheck the option to only allow connections from computers running Remote Desktop that use Network Level Authentication.
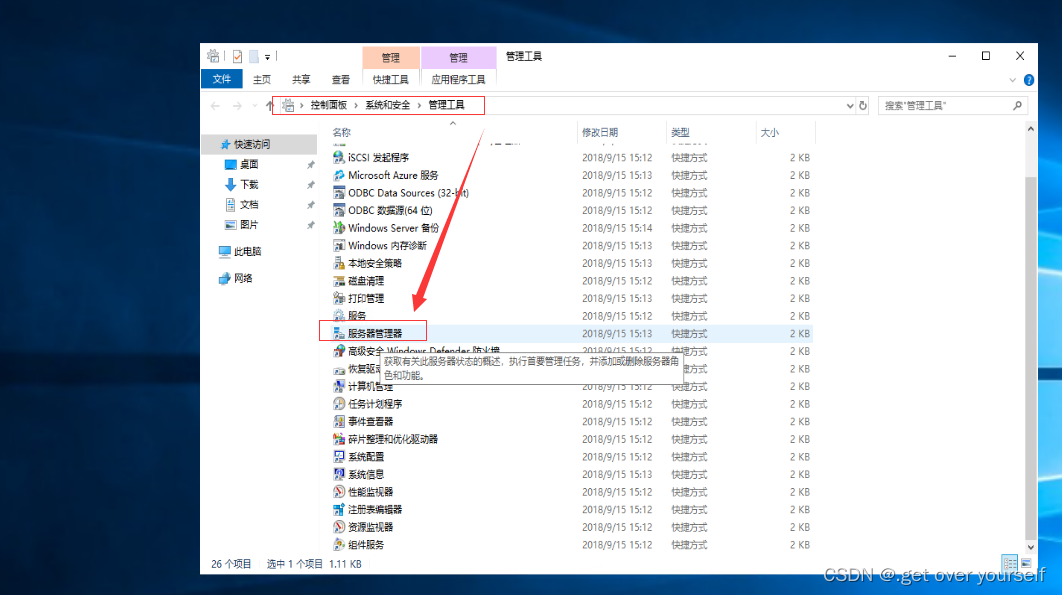
Step 3: Find the Control Panel on the remote desktop -> System and Security -> Administrative Tools -> Server and Manager
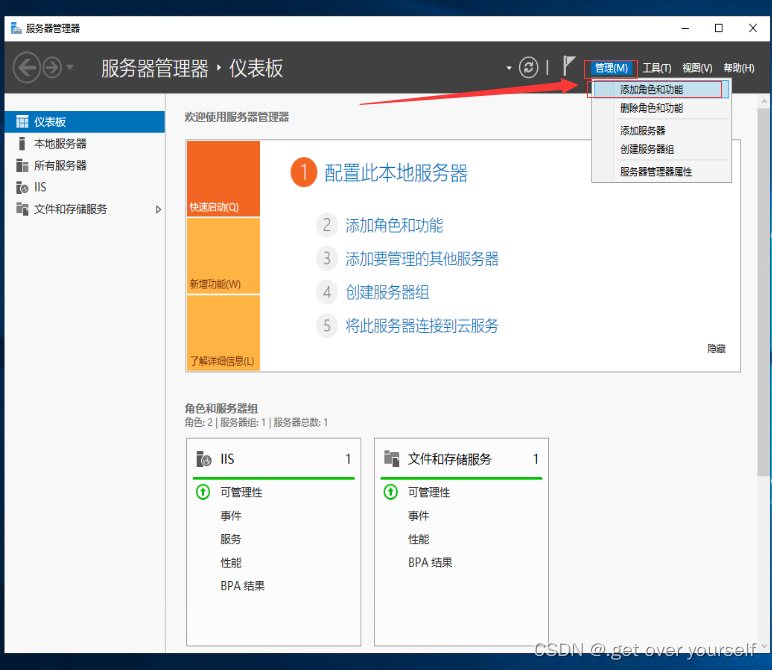
Step 4: Left-click Management –> Click Add Roles and Functions
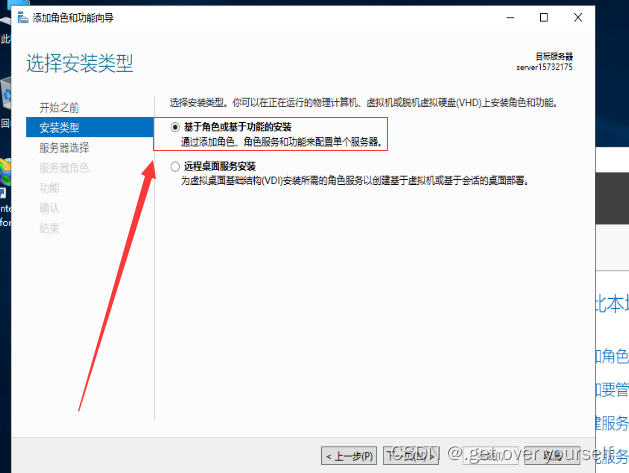
Step 5: Skip reading the regulations and choose role-based or feature-based installation
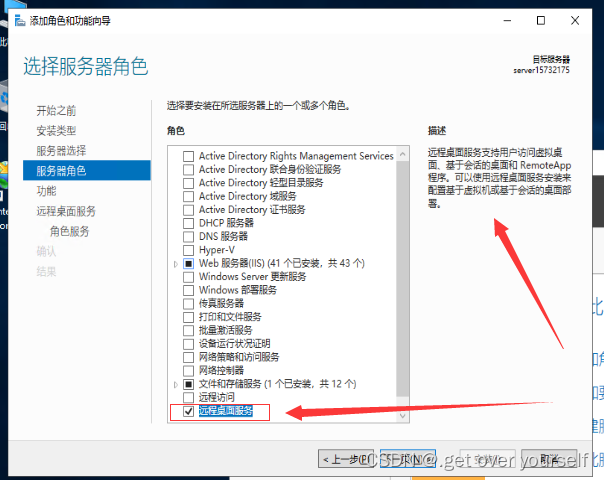
Step 6: Select the server and left-click to skip without doing any operation. Click on the server role - "Select Remote Desktop Service"
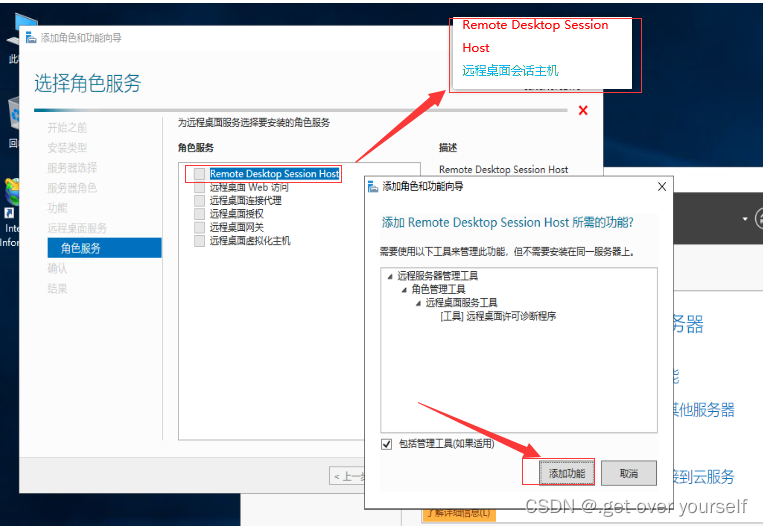
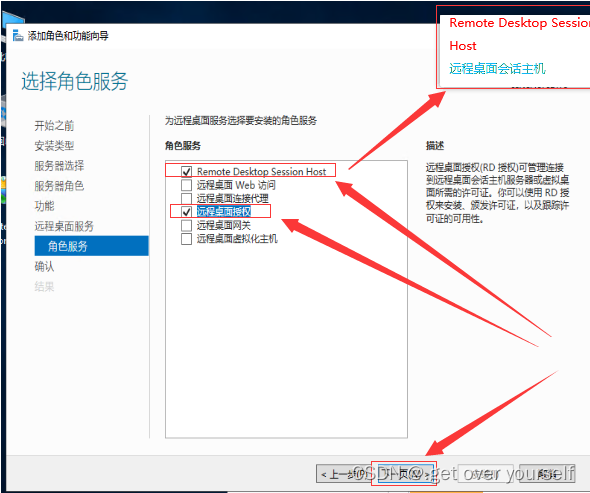
Step 7: Add role service –> Remote Desktop Session Host (remote desktop host) and remote desktop authorization, and finally click next page
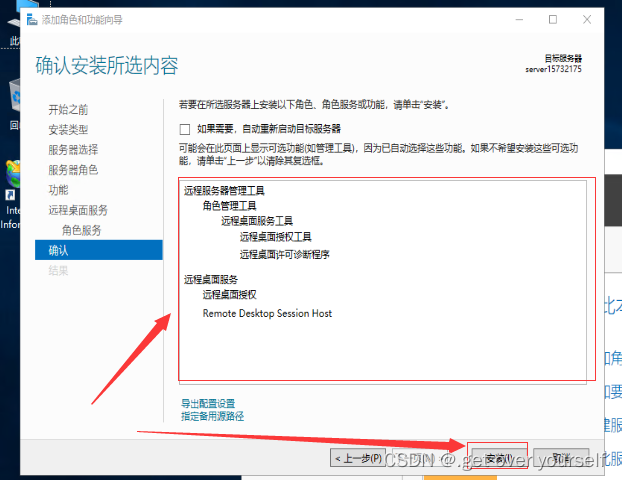
Step 8: Confirm the selected content for installation. After it is correct, click Install
-Note: Make sure to check the box to automatically restart the target server
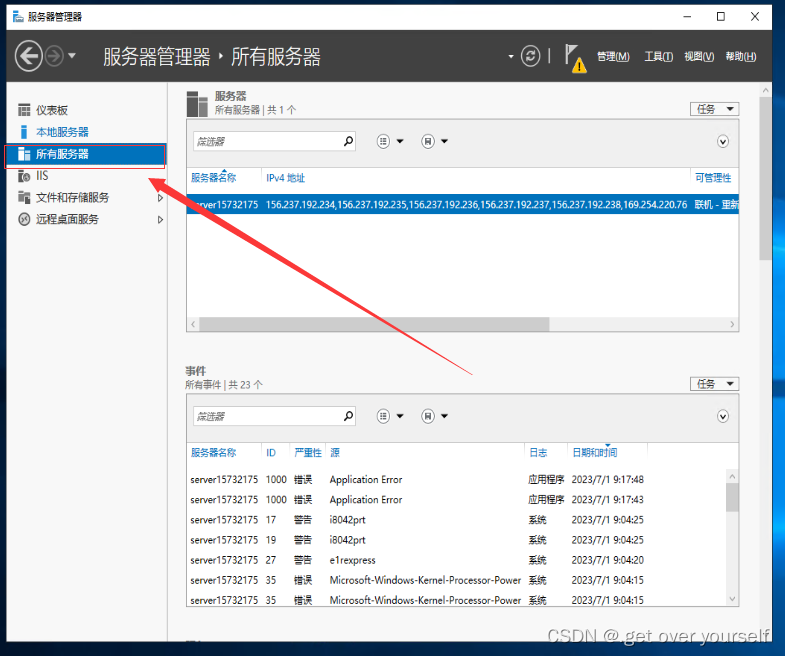
Step 9: View on all servers
2. Configure corresponding strategies
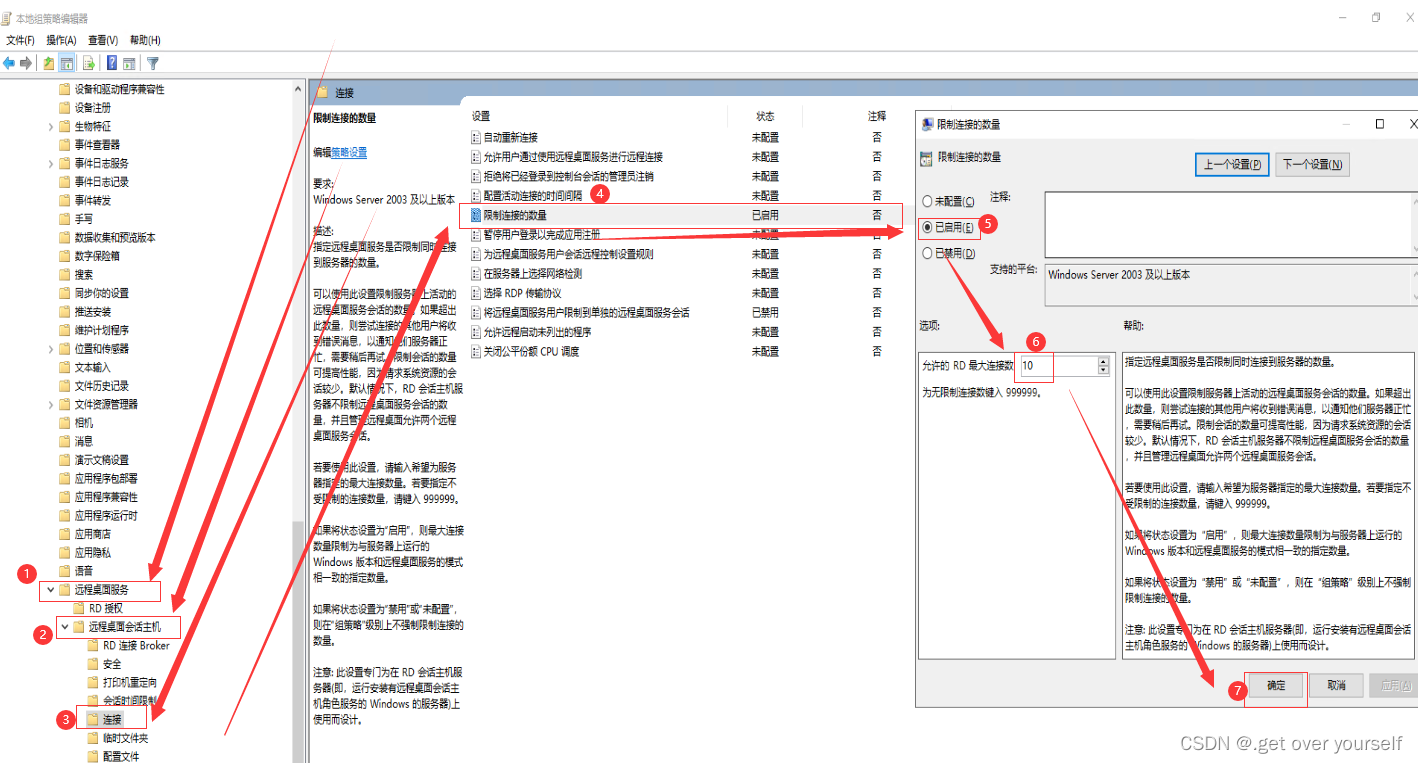
After the server restarts, log in to the server and run Group Policy. You can open Group Policy through "Start" - "Run" - "gpedit.msc" in the lower left corner. In Group Policy, go to "Computer Configuration\Policy\Administrative Templates\Windows" In Components\Remote Desktop Services\Remote Desktop Session Host\Connections", configure and enable this policy in Limit the number of connections
Step 10: In the remote desktop CMD window, enter the gpedit.msc command to bring up the local Group Policy Editor
gpedit.msc

Step 11: Click to expand "Computer Configuration>>>Administrative Templates>>>Windows Components>>>Remote Desktop Services>>>Remote Desktop Session Host>>>Connections"
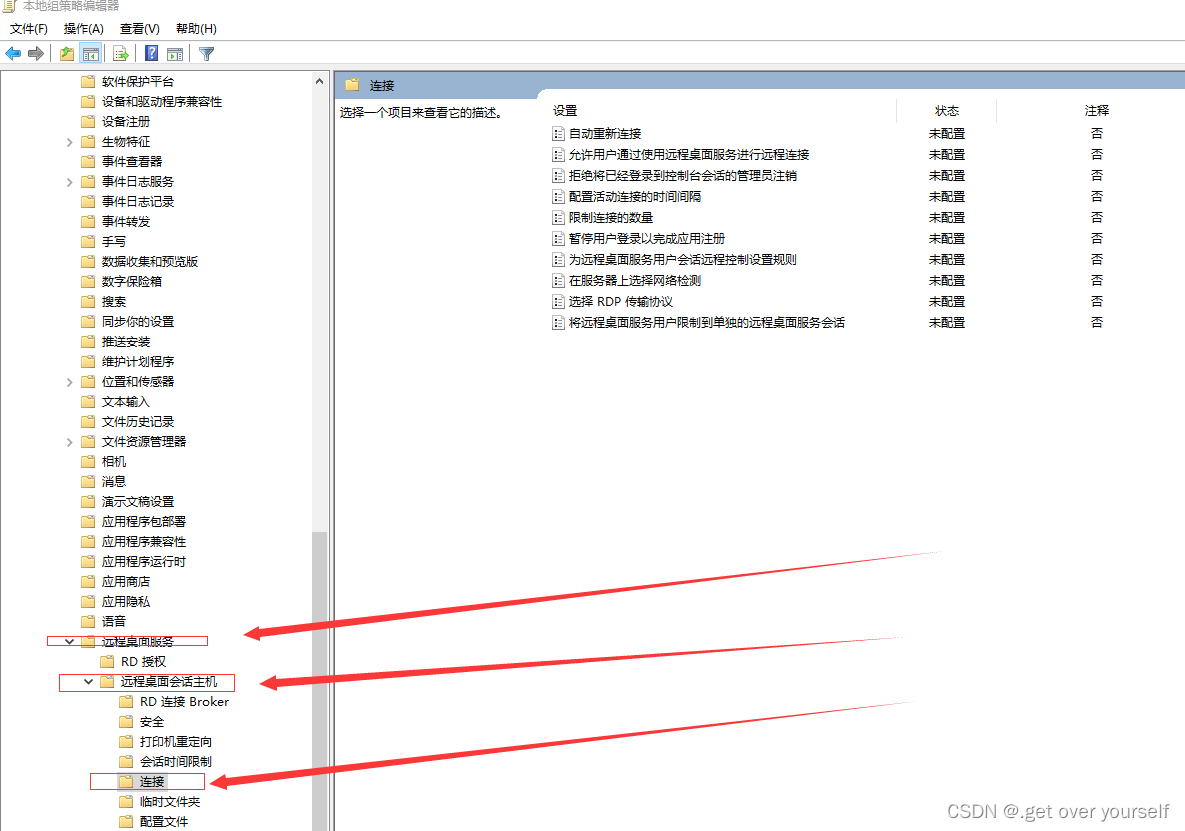
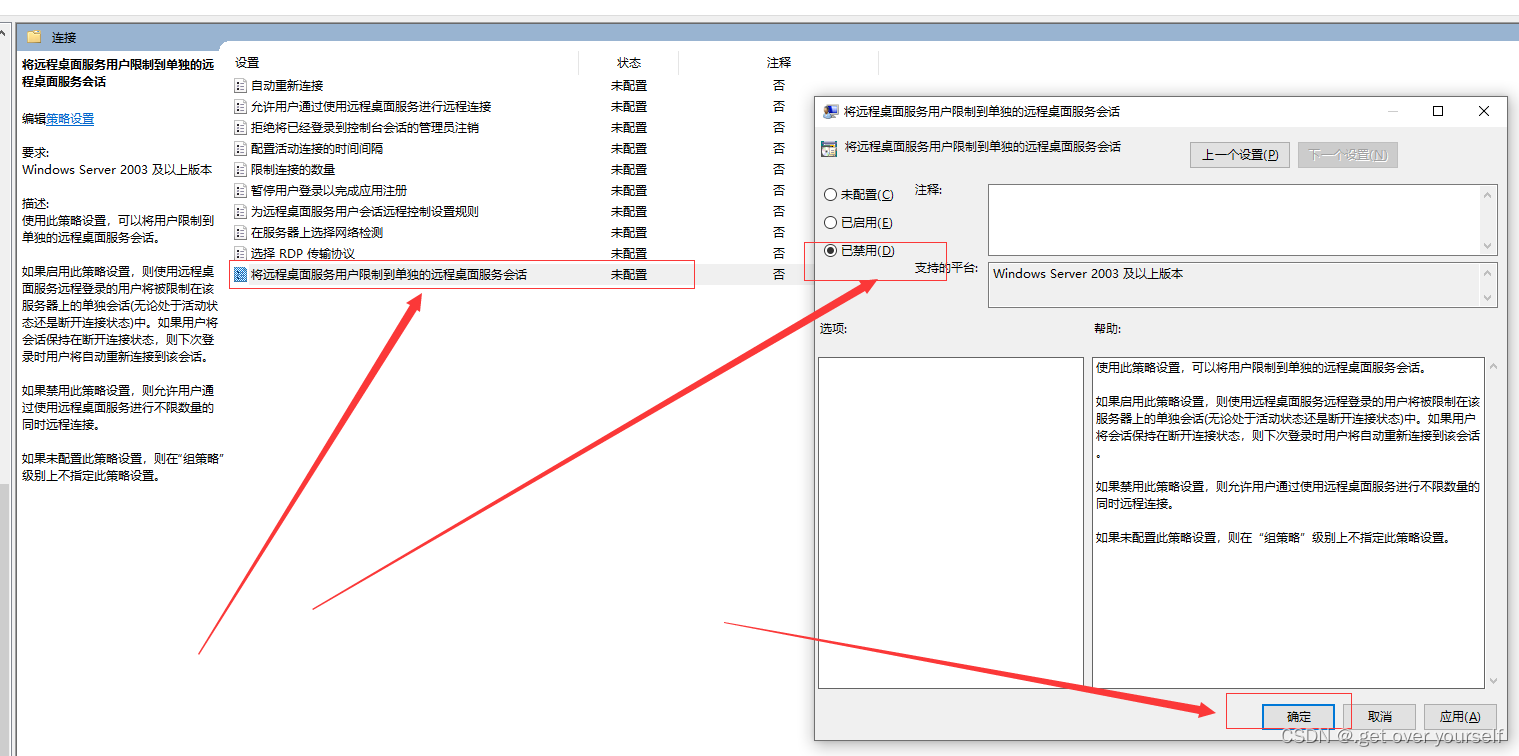
Step 12: Find and double-click on the right side of the connection item to open "Restrict Remote Desktop Service users to separate Remote Desktop sessions"
Step 13: Find and double-click on the right side of the connection item to open "Limit the number of connections"
Step 14: Enter the gpupdate /force command on the command line to refresh the policy and make the policy take effect.
gpupdate /force