Example of style display:
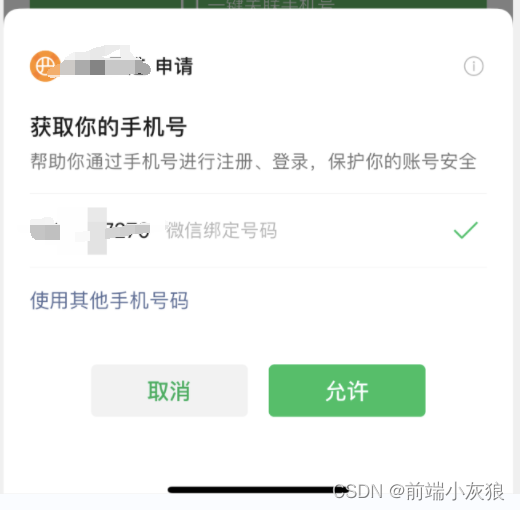
The principle is: the software we developed calls the WeChat app bullet box, which is mainly to obtain the information of the current WeChat logged-in user (allow/cancel)
-
Permission is to allow the software we develop to obtain the user information of WeChat login
Popular: Get WeChat user information to log in
-
not allowed
Popular: It is not allowed to obtain WeChat user information to log in
The first step: the first is to obtain user information
1. Recommended technology: wx.getUserProfile(Object object)
wxLogin() {
				// 第一步是获取微信用户的基本信息
				wx.getUserProfile({
					// 描述你获取我手机上的微信app的登录用户的作用
					desc: "用于完善会员资料",
					//弹出授权框之后,你点击允许 success
					success: (res) => {
						console.log(res);
					},
					//弹出授权框之后,你点击取消 fail
					// fail: (err) => {
					// }
				})

			}
Note: There will be an error report, or a pop-up box will not appear after clicking. Generally, you can check your own development ID, or change the version developed by the applet. If the version is too high, it will not be displayed.
Step 2: After authorized login, get user information
Solve the problem, how to make the personal center page use the information of our login page
Summary: how two pages share data
Method 1: vuex
Method 2: Store locally (localstorage, sessionstorage)
Both methods are available, depending on your needs
1. After getting the data, we save the user information locally: wx.setStorageSync(string key, any data)
2. After saving locally, the next step is to continue to log in and get the code value given by the WeChat server
````js
wx.login({
    success:(res)=>{
        // 得到code的值
    }
})

````
3. Send an asynchronous request, access the background, request to get the code value, and the obtained value needs to be converted into a string
wx.login({
            success: async res => {
              // console.log(res);
              // 拿到code访问后台接口发请求
              let data = await api_loginCode({
                code: res.code
              });
              // console.log(data);
              // 把token存到本地
              wx.setStorageSync('token', JSON.stringify(data));
              // 全部做完 跳转到个人中心
              wx.reLaunch({
                url: '/pages/personCenter/personCenter'
              });
            }
          });
4. Save the token value returned by the request locally, and then jump to the personal center page
// 全部都做完了,跳转到个人中心
                                wx.switchTab({
                                    url: '/pages/personCenter/personCenter'
                                })
5. Login complete code:
methods: {
    wxLogin() {
      // 第一步是获取微信用户的基本信息
      wx.getUserProfile({
        // 描述你获取我手机上的微信app的登录用户的作用
        desc: '用于完善会员资料',
        //弹出授权框之后,你点击允许 success
        success: res => {
          // console.log(res);
          // 把数据存到本地 本地是存的字符串  但是wx.setStorageSync是一个对象
          wx.setStorageSync('userInfo', JSON.stringify(res.userInfo));
          // 再次调用微信登录 需要拿到code
          wx.login({
            success: async res => {
              // console.log(res);
              // 拿到code访问后台接口发请求
              let data = await api_loginCode({
                code: res.code
              });
              // console.log(data);
              // 把token存到本地
              wx.setStorageSync('token', JSON.stringify(data));
              // 全部做完 跳转到个人中心
              wx.reLaunch({
                url: '/pages/personCenter/personCenter'
              });
            }
          });
        }
      });
    }
  }
Step 3: Jump to the personal center page
1. First, there are two header pages, one is not logged in and the other is logged in, which needs to be rendered according to userInfo information
	<!-- 头部有两个 ,一个是登录转态的 -->
		<view class="header" v-if="userInfo.nickName">
			<image class="userImg" :src="userInfo.avatarUrl" mode=""></image>
			<view class='userInfo'>
				<view @click="exit">退出登录</view>
			</view>
		</view>
		<!-- 未登录状态的 -->
		<view class="header" v-else>
			<image class="userImg" src="../../static/images/personal/personal.png" mode=""></image>
			<view class='userInfo'>
				<view @click="tologin">未登录</view>
			</view>
		</view>
2. Jumping to the personal center component is equivalent to sending an asynchronous request, and then defining variables to receive the information of the local depositor, and the obtained value needs to be converted into an object form
async mounted() {
    let userInfo = wx.getStorageSync('userInfo');
    // console.log(userInfo);
    if (userInfo) {
      // 有值代表登录 有值在转化为对象
      this.userInfo = JSON.parse(userInfo);
      // 有值 有登录 在发请求
      let res = await api_loginToken({
        token: JSON.parse(wx.getStorageSync('token'))
      });
      // console.log(res);
      this.info = res;
    } else {
      // 没有值代表没有登录
    }
  },
3. In the case of value, to send a request is to get the personal center, my asset information
Step 4: Log out
1. If you log out, you need to clear the user information and token information
methods: {
    // 退出登录  清空本地存储 不能清空所有,只需要清空userInfo和token
    goback() {
      // wx.clearStorageSync();
      wx.removeStorageSync('userInfo');
      wx.removeStorageSync('token');
      wx.reLaunch({
        url: '/pages/personCenter/personCenter'
      });
    },
    tologin() {
      wx.navigateTo({
        url: '/pages/login/login'
      });
    }
  }
Draw a picture to understand, about the applet authorization login steps:
