Table of contents
3. Data interaction authorization login
Okay, it's here today, I hope to help you! ! !
1. Process explanation
1.1.Illustration:

2.2.Explanation
This picture is aboutthe flow chart of WeChat applet authorized login. The flow chart shows the process of obtaining user identity using the official login capability provided by WeChat. Below is an explanation of some of the key steps in the flowchart:
1. The mini program obtains the user identity provided by WeChat through the official login capability provided by WeChat in order to establish a user system within the mini program.
2. Developers need to call the wx.login() method in the applet to obtain a temporary code, thecode is a temporary string, and then passedwx.request() Initiates a network request and passes code to the background server.
3. The developer server sends code and AppID (mini program ID) and AppSecret (mini program key) [ . session_key refers to the current login request and is the identifier of a session. openid and information such as session_key] Call the WeChat interface service (Wechat Http Api) to obtainThe ID sent later is the unique identifier for the WeChat interface service
4. The developer server transfers session_key and openid ( The openid transferred from the WeChat interface is 3 For the WeChat applet, it is the authorized unique identifier ) and other user information associated with the custom login state, and returns the custom login state to the applet.
5. In subsequent business requests, the mini program can carry a custom login status to initiate a request to the developer server to obtain business data.
6. The developer server verifies the custom login status and returns the corresponding business data to the mini program.
The process of authorized login of WeChat applet includes calling the wx.login() method on the applet to obtain the temporary code, the developer server obtains information such as session_key and openid through code+AppID+AppSecret, and associates it with the custom login state. Finally Mini programs can use custom login status to initiate business requests to the developer server.
2. Official login
In the official documents, there are methods and codes for logging in through authorization. I will copy them into the project for a demonstration.
There are two methods, which have different user experience and security issues. Here is a demonstration for you:
-
wxLogin
Call the interface to obtain the login credentials (code). The user's login status information is exchanged through the voucher, including the user's unique identification in the current mini program (openid), the unique identification under the WeChat open platform account (unionid, if the current mini program has been bound to the WeChat open platform account) and this login The session key (session_key), etc. Encryption and decryption of user data communication depends on the session key.
Parameter understanding:
|
|||||||||||||||||||||||||||||||
| code | string | User login credentials (valid for five minutes). Developers need to call code2Session in the background of the developer server, and use code to exchange openid, unionid, session_key and other information | |||||||||||||||||||||||||||||
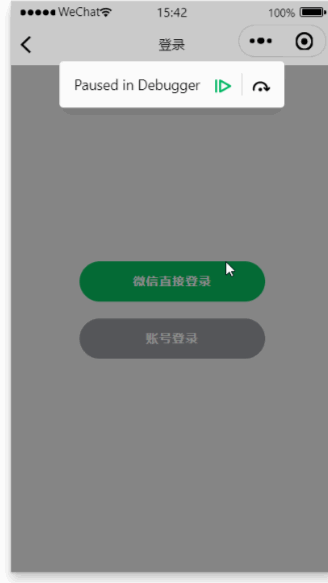
Demonstration effect:

-
code
index.wxml
<!--pages/index/index.wxml-->
<view>
  <button wx:if="{

   {canIUseGetUserProfile}}" type="primary" class="wx-login-btn" bindtap="getUserProfile">微信直接登录1</button>
  <button wx:else open-type="getUserInfo" type="primary" class="wx-login-btn" bindgetuserinfo="wxLogin">微信直接登录2</button>
  <image mode="scaleToFill" src="{

   {userInfo.avatarUrl}}" />
  <text>昵称:{

   {userInfo.nickName}}</text>
</view>
index.js
// pages/index/index.js
Page({
  data: {
    userInfo: {},
    canIUseGetUserProfile: true,
  },
  onLoad() {
    // if (wx.getUserProfile) {
    //   this.setData({
    //     canIUseGetUserProfile: true
    //   })
    // }
  },
  getUserProfile(e) {
    console.log('getUserProfile')
    // 推荐使用 wx.getUserProfile 获取用户信息,开发者每次通过该接口获取用户个人信息均需用户确认
    // 开发者妥善保管用户快速填写的头像昵称,避免重复弹窗
    wx.getUserProfile({
      desc: '用于完善会员资料', // 声明获取用户个人信息后的用途,后续会展示在弹窗中,请谨慎填写
      success: (res) => {
        console.log(res);
        this.setData({
          userInfo: res.userInfo,
          hasUserInfo: true
        })
      }
    })
  },
  wxLogin: function(e) {
    // debugger
    console.log('wxLogin')
    console.log(e.detail.userInfo);
    this.setData({
      userInfo: e.detail.userInfo
    })
    if (e.detail.userInfo == undefined) {
      app.globalData.hasLogin = false;
      util.showErrorToast('微信登录失败');
      return;
    }
  },
  /**
   * 生命周期函数--监听页面初次渲染完成
   */
  onReady() {

  },

  /**
   * 生命周期函数--监听页面显示
   */
  onShow() {

  },

  /**
   * 生命周期函数--监听页面隐藏
   */
  onHide() {

  },

  /**
   * 生命周期函数--监听页面卸载
   */
  onUnload() {

  },

  /**
   * 页面相关事件处理函数--监听用户下拉动作
   */
  onPullDownRefresh() {

  },

  /**
   * 页面上拉触底事件的处理函数
   */
  onReachBottom() {

  },

  /**
   * 用户点击右上角分享
   */
  onShareAppMessage() {

  }
})
js file canIUseGetUserProfile attribute value: true, it is the wx.getUserProfile method, when it is false, it is the wxLogin method.
Three. Alternating number positions Entering the teaching box
The following code is a continuation based on my blog:Backend data interaction and wxs application for WeChat applet development
3.1. Front-end code
Write in the project api.js Request access address in the file
// 以下是业务服务器API地址
 // 本机开发API地址
var WxApiRoot = 'http://localhost:8080/oapro/wx/';
// 测试环境部署api地址
// var WxApiRoot = 'http://192.168.191.1:8080/oapro/wx/';
// 线上平台api地址
//var WxApiRoot = 'https://www.oa-mini.com/demo/wx/';

module.exports = {
  IndexUrl: WxApiRoot + 'home/index', //首页数据接口
  SwiperImgs: WxApiRoot+'swiperImgs',
  MettingInfos: WxApiRoot+'meeting/list',
  AuthLoginByWeixin: WxApiRoot + 'auth/login_by_weixin', //微信登录
  UserIndex: WxApiRoot + 'user/index', //个人页面用户相关信息
  AuthLogout: WxApiRoot + 'auth/logout', //账号登出
  AuthBindPhone: WxApiRoot + 'auth/bindPhone' //绑定微信手机号
};
Note: You need to access the data after corresponding to the request address of the background.
Personal center
Write in the index.wxml file on the personal center page:
<view class="page-container">
    <view class="user-info-container">
        <view class="user-info"  bindtap="goLogin">
            <image class="user-img" mode="scaleToFill" src="{

   {userInfo.avatarUrl}}" />
            <text class="user-info-name">{

   {userInfo.nickName}}</text>
        </view>
        <image class="user-update" src="/static/tabBar/component.png" bindtap='goPages' data-url='/pages/ucenter/user/user'/>
    </view>

    <view class="boundary" />
    <view class="cells-container">
        <view class="cell-wrap">
            <image class="cell-icon" src="/static/tabBar/sdk.png" />
            <text class="cell-text">我主持的会议</text>
            <view class="cell-right">
                <view class="cell-list-num">{

   {metting_pubs}}</view>
                <view class="cell-arrow"></view>
            </view>
        </view>
        <view class="cell-wrap">
            <image class="cell-icon" src="/static/tabBar/sdk.png" />
            <text class="cell-text">我参与的会议</text>
            <view class="cell-right">
                <view class="cell-list-num">{

   {metting_joins}}</view>
                <view class="cell-arrow"></view>
            </view>
        </view>
    </view>
    <view class="boundary" />
    <view class="cells-container">
        <view class="cell-wrap">
            <image class="cell-icon" src="/static/tabBar/sdk.png" />
            <text class="cell-text">我发布的投票</text>
            <view class="cell-right">
                <view class="cell-list-num">1</view>
                <view class="cell-arrow"></view>
            </view>
        </view>
        <view class="cell-wrap">
            <image class="cell-icon" src="/static/tabBar/sdk.png" />
            <text class="cell-text">我参与的投票</text>
            <view class="cell-right">
                <view class="cell-list-num">10</view>
                <view class="cell-arrow"></view>
            </view>
        </view>
    </view>
    <view class="boundary" />
    <view class="cells-container">
        <view class="cell-wrap">
            <image class="cell-icon" src="/static/tabBar/template.png" />
            <text class="cell-text">消息</text>
            <view class="cell-right">
                <view class="cell-list-num"></view>
                <view class="cell-arrow"></view>
            </view>
        </view>
        <view class="cell-wrap">
            <image class="cell-icon" src="/static/tabBar/component.png" />
            <text class="cell-text">设置</text>
            <view class="cell-right">
                <view class="cell-list-num"></view>
                <view class="cell-arrow"></view>
            </view>
        </view>
    </view>
</view>
Write data requests and methods in index.js
// pages/ucenter/index/index.js
var util = require('../../../utils/util.js');
var api = require('../../../config/api.js');
const app = getApp();
Page({

    /**
     * 页面的初始数据
     */
    data: {
        userInfo: {
            nickName: '点击登录',
            avatarUrl: '/static/images/avatar.png'
        },
        hasLogin: false,
        metting_pubs: '',
        metting_joins: ''
    },

    /**
     * 生命周期函数--监听页面加载
     */
    onLoad(options) {

    },


    /**
     * 生命周期函数--监听页面显示
     */
    onShow() {
        this.getUserInfo();
    },
    getUserInfo() {
      // console.log('ucenter.index.app.globalData.hasLogin='+app.globalData.hasLogin)
        //获取用户的登录信息
        if (app.globalData.hasLogin) {
            let userInfo = wx.getStorageSync('userInfo');
            this.setData({
                userInfo: userInfo,
                hasLogin: true
            });
            //查询个人统计信息
            util.request(api.UserIndex).then(res => {
                if (res.errno === 0) {
                    this.setData({
                        metting_pubs: res.data.metting_pubs,
                        metting_joins: res.data.metting_joins
                    });
                }
            });
        }
    },
    goLogin() {
        if (!this.data.hasLogin) {
            wx.navigateTo({
                url: "/pages/auth/login/login"
            });
        }
    },
    /**
     * 页面跳转
     */
    goPages: function (e) {
        if (this.data.hasLogin) {
            wx.navigateTo({
                url: e.currentTarget.dataset.url
            });
        } else {
            wx.navigateTo({
                url: "/pages/auth/login/login"
            });
        };
    }

})
The settings page after creating a user login is: user
user.wxml
<!--pages/ucenter/user/user.wxml-->
<form bindsubmit="formSubmit">
    <view class='personal-data'>
        <view class='list'>
            <view class='item acea-row row-between-wrapper'>
                <view>头像</view>
                <view class='pictrue'>
                    <image src='{

   {userInfo.avatarUrl}}'></image>
                </view>
            </view>
            <view class='item acea-row row-between-wrapper'>
                <view>名字</view>
                <view class='input'><input type='text' disabled='true' name='nickname' value='{

   {userInfo.nickName}}'></input></view>
            </view>
            <view class='item acea-row row-between-wrapper'>
                <view>手机号码</view>
                <button name='phone' class='phoneW' value='{

   {userInfo.phone}}' wx:if="{

   {!userInfo.phone}}" bindgetphonenumber="getPhoneNumber" hover-class='none' open-type='getPhoneNumber'>
                    点击获取
                </button>
                <view class='input acea-row row-between-wrapper' wx:else>
                    <input type='text' disabled='true' name='phone' value='{

   {userInfo.phone}}' class='id'></input>
                    <text class='iconfont icon-suozi'></text>
                </view>
            </view>

            <view class='item acea-row row-between-wrapper'>
                <view>ID号</view>
                <view class='input acea-row row-between-wrapper'>
                    <input type='text' value='1000{

   {userInfo.userId}}' disabled='true' class='id'></input>
                    <text class='iconfont icon-suozi'></text>
                </view>
            </view>
        </view>
        <button class='modifyBnt' bindtap="exitLogin">退 出</button>
    </view>
</form>
user.wxss
@import '/static/font/iconfont.wxss';
.personal-data .list {
    margin-top: 15rpx;
    background-color: #fff;
}

.personal-data .list .item {
    padding: 30rpx 30rpx 30rpx 0;
    border-bottom: 1rpx solid #f2f2f2;
    margin-left: 30rpx;
    font-size: 32rpx;
    color: #282828;
}

.personal-data .list .item .phone {
    background-color: #85c43f;
    width: 160rpx;
    height: 56rpx;
    font-size: 24rpx;
    color: #fff;
    line-height: 56rpx;
    border-radius: 32rpx
}

.personal-data .list .item .pictrue {
    width: 88rpx;
    height: 88rpx;
}

.personal-data .list .item .pictrue image {
    width: 100%;
    height: 100%;
    border-radius: 50%;
}

.personal-data .list .item .input {
    width: 415rpx;
    text-align: right;
    color: #868686;
}

.personal-data .list .item .input .id {
    width: 365rpx;
}

.personal-data .list .item .input .iconfont {
    font-size: 35rpx;
}

.personal-data .modifyBnt {
    /* background-color: #85c43f; */
    /* background: linear-gradient(to left right, #85c43f, #fefefd); */
    background: radial-gradient(circle at 50%,#85c43f,#CDDC39);
    font-size: 32rpx;
    color: #fff;
    width: 690rpx;
    height: 90rpx;
    border-radius: 50rpx;
    display: flex;
    justify-content: center;
    align-items: center;
    line-height: 90rpx;
    margin: 76rpx auto 0 auto;
}


.acea-row{display:flex;flex-wrap:wrap;}
.acea-row.row-top{align-items:flex-start;}
.acea-row.row-middle{align-items:center;}
.acea-row.row-bottom{align-items:flex-end;}
.acea-row.row-left{justify-content:flex-start;}
.acea-row.row-center{justify-content:center;}
.acea-row.row-right{justify-content:flex-end;}
.acea-row.row-between{justify-content:space-between;}
.acea-row.row-around{justify-content:space-around;}
.acea-row.row-column{flex-direction:column;}
.acea-row.row-column-between{flex-direction:column;justify-content:space-between;}
.acea-row.row-column-around{flex-direction:column;justify-content:space-around;}
.acea-row.row-center-wrapper{align-items:center;justify-content:center;}
.acea-row.row-between-wrapper{align-items:center;justify-content:space-between;}
view, image, text, navigator {
    box-sizing: border-box;
    padding: 0;
    margin: 0;
}
user.js
var util = require('../../../utils/util.js');
var api = require('../../../config/api.js');
var user = require('../../../utils/user.js');
var app = getApp();
Page({

  /**
   * 页面的初始数据
   */
  data: {
    userInfo: {},
    hasLogin: false,
    userSharedUrl: ''
  },

  /**
      * 生命周期函数--监听页面加载
   */
  onLoad: function (options) {

  },
  onShow: function () {
    let that = this;
    //获取用户的登录信息
    let userInfo = wx.getStorageSync('userInfo');
    this.setData({
      userInfo: userInfo,
      hasLogin: true
    });

  },
  getPhoneNumber: function (e) {
      console.log(e);
    let that = this;
    if (e.detail.errMsg !== "getPhoneNumber:ok") {
      // 拒绝授权
      return;
    }

    if (!this.data.hasLogin) {
      wx.showToast({
        title: '绑定失败:请先登录',
        icon: 'none',
        duration: 2000
      });
      return;
    }

    util.request(api.AuthBindPhone, {
      iv: e.detail.iv,
      encryptedData: e.detail.encryptedData
    }, 'POST').then(function (res) {
      if (res.errno === 0) {
        let userInfo = wx.getStorageSync('userInfo');
        userInfo.phone = res.data.phone;//设置手机号码
        wx.setStorageSync('userInfo', userInfo);
        that.setData({
          userInfo: userInfo,
          hasLogin: true
        });
        wx.showToast({
          title: '绑定手机号码成功',
          icon: 'success',
          duration: 2000
        });
      }
    });
  },
  exitLogin: function () {
    wx.showModal({
      title: '',
      confirmColor: '#b4282d',
      content: '退出登录?',
      success: function (res) {
        if (!res.confirm) {
          return;
        }

        util.request(api.AuthLogout, {}, 'POST');
        app.globalData.hasLogin = false;
        wx.removeStorageSync('token');
        wx.removeStorageSync('userInfo');
        wx.reLaunch({
          url: '/pages/index/index'
        });
      }
    })
  }
})
3.2.Backend code
A controller written in the background to perform front-end requests and data processing and provide feedback to the front-end
WxAuthController :
package com.junlinyi.ssm.wxcontroller;

/**
 * @Autho donkee
 * @Since 2022/6/27
 */

import cn.binarywang.wx.miniapp.bean.WxMaPhoneNumberInfo;
import com.alibaba.fastjson.JSONObject;
import com.junlinyi.ssm.annotation.LoginUser;
import com.junlinyi.ssm.model.UserInfo;
import com.junlinyi.ssm.model.WxLoginInfo;
import com.junlinyi.ssm.model.WxUser;
import com.junlinyi.ssm.service.UserToken;
import com.junlinyi.ssm.service.UserTokenManager;
import com.junlinyi.ssm.service.WxUserService;
import com.junlinyi.ssm.util.JacksonUtil;
import com.junlinyi.ssm.util.ResponseUtil;
import com.junlinyi.ssm.util.UserTypeEnum;
import lombok.extern.slf4j.Slf4j;
import org.springframework.beans.factory.annotation.Autowired;
import org.springframework.util.StringUtils;
import org.springframework.web.bind.annotation.PostMapping;
import org.springframework.web.bind.annotation.RequestBody;
import org.springframework.web.bind.annotation.RequestMapping;
import org.springframework.web.bind.annotation.RestController;

import cn.binarywang.wx.miniapp.api.WxMaService;
import cn.binarywang.wx.miniapp.bean.WxMaJscode2SessionResult;
import javax.servlet.http.HttpServletRequest;
import java.text.DateFormat;
import java.text.SimpleDateFormat;
import java.util.Date;
import java.util.HashMap;
import java.util.Map;

/**
 * 鉴权服务
 */
@Slf4j
@RestController
@RequestMapping("/wx/auth")
public class WxAuthController {
    @Autowired
    private WxMaService wxService;
    @Autowired
    private WxUserService userService;
    /**
     * 微信登录
     *
     * @param wxLoginInfo
     *            请求内容,{ code: xxx, userInfo: xxx }
     * @param request
     *            请求对象
     * @return 登录结果
     */
    @PostMapping("login_by_weixin")
    public Object loginByWeixin(@RequestBody WxLoginInfo wxLoginInfo, HttpServletRequest request) {

        //客户端需携带code与userInfo信息
        String code = wxLoginInfo.getCode();
        UserInfo userInfo = wxLoginInfo.getUserInfo();
        if (code == null || userInfo == null) {
            return ResponseUtil.badArgument();
        }
        //调用微信sdk获取openId及sessionKey
        String sessionKey = null;
        String openId = null;
        try {
            long beginTime = System.currentTimeMillis();
            //
            WxMaJscode2SessionResult result = this.wxService.getUserService().getSessionInfo(code);
//            Thread.sleep(6000);
            long endTime = System.currentTimeMillis();
            log.info("响应时间:{}",(endTime-beginTime));
            sessionKey = result.getSessionKey();//session id
            openId = result.getOpenid();//用户唯一标识 OpenID
        } catch (Exception e) {
            e.printStackTrace();
        }

        if (sessionKey == null || openId == null) {
            log.error("微信登录,调用官方接口失败:{}", code);
            return ResponseUtil.fail();
        }else{
            log.info("openId={},sessionKey={}",openId,sessionKey);
        }
        //根据openId查询wx_user表
        //如果不存在,初始化wx_user,并保存到数据库中
        //如果存在,更新最后登录时间
        WxUser user = userService.queryByOid(openId);

        if (user == null) {
            user = new WxUser();
            user.setUsername(openId);
            user.setPassword(openId);
            user.setWeixinOpenid(openId);
            user.setAvatar(userInfo.getAvatarUrl());
            user.setNickname(userInfo.getNickName());
            user.setGender(userInfo.getGender());
            user.setUserLevel((byte) 0);
            user.setStatus((byte) 0);
            user.setLastLoginTime(new Date());
            user.setLastLoginIp(IpUtil.client(request));
            user.setShareUserId(1);

            userService.add(user);

        } else {
            user.setLastLoginTime(new Date());
            user.setLastLoginIp(IpUtil.client(request));
            if (userService.updateById(user) == 0) {
                log.error("修改失败:{}", user);
                return ResponseUtil.updatedDataFailed();
            }
        }
        // token
        UserToken userToken = null;
        try {
            userToken = UserTokenManager.generateToken(user.getId());
        } catch (Exception e) {
            log.error("微信登录失败,生成token失败:{}", user.getId());
            e.printStackTrace();
            return ResponseUtil.fail();
        }
        userToken.setSessionKey(sessionKey);
        log.info("SessionKey={}",UserTokenManager.getSessionKey(user.getId()));
        Map<Object, Object> result = new HashMap<Object, Object>();
        result.put("token", userToken.getToken());
        result.put("tokenExpire", userToken.getExpireTime().toString());
        userInfo.setUserId(user.getId());
        if (!StringUtils.isEmpty(user.getMobile())) {// 手机号存在则设置
            userInfo.setPhone(user.getMobile());
        }
        try {
            DateFormat df = new SimpleDateFormat("yyyy-MM-dd");
            String registerDate = df.format(user.getAddTime() != null ? user.getAddTime() : new Date());
            userInfo.setRegisterDate(registerDate);
            userInfo.setStatus(user.getStatus());
            userInfo.setUserLevel(user.getUserLevel());// 用户层级
            userInfo.setUserLevelDesc(UserTypeEnum.getInstance(user.getUserLevel()).getDesc());// 用户层级描述
        } catch (Exception e) {
            log.error("微信登录:设置用户指定信息出错:"+e.getMessage());
            e.printStackTrace();
        }
        result.put("userInfo", userInfo);


        log.info("【请求结束】微信登录,响应结果:{}", JSONObject.toJSONString(result));

        return ResponseUtil.ok(result);
    }
    /**
     * 绑定手机号码
     *
     * @param userId
     * @param body
     * @return
     */
    @PostMapping("bindPhone")
    public Object bindPhone(@LoginUser Integer userId, @RequestBody String body) {
        log.info("【请求开始】绑定手机号码,请求参数,body:{}", body);

        String sessionKey = UserTokenManager.getSessionKey(userId);
        String encryptedData = JacksonUtil.parseString(body, "encryptedData");
        String iv = JacksonUtil.parseString(body, "iv");
        WxMaPhoneNumberInfo phoneNumberInfo = null;
        try {
            phoneNumberInfo = this.wxService.getUserService().getPhoneNoInfo(sessionKey, encryptedData, iv);
        } catch (Exception e) {
            log.error("绑定手机号码失败,获取微信绑定的手机号码出错:{}", body);
            e.printStackTrace();
            return ResponseUtil.fail();
        }
        String phone = phoneNumberInfo.getPhoneNumber();
        WxUser user = userService.selectByPrimaryKey(userId);
        user.setMobile(phone);
        if (userService.updateById(user) == 0) {
            log.error("绑定手机号码,更新用户信息出错,id:{}", user.getId());
            return ResponseUtil.updatedDataFailed();
        }
        Map<Object, Object> data = new HashMap<Object, Object>();
        data.put("phone", phone);

        log.info("【请求结束】绑定手机号码,响应结果:{}", JSONObject.toJSONString(data));
        return ResponseUtil.ok(data);
    }
    /**
     * 注销登录
     */
    @PostMapping("logout")
    public Object logout(@LoginUser Integer userId) {
        log.info("【请求开始】注销登录,请求参数,userId:{}", userId);
        if (userId == null) {
            return ResponseUtil.unlogin();
        }
        try {
            UserTokenManager.removeToken(userId);
        } catch (Exception e) {
            log.error("注销登录出错:userId:{}", userId);
            e.printStackTrace();
            return ResponseUtil.fail();
        }

        log.info("【请求结束】注销登录成功!");
        return ResponseUtil.ok();
    }
}
Configure the background database and the AppID (miniprogram ID) and AppSecret (miniprogram) of the WeChat applet in the application.yml file key) to help access WeChat’s interface services.
server:
  port: 8080 #指服器端口号
  servlet:
    context-path: /oapro

spring:
  datasource:
    #type连接池类型 DBCP,C3P0,Hikari,Druid,默认为Hikari
    type: com.zaxxer.hikari.HikariDataSource
    driver-class-name: com.mysql.jdbc.Driver
    url: jdbc:mysql://localhost:3306/mybatis_oapro?useUnicode=true&characterEncoding=UTF-8&useSSL=false
    username: root
    password: 123456
mybatis:
  mapper-locations: classpath*:mapper/*.xml #指定mapper文件位置
  type-aliases-package: com.CloudJun.ssm.model #指定自动生成别名所在包

logging:
  level:
    root:  info
    org.springframework:  info
    org.mybatis:  ERROR
    com.CloudJun.ssm.mapper: debug

oa:
  wx:
    app-id: # 这里填写AppID(小程序ID)
    app-secret: # 这里填写AppSecret(小程序密钥)
    msgDataFormat: JSON
Finally, the service is started in the background, and data access and WeChat authorized login are performed on the front end.
Effect :