Tkinter is a built-in GUI implementation module in python, but it needs to manually build components and adjust styles. PyQt implements a function similar to Qt creator, which can directly adjust buttons, input boxes, etc. on the interface by dragging, which greatly simplifies the use. Since I installed python2.7, I use the PyQt4 version.
1. Installation
1.1 python2.7
1.2 Development environment Pycharm
1.3 PyQt4
PyQt4 download link https://sourceforge.net/projects/pyqt/files/PyQt4/
PyQt4 Python2.7 Windows *64 version download link https://sourceforge.net/projects/pyqt/files/PyQt4/PyQt-4.9.4/
You can also pip install (if you install it, the blogger pip will not succeed anyway)
(PyQt5 download link https://sourceforge.net/projects/pyqt/files/PyQt5/ )
As shown in the picture below: Be sure to choose a good version

2. Configuration
Open Pycharm, File ->Settings ->Tools ->External Tools, add extension components

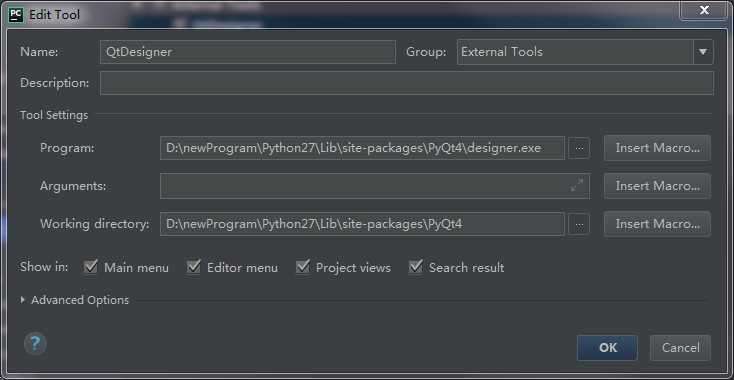
! Note that this operation of PyUIC has intermediate Arguments!
-m PyQt4.uic.pyuic $FileName$ -o $FileNameWithoutExtension$.py

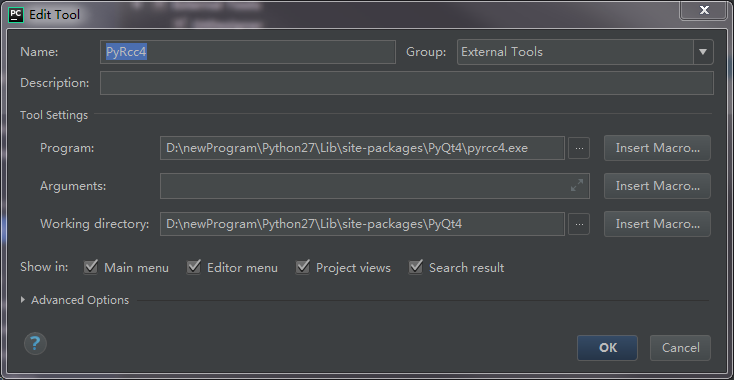
After the addition is complete, check whether the addition is successful in Tools -> External Tools
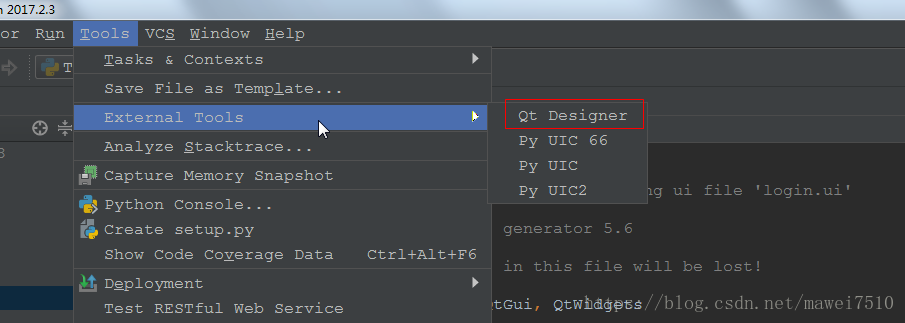
3. Click QtDesigner, and the Qt Designer design interface will pop up
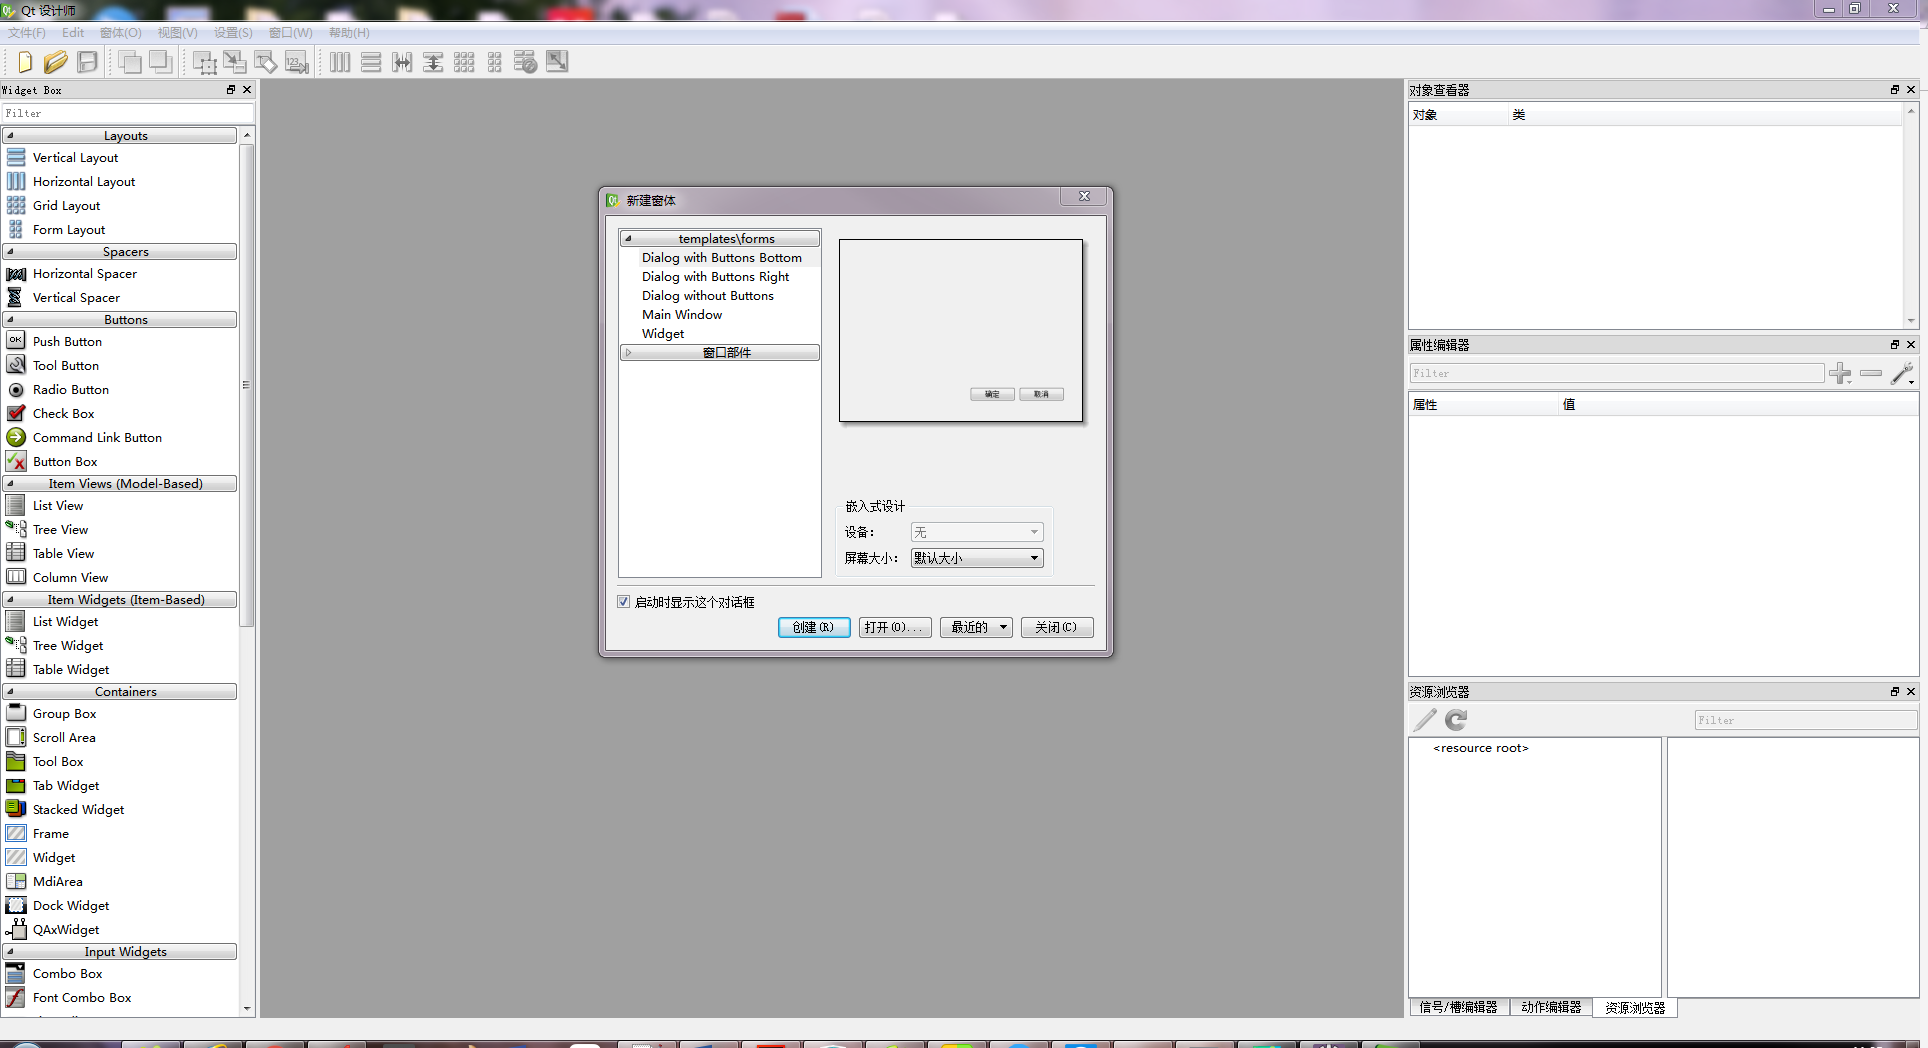
At this point, you can design the GUI in this window
After designing the UI interface, save the UI file to the folder path. This path is very important. Don’t save it wrong, or you will not be able to find the UI file path when converting later. I created a new UI folder in the project, specifically Store the .ui file Note: This path should be consistent with the path of the Working Directory of the above Py uic configuration
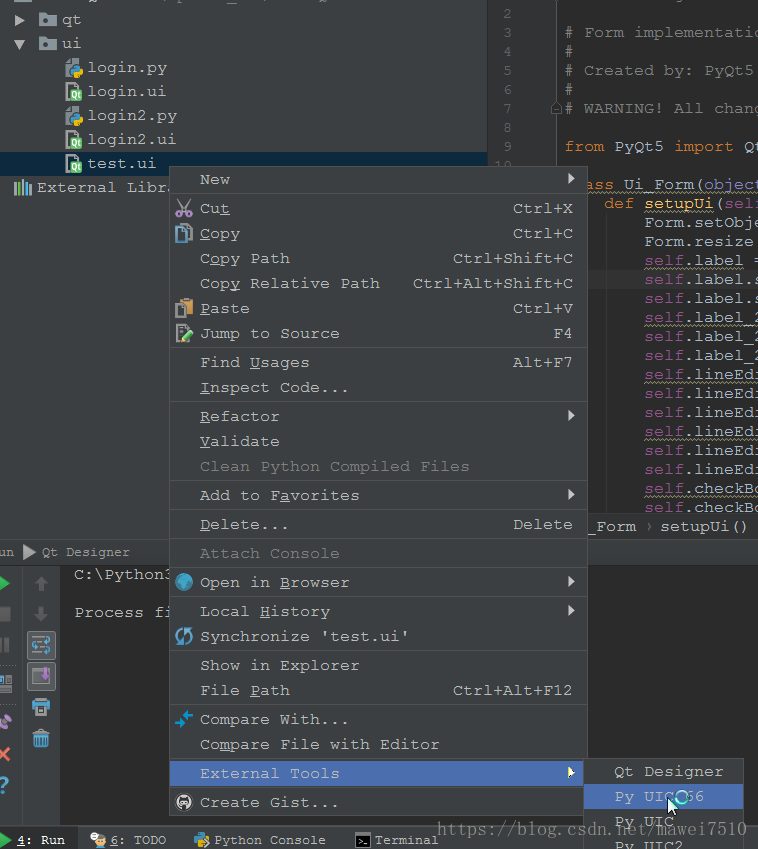
Convert UI file to Py file Right-click the UI file and select Py UIC, then a Py file will be automatically generated
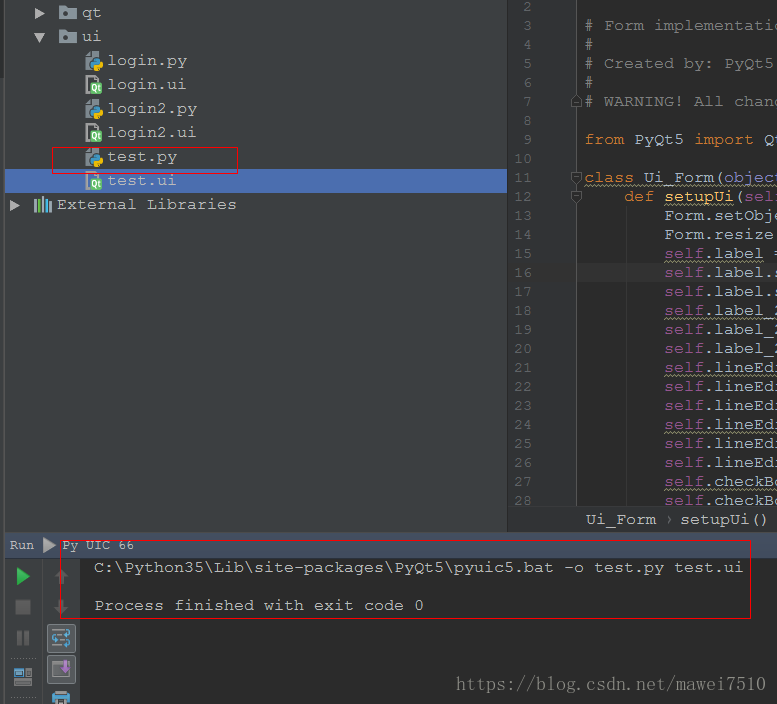
4. Finally - the code calls the automatically generated .py UI file
This is the generated .py code
# -*- coding: utf-8 -*-

# Form implementation generated from reading ui file 'ui-a.ui'
#
# Created: Wed Jun 12 17:14:40 2019
#      by: PyQt4 UI code generator 4.9.4
#
# WARNING! All changes made in this file will be lost!

from PyQt4 import QtCore, QtGui

try:
    _fromUtf8 = QtCore.QString.fromUtf8
except AttributeError:
    _fromUtf8 = lambda s: s

class Ui_firstMainWindow(object):
    def setupUi(self, firstMainWindow):
        firstMainWindow.setObjectName(_fromUtf8("firstMainWindow"))
        firstMainWindow.resize(556, 444)
        firstMainWindow.setCursor(QtGui.QCursor(QtCore.Qt.ArrowCursor))
        self.centralwidget = QtGui.QWidget(firstMainWindow)
        self.centralwidget.setObjectName(_fromUtf8("centralwidget"))
        self.queren = QtGui.QPushButton(self.centralwidget)
        self.queren.setGeometry(QtCore.QRect(430, 360, 93, 28))
        self.queren.setObjectName(_fromUtf8("queren"))
        firstMainWindow.setCentralWidget(self.centralwidget)
        self.menubar = QtGui.QMenuBar(firstMainWindow)
        self.menubar.setGeometry(QtCore.QRect(0, 0, 556, 23))
        self.menubar.setObjectName(_fromUtf8("menubar"))
        firstMainWindow.setMenuBar(self.menubar)
        self.statusbar = QtGui.QStatusBar(firstMainWindow)
        self.statusbar.setObjectName(_fromUtf8("statusbar"))
        firstMainWindow.setStatusBar(self.statusbar)

        self.retranslateUi(firstMainWindow)
        QtCore.QMetaObject.connectSlotsByName(firstMainWindow)

    def retranslateUi(self, firstMainWindow):
        firstMainWindow.setWindowTitle(QtGui.QApplication.translate("firstMainWindow", "UI设计师", None, QtGui.QApplication.UnicodeUTF8))
        self.queren.setText(QtGui.QApplication.translate("firstMainWindow", "确认", None, QtGui.QApplication.UnicodeUTF8))

if  __name__=="__main__":
    import  sys
    reload(sys)                                 #
    sys.setdefaultencoding( "utf-8" )           # 这两步是为了解决print中文报ascii编码错误

    app=QtGui.QApplication(sys.argv)
    widget= QtGui.QMainWindow()
    ui= Ui_firstMainWindow()
    ui.setupUi(widget)
    widget.show()
    sys.exit(app.exec_())
一定在最下面加入以下代码,然后运行,即可看到效果


if  __name__=="__main__":
    import  sys

    reload(sys)                                 #
    sys.setdefaultencoding( "utf-8" )           # 这两步是为了解决print中文报ascii编码错误

    app=QtGui.QApplication(sys.argv)
    widget= QtGui.QMainWindow()
    ui= Ui_firstMainWindow()
    ui.setupUi(widget)
    widget.show()
    sys.exit(app.exec_())
5. Finally, you need to convert the py file into an exe execution program file
Put the py file and the icon (must be in .ico format and can be transferred online) under the same file
cd to the corresponding directory, execute:
pyinstaller -F -i 1.ico 2.py or
pyinstaller.exe -w -F xx\xx\xxx.py
(There is a terminal black window when running by default, adding -m will cancel the black window)
-w: The directly released exe application has a command line debugging window. Adding the -w command in the command can block the command box (you can not add -w in the debugging stage, and add the -w parameter in the final release)
-F: This is capitalized. Use the -F command to package the application into an independent exe file, otherwise it is a folder with various dll and dependent files
-p : After this command, you can add the path where pyinstaller searches for modules. Because there are many modules involved in application packaging. Here you can add your own path. However, after the author's test, the site-packages directory can be recognized, and generally no need to add it manually
-i command
An icon representing the executable, followed by the icon file
After the execution is complete, an exe file will be generated under the dist file, click Execute