[Android] The most complete analysis of linear layout (LinearLayout)
1. Overview of LinearLayout
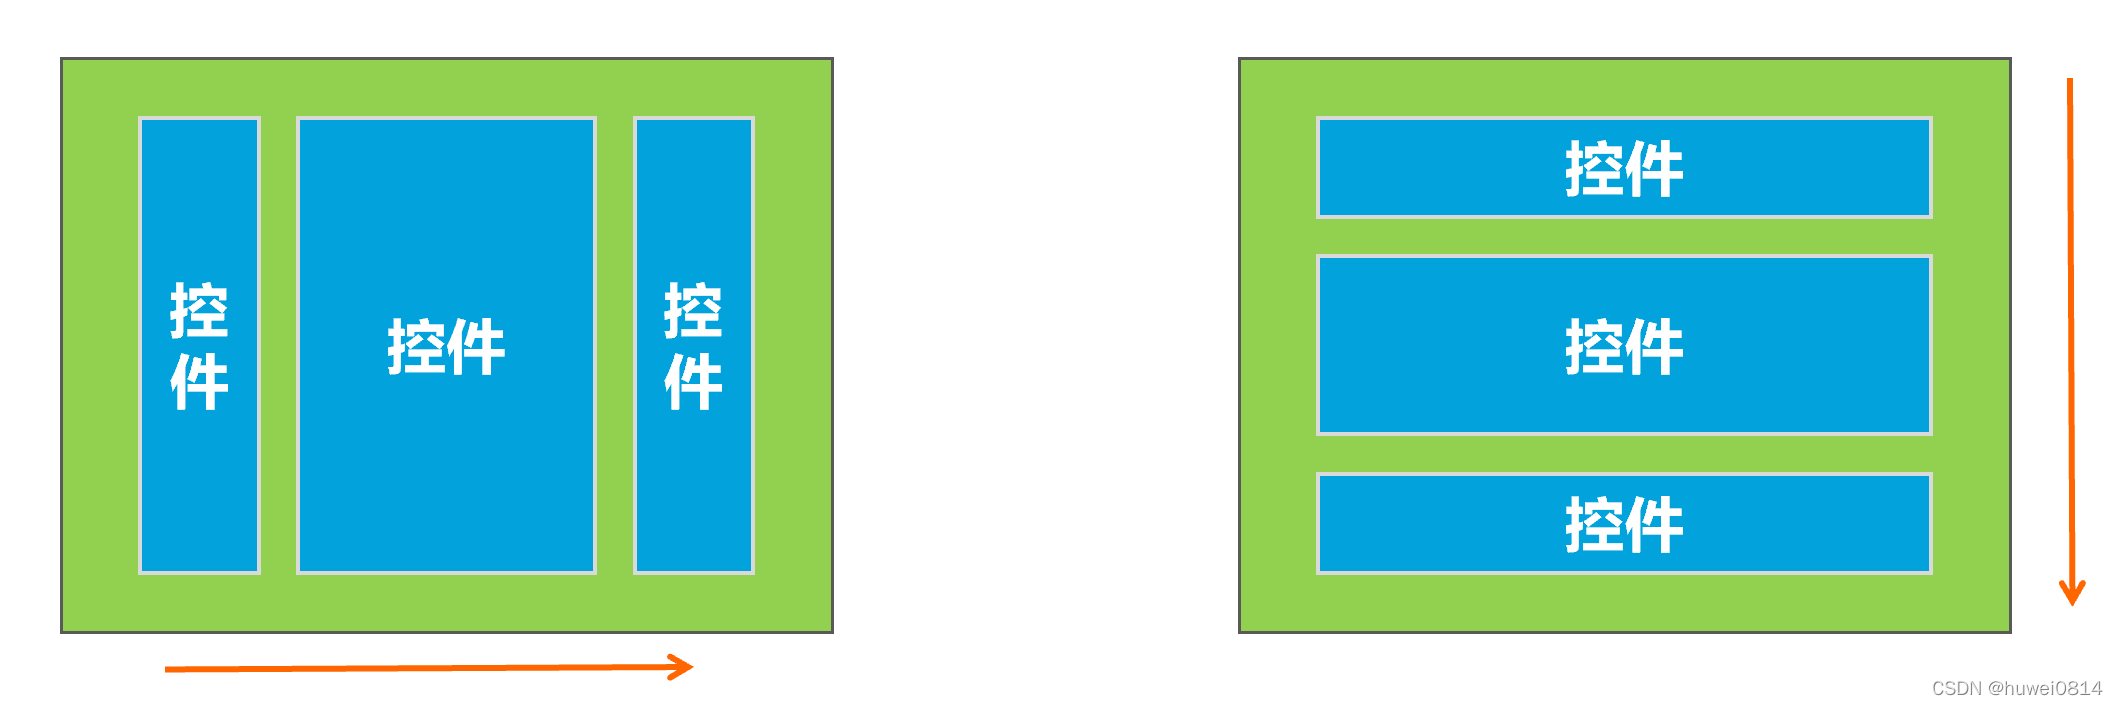
线性布局(LinearLayout)Mainly arrange the controls in the interface horizontally or vertically. and arrange the controls into a straight line. In a linear layout, if arranged horizontally, only one control can be placed vertically, and if arranged vertically, only one control can be placed horizontally.
To use linear layout, you need to change the layout node to LinearLayout, the basic format is as follows:
<LinearLayout xmlns:android="http://schemas.android.com/apk/res/android"
    xmlns:app="http://schemas.android.com/apk/res-auto"
    xmlns:tools="http://schemas.android.com/tools"
    android:layout_width="match_parent"
    android:layout_height="match_parent"
    tools:context=".MainActivity">
 ....

</LinearLayout>
2. Common properties of LinearLayout
2.1 orientation attribute
In linear layout, controls are arranged in two directions, horizontal and vertical, and the direction of control arrangement is android:orientationcontrolled by an attribute, which needs to be added to LinearLayoutthe attribute of the mark.
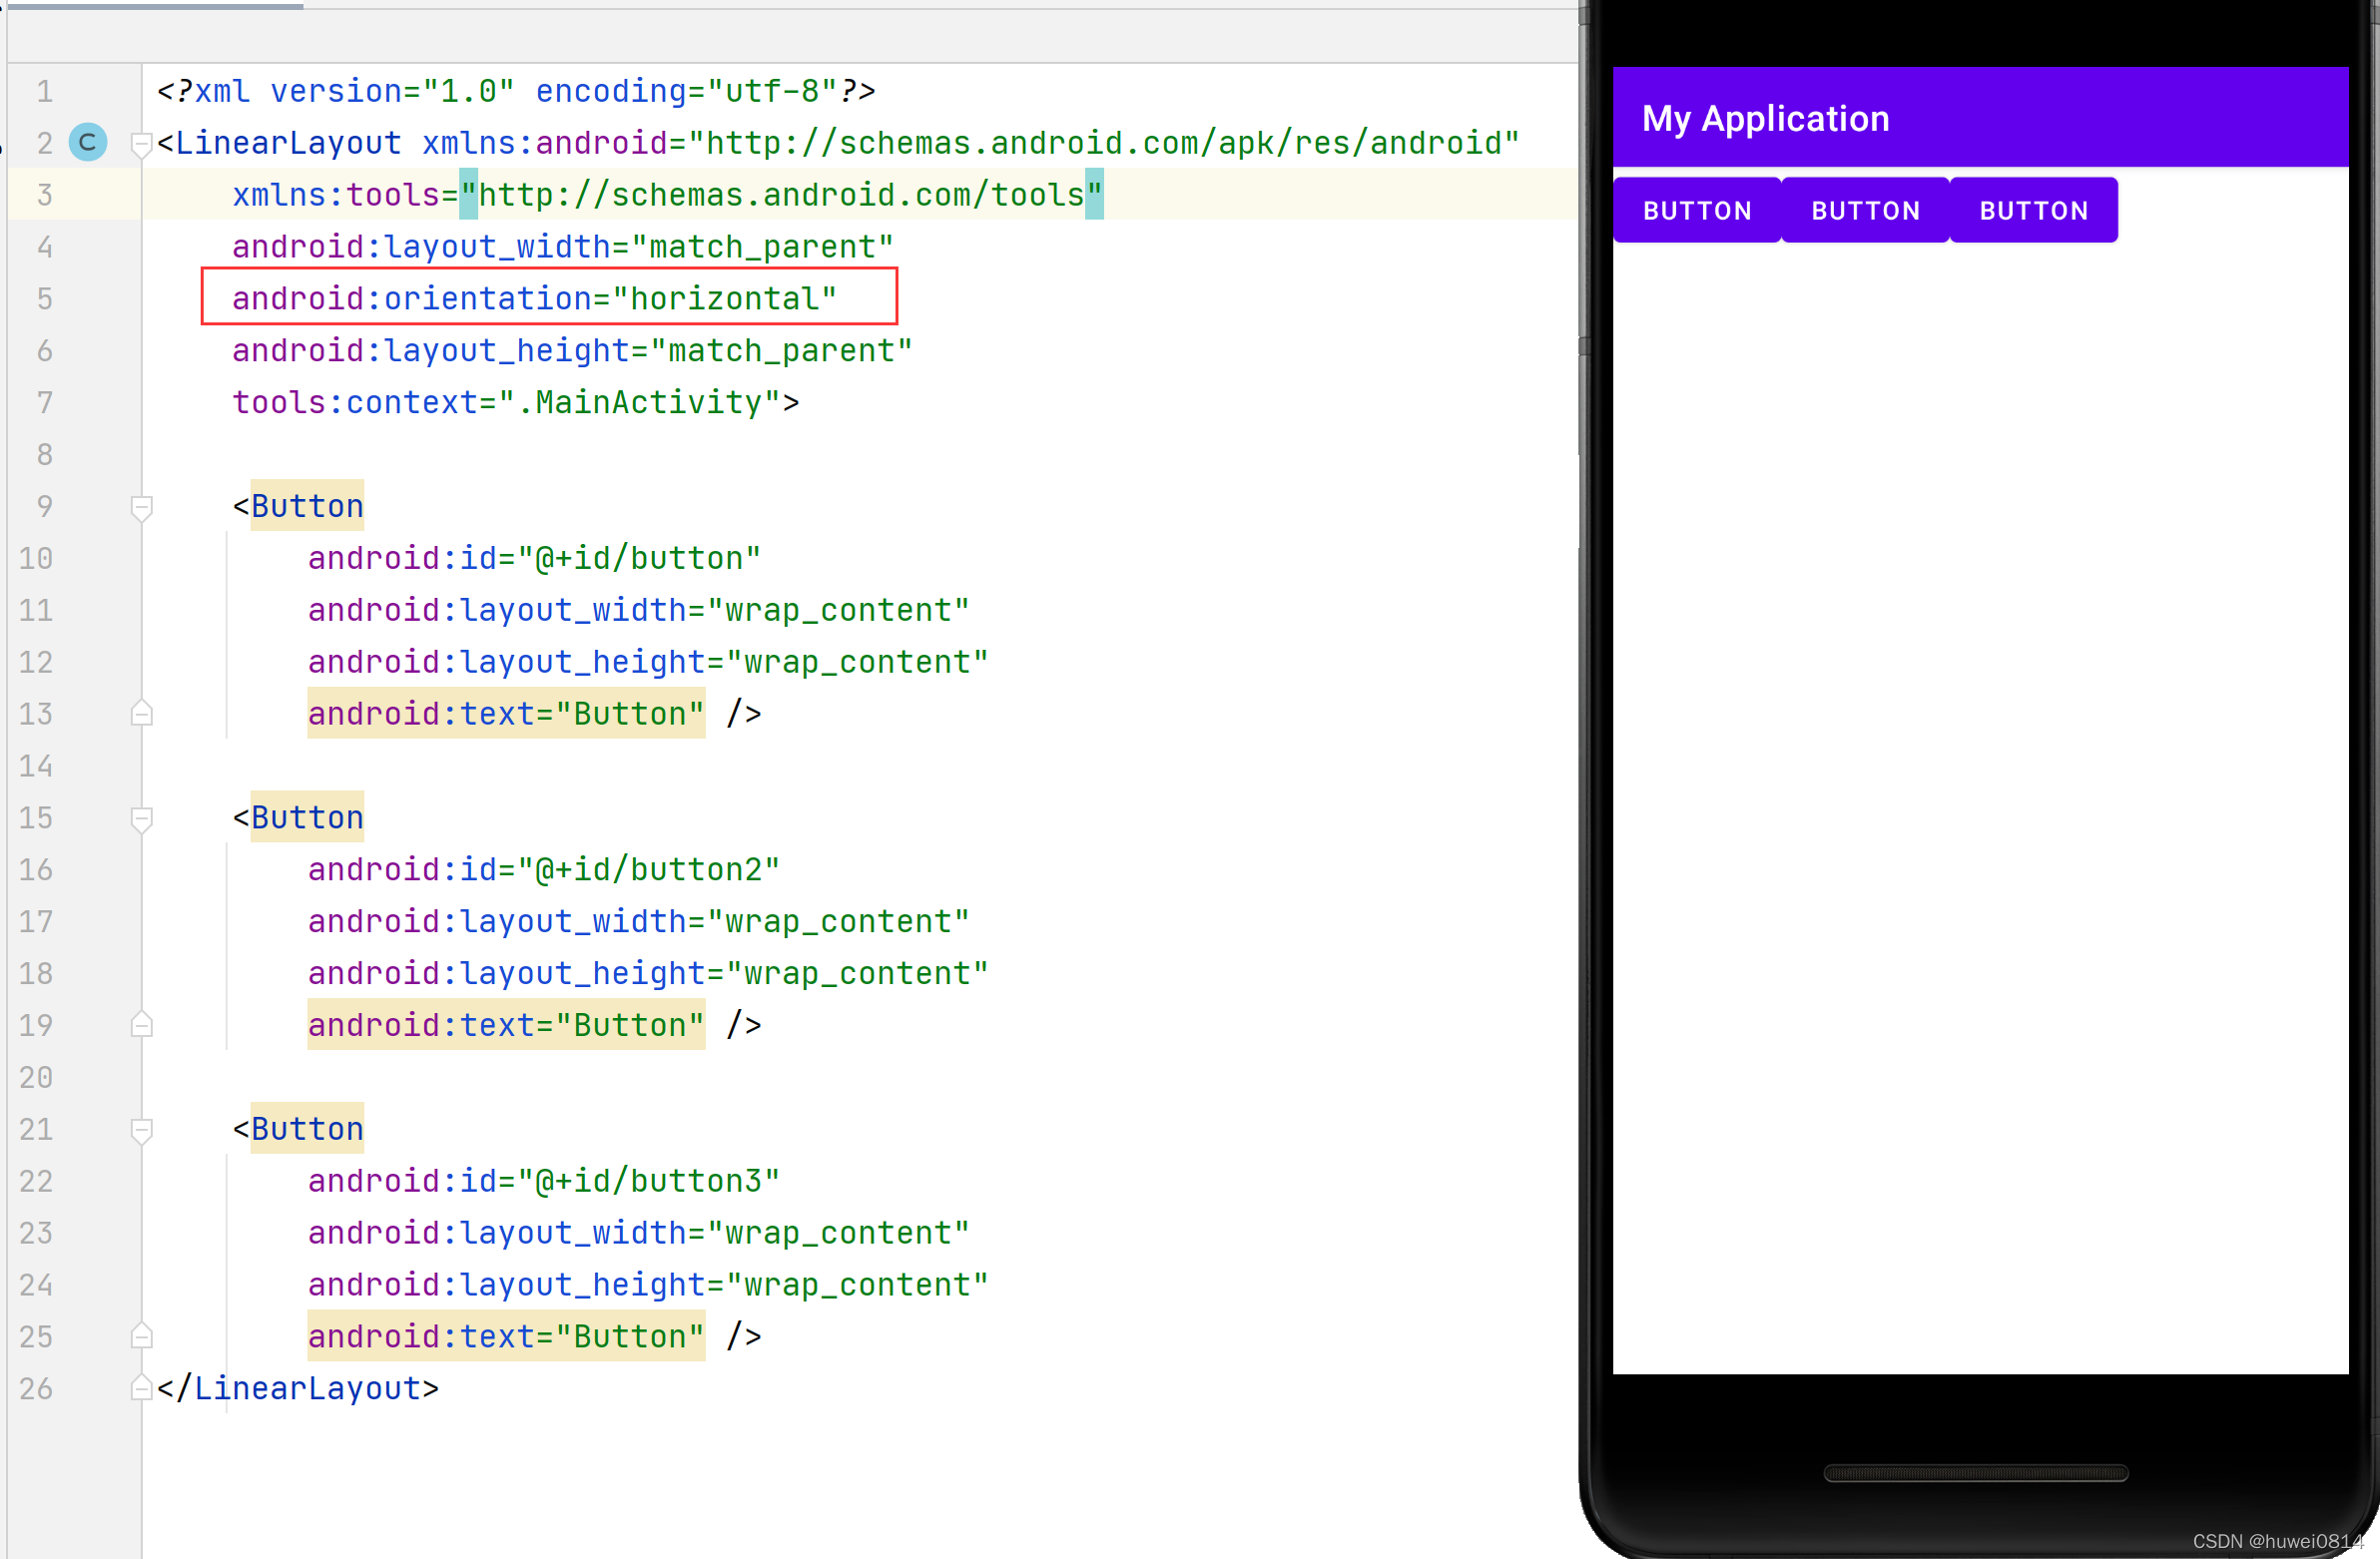
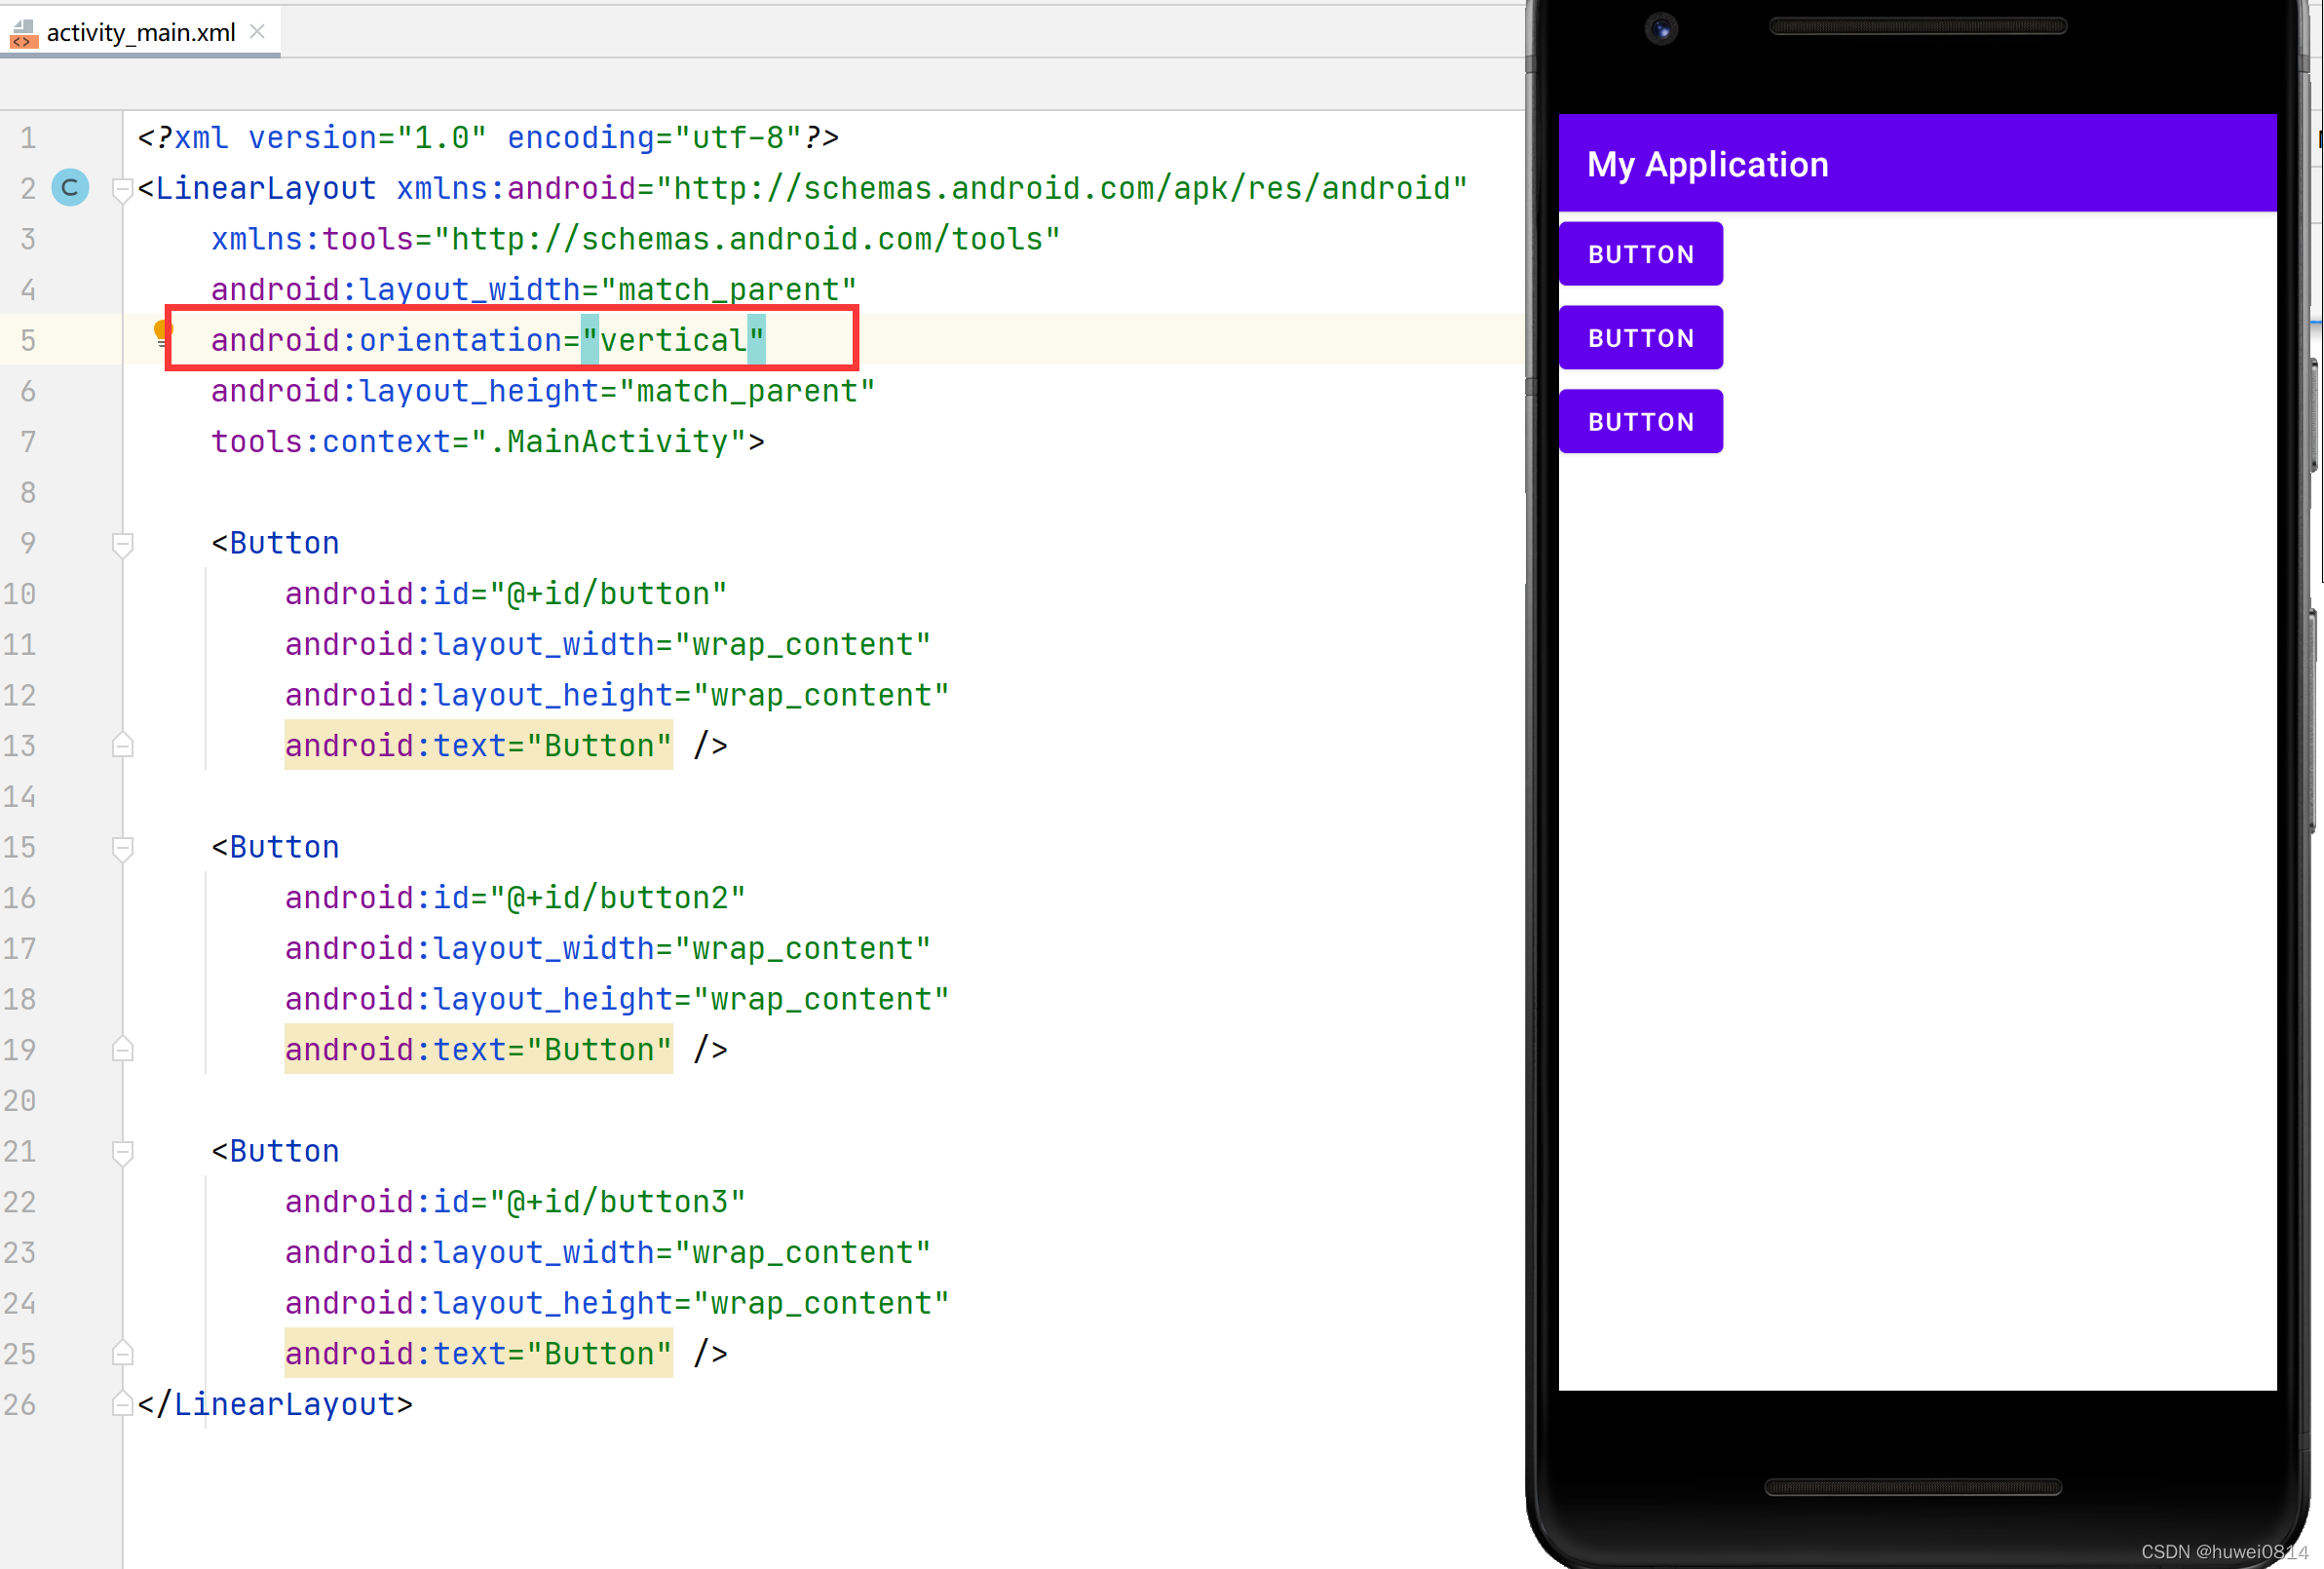
As can be seen from the figure above, if orientationthe property value is set to horizontal, the controls will 从左往右be arranged in the horizontal direction, and if orientationthe property value is set to , verticalthe controls will be arranged in the vertical direction 从上往下.
2.2 Gravity property
The controls in the linear layout are 从左往右arranged or 从上往下aligned by default. If you want the controls in the linear layout to be aligned to the right edge or bottom, you can use gravityproperties to control them.
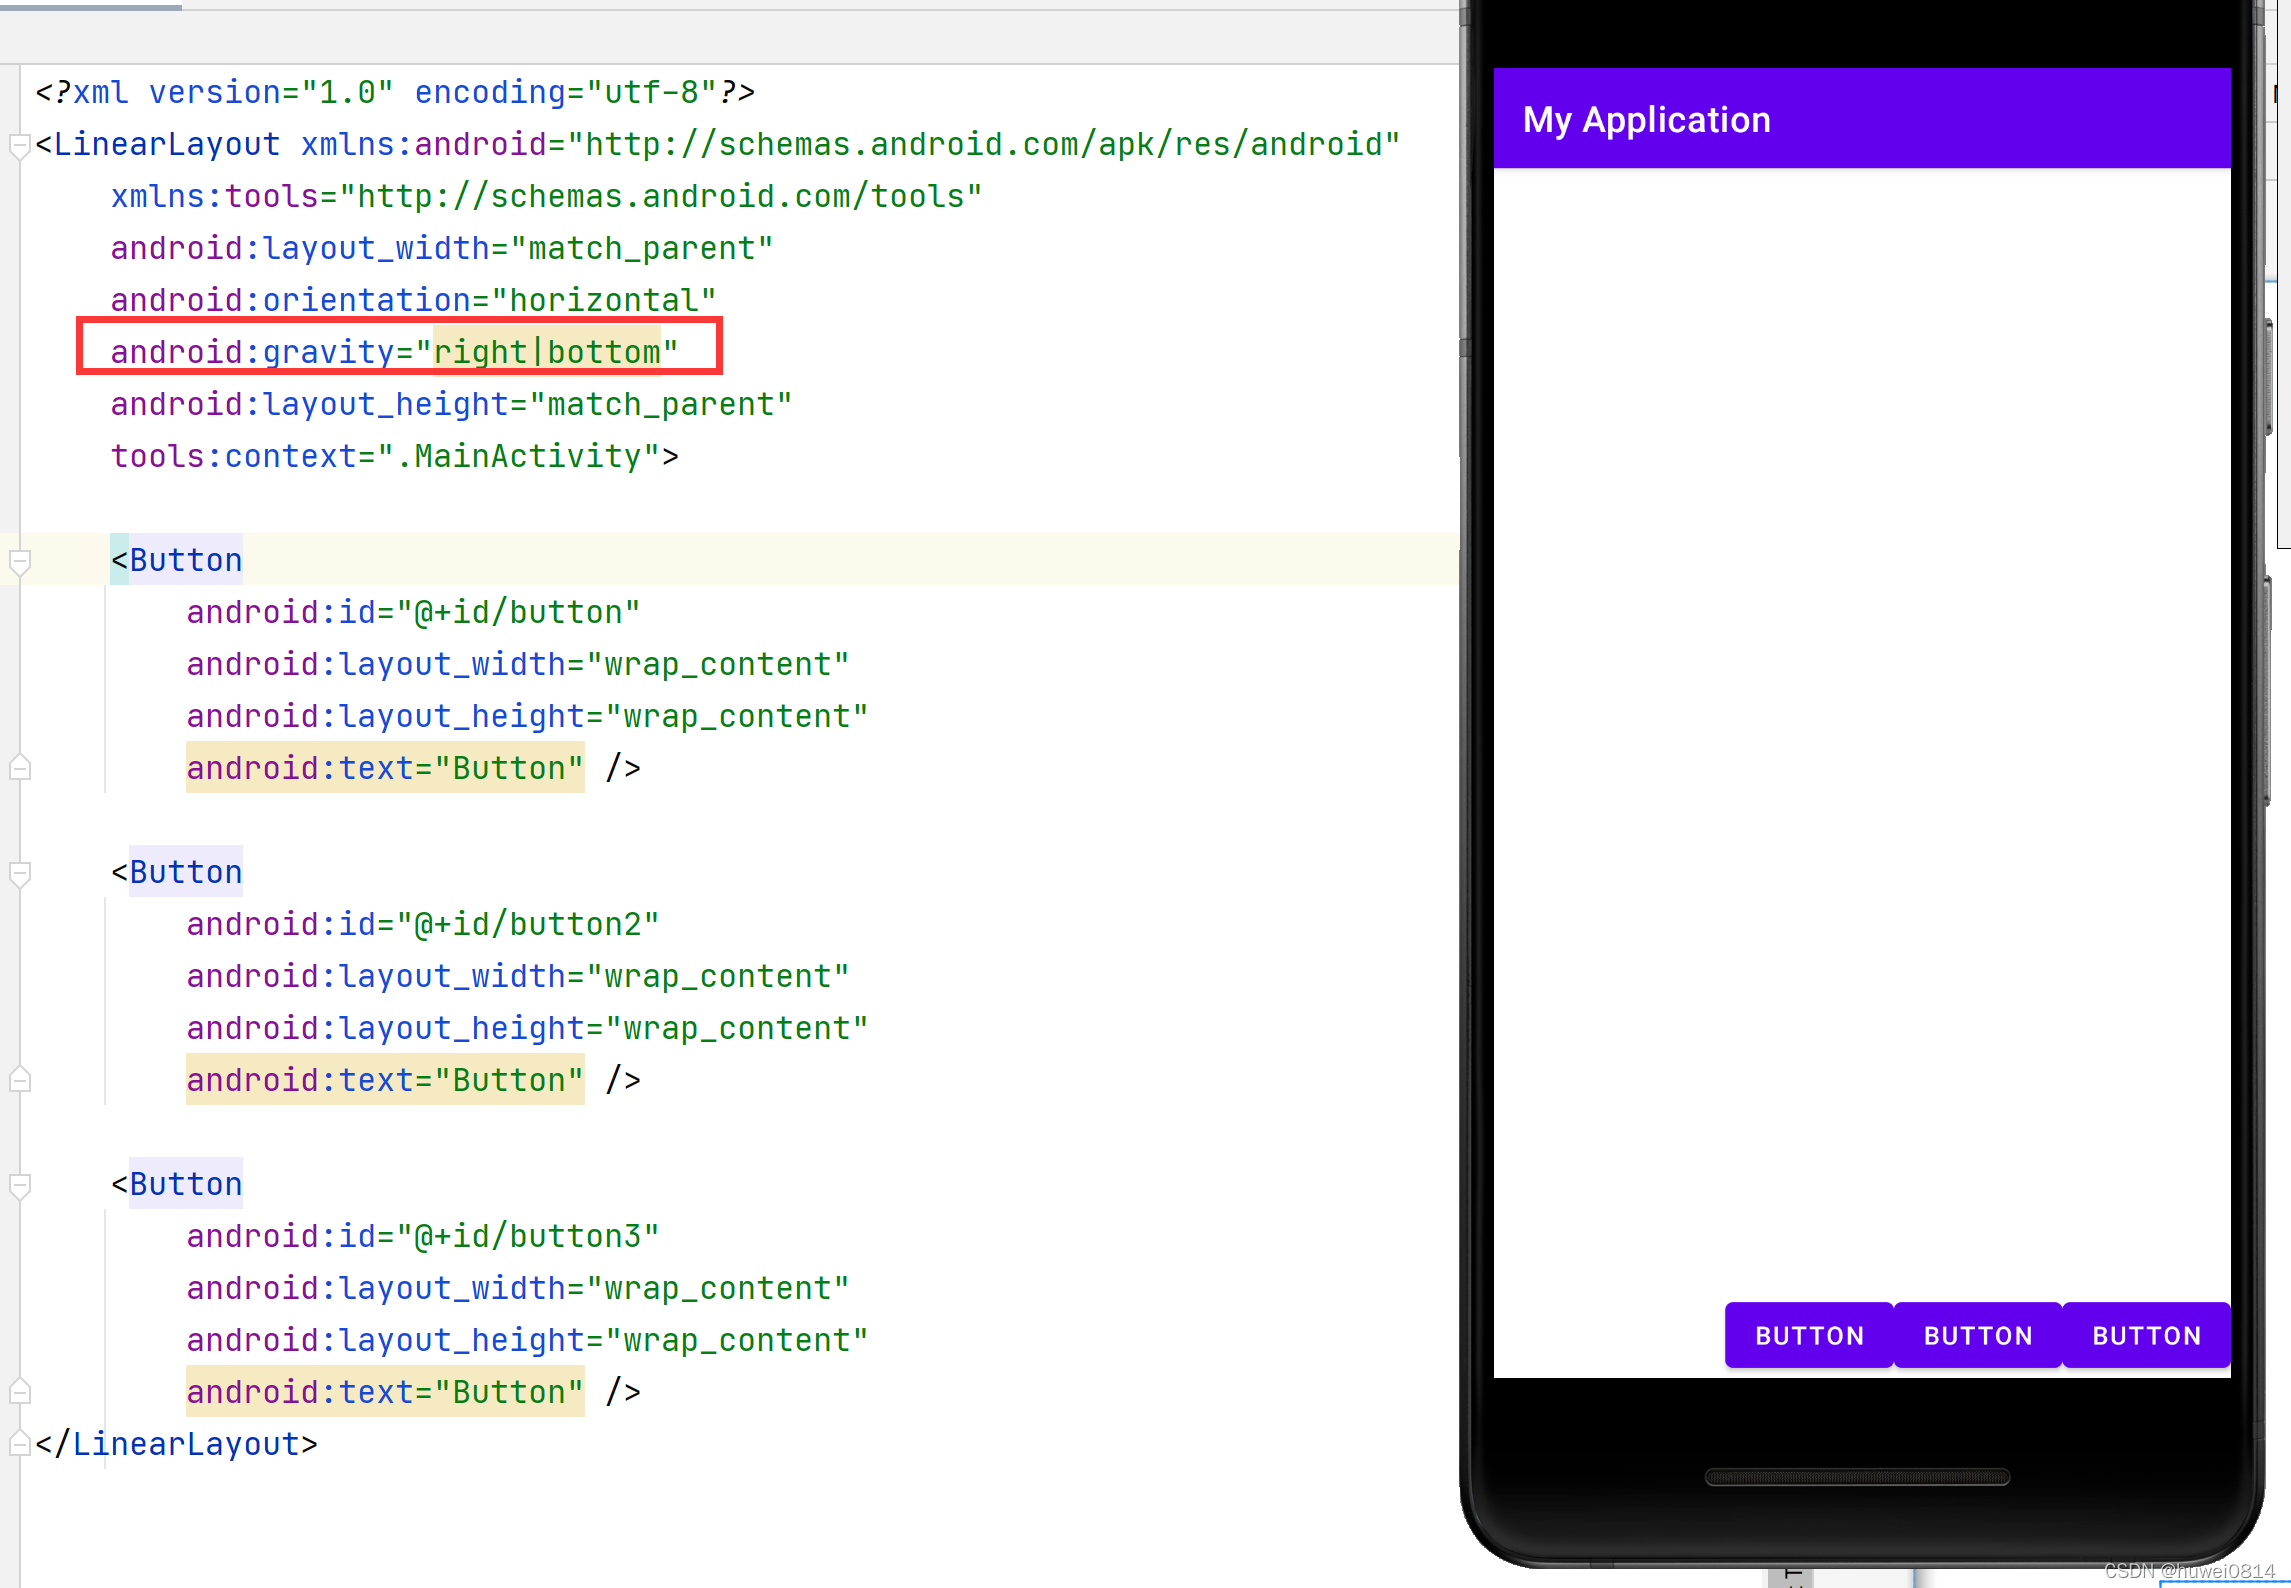
However, this attribute value is not only LinearLayoutavailable in , other layouts can also take effect with this attribute.
2.3 layout_weight attribute
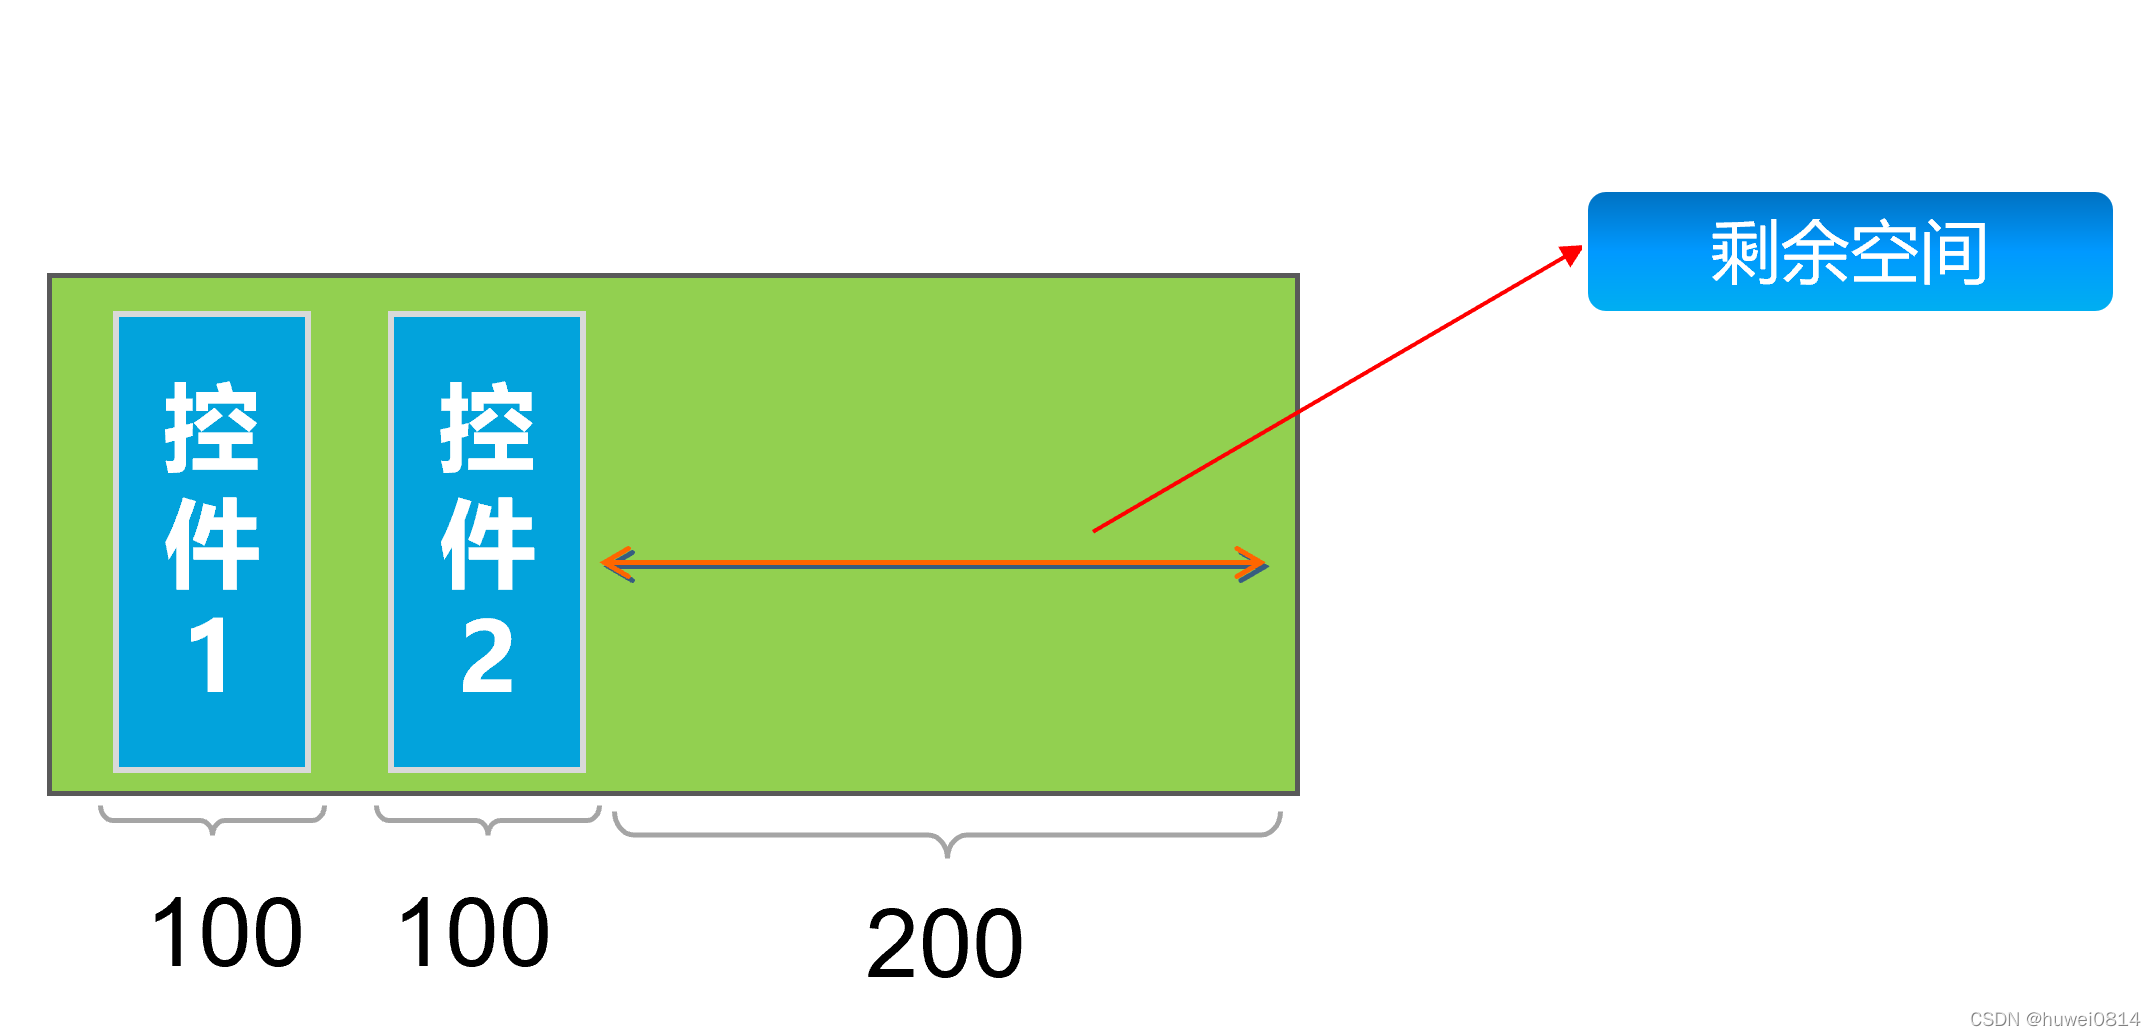
LinearLayoutAnother commonly used attribute in is layout_weightthat this attribute needs to be added to LinearLayoutthe child control. Its role is to allocate the remaining space in the linear layout to the control.
As shown in the figure below, when no layout_weightattributes are added to the control, the area where the control does not occupy the linear layout will be vacated.
<?xml version="1.0" encoding="utf-8"?>
<LinearLayout xmlns:android="http://schemas.android.com/apk/res/android"
    xmlns:tools="http://schemas.android.com/tools"
    android:layout_width="400dp"
    android:layout_height="300dp"
    android:background="@color/teal_200"
    android:orientation="horizontal"
    tools:context=".MainActivity">

    <Button
        android:id="@+id/button"
        android:layout_width="100dp"
        android:layout_height="wrap_content"
        android:text="Button" />

    <Button
        android:id="@+id/button2"
        android:layout_width="wrap_content"
        android:layout_height="wrap_content"
        android:text="Button" />

</LinearLayout>
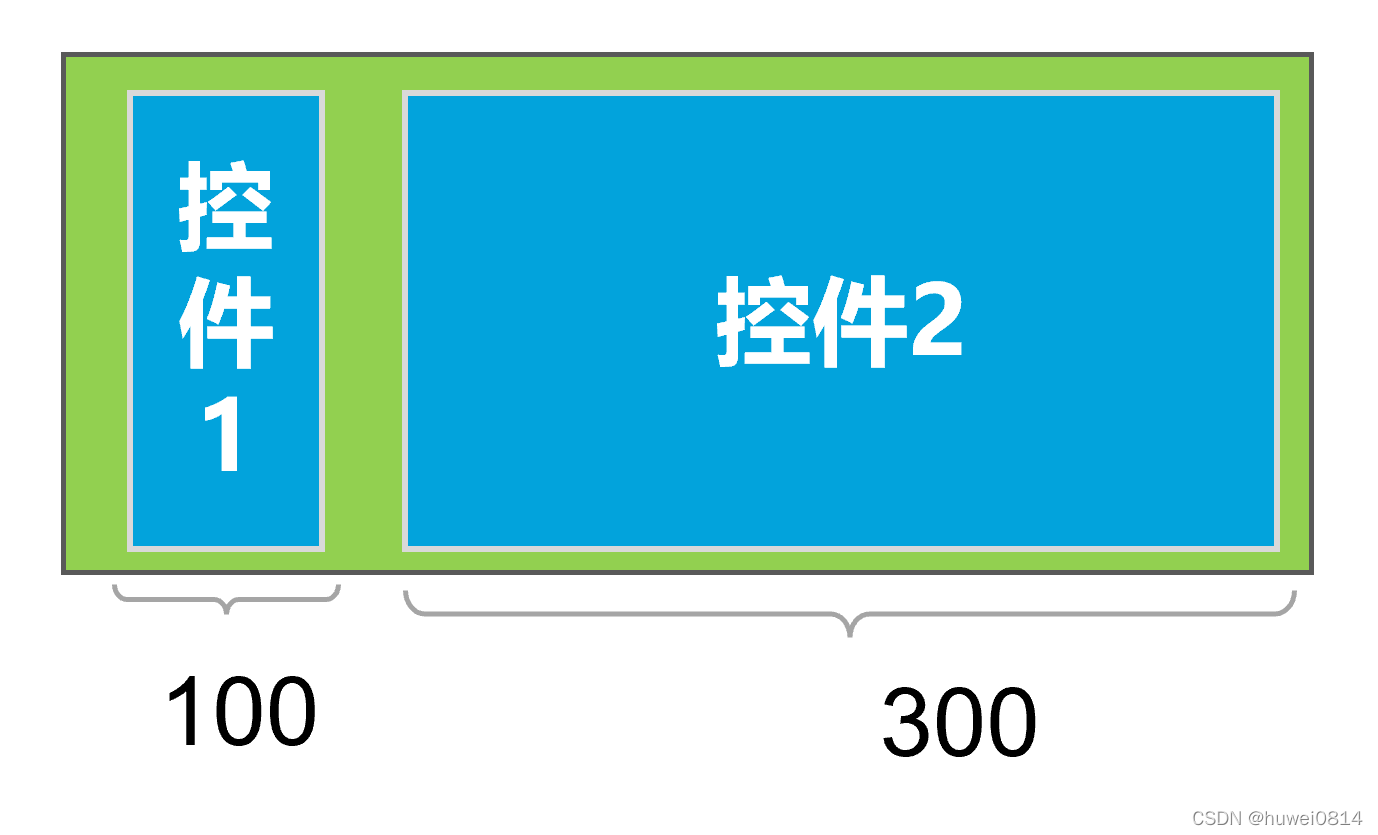
After adding the control button2 android:layout_weight="1", it will fill up the remaining space of the linear layout.
<?xml version="1.0" encoding="utf-8"?>
<LinearLayout xmlns:android="http://schemas.android.com/apk/res/android"
    xmlns:tools="http://schemas.android.com/tools"
    android:layout_width="400dp"
    android:layout_height="300dp"
    android:background="@color/teal_200"
    android:orientation="horizontal"
    tools:context=".MainActivity">
    <Button
        android:id="@+id/button"
        android:layout_width="100dp"
        android:layout_height="wrap_content"
        android:text="Button" />
    <Button
        android:id="@+id/button2"
        android:layout_weight="1"
        android:layout_width="wrap_content"
        android:layout_height="wrap_content"
        android:text="Button" />

</LinearLayout>
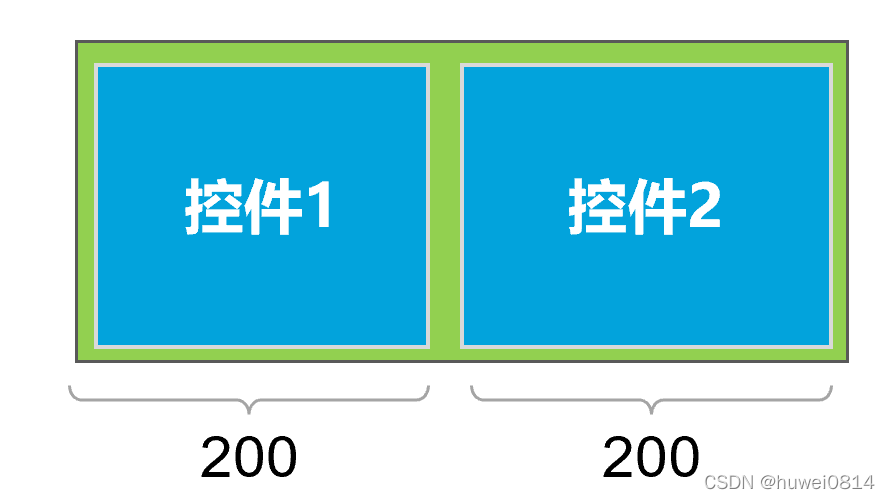
If button1both are given and button2added android:layout_weight="1", the two controls will evenly distribute the remaining space.
<?xml version="1.0" encoding="utf-8"?>
<LinearLayout xmlns:android="http://schemas.android.com/apk/res/android"
    xmlns:tools="http://schemas.android.com/tools"
    android:layout_width="400dp"
    android:layout_height="300dp"
    android:background="@color/teal_200"
    android:orientation="horizontal"
    tools:context=".MainActivity">

    <Button
        android:id="@+id/button1"
        android:layout_width="100dp"
        android:layout_weight="1"
        android:layout_height="wrap_content"
        android:text="Button" />

    <Button
        android:id="@+id/button2"
        android:layout_weight="1"
        android:layout_width="wrap_content"
        android:layout_height="wrap_content"
        android:text="Button" />

</LinearLayout>
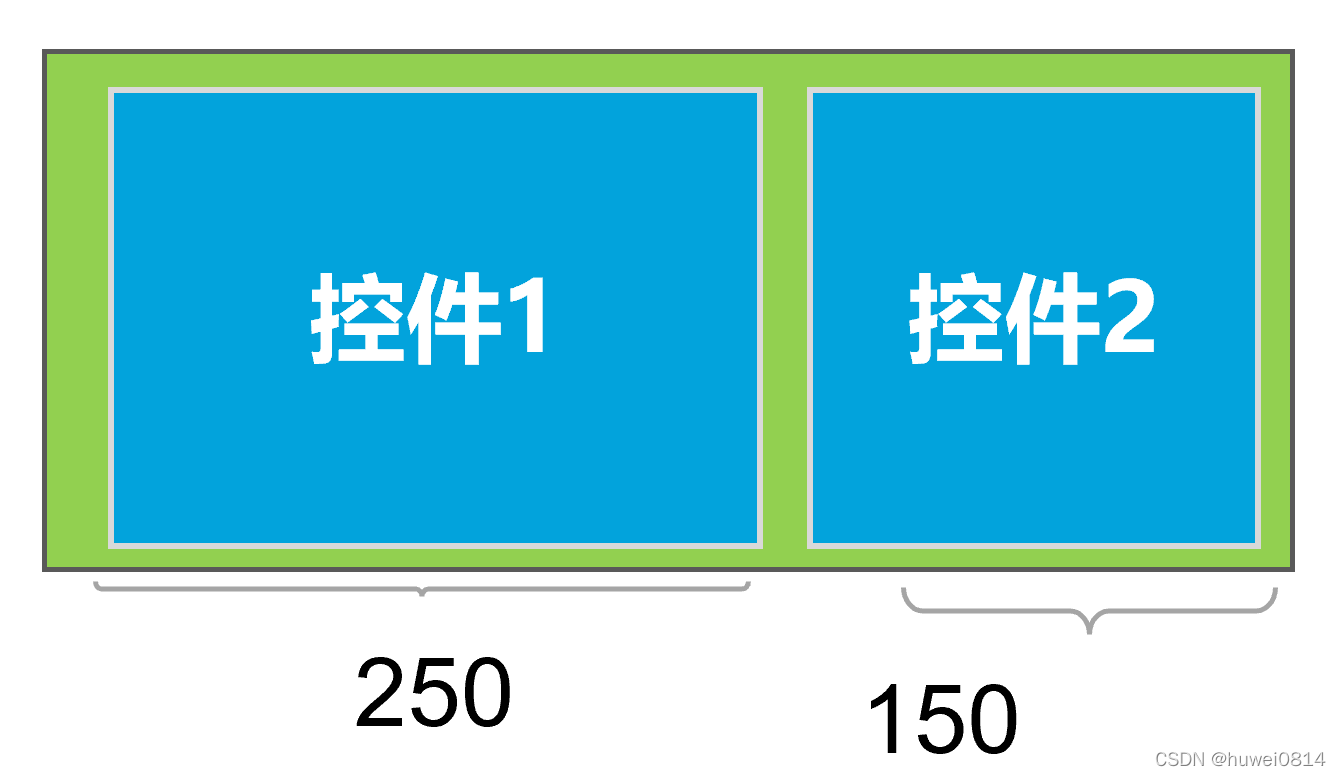
If you button1add android:layout_weight="3", button2add android:layout_weight="1", since the remaining space is 200, button1and button2will allocate the remaining space in a ratio of 3:1.
<?xml version="1.0" encoding="utf-8"?>
<LinearLayout xmlns:android="http://schemas.android.com/apk/res/android"
    xmlns:tools="http://schemas.android.com/tools"
    android:layout_width="400dp"
    android:layout_height="300dp"
    android:background="@color/teal_200"
    android:orientation="horizontal"
    tools:context=".MainActivity">

    <Button
        android:id="@+id/button1"
        android:layout_width="100dp"
        android:layout_weight="3"
        android:layout_height="wrap_content"
        android:text="Button" />

    <Button
        android:id="@+id/button2"
        android:layout_weight="1"
        android:layout_width="wrap_content"
        android:layout_height="wrap_content"
        android:text="Button" />

</LinearLayout>