1. Brief description
After preparing for the above two parts, you can now install the IC EDA tool, configure the EDA environment, and have a basic simulation script, and finally run a project to verify whether the entire EDA environment is normal. Currently, we demonstrate the installation of vcs and verdi, other tools can be installed by themselves, and the installation of other IC tools and FPGA will be added later.
2. Preparation
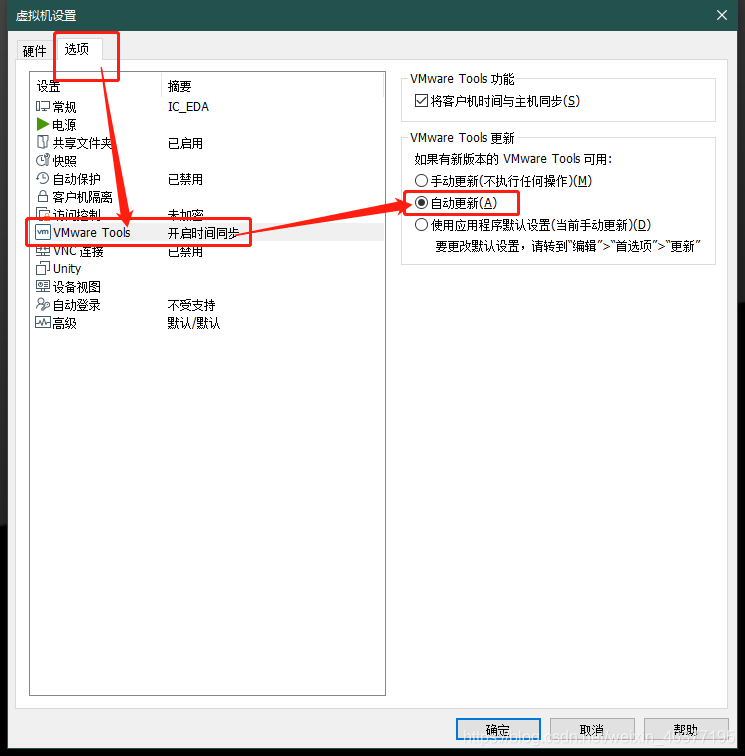
1) Configure vmware Tools installation
Shared files need to install vmware Tools in order to be used normally, this step must be set to install.

Choose to update Tools automatically. If it is not set here, after starting the virtual machine, the item "Reinstall Tools" is grayed out;
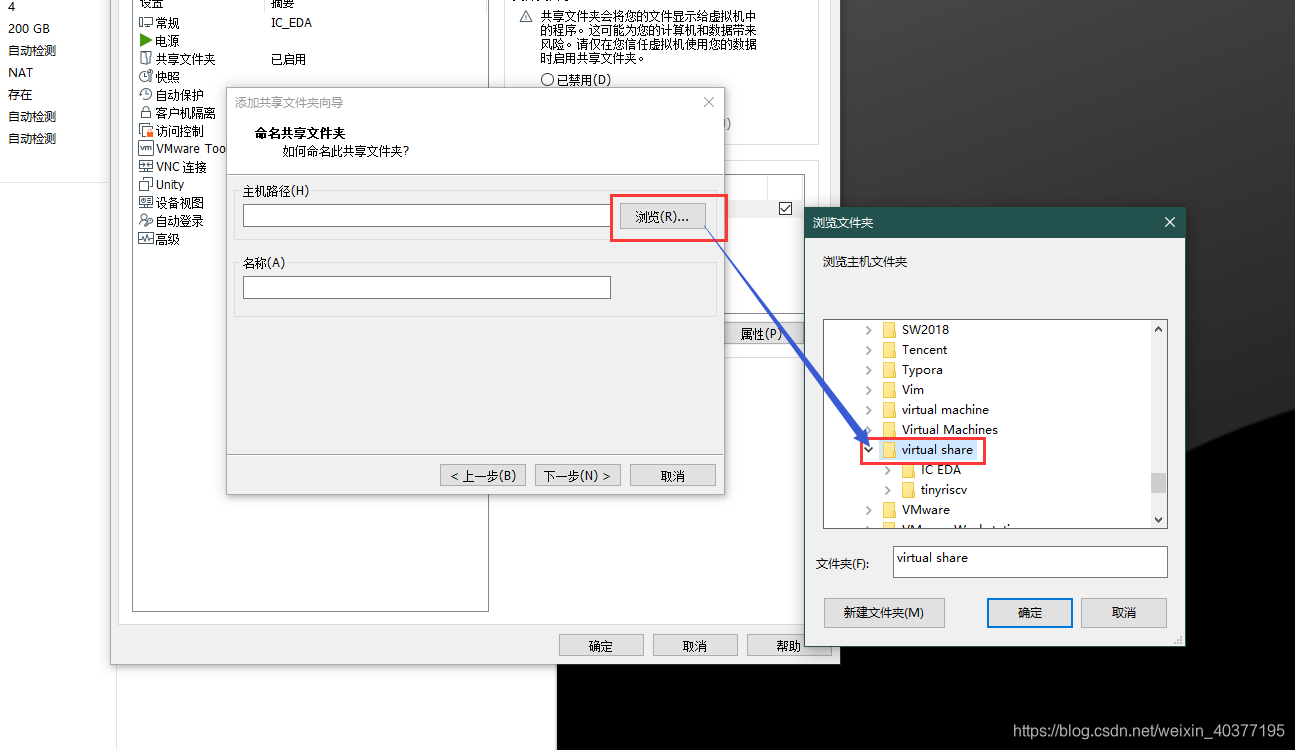
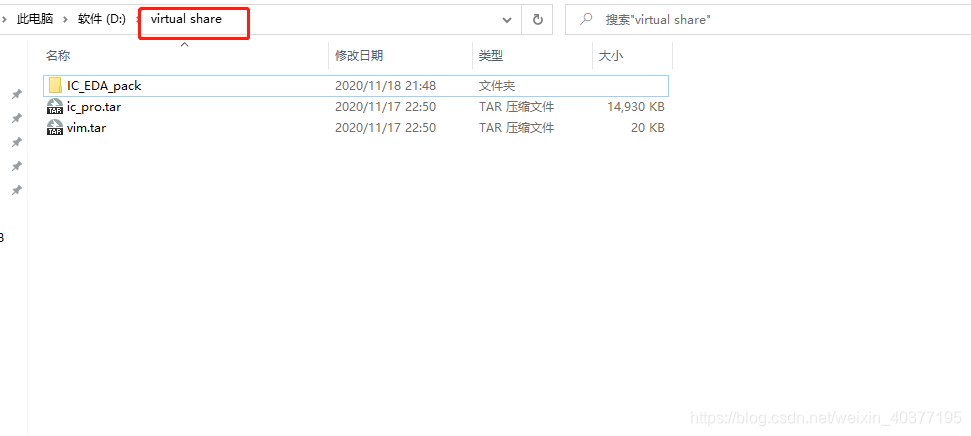
2) Set up shared files
In order to facilitate the copying of files, we need to set up shared files. Later we need to copy the installation package, project and other files into the virtual machine;

any location is fine , mine is on the D drive
3) Install VMware Tools
After completion of the setting on the virtual machine to note here: In the login screen you need to click on the menu bar of the virtual machine -> reinstall Tools VMware , because after you log into this option is likely to be grayed out, I used to follow steps 1) were Can solve the gray problem of reinstalling VMware Tools .
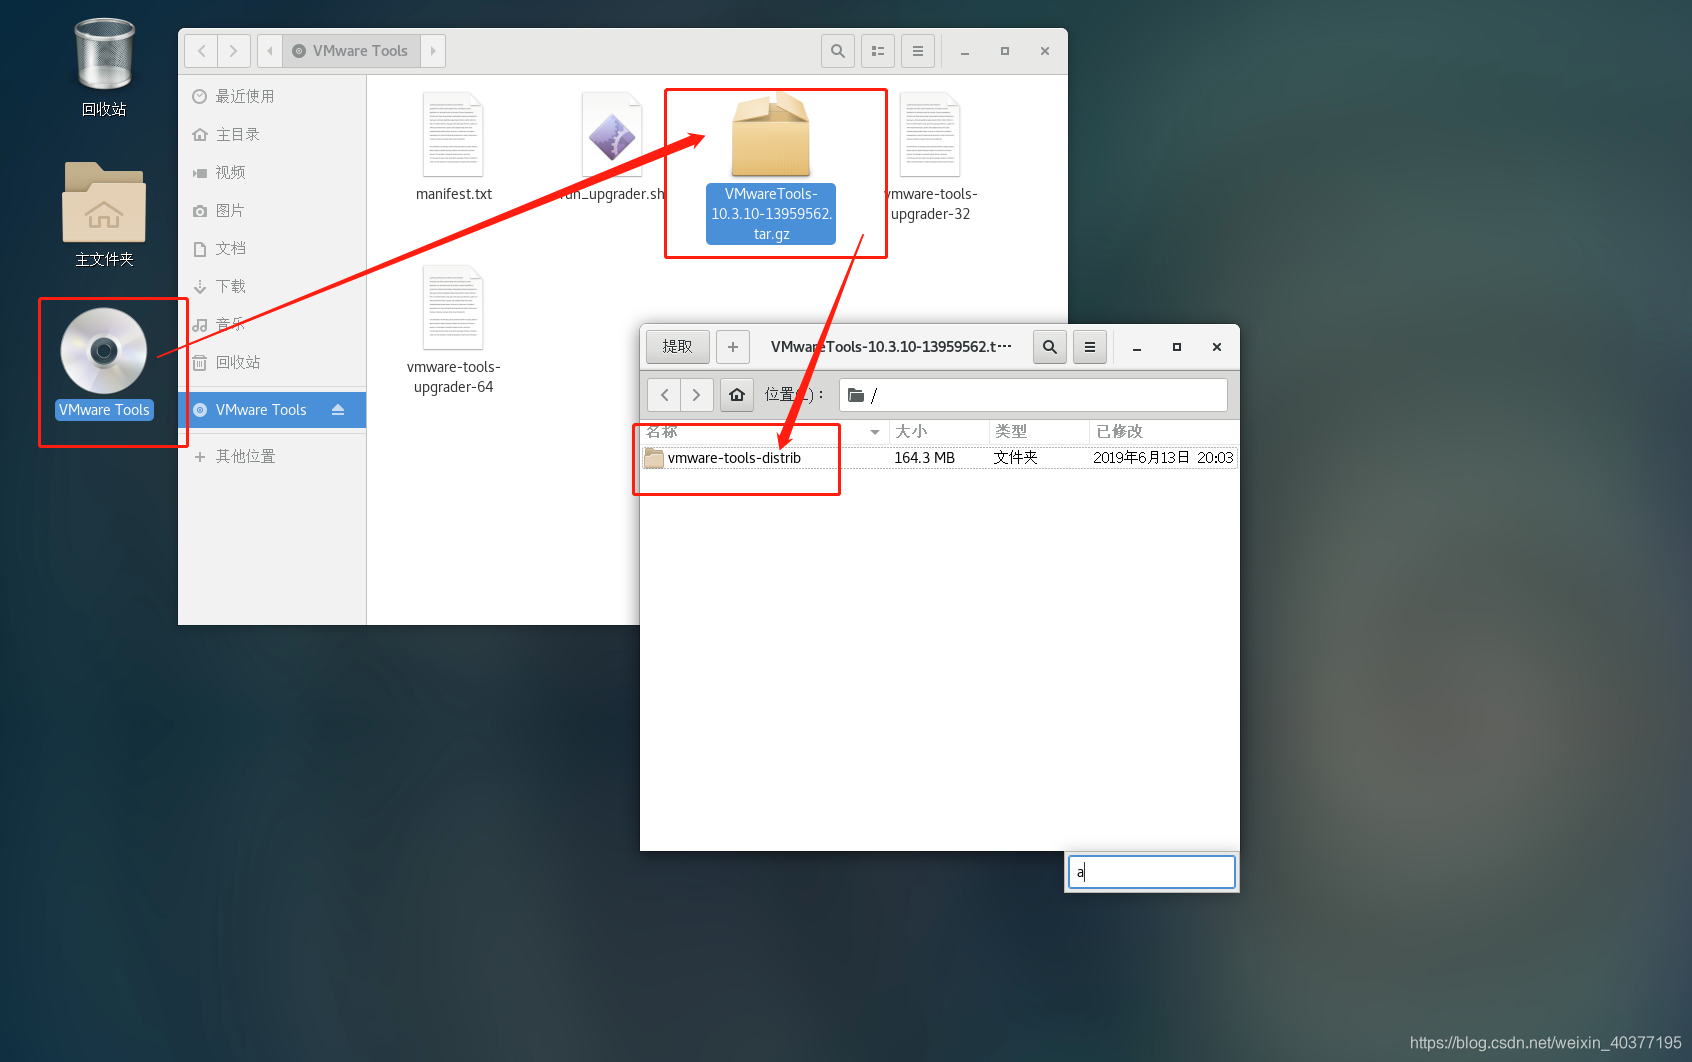
Then log in to the desktop, double-click the CD icon to open the desktop, double-click to open the compressed package, and finally drag the file to the desktop to complete the decompression.
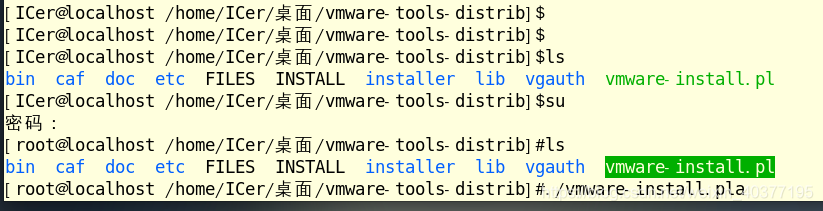
Open the terminal, enter the directory you just unzipped, use the su command to enter the super user, run the following command to install, you will be prompted to confirm during the installation process, all enter y , and then press Enter.
./vmware-install.pl
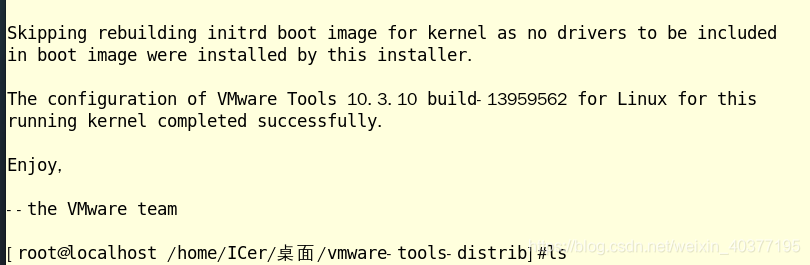
If the following information is printed, the installation is successful;
4) Copy in the file
Copy the following files into the virtual share directory under the window system. The files are: vcs, verdi and other IC installation packages, ic projects, and vim plug-ins.
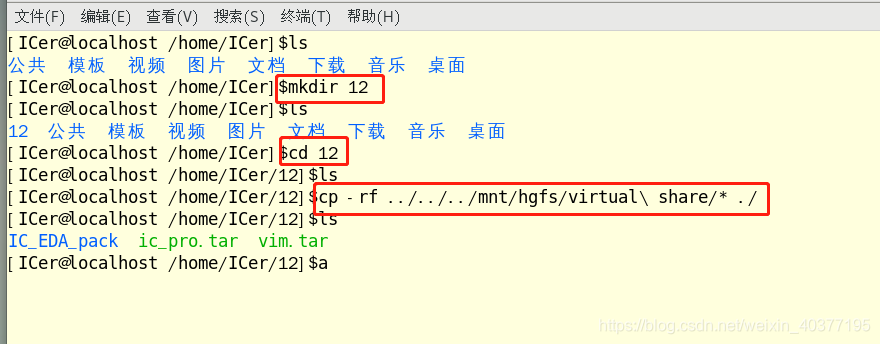
Enter the virtual machine, open the terminal, first create a new folder, the name should not be Chinese, then enter the new folder, copy all the files from the shared file directory. The specific order is as follows, the file comparison conference will wait a while:
mkdir 12
cd 12
cp -rf ../../../mnt/hgfs/virtual\ share/* ./
3. Installation
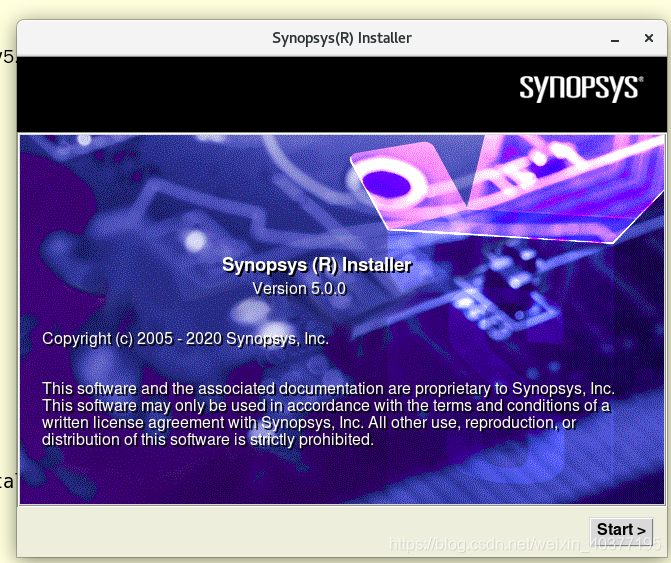
1) Install installer
Enter the synopsysinstaller_v5.0 directory, run the .run file first, and then prompt you to enter the installation path, the default is to press Enter in the current directory; after completion, run the generated setup.sh file directly. But the following error will appear.
sudo ./SynopsysInstaller_v5.0.run
./setup.sh

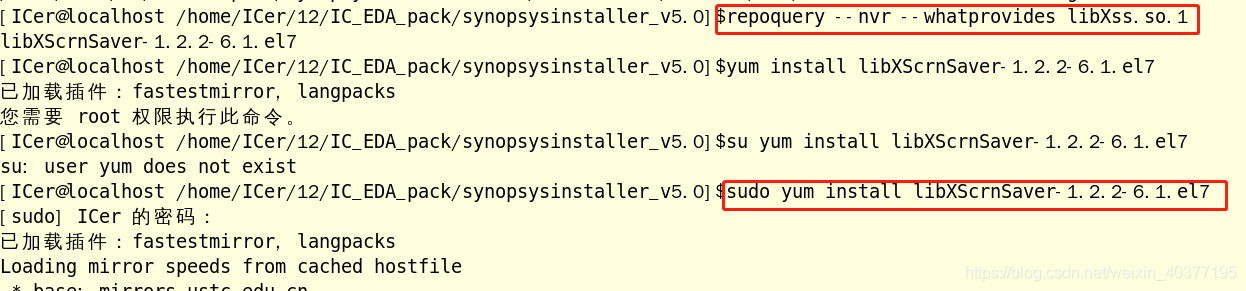
The problem should be the lack of dependent libraries. First find out which installation package this library comes from, and then install it. There will be a prompt during the installation process, just type "y" and press enter.
repoquery --nvr --whatprovides libXss.so.1
sudo yum install libXScrnSaver-1.2.2-6.1.el7
After the dependent library is installed, run "./setup.sh" again and the installation interface will appear.
2) Install IC software
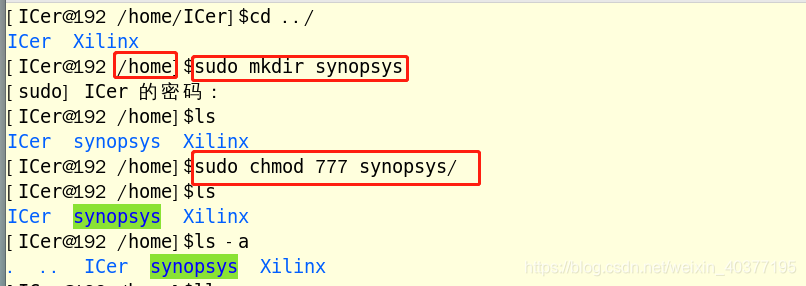
Enter the home directory and create a new synopsys folder, and then synopsys software will be installed in this directory; home is not under a normal user and requires super user authority, and the software installation must be under a normal user, so this file needs to be added with authority turn on;
sudo mkdir synopsys
sudo chmod 777 synopsys
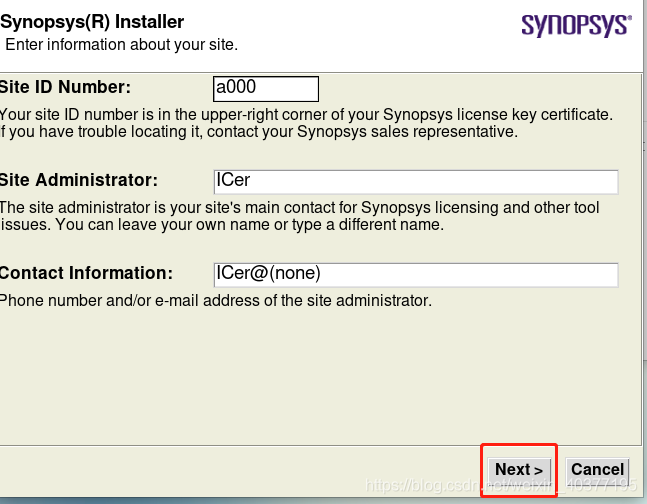
Then go back to the install directory, run "./setup.sh" to start the installation, click start; by

default, click next.
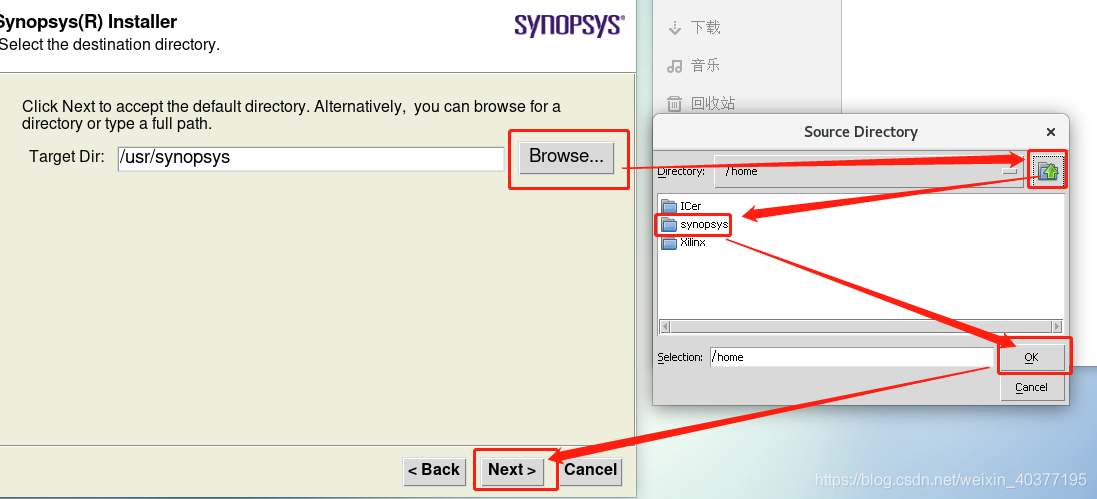
Here you need to select the path of the installation package, we first install scl, select and click ok;
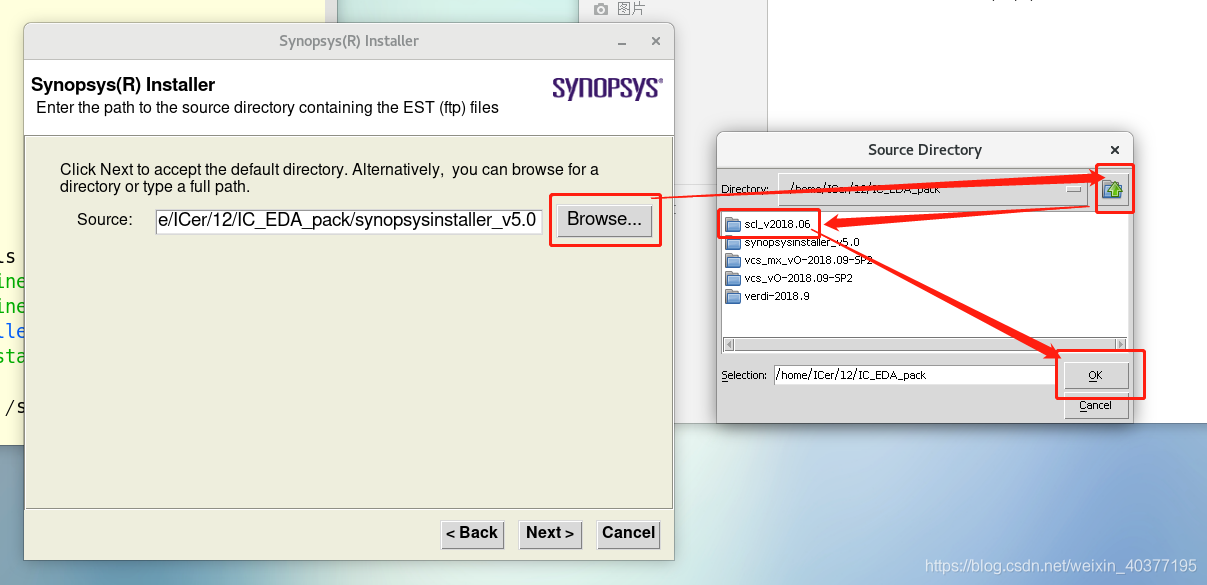
here select our installation path, select the synopsys directory we created above.
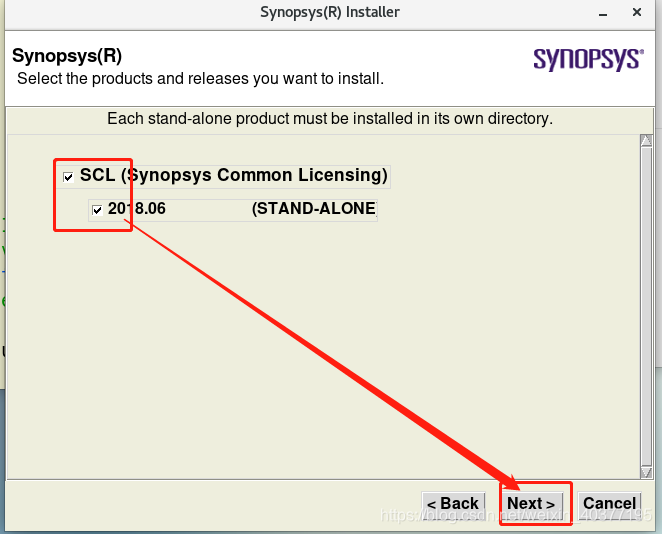
Select all, next.
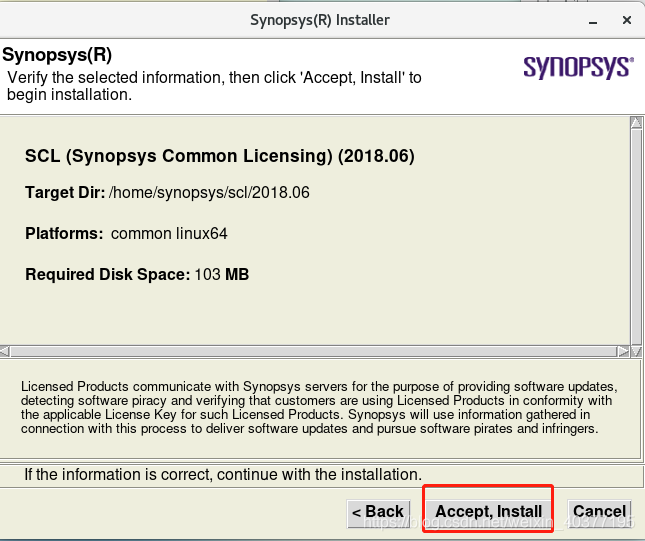
The installation is confirmed, there is no problem, click next;

click accept and install, the
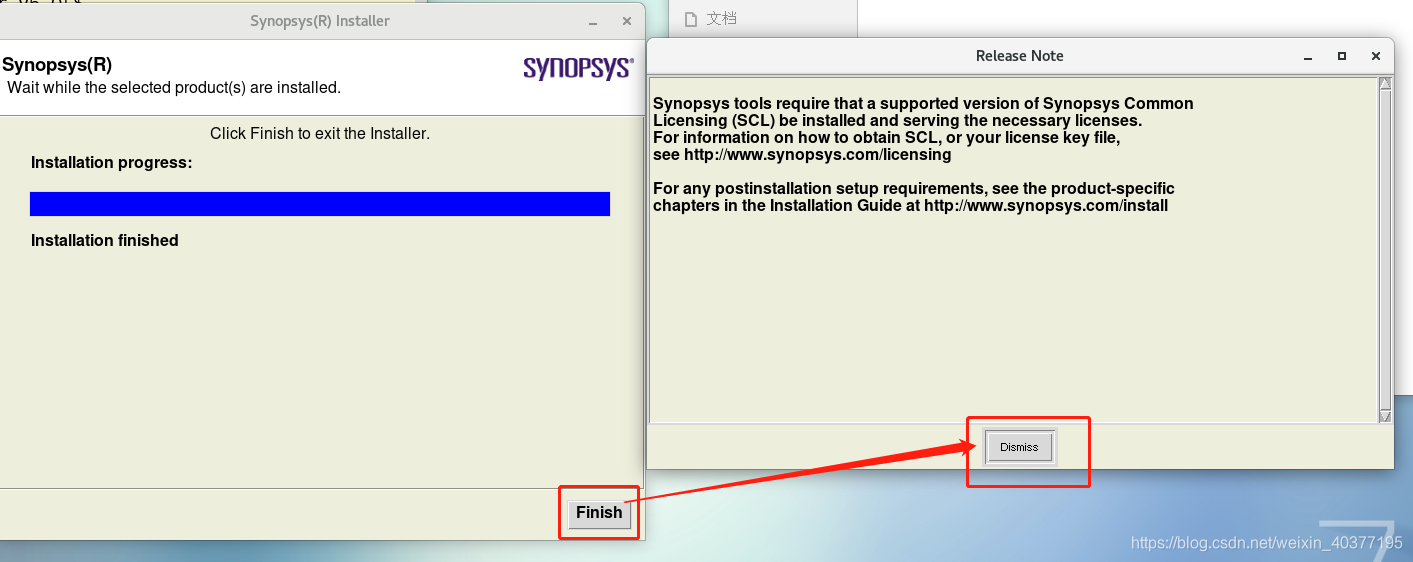
installation is complete, click Finish, and then click Dismiss to complete;
other synopsys software is the same step, install them in sequence!
4. License generation, environment and activation
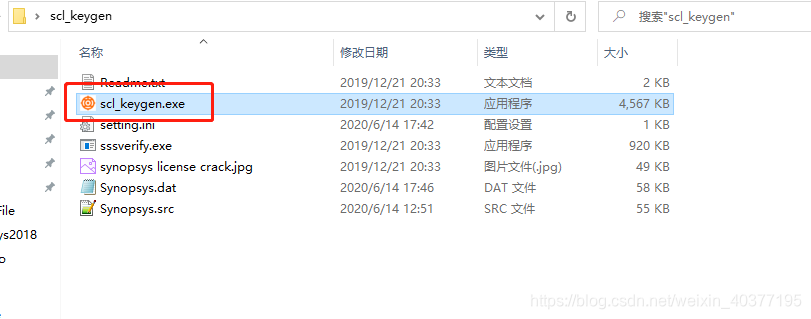
1) Start the scl_keygen generator
This needs to be done under the window, double-click to run scl_keygen.exe.
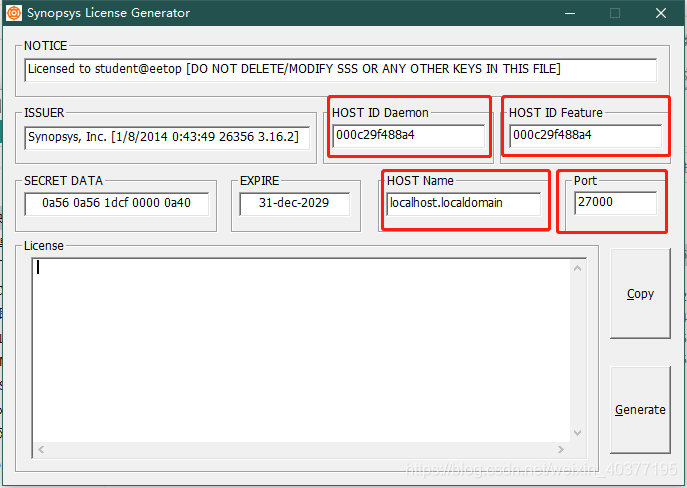
These 4 information need to be filled in, HOST ID Daemon and HOST ID Feature are filled in the same, Port select 27000.
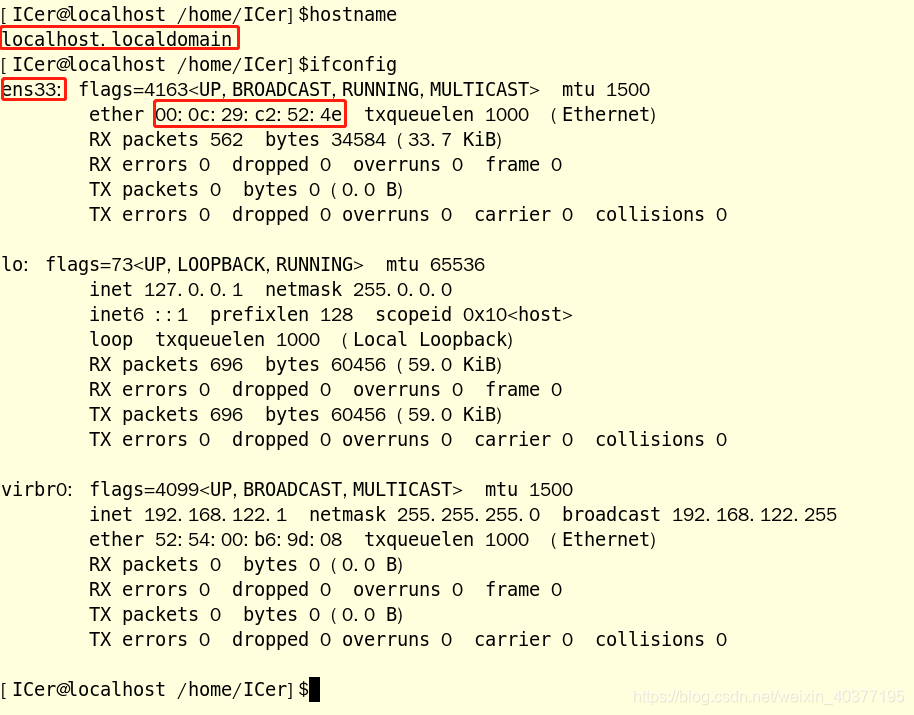
Enter the virtual machine, open the terminal and use the following command to find
hostname
ifconfig
I fill in the following, then click Generate to generate the license to
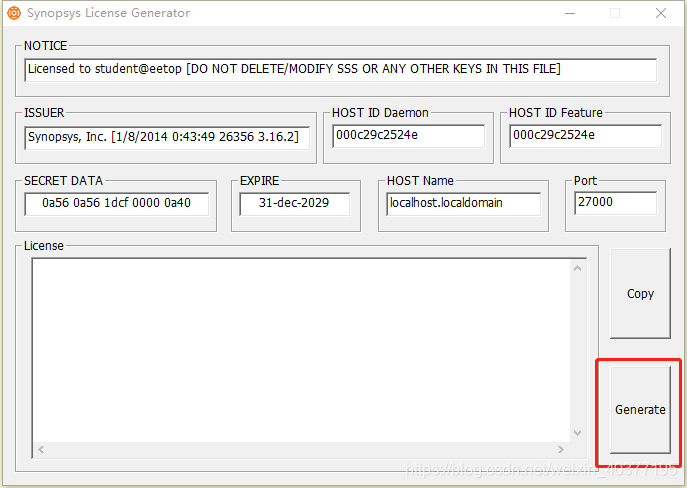
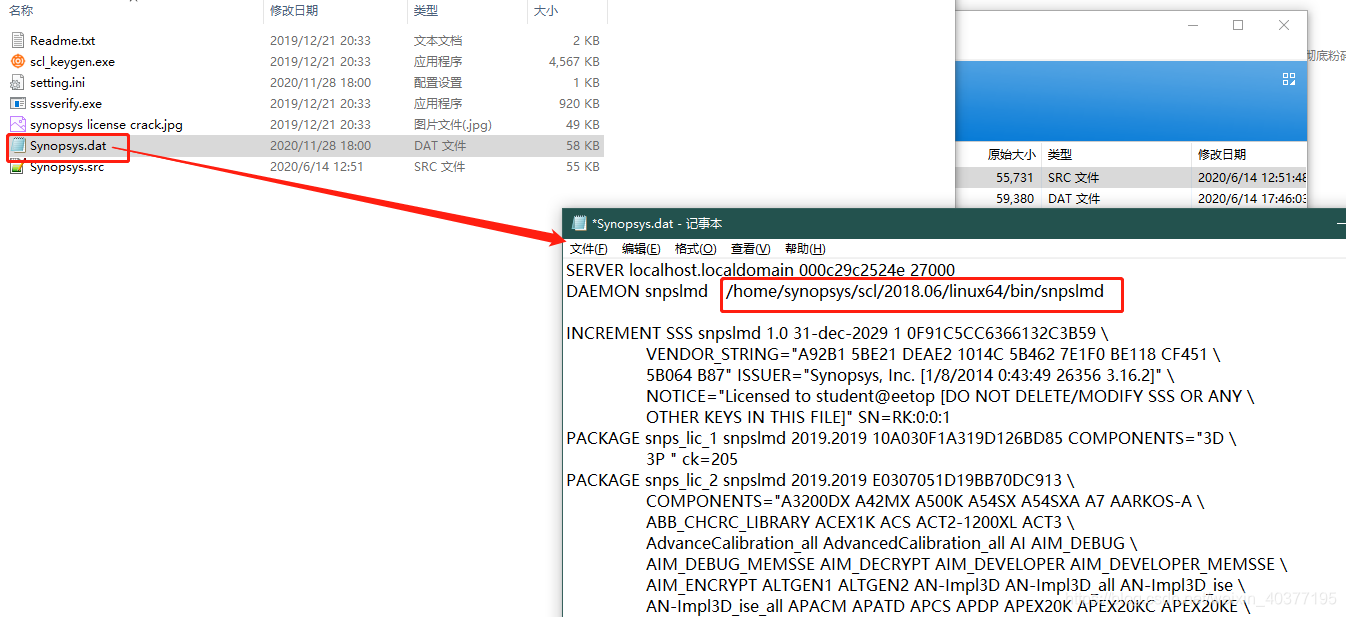
open the generated license file, modify the second line, this needs to be consistent with the scl path in the virtual machine, otherwise the license is invalid. Copy this file to the shared file after modification. This file needs to be placed in the "scl/2018.06/admin/license/" directory at the end, which must be consistent with the path set in the environment.
2) Environment settings
Open the .bashrc environment file and add the following content to correspond to your own installation path. But you need to pay attention to the penultimate line, you need to confirm whether the host name is correct. Save and exit, source it.
export DVE_HOME=/home/synopsys/vcs/O-2018.09-SP2
export VCS_HOME=/home/synopsys/vcs/O-2018.09-SP2
export VCS_MX_HOME=/home/synopsys/vcs-mx/O-2018.09-SP2
export LD_LIBRARY_PATH=/home/synopsys/verdi/Verdi_O-2018.09-SP2/share/PLI/VCS/LINUX64
export VERDI_HOME=/home/synopsys/verdi/Verdi_O-2018.09-SP2
export SCL_HOME=/home/synopsys/scl/2018.06


#dve
PATH=$PATH:$VCS_HOME/gui/dve/bin
alias dve="dve"

#VCS
PATH=$PATH:$VCS_HOME/bin
alias vcs="vcs"

#VERDI
PATH=$PATH:$VERDI_HOME/bin
alias verdi="verdi"

#scl
PATH=$PATH:$SCL_HOME/linux64/bin
export VCS_ARCH_OVERRIDE=linux

#LICENCE
export LM_LICENSE_FILE=[email protected]
alias lmg_synopsys="lmgrd -c /home/synopsys/scl/2018.06/admin/license/Synopsys.dat"
3) Activate
First use the following command to set the open port:
firewall-cmd --zone=public --add-port=27000/tcp --permanent
firewall-cmd --reload
Then enter "lmg_synopsys" to activate it. You need to do this every time you start the virtual machine. But there is a lack of dependent libraries. Enter the following command to install:
lmg_synopsys
yum install redhat-lsb.i686

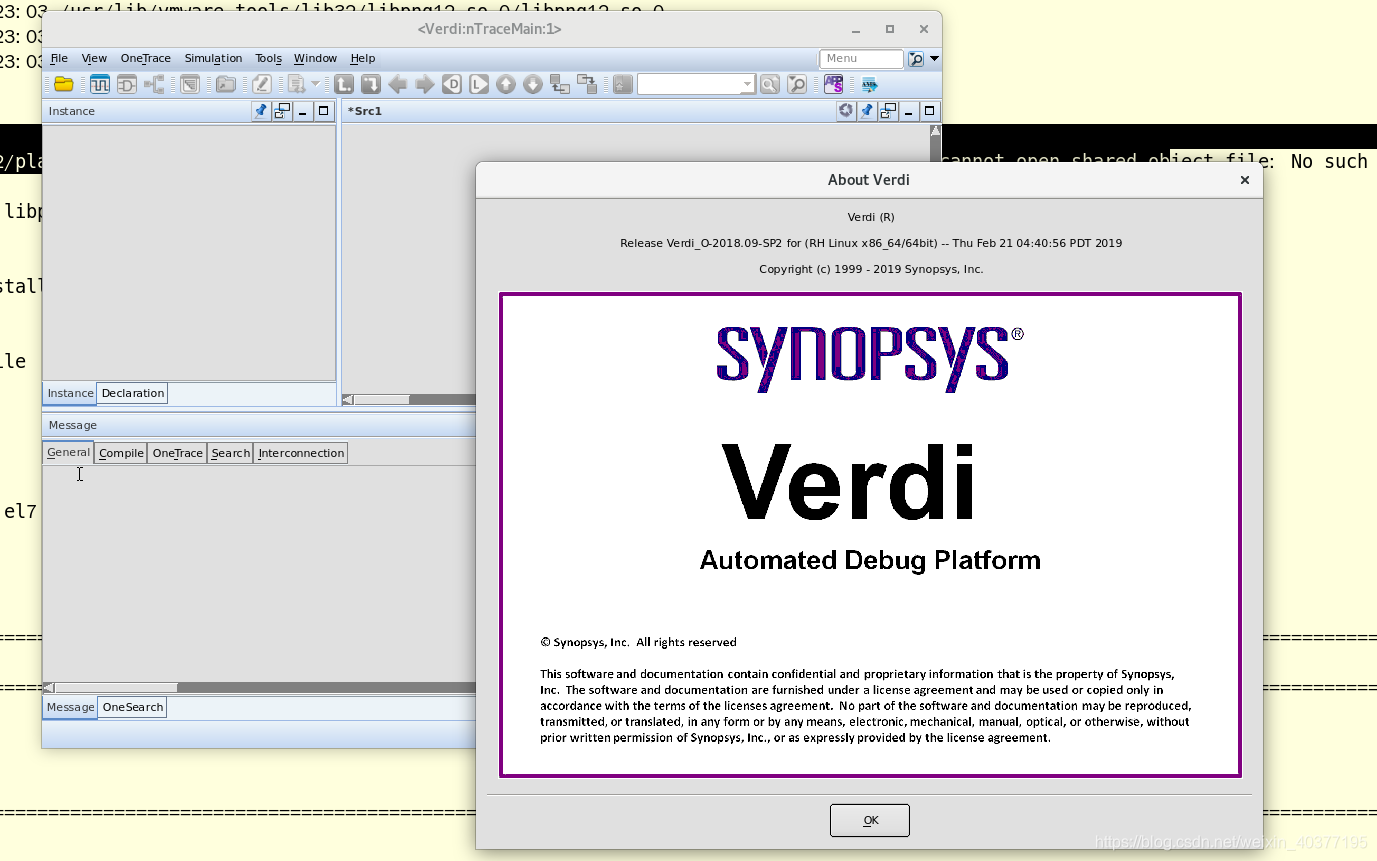
After activation, enter "verdi" to open the verdi tool to check whether the activation is successful, but there are errors here, use the following command to install, and then enter "verdi" after success, you can open verdi, and the activation is successful
sudo yum install libpng12 -y

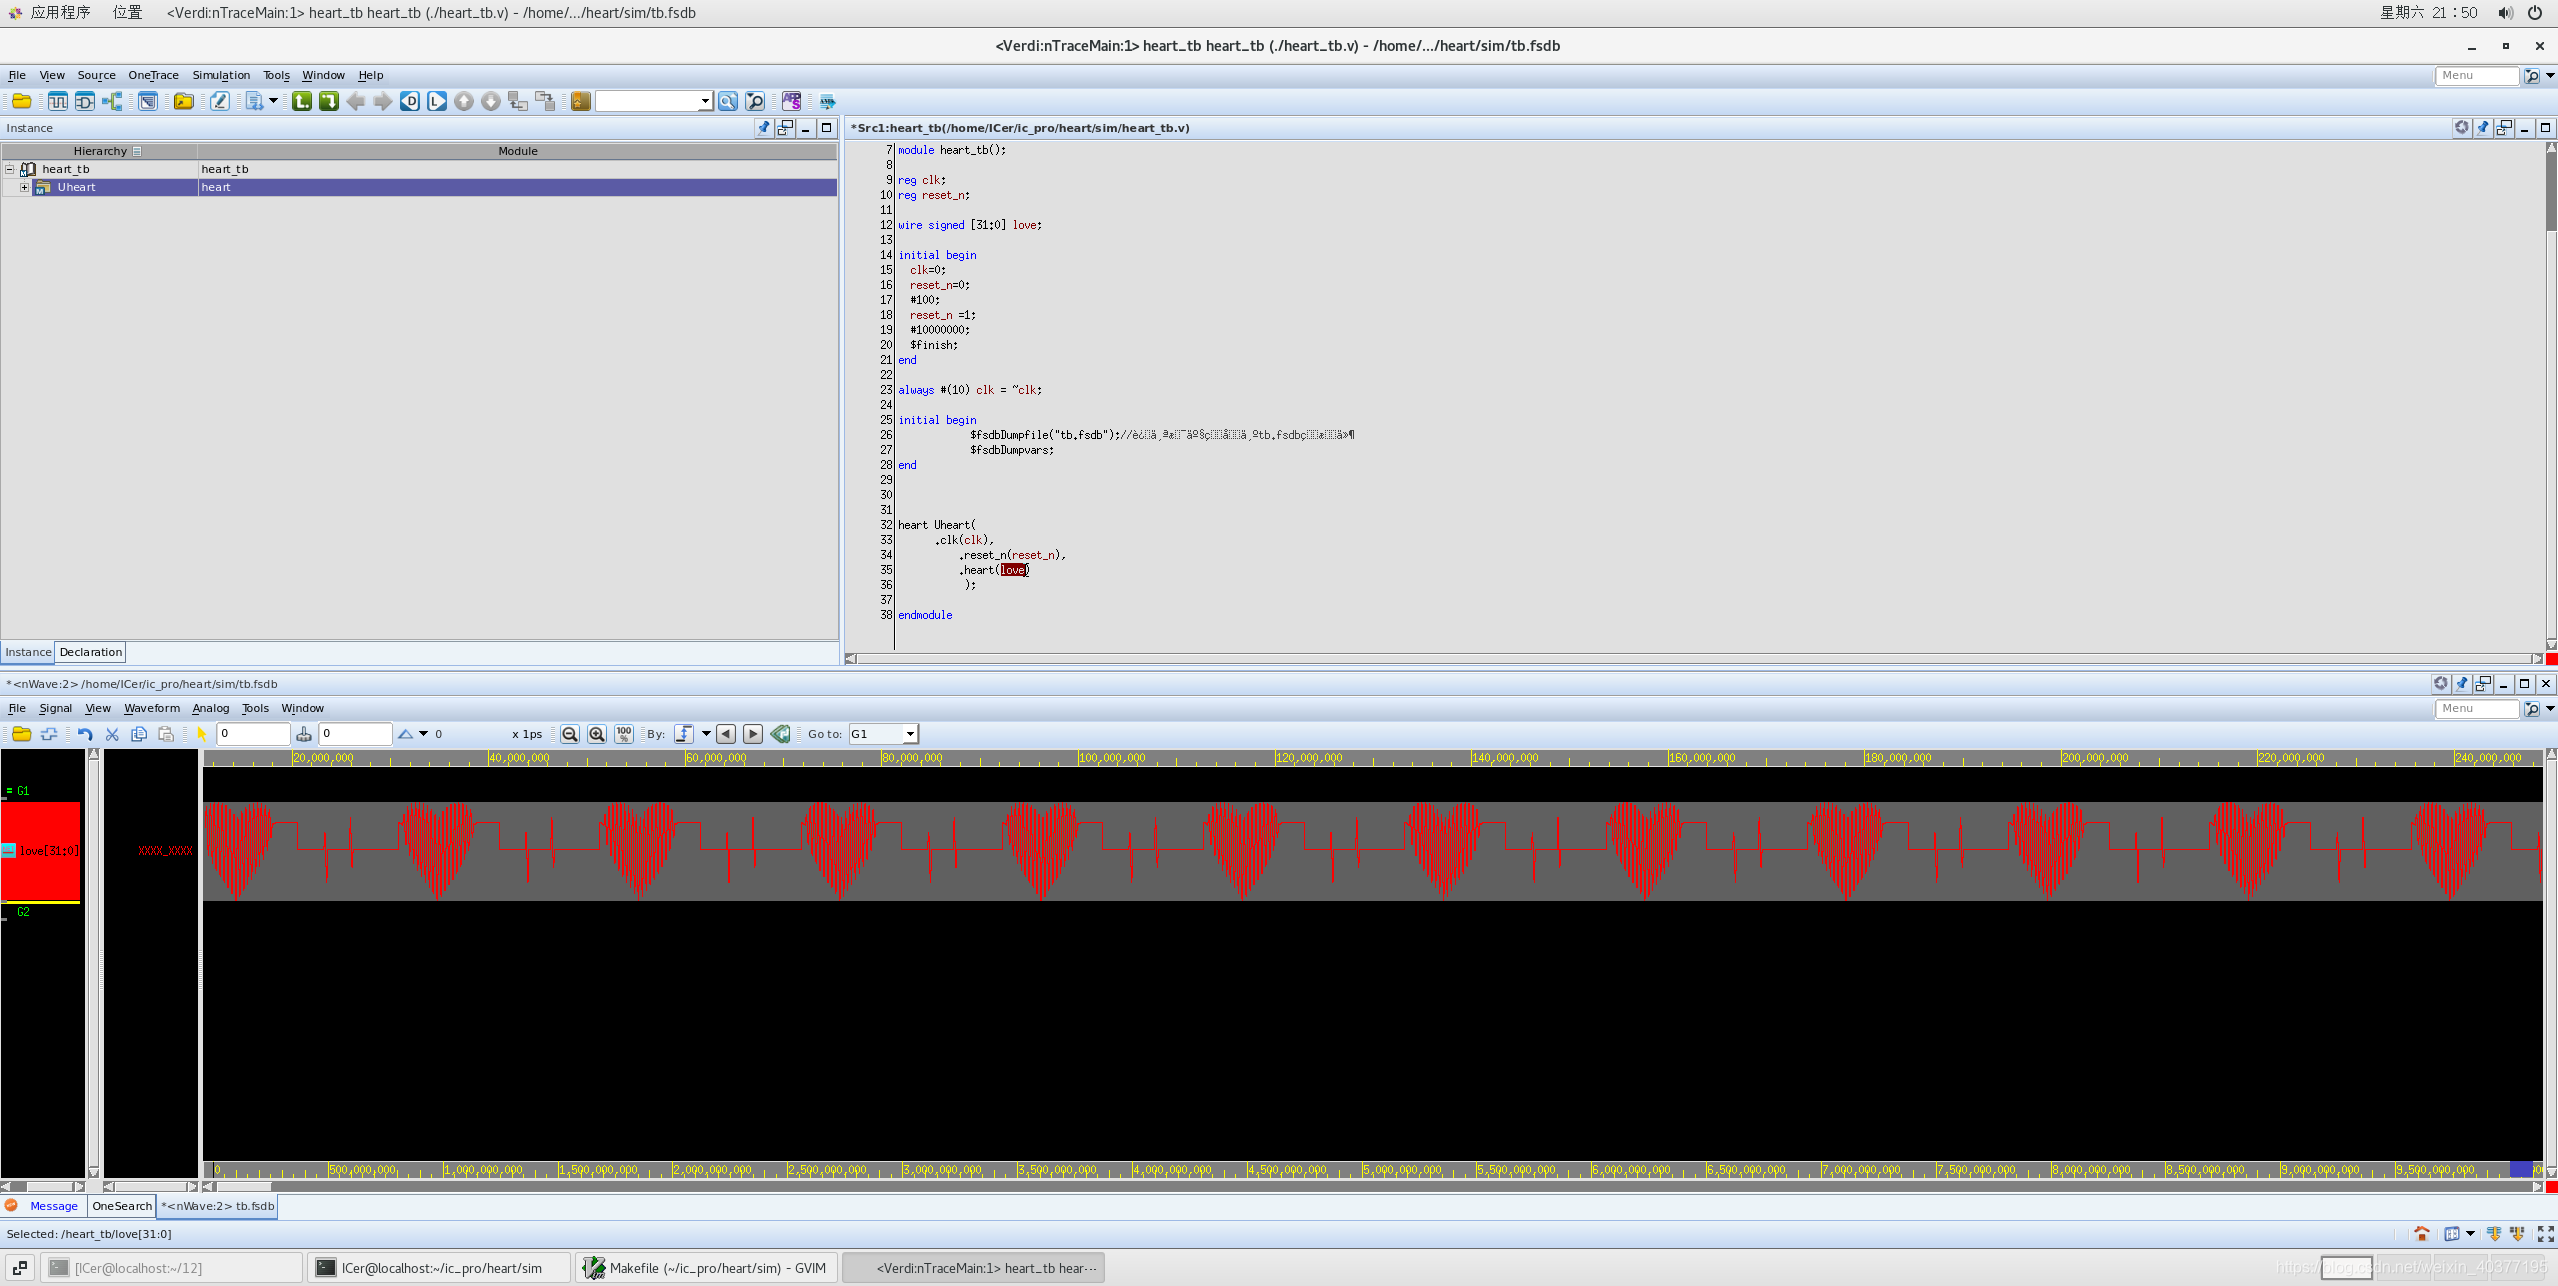
4. Test Engineering
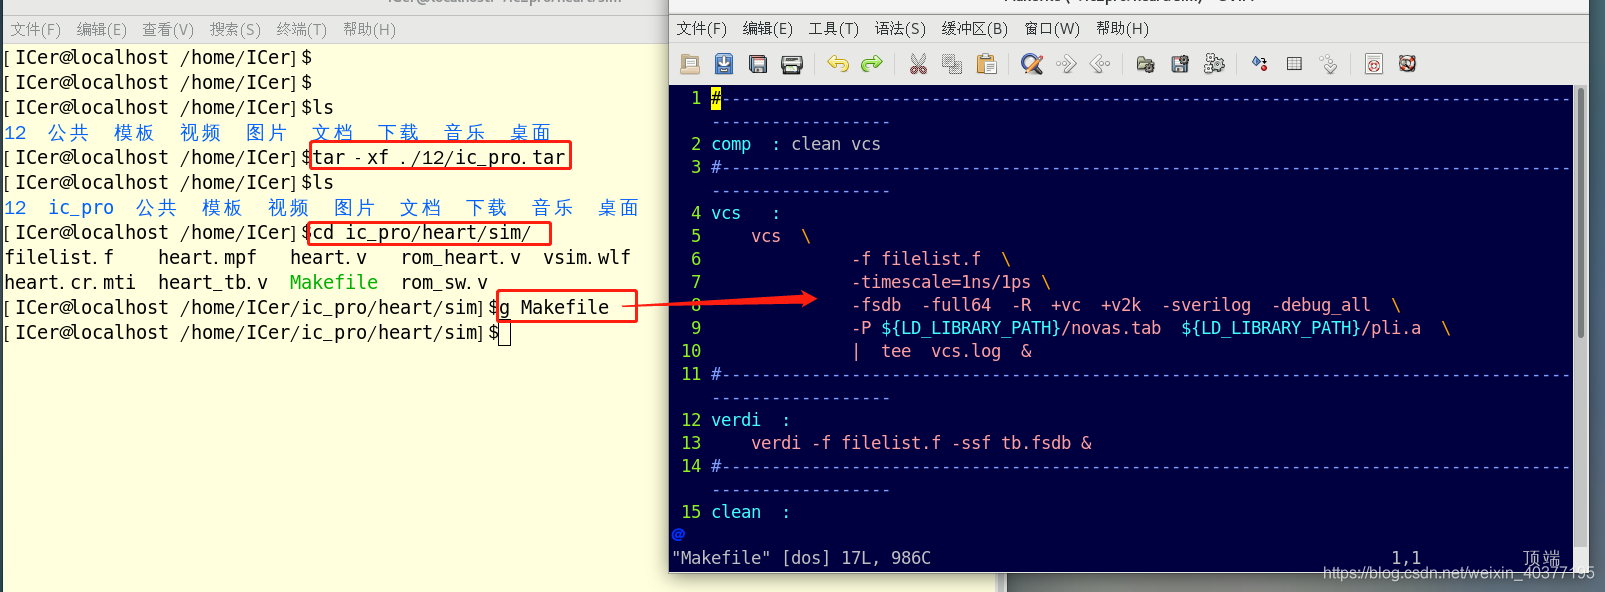
Use the following command to decompress the ic_pro.tar under the 12 file in the home directory, then enter the simulation directory of the project, open the make script with gvim, this is the simulation script.
tar -xf ./12/ic_pro.tar
cd ic_pro/heart/sim/
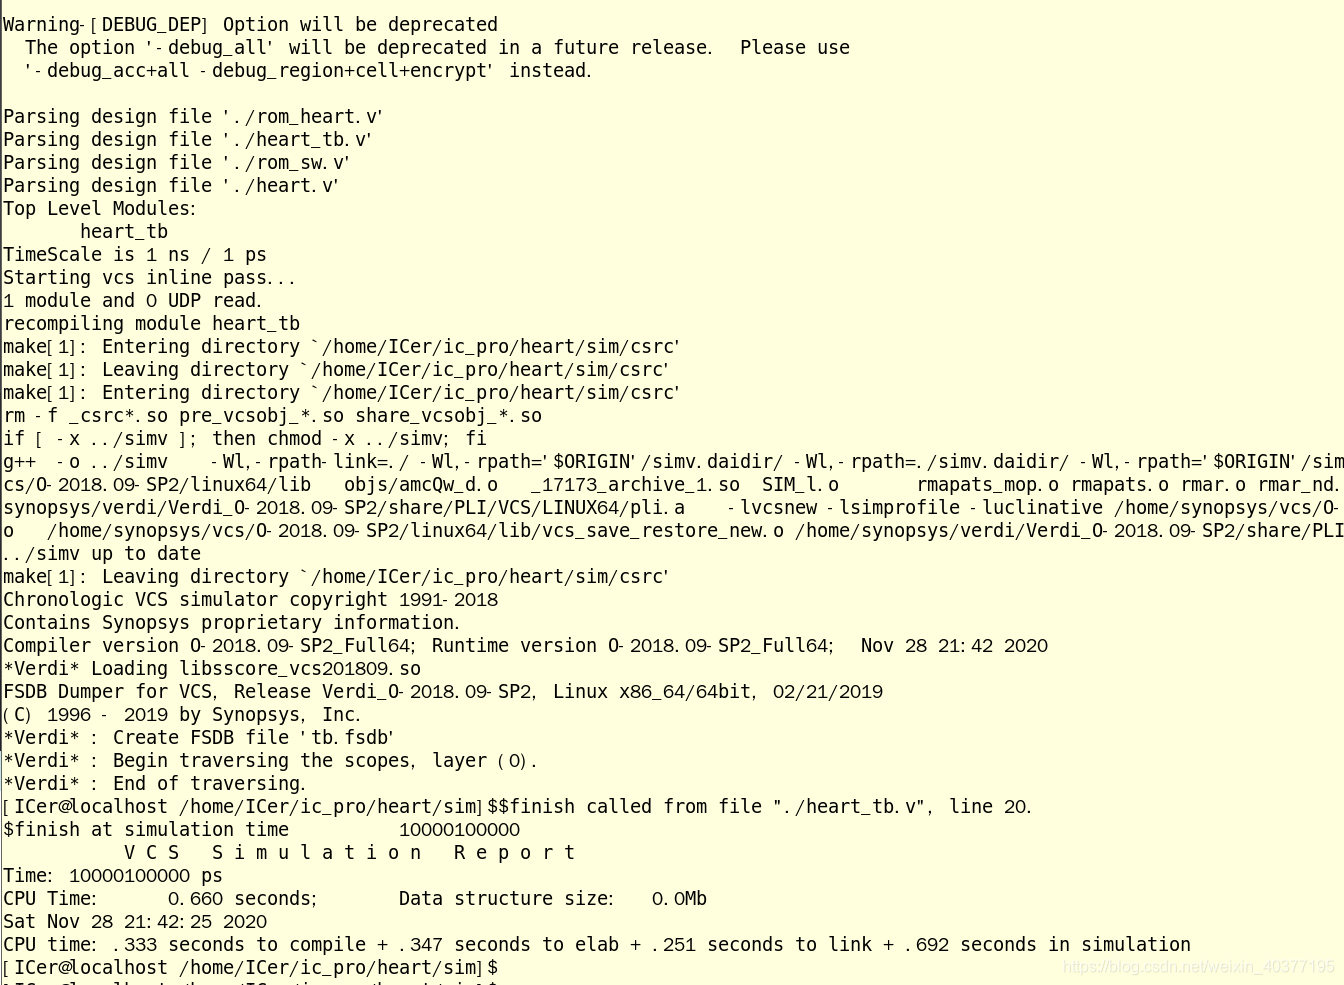
Enter the following command to simulate,
make vcs
make verdi
If there is an error message: gcc: Command not found. You need to install gcc, but there will be other problems. Generally, there may be problems with the environment and license, which need to be checked carefully. Install gcc using the following command:
yum -y update gcc
yum -y install gcc+ gcc-c++
The effect of the simulation is as follows. Use verdi to view the waveform. For this project, please see my article: vcs+verdi version of Qixi Festival .
5. Summary
Now complete the installation of IC EDA, this process is much more complicated than under windows, you need to do it slowly, don't rush for quick success. If you encounter problems during the installation process, you can chat with me privately through the WeChat official account. Of course, if there are errors, please correct me.
This IC EDA virtual machine can follow my WeChat public account and reply " EDA virtual machine " in the background ; the entire installation file, including vmware installation package, Centos image, synopsys installation package, engineering and other files, will reply " EDA installation package " in the background .
Welcome to follow my public account: Core Kingdom, there are more FPGA & digital IC technology sharing, and you can also get open source FPGA projects!