音视频系列4:新手如何入门ffmpeg(以FLV解码H.264为例)
安装
首先是安装,可以选择包管理器(在ubuntu即apt-get)安装,也可以使用源码编译的方式,两者的区别就是源码编译可以看到源码,而包管理器则不能,对于新手来说,我个人倾向于使用源码编译。
编译安装需注意事项:
说一下一个比较坑的事情,这个编译guide给我安装的是snapshot版本,而不是release版本。那这样就会出现两个问题,一个是容易出bug,另一个是无法查看ffmpeg的版本号,查找对应的api只能看头文件,无法看documentation(虽然我重装了之后也没有看到相应版本的documentation,可能ffmpeg和opencv不太一样吧,不过没关系,采用release版本会比快照版本好一些)。
好在使用这个编译方式,很容易更新,只需要把相关包删除,更新安装包,再编译一遍就可以了。因此,我在github上下载了最新的release版本,重新编译了ffmpeg,更新到目前的release版本4.1.5。
上手
直接跑demo
对于有编程经验的小伙子来说,自然是直接跑demo,跑出来再慢慢看,我也是这么干的,直接搜索的话,会出现一些参差不齐的文章,那么我推荐你看雷神的博客。雷神的博客包含了很多demo,但我觉得相关知识科普还是比较少,跑完demo之后,你会发现你看不懂代码是什么意思,这时候你要进阶到第二阶段。
雷神雷霄骅博客:https://blog.csdn.net/leixiaohua1020
ffmpeg库的Tutorial
首先是你要了解ffmpeg的库基本类的作用,ffmpeg的数据流动,关于这点github上有一个Tutorial做得挺好的,通过它你可以了解一些基本类的作用,了解ffmpeg是怎么操作的,这样,你就基本了解了ffmpeg的基本操作,但这还不够,你没有相关的专业知识,这时候你就是进阶到第三阶段。
https://github.com/leandromoreira/ffmpeg-libav-tutorial#learn-ffmpeg-libav-the-hard-way
专业知识的学习
比如说,H.264、yuv、rgb有什么区别;pts,dts又是什么。这些知识能够让你处理一些错误的发生,或者快速地找到错误,但如果你只是想简单的跑通某一个demo,不想深究,那么就没必要系统地学习了,只是这样出现了错误可能会兜兜转转,无法知道错误,只能够靠问人来解决。这里推荐看维基百科,或者是一些专业书籍。
看ffmpeg的源码
有时候google可以查到别人的demo,但不一定所有的函数在网上都有demo,但源码一定有。看源码能让你快速知道这个函数是怎么使用的。
这个源码在你ffmpeg源码目录下的fftools里面。
下面我通过举例,来让你知道如何快速使用api。
举例
发现问题
假设你现在编译的代码没错,但含有以下警告:
xxxx is deprecated [-Wdeprecated-declarations]
例如我在音视频系列第二节中采用的代码,会包含以下错误:
av_bitstream_filter_init(const char*)’ is deprecated [-Wdeprecated-declarations]
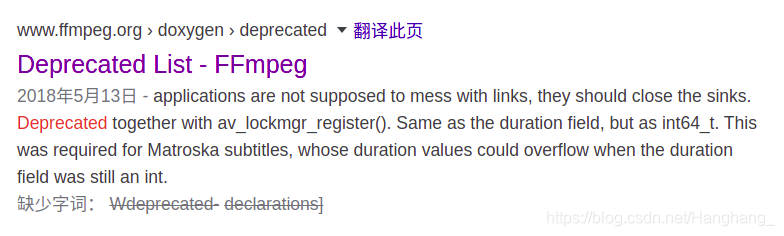
这时候我们要通过谷歌搜索,这个是什么意思。你会发现,出现这个警告的原因,是因为这个API过时了,当然deprecate这个单词本身就带有过时的意思,英语好的同学可以直接发现,原来是这个意思。
然后你就在你的代码中,找出所有会出现deprecate警告的函数。
比如在我第二节的代码中,有几个函数是已经过时了的。
av_bitstream_filter_init
av_bitstream_filter_filter
av_bitstream_filter_close
说句题外话(不是本文重点),这几个函数起什么作用呢?要知道,ffmpeg解码获得的AVPacket只包含了视频压缩数据,并没有包含相关的解码信息(比如:h264的sps pps头信息,AAC的adts头信息),没有这些编码头信息解码器(MediaCodec)是识别不到不能解码的。在ffmpeg中,为这些AVPacket添加解码头信息就是通过上面这几个函数实现的。参考此处。
查找API文档
API文档:https://www.ffmpeg.org/doxygen/trunk/index.html
这里会告诉你相关函数的新API怎么使用。
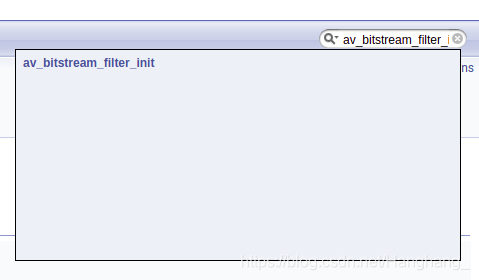
右上角有一个搜索框:搜索刚刚过时的函数如:av_bitstream_filter_init
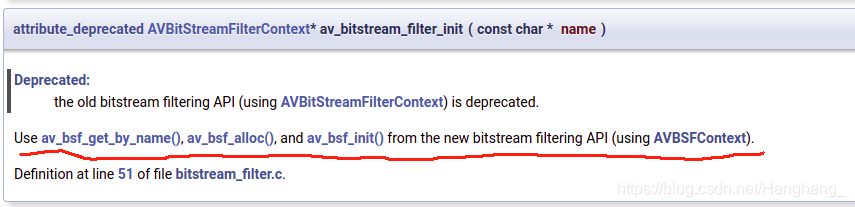
看下图可知,这个函数被新版的函数代替了,我们要把原函数改为: av_bsf_get_by_name(), av_bsf_alloc(), and av_bsf_init()
点击还可知道它的函数使用方法。

好了,即使知道了相关的函数,也知道了他的使用方法,可我还是不会用,怎么办?有demo吗老哥?
回:当然有!
ffmpeg源码走起
打开刚刚我们所说的,ffmpeg目录下的fftool/文件夹,会看到有很多.c文件,我们优先看ffmpeg.c文件,如果这个找不到再找其他的。
使用ctrl+f定位刚刚新的api,看看里面是怎么使用的。
比如刚刚找到的av_bsf_init,如下图:

好了,这下你终于知道这个api怎么使用了,接下来就是该代码了。
编译如下:

修改后的源码
关于拉取芒果台视频流转RGB的代码,在下面更新一下,有兴趣的小伙伴,可以将下面代码与第二节的代码,以及ffmpeg.c相应代码进行比较,你会发现ffmpeg.c里实际上已经告诉你怎么用了,对着修改使用就好了。
#include <iostream>
extern "C"
{
#include "libavformat/avformat.h"
#include <libavutil/mathematics.h>
#include <libavutil/time.h>
#include <libavutil/samplefmt.h>
#include <libavcodec/avcodec.h>
#include <libavfilter/buffersink.h>
#include <libavfilter/buffersrc.h>
};
#include "opencv2/core.hpp"
#include<opencv2/opencv.hpp>


void AVFrame2Img(AVFrame *pFrame, cv::Mat& img);
void Yuv420p2Rgb32(const uchar *yuvBuffer_in, const uchar *rgbBuffer_out, int width, int height);
using namespace std;
using namespace cv;

AVFilterContext *buffersrc_ctx;
AVFilterGraph *filter_graph;

int main(int argc, char* argv[])
{
    AVFormatContext *ifmt_ctx = NULL;
    AVPacket pkt;
    AVFrame *pframe = NULL;
    int ret, i;
    int videoindex=-1;

    AVCodecContext  *pCodecCtx;
    AVCodec         *pCodec;

    const AVBitStreamFilter *buffersrc  =  NULL;
    AVBSFContext *bsf_ctx;
    AVCodecParameters *codecpar = NULL;

    const char *in_filename  = "rtmp://58.200.131.2:1935/livetv/hunantv";   //芒果台rtmp地址
    //const char *in_filename  = "test.h264";   //芒果台rtmp地址
    //const char *in_filename  = "rtmp://localhost:1935/rtmplive";   //芒果台rtmp地址
    const char *out_filename_v = "test1.h264";	//Output file URL
    //Register
    av_register_all();
    //Network
    avformat_network_init();
    //Input
    if ((ret = avformat_open_input(&ifmt_ctx, in_filename, 0, 0)) < 0)
    {
        printf( "Could not open input file.");
        return -1;
    }
    if ((ret = avformat_find_stream_info(ifmt_ctx, 0)) < 0)
    {
        printf( "Failed to retrieve input stream information");
        return -1;
    }

    videoindex=-1;
    for(i=0; i<ifmt_ctx->nb_streams; i++)
    {
        if(ifmt_ctx->streams[i]->codecpar->codec_type==AVMEDIA_TYPE_VIDEO)
        {
            videoindex=i;
            codecpar = ifmt_ctx->streams[i]->codecpar;
        }
    }
    //Find H.264 Decoder
    pCodec = avcodec_find_decoder(AV_CODEC_ID_H264);
    if(pCodec==NULL){
        printf("Couldn't find Codec.\n");
        return -1;
    }

    pCodecCtx = avcodec_alloc_context3(pCodec);
    if (!pCodecCtx) {
        fprintf(stderr, "Could not allocate video codec context\n");
        exit(1);
    }

    if(avcodec_open2(pCodecCtx, pCodec,NULL)<0){
        printf("Couldn't open codec.\n");
        return -1;
    }

    pframe=av_frame_alloc();
    if(!pframe)
    {
        printf("Could not allocate video frame\n");
        exit(1);
    }

    FILE *fp_video=fopen(out_filename_v,"wb+"); //用于保存H.264

    cv::Mat image_test;
    // 旧的API
   /*//AVBitStreamFilterContext* h264bsfc =  av_bitstream_filter_init("h264_mp4toannexb");
*/

    buffersrc = av_bsf_get_by_name("h264_mp4toannexb");
    ret = av_bsf_alloc(buffersrc,&bsf_ctx);
    if(ret < 0)
        return -1;
    avcodec_parameters_copy(bsf_ctx->par_in,codecpar);
    ret = av_bsf_init(bsf_ctx);


    while(av_read_frame(ifmt_ctx, &pkt)>=0)
    {
        if (pkt.stream_index == videoindex) {
            //旧的API
//            av_bitstream_filter_filter(h264bsfc, ifmt_ctx->streams[videoindex]->codec, NULL, &pkt.data, &pkt.size,
//                                       pkt.data, pkt.size, 0);

            ret = av_bsf_send_packet(bsf_ctx, &pkt);
            if(ret < 0) {
                cout << " bsg_send_packet is error! " << endl;
                continue;
            }
            ret = av_bsf_receive_packet(bsf_ctx, &pkt);
            if(ret < 0) {
                cout << " bsg_receive_packet is error! " << endl;
                continue;
            }
            printf("Write Video Packet. size:%d\tpts:%ld\n", pkt.size, pkt.pts);

            //保存为h.264 该函数用于测试
            //fwrite(pkt.data, 1, pkt.size, fp_video);

            // Decode AVPacket
            if(pkt.size)
            {
                ret = avcodec_send_packet(pCodecCtx, &pkt);
                if (ret < 0 || ret == AVERROR(EAGAIN) || ret == AVERROR_EOF) {
                    std::cout << "avcodec_send_packet: " << ret << std::endl;
                    continue;
                }
                //Get AVframe
                ret = avcodec_receive_frame(pCodecCtx, pframe);
                if (ret == AVERROR(EAGAIN) || ret == AVERROR_EOF) {
                    std::cout << "avcodec_receive_frame: " << ret << std::endl;
                    continue;
                }
                //AVframe to rgb
                AVFrame2Img(pframe,image_test);
            }

        }
        //Free AvPacket
        av_packet_unref(&pkt);
    }
    //Close filter 旧的API
  //  av_bitstream_filter_close(h264bsfc);
    av_bsf_free(&bsf_ctx);

    fclose(fp_video);
    avformat_close_input(&ifmt_ctx);
    if (ret < 0 && ret != AVERROR_EOF)
    {
        printf( "Error occurred.\n");
        return -1;
    }
    return 0;
}
void Yuv420p2Rgb32(const uchar *yuvBuffer_in, const uchar *rgbBuffer_out, int width, int height)
{
    uchar *yuvBuffer = (uchar *)yuvBuffer_in;
    uchar *rgb32Buffer = (uchar *)rgbBuffer_out;

    int channels = 3;

    for (int y = 0; y < height; y++)
    {
        for (int x = 0; x < width; x++)
        {
            int index = y * width + x;

            int indexY = y * width + x;
            int indexU = width * height + y / 2 * width / 2 + x / 2;
            int indexV = width * height + width * height / 4 + y / 2 * width / 2 + x / 2;

            uchar Y = yuvBuffer[indexY];
            uchar U = yuvBuffer[indexU];
            uchar V = yuvBuffer[indexV];

            int R = Y + 1.402 * (V - 128);
            int G = Y - 0.34413 * (U - 128) - 0.71414*(V - 128);
            int B = Y + 1.772*(U - 128);
            R = (R < 0) ? 0 : R;
            G = (G < 0) ? 0 : G;
            B = (B < 0) ? 0 : B;
            R = (R > 255) ? 255 : R;
            G = (G > 255) ? 255 : G;
            B = (B > 255) ? 255 : B;

            rgb32Buffer[(y*width + x)*channels + 2] = uchar(R);
            rgb32Buffer[(y*width + x)*channels + 1] = uchar(G);
            rgb32Buffer[(y*width + x)*channels + 0] = uchar(B);
        }
    }
}

void AVFrame2Img(AVFrame *pFrame, cv::Mat& img)
{
    int frameHeight = pFrame->height;
    int frameWidth = pFrame->width;
    int channels = 3;
    //输出图像分配内存
    img = cv::Mat::zeros(frameHeight, frameWidth, CV_8UC3);
    Mat output = cv::Mat::zeros(frameHeight, frameWidth,CV_8U);

    //创建保存yuv数据的buffer
    uchar* pDecodedBuffer = (uchar*)malloc(frameHeight*frameWidth * sizeof(uchar)*channels);

    //从AVFrame中获取yuv420p数据,并保存到buffer
    int i, j, k;
    //拷贝y分量
    for (i = 0; i < frameHeight; i++)
    {
        memcpy(pDecodedBuffer + frameWidth*i,
               pFrame->data[0] + pFrame->linesize[0] * i,
               frameWidth);
    }
    //拷贝u分量
    for (j = 0; j < frameHeight / 2; j++)
    {
        memcpy(pDecodedBuffer + frameWidth*i + frameWidth / 2 * j,
               pFrame->data[1] + pFrame->linesize[1] * j,
               frameWidth / 2);
    }
    //拷贝v分量
    for (k = 0; k < frameHeight / 2; k++)
    {
        memcpy(pDecodedBuffer + frameWidth*i + frameWidth / 2 * j + frameWidth / 2 * k,
               pFrame->data[2] + pFrame->linesize[2] * k,
               frameWidth / 2);
    }

    //将buffer中的yuv420p数据转换为RGB;
    Yuv420p2Rgb32(pDecodedBuffer, img.data, frameWidth, frameHeight);

    //简单处理,这里用了canny来进行二值化
//    cvtColor(img, output, CV_RGB2GRAY);
//    waitKey(2);
//    Canny(img, output, 50, 50*2);
//    waitKey(2);
    imshow("test",img);
    waitKey(1);
    // 测试函数
    // imwrite("test.jpg",img);
    //释放buffer
    free(pDecodedBuffer);
    img.release();
    output.release();
}
cmake文件就不在这里放了,请参考第二节。
