课前回顾
字符串常量的存储
1、由一对双引号包含的若干字符
2、使用malloc()函数分配一块空间用于存储多个字符
char* ptr_c = (char*)malloc(32);
//通过内存分配,直接使用分配到的内存来存储数据
进程对内存的使用
说明:本段参考Tony He老师的《换个姿势学C语言 》
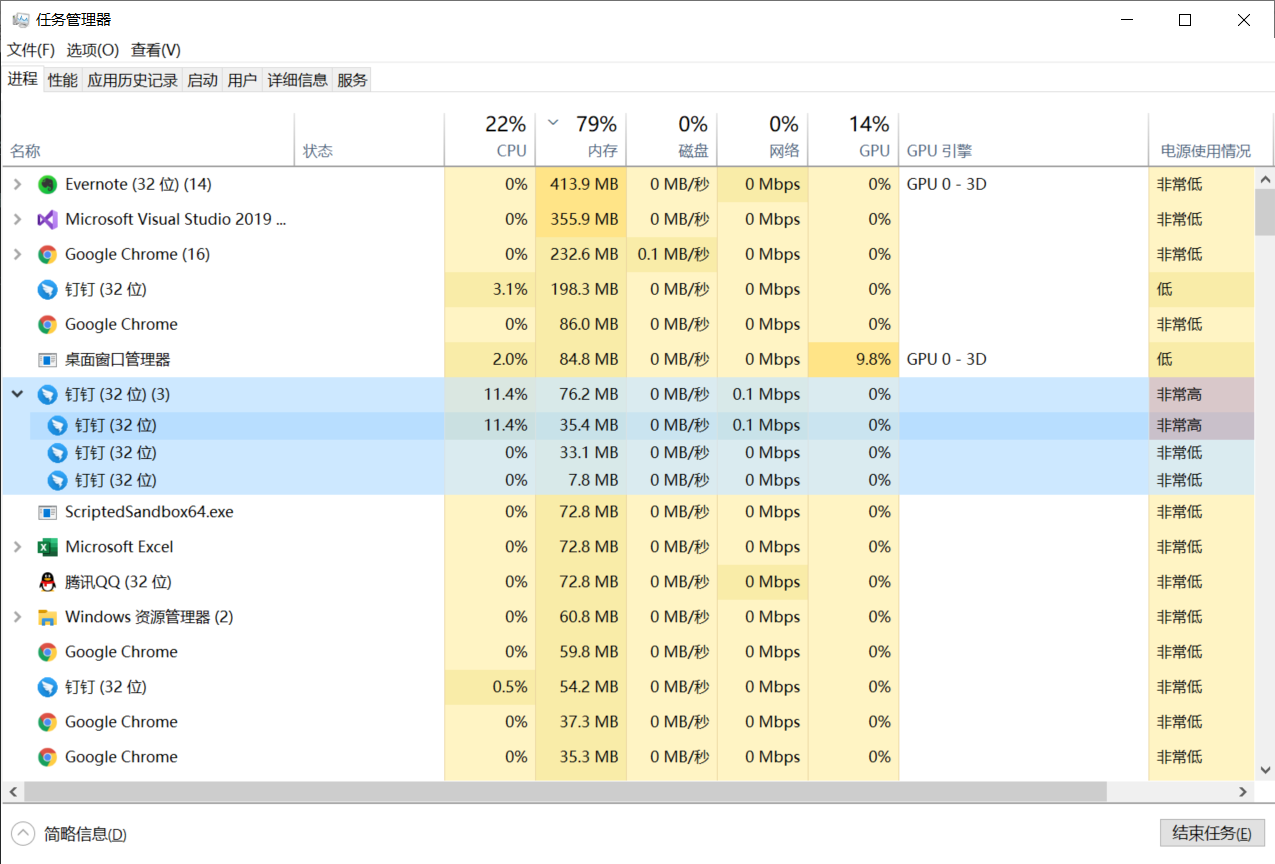
一个应用程序被启动后至少会启动一个进程,同一个应用程序被启动多次则会启动多个进程。在32位版本的Windows下运行的所有进程都分配最多4GB的内存空间,这里分配的4GB空间是如下分配的:
- 操作系统和所有进程共享使用2GB(类似买房时的公摊面积)
- 使用进程2GB(被称为用户空间)
Linux操作系统中进程占用的内存空间也是4GB,但是用户空间最多可以使用3GB,Windows也可以修改启动参数实现这一点。
使用的Visual Studio 2019编译程序时在默认情况下使用32位模式,即使你安装的是64位CPU操作系统,单个进程的用户空间也不能超过2G。
关于进程使用的2GB用户空间同时也会划分成不同的区段:
- 可执行文件镜像区:存储着可执行文件的镜像,此区域大小取决于可执行文件的大小
- 动态链接库的映射区:如果程序使用动态链接库,此区域则会装载动态链接库的代码,此区域的大小取决于动态链接库的大小。
- 栈区:由编译器自动分配和释放,存储函数的参数值,局部变量的值等,Visual Studio中默认为1MB,可以通过链接属性改变。
- 堆区:程序员可以自行分配和释放的内存区域(Windows下的32位应用程序一般不能超过1.6G)。
- 保留区:保留区是一块不允许被访问的内存,任何对保留区内存的读写都会引起程序的崩溃(比如内存地址为0,对应的即使保留区,空指针赋值为就是让指针指向保留区的一个地址)
动态链接库和静态链接库的区别:
- 程序编译时,动态链接库的代码不会链接到可执行文件内,相反,静态链接库的代码则会被链接到可执行文件内。
计算机内存的计量单位
在计算机的内存中最小的单位是“位(bit)”,表示二进制的位,一个二进制只能表达"0"和"1"。一个字节(Byte)等于8位。字节是数据数量的基本单位,分配的内存最小单位是1字节。
使用"千字节"表示更大的内存空间,1000字节(kB)多用于表示硬盘容量、闪存容量时的计算。而第二种"千字节"是程序员更认可的1024字节,1024 等于 2的十次方,同时1024字节等于1KB。
- 1024KB == 1MB(Megabyte)
- 1024MB == 1GB(Gigabyte)
- 1024GB == 1TB(Tara-byte)
- 1024TB == 1PB(Peta-byte)
使用指针进行内存分配注意事项
#include <stdio.h>
#include <stdlib.h>
int main()
{
    char* ptr = NULL;
   //如果在声明指针变量时无法确定指针变量的值,作为习惯,我们将其设置位空指针 NULL
  // *ptr = 'A';           //引发了异常: 写入访问权限冲突。ptr 是 nullptr

    char* ptr_c = (char*)malloc(1024 * 1024 * 1024);
   //为什么malloc() 函数要返回void* 类型的指针,为什么要进行强制类型转换
   //便于程序员根据自己的需要,进项类型转换

   //指针为什么要分成多种类型?不同类型的指针变量所占用的内存空间是一样的吗?
    int* ptr_a = NULL;
    float* ptr_f = NULL;
    double* ptr_d = NULL;
    printf("%d    %d     %d\r\n", sizeof(ptr_a), sizeof(ptr_f), sizeof(ptr_d));
    /*
   输出结果:
   4       4       4
   */

    return 0;
}
自定义字符串长度函数
/*
定义LengthOfString函数用于计算字符串中字符的个数(字符的长度),参数为字符串常量的首地址,返回值为字符的个数(不含'\0')
*/
#include <stdio.h>
#include <stdlib.h>
#include <string.h>
#include <assert.h>
/*
计算字符串的长度
在该函数中,没有通过该指针改变字符串内容的意图,为了防止通过该指针影响字符串的内容,可以在char* 前面添加const限定符
*/
int LengthOfString(const char* str)
{
     //*str = 'A';                //表达式必须是可修改的左值
    /*
    使用断言防止空指针
    在C语言中,可以使用断言assert()来确保某个条件成立,只有在条件成立的情况下,才能该程序继续运行
    */
    assert(str != NULL);
    //对于计数类的程序,一般都是声明一个整型变量来存储返回值
    int result = 0;                     //保存输入的字符串长度
   while (*str++ != '\0')
   {
          result++;
   }
   /*
   while()语句本质上只能控制一条语句的循环
   但是,一对大括号包含的若干条语句被称为语句块,语句块可以被while当作一条语句
   */
   return result;
}
int main()
{
   char* ptr = (char*)malloc(1024);
   if (ptr == NULL)
   {
          printf("内存分配失败\r\n");
   }
   else
   {
          printf("内存分配成功\r\n");
          int count = scanf("%s", ptr);  //该函数目前不安全,可使用微软定义的scanf_s()函数来代替scanf()函数
    /*
    sacnf() 函数
    参数1:用字符串常量表示的输入格式字符串
    参数2:用户输入的数据送到的目标地址
    */
    //scanf_s("%s", ptr);

    //ptr = NULL;         //调用断言,会强制程序终止
    int len = LengthOfString(ptr);
     printf("%d\r\n", len);
     }
     free(ptr);
     return 0;
}
自定义字符串复制函数
/*
完成stringCopy函数,实现与函数strcpy同样的功能,函数原型如下:
void stringCopy(char* dest, const char* source)
*/
#include <stdio.h>
#include <stdlib.h>
void StringCopy(char* dest, const char* source);//函数声明,模拟strcpy()函数
int main()
{
    char* ptr_a = (char*)malloc(1024);//申请1024字节的内存空间,并将该块内存的首地址指向ptr_a
    char* ptr_b = (char*)malloc(1024);//申请1024字节的内存空间,并将该块内存的首地址指向ptr_b
    if (ptr_b == NULL)
    {
        printf("内存空间申请失败!\r\n");
    }
    else
    {
        printf("内存空间申请成功!\r\n");
        int count = scanf("%s", ptr_a);
        StringCopy(ptr_a, ptr_b);
        printf("运行程序后ptr_a指向的内存空间存储的字符串为:%s", ptr_a);
    }
    free(ptr_a); //释放内存
    free(ptr_b);
    return 0;
}
void StringCopy(char* dest, const char* source)//函数定义
{
//*dest = *source; //当复制一个字符时,可以直接这样使用
//当复制多个字符的时候,使用下面的while循环
    while (*source != '\0')
    {
        *dest = *source;
        dest++;
        source++;
    }
}
在输入字符串按下回车后,会显示屯屯屯屯屯屯屯屯屯屯屯屯屯屯屯屯屯屯屯屯屯屯屯屯屯屯屯屯屯屯···
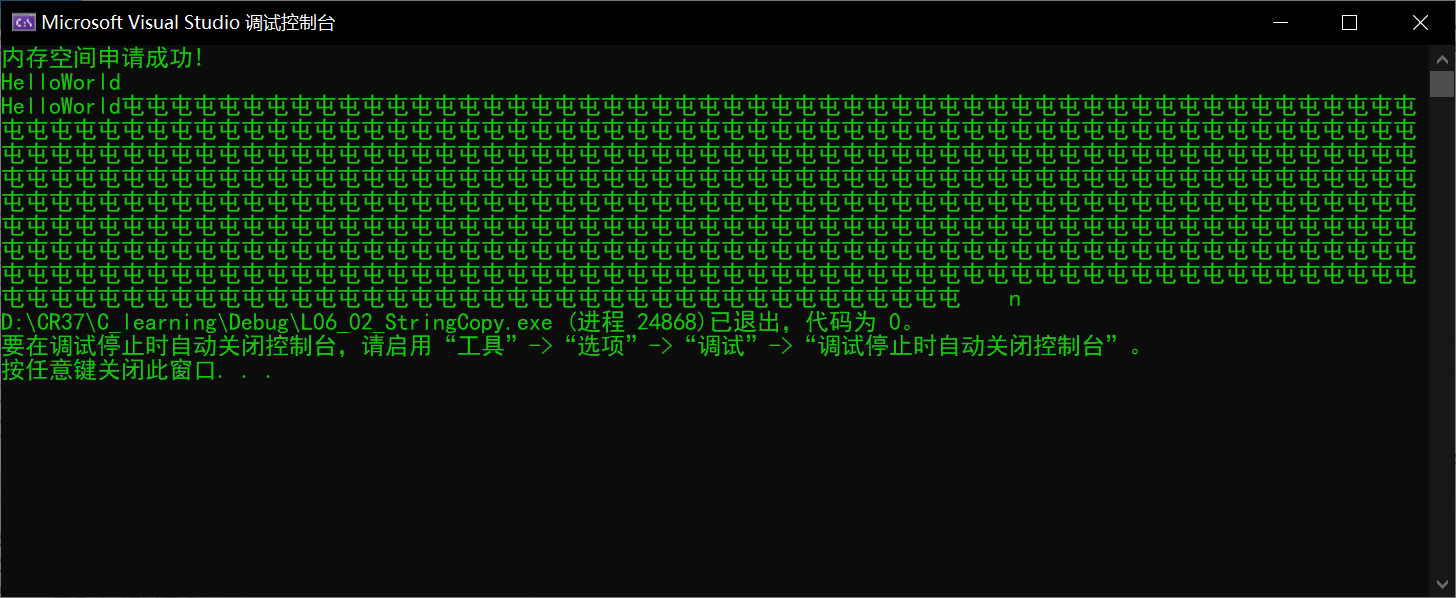
在Visual Studio的调试模式下malloc()函数会自动往申请的空间内填写内容,至于填写的内容转换成中文编就是屯屯屯屯屯屯···
解决 "屯屯屯屯···" 问题
//添加while循环条件 *dest = '\0'
while (*dest = '\0' || *source != '\0')
{
    *dest = *source;
    dest++;
    source++;
}
EasyX的简单使用
去EasyX官网下载最新的EasyX库的安装程序,下载后双击打开,EasyX库安装程序会自动检测当前计算机使用的IDE(Integrated Development Environment)版本,然后点击安装即可在对应的IDE中添加EasyX头文件和库文件。安装速度很快,完成后就可以在IDE中添加 graphics.h头文件进行使用。

EaxyX库函数的简单使用
#include <stdio.h>
#include <graphics.h>
#include <conio.h>
int main()
{
initgraph(600,500);//创建绘图窗口,大小为600x500像素
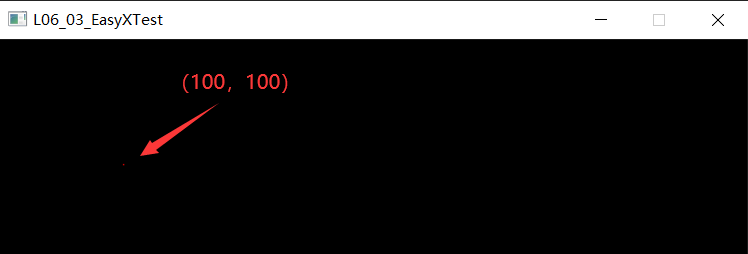
putpixel(100, 100, RGB(255, 0, 0));
//使用putpixel()函数生成1像素点,三个参数,参数1为点的X轴坐标,参数2为点的Y轴坐标,参数3为点的颜色
circle(200, 200, 150);//使用circle()函数 画圆圈,圆心坐标(200,200),半径100
for (int x = 200; x <= 350; x++)
{
putpixel(x, 200, RGB(0, 255, 0));
//同样在使用putpixel()函数的基础上,就可以使用for()循环输出多个相连续的点,也就是一条直线
}
for (int y = 200; y <= 350; y++)
{
putpixel(200, y, RGB(0, 0, 255));
}
_getch();=//按任意键继续
closegraph();//关闭绘图窗口
return 0;
}运行程序后的结果:

习题练习:
1、完成stringCopy函数,实现与函数strcpy同样的功能,函数原型如下:
void stringCopy(char* dest, const char* source)代码实现:
/*
完成stringCopy函数,实现与函数strcpy同样的功能,函数原型如下:
void stringCopy(char* dest, const char* source)
*/
#include <stdio.h>
#include <stdlib.h>
void StringCopy(char* dest, const char* source);
int main()
{
char* ptr_a = (char*)malloc(1024);
char* ptr_b = (char*)malloc(1024);
if (ptr_a == NULL)
{
printf("内存空间申请失败!\r\n");
}
else
{
printf("内存空间申请成功!\r\n");
int count = scanf("%s", ptr_b);
StringCopy(ptr_a, ptr_b);
printf("运行程序后ptr_a指向的内存空间存储的字符串为:%s", ptr_a);
}
free(ptr_a);
free(ptr_b);
return 0;
}
void StringCopy(char* dest, const char* source)
{
//*dest = *source; //当复制一个字符时,可以直接这样使用
while (*dest = '\0' || *source != '\0')
{
*dest = *source;
dest++;
source++;
}
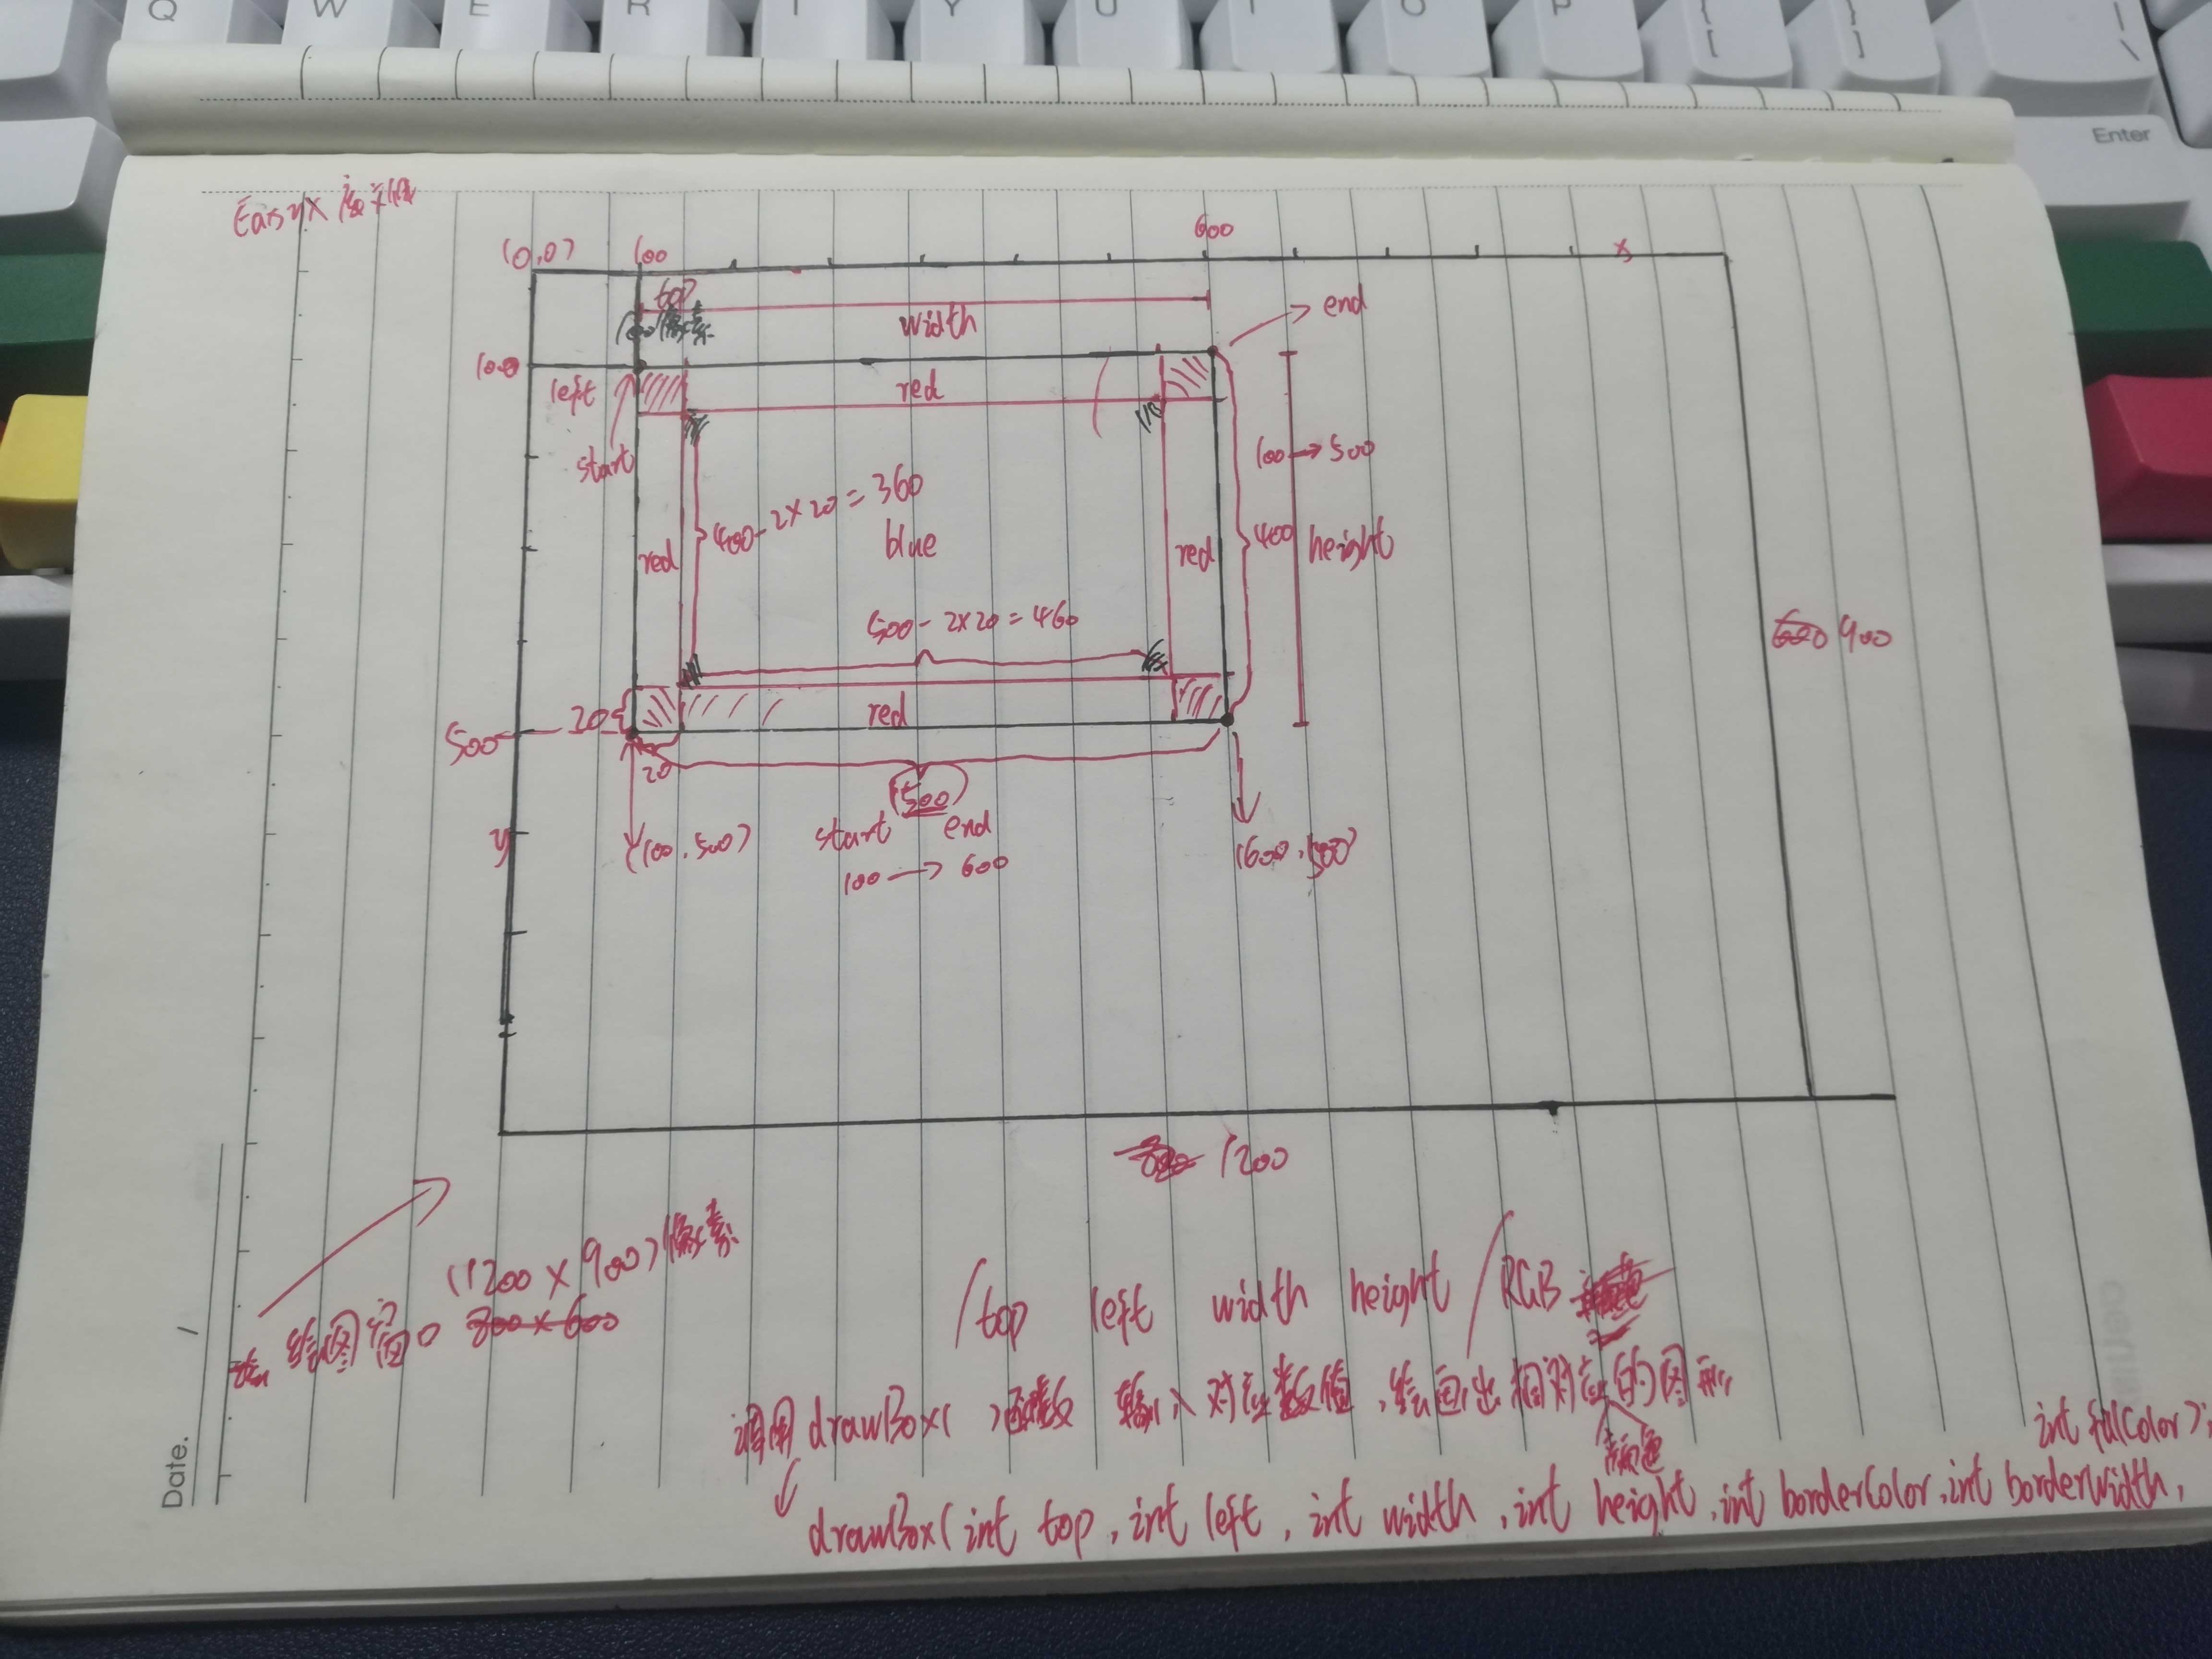
}2、完成drawBox函数,实现在屏幕指定位置绘制指定大小、颜色的矩形功能,函数原型如下:
void drawBox(int top, int left, int width, int height, int borderColor, int borderWidth, int fillColor)
/*
int top;    //要生成图像的左上角坐标的开始点(距离生成的绘制框顶部边框的距离)
int left;   //要生成图像的左上角坐标的开始点(距离生成的绘制框左侧边框的距离)
int width;  //要生成的最外图形的边框长度
int hieght; //要生成的最外图形的边框高度
int borderColor;    //要生成的最外图形背景色
int borderWidth;    //生成嵌套图形间的高度差
int fillColor;  //要生成的嵌套图形背景色
*/
问题分析:
1、绘制出两个或多个嵌套的四边形,为了区分可以将每个四边形的颜色设置成不一样的
2、使用initgraph()函数生成对应大小像素的绘制框,例如:initgraph(640,480);会生成一个640像素x480
像素的窗口
3、像素点的坐标可以用(x,y)表示,使用putpixel(100, 100, RGB(255, 0, 0)); 就会在窗口里生成一个坐标为(100,100)的红色像素点。
4、画图可以帮助我们快速理解问题的具体需求,点会画了,线也就好画了。在代码中可以先使用几对临时数据帮助我们更快的解决问题。废话不多说,上代码。

//为了方便我们需要声明并定义两个函数用来快速生成对应颜色的像素线

//垂直线,X轴不变
void VerticalLine(int x, int yStart, int yEnd, int color)
{
       for (int y = yStart; y <= yEnd; y++)
       {
              putpixel(x, y, color);
       }
       /*
       参数意思:
       int x;   垂直打印连续的像素点,每个点的X轴坐标是固定的,该变量的值为像素点开始的X轴坐标
       int yStart;  Y轴像素点的开始位置
       int yEnd;    Y轴像素点的结束位置
       int color;   生成连续像素点的颜色
       */
}

//水平线,y轴不变
void LevelLine(int y, int xStart, int xEnd, int color)
{
       for (int x = xStart; x <= xEnd; x++)
       {
              putpixel(x, y, color);
       }
       /*
       参数意思:
       int y;   水平打印连续的像素点,每个点的Y轴坐标是固定的,该变量的值为像素点开始的Y轴坐标
       int xStart;  Y轴像素点的开始位置
       int xEnd;    Y轴像素点的结束位置
       int color;   生成连续像素点的颜色
       */
}
Veision:1 输入固定参数,显示对应的图形
//在函数drawBox()中调用 void verticalLine()、void levelLine()即可生成对应颜色的四边形
void drawBox(int top, int left, int width, int height, int borderColor, int borderWidth, int fillColor)
{
//最外侧四边形的两条上下线的起始点,结束点及颜色
VerticalLine(100, 100, 400, RGB(255, 0, 0));
VerticalLine(600, 100, 400, RGB(255, 0, 0));
//中间四边形的两条上下线的起始点,结束点及颜色
VerticalLine(120, 120, 380, RGB(0, 255, 0));
VerticalLine(580, 120, 380, RGB(0, 255, 0));
//最内层四边形的两条上下线的起始点,结束点及颜色
VerticalLine(140, 140, 360, RGB(0, 0, 255));
VerticalLine(560, 140, 360, RGB(0, 0, 255));
//最外侧四边形的两条左右线的起始点,结束点及颜色
LevelLine(100, 100, 600, RGB(255, 0, 0));
LevelLine(400, 100, 600, RGB(255, 0, 0));
//中间四边形的两条左右线的起始点,结束点及颜色
LevelLine(120, 120, 580, RGB(0, 255, 0));
LevelLine(380, 120, 580, RGB(0, 255, 0));
//最内层四边形的两条左右线的起始点,结束点及颜色
LevelLine(140, 140, 560, RGB(0, 0, 255));
LevelLine(360, 140, 560, RGB(0, 0, 255));
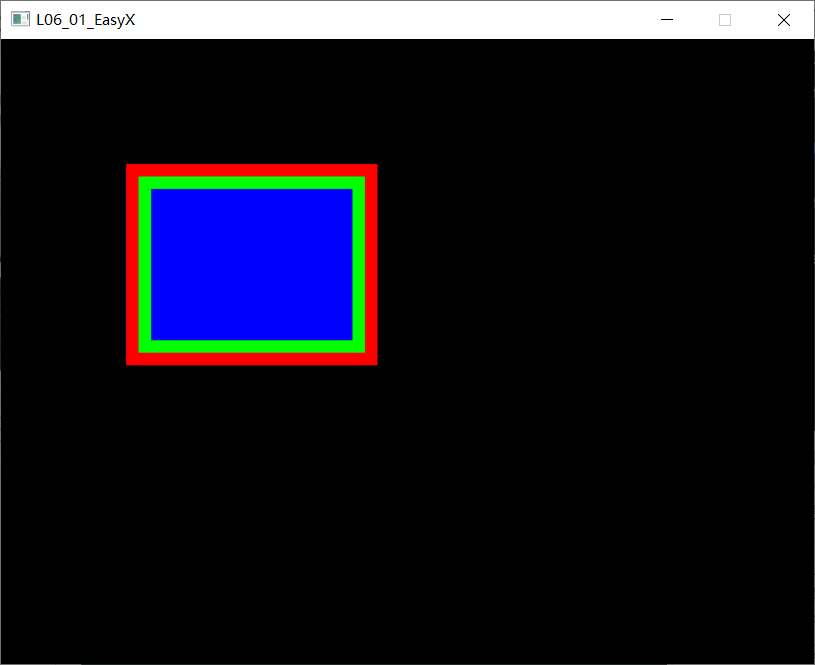
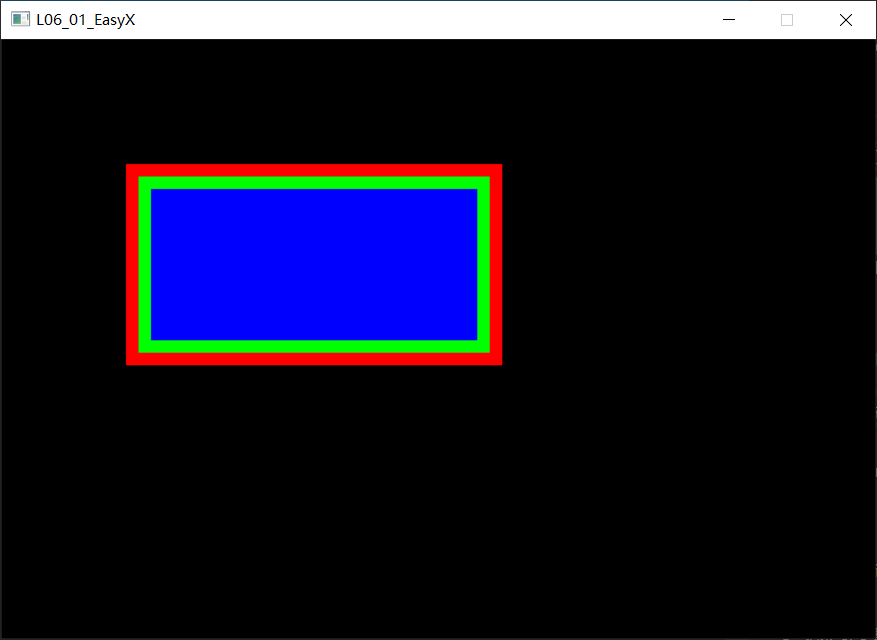
}运行代码效果图如下:

Version 2:使用for()循环简化上一步的代码
//如上图所示,该for()循环将实现最外侧的四边形,并进行填充对应的色彩
for (int x = 100; x <= 400; x++)
{
   for (int y = 100; y <= 260; y++)
    {
       VerticalLine(x, y, 260, RGB(255, 0, 0));
     }
}
//如上图所示,该for()循环将实现中间的四边形,并进行填充对应的色彩
for (int y = 110; y <= 390; y++)
{
   for (int x = 110; x <= 250; x++)
    {
        LevelLine(x, y, 390, RGB(0, 255, 0))
     }
 }
//如上图所示,该for()循环将实现最内侧的四边形,并进行填充对应的色彩
for (int y = 120; y <= 380; y++)
{
    for (int x = 120; x <= 240; x++)
    {
        LevelLine(x, y, 380, RGB(0, 0, 255));
   }
}
运行代码后的效果如下:
Version 迭代版:
/*
为了实现在屏幕指定位置绘制指定大小、颜色的矩形功能,
由于上面的代码是传输的具体值,和题意不符,所以话需要进一步改进代码。
*/
void drawBox(int top, int left, int wigth, int height, int borderColor, int
borderWidth, int borderWidth2, int fillColor, int fillColor2)
{
    //打印最外侧层图形
    for (int x = top; x <= wigth; x++)
    {
         for (int y = left; y <= height; y++)
        {
            VerticalLine(x, y, height, borderColor);
        }
     }
    //打印中间层图形
    for (int y = top + borderWidth; y <= wigth - borderWidth; y++)
    {
        for (int x = left + borderWidth; x <= height - borderWidth; x++)
        {
            LevelLine(x, y, wigth - borderWidth, fillColor);
         }
    }

    //打印最内层图形
    for (int y = top + borderWidth + borderWidth2; y <= wigth - borderWidth -
borderWidth2; y++)
    {
        for (int x = left + borderWidth + borderWidth2; x <= height -
borderWidth - borderWidth2; x++)
        {
            LevelLine(x, y, wigth - borderWidth- borderWidth2, fillColor2);
        }
    }

}
最后贴上完整的代码:
#include <stdio.h>
#include <graphics.h>
#include <conio.h>
//函数声明
void VerticalLine(int x, int yStart, int yEnd, int color);
void LevelLine(int y, int xStart, int xEnd, int color);
//该函数实现的三个嵌套的四边形
void drawBox(int top, int left, int wigth, int height, int borderColor, int
borderWidth, int borderWidth2, int fillColor, int fillColor2);
int main()
{
    initgraph(640, 480);//窗口大小
    /*
    调用drawBox()函数,在800像素x600像素的窗口内会绘制一个100像素x100像素的正方形
    绘制的图形边框颜色为红色( RGB(255, 0, 0) ),图形的边框宽度为10像素
    绘制的图形内部(不包括边框)颜色为蓝色( RGB(0, 0, 255) )
    */
    drawBox(100, 100, 300, 260, RGB(255, 0, 0), 10, 10, RGB(0, 255, 0),RGB(0, 0,
255));
    _getch();//防止生成的绘图窗口一闪而过
    closegraph();//关闭绘图窗口
    return 0;
}
    //垂直线,X轴不变
void VerticalLine(int x, int yStart, int yEnd, int color)
{
    for (int y = yStart; y <= yEnd; y++)
    {
        putpixel(x, y, color);
    }
}

//水平线,y轴不变
void LevelLine(int y, int xStart, int xEnd, int color)
{
    for (int x = xStart; x <= xEnd; x++)
    {
        putpixel(x, y, color);
    }
}
//drawBox()函数定义
void drawBox(int top, int left, int wigth, int height, int borderColor, int
borderWidth, int borderWidth2, int fillColor, int fillColor2)
{
    //打印最外侧层图形
    for (int x = top; x <= wigth; x++)
    {
         for (int y = left; y <= height; y++)
        {
            VerticalLine(x, y, height, borderColor);
        }
     }
    //打印中间层图形
    for (int y = top + borderWidth; y <= wigth - borderWidth; y++)
    {
        for (int x = left + borderWidth; x <= height - borderWidth; x++)
        {
            LevelLine(x, y, wigth - borderWidth, fillColor);
         }
    }

    //打印最内层图形
    for (int y = top + borderWidth + borderWidth2; y <= wigth - borderWidth -
borderWidth2; y++)
    {
        for (int x = left + borderWidth + borderWidth2; x <= height -
borderWidth - borderWidth2; x++)
        {
            LevelLine(x, y, wigth - borderWidth- borderWidth2, fillColor2);
        }
    }

}main()函数中调用drawBox()函数,drawBox(100, 100, 300, 260, RGB(255, 0, 0), 10, 10, RGB(0, 255, 0),RGB(0, 0, 255)); drawBos()函数里的参数是可以替换的,这里的意思是initgraph(650, 500);//窗口大小会在650像素x500像素的窗口显示三个嵌套的四边形,最外侧的四边形左上角的坐标为(100像素,100像素),最外侧的四边形长度为300像素,宽度为260像素,图形的填充色为红色,中间层图形和最外侧图形的边距少10像素,填充色为绿色,最内层的图形和中间层的图形边距少10像素,填充色为蓝色。
运行代码后的效果如下所示: