为了方便记录一下MySQL的安装过程,特意写此文进行记录;
1、安装环境
[root@VM_0_9_centos ~]# lsb_release -a
LSB Version:	:core-4.1-amd64:core-4.1-noarch:cxx-4.1-amd64:cxx-4.1-noarch:desktop-4.1-amd64:desktop-4.1-noarch:languages-4.1-amd64:languages-4.1-noarch:printing-4.1-amd64:printing-4.1-noarch
Distributor ID:	CentOS
Description:	CentOS Linux release 7.4.1708 (Core)
Release:	7.4.1708
Codename:	Core
2、MySQL下载
有两种方式:
2.1官网下载
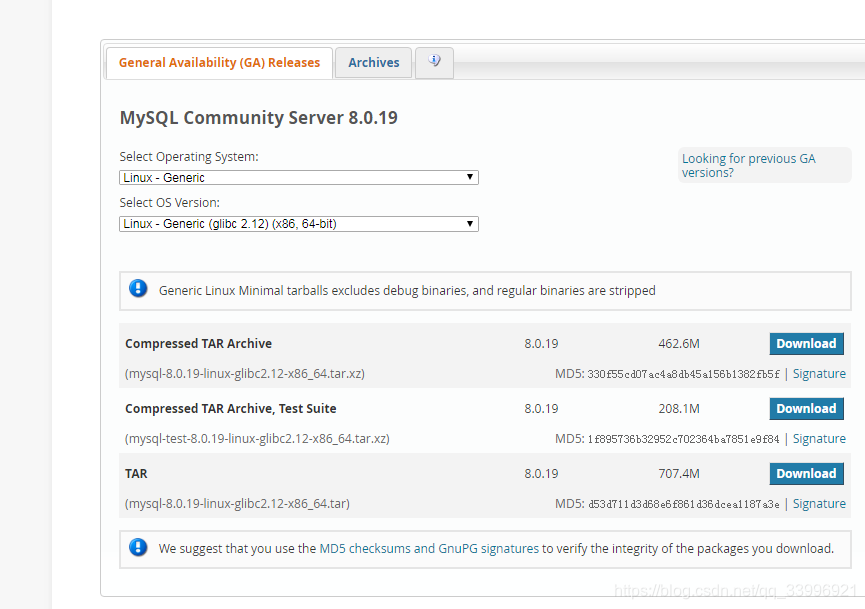
1、登录官网
https://dev.mysql.com/downloads/mysql/
2、选择版本
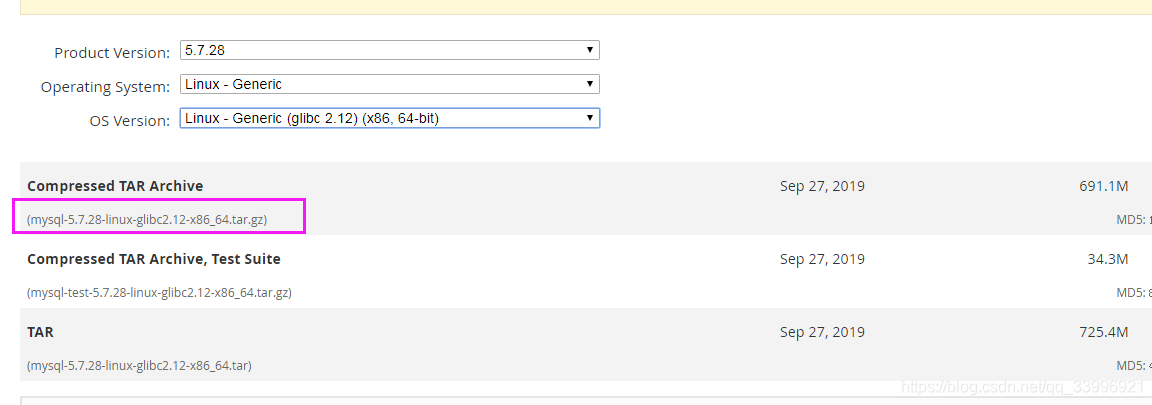
3、如果要选择往期版本,可以到【archive】中进行选择,本文选择mysql-5.7.28-linux-glibc2.12-x86_64.tar.gz版本进行安装。
4、获取下载地址
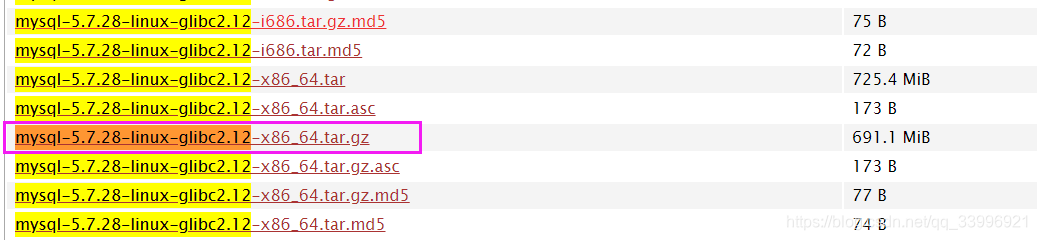
https://downloads.mysql.com/archives/get/p/23/file/mysql-5.7.28-linux-glibc2.12-x86_64.tar.gz
2.2 国内镜像下载
从官网下载会比较缓慢,我的显示需要N(N>5)个小时,如果从官网下载比较快的小伙伴可以不用看国内这个步骤。
1、选择镜像源
`mysql国内镜像下载网址:`

http://mirrors.sohu.com/mysql/
http://mirrors.ustc.edu.cn/mysql-ftp/Downloads/

`开源镜像站点汇总:`

http://segmentfault.com/a/1190000000375848
2、选择MySQL的镜像,选择的版本为mysql-5.7.28-linux-glibc2.12-x86_64.tar.gz.
http://mirrors.sohu.com/mysql/MySQL-5.7/
3、获取下载地址:
http://mirrors.sohu.com/mysql/MySQL-5.7/mysql-5.7.28-linux-glibc2.12-x86_64.tar.gz
2.3 下载到本地
`进入到/usr/src/目录下`
[root@VM_0_9_centos ~]# cd /usr/src/

`下载MySQL`
[root@VM_0_9_centos src]# wget http://mirrors.sohu.com/mysql/MySQL-5.7/mysql-5.7.28-linux-glibc2.12-x86_64.tar.gz
3、安装准备工作
3.1检查是否存在mysql/mariadb
centos7系统自带mariadb数据库,先卸载再安装mysql,防止有冲突.
`查看是否存在mysql`
[root@VM_0_9_centos src]# rpm -qa | grep -i mysql

`查看是否存在mariadb`
[root@VM_0_9_centos src]# rpm -qa | grep mariadb
mariadb-libs-5.5.56-2.el7.x86_64
3.2 卸载已已存在的mysql/mariadb
`卸载mariadb`
[root@VM_0_9_centos src]# rpm -e --nodeps mariadb-libs-5.5.56-2.el7.x86_64
`再次查看,已经卸载`
[root@VM_0_9_centos src]# rpm -qa | grep mariadb
4、安装配置
4.1、目录准备
`进入下载目录进行解压`
[root@VM_0_9_centos plugin]# cd /usr/src
[root@VM_0_9_centos src]# tar -zvxf mysql-5.7.28-linux-glibc2.12-x86_64.tar.gz

`移动到/usr/local中,并重命名为mysql`
[root@VM_0_9_centos src]# mv mysql-5.7.28-linux-glibc2.12-x86_64 /usr/local/mysql

`进入mysql目录下创建data文件夹`
[root@VM_0_9_centos mysql]# cd /usr/local/mysql
[root@VM_0_9_centos mysql]# mkdir data
4.2、主目录权限设置
`查看组和用户情况`
[root@VM_0_9_centos mysql]# cat /etc/group | grep mysql
[root@VM_0_9_centos mysql]# cat /etc/passwd |grep mysql
若存在,则删除原mysql用户:userdel -r mysql,会删除其对应的组和用户。
创建mysql组和mysql用户
`创建mysql组和mysql用户`
[root@VM_0_9_centos mysql]# groupadd mysql
[root@VM_0_9_centos mysql]# useradd -r -g mysql mysql
[root@VM_0_9_centos mysql]# chown -R mysql:mysql /usr/local/mysql

`查看组和用户情况`
[root@VM_0_9_centos mysql]# cat /etc/group | grep mysql
mysql:x:1000:
[root@VM_0_9_centos mysql]# cat /etc/passwd |grep mysql
mysql:x:995:1000::/home/mysql:/bin/bash
4.3、创建配置文件
修改配置文件,配置不对的话,后面初始化不全,会拿不到默认密码。
[root@VM_0_9_centos mysql]# vim /etc/my.cnf
my.cnf配置文件内容如下:
[mysqld]
bind-address=0.0.0.0
port=3306
user=mysql
basedir=/usr/local/mysql
datadir=/usr/local/mysql/data
socket=/tmp/mysql.sock
pid-file=/tmp/mysqld/mysqld.pid
log-error=/var/log/mysqld.log
#character config
character_set_server=utf8mb4
symbolic-links=0
explicit_defaults_for_timestamp=true
4.3.1 创建/tmp/mysql.sock
创建mysql.sock文件,用来设置用户组及用户,授权
[root@VM_0_9_centos src]# cd /tmp
[root@VM_0_9_centos tmp]# touch mysql.sock
[root@VM_0_9_centos tmp]# chown mysql:mysql mysql.sock
[root@VM_0_9_centos tmp]# chmod 755 mysql.sock
4.3.2 创建/tmp/mysqld/mysqld.pid
[root@VM_0_9_centos tmp]# mkdir mysqld
[root@VM_0_9_centos tmp]# cd mysqld
[root@VM_0_9_centos mysqld]# touch mysqld.pid
[root@VM_0_9_centos mysqld]# cd ..
[root@VM_0_9_centos tmp]# chown -R mysql:mysql mysqld
[root@VM_0_9_centos tmp]# cd mysqld
[root@VM_0_9_centos mysqld]# chmod 755 mysqld.pid
4.3.2 创建/var/log/mysqld.log
[root@VM_0_9_centos mysqld]# touch /var/log/mysqld.log
[root@VM_0_9_centos mysqld]# chown -R mysql:mysql /var/log
[root@VM_0_9_centos mysqld]# cd /var/log
[root@VM_0_9_centos log]# chmod 755 mysqld.log
5、安装和初始化数据库
5.1 初始化安装
[root@VM_0_9_centos bin]# cd /usr/local/mysql/bin/
`初始化数据库`
[root@VM_0_9_centos bin]# ./mysqld --defaults-file=/etc/my.cnf --basedir=/usr/local/mysql/ --datadir=/usr/local/mysql/data --log-error=/var/log/mysqld.log --user=mysql --initialize
`错误信息`
./mysqld: error while loading shared libraries: libnuma.so.1: cannot open shared object file: No such file or directory
出现错误信息,需安装libnuma后再执行。
[root@VM_0_9_centos bin]# yum -y install numactl
[root@VM_0_9_centos bin]# ./mysqld --defaults-file=/etc/my.cnf --basedir=/usr/local/mysql/ --datadir=/usr/local/mysql/data --log-error=/var/log/mysqld.log --user=mysql --initialize
5.2 启动MySQL:
先将mysql.server放置到/etc/init.d/mysql中
`复制mysql.server`
[root@VM_0_9_centos support-files]# cp /usr/local/mysql/support-files/mysql.server /etc/init.d/mysql

`启动MySQL`
[root@VM_0_9_centos support-files]# service mysql start
Starting MySQL.

`查看MySQL进程`
[root@VM_0_9_centos support-files]# ps -ef | grep mysql
root     14276     1  0 15:24 pts/0    00:00:00 /bin/sh /usr/local/mysql/bin/mysqld_safe --datadir=/usr/local/mysql/data --pid-file=/tmp/mysqld/mysqld.pid
mysql    14507 14276  0 15:24 pts/0    00:00:00 /usr/local/mysql/bin/mysqld --basedir=/usr/local/mysql --datadir=/usr/local/mysql/data --plugin-dir=/usr/local/mysql/lib/plugin --user=mysql --log-error=/var/log/mysqld.log --pid-file=/tmp/mysqld/mysqld.pid --socket=/tmp/mysql.sock --port=3306
root     14868  5115  0 15:26 pts/0    00:00:00 grep --color=auto mysql
默认密码在mysqld.log日志里, 找到后保存到安全的地方:
[root@VM_0_9_centos support-files]# cat /var/log/mysqld.log |grep "password"
2020-03-15T07:11:26.472571Z 1 [Note] A temporary password is generated for root@localhost: 7dgEjXw*mQ((
5.3 登录MySQL
`建立软连接,可以直接用mysql直接访问`
[root@VM_0_9_centos bin]#  ln -s /usr/local/mysql/bin/mysql /usr/bin

`登录`
[root@VM_0_9_centos bin]# mysql -uroot -p
Enter password:
Welcome to the MySQL monitor.  Commands end with ; or \g.
Your MySQL connection id is 3
Server version: 5.7.28

Copyright (c) 2000, 2019, Oracle and/or its affiliates. All rights reserved.

Oracle is a registered trademark of Oracle Corporation and/or its
affiliates. Other names may be trademarks of their respective
owners.

Type 'help;' or '\h' for help. Type '\c' to clear the current input statement.

`在任何操作之前都会提示需要先修改密码`
mysql> show databases;
ERROR 1820 (HY000): You must reset your password using ALTER USER statement before executing this statement.
5.4 设置密码及权限
`重置密码`
mysql>  set password=password("123456");
Query OK, 0 rows affected, 1 warning (0.00 sec)

`设置远程登录权限`
mysql>grant all privileges on *.* to 'root'@'%' identified by '123456';
Query OK, 0 rows affected, 1 warning (0.00 sec)

`刷新:`
mysql> flush privileges;
Query OK, 0 rows affected (0.01 sec)

`退出`
mysql> exit;
Bye
5.5 设置开机启动
前面已将mysql.server放置到/etc/init.d/mysql中,下面来配置开机启动;
`查看mysql服务是否在服务配置中`
[root@VM_0_9_centos bin]# chkconfig --list mysql

Note: This output shows SysV services only and does not include native
      systemd services. SysV configuration data might be overridden by native
      systemd configuration.

      If you want to list systemd services use 'systemctl list-unit-files'.
      To see services enabled on particular target use
      'systemctl list-dependencies [target]'.

service mysql supports chkconfig, but is not referenced in any runlevel (run 'chkconfig --add mysql')

`若没有,则把mysql注册为开机启动的服务`
[root@VM_0_9_centos bin]# chkconfig --add mysql

`查看mysql服务是否在服务配置中`
[root@VM_0_9_centos bin]# chkconfig --list mysql
..............
mysql          	0:off	1:off	2:on	3:on	4:on	5:on	6:off
启动或停止的命令如下:
`查看状态`
[root@VM_0_9_centos bin]# service mysql status
MySQL running (14507)                                      [  OK  ]

`停止`
[root@VM_0_9_centos bin]# service mysql stop
Shutting down MySQL..                                      [  OK  ]

`启动`
[root@VM_0_9_centos bin]# service mysql start
Starting MySQL.                                            [  OK  ]

`重启`
[root@VM_0_9_centos bin]# service mysql restart
Shutting down MySQL..                                      [  OK  ]
Starting MySQL.
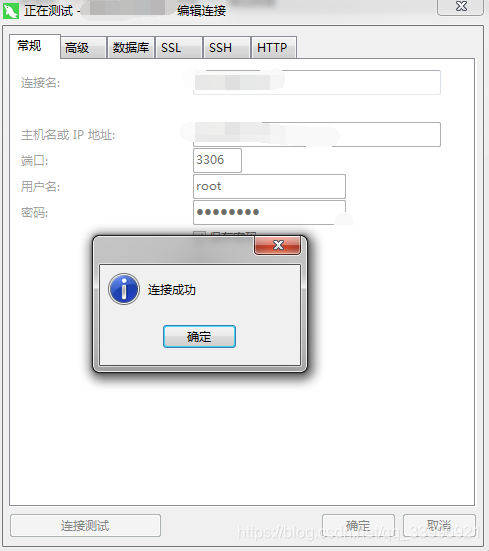
6、用Navicat访问
如果出现如下问题,可以查看一下防火墙转态;
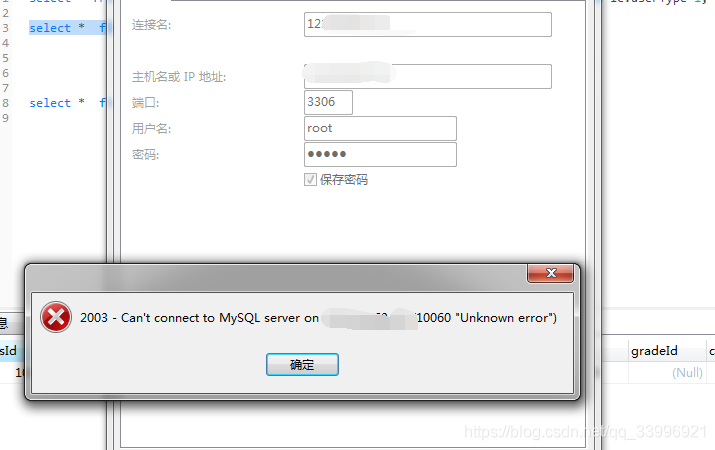
`查看防火墙状态`
[root@VM_0_9_centos bin]# systemctl status firewalld
● firewalld.service - firewalld - dynamic firewall daemon
   Loaded: loaded (/usr/lib/systemd/system/firewalld.service; disabled; vendor preset: enabled)
   Active: `active (running)` since Sun 2020-03-15 16:09:32 CST; 2s ago
     Docs: man:firewalld(1)
 Main PID: 23121 (firewalld)
   CGroup: /system.slice/firewalld.service
           └─23121 /usr/bin/python -Es /usr/sbin/firewalld --nofork --nopid

。。。。。。。。。省略。。。。。。。。。。。。。。。
发现防火墙是active的,我为了方便直接关闭了防火墙,线上的话可以进行防火墙的配置,开放3306端口就可以,此处不再详述。
`关闭防火墙`
[root@VM_0_9_centos bin]# systemctl stop firewalld

`查看防火墙状态`
[root@VM_0_9_centos bin]# systemctl status firewalld
● firewalld.service - firewalld - dynamic firewall daemon
   Loaded: loaded (/usr/lib/systemd/system/firewalld.service; disabled; vendor preset: enabled)
   Active:` inactive (dead)`
     Docs: man:firewalld(1)

。。。。。。。。。省略。。。。。。。。。。。。。。。
再使用Navicat进行连接。