安装配置
python -m pip install paddlepaddle -i https://mirror.baidu.com/pypi/simple
- 进入python环境测试
Python 3.7.6 (tags/v3.7.6:43364a7ae0, Dec 19 2019, 00:42:30) [MSC v.1916 64 bit (AMD64)] on win32
Type "help", "copyright", "credits" or "license" for more information.
>>> import paddle.fluid
>>> paddle.fluid.install_check.run_check()
- 如果控制台显示Your Paddle is installed successfully! Let’s start deep Learning with Paddle now就代表我们已经安装成功了。另外我们还需要安装paddlehub:
pip install -i https://mirror.baidu.com/pypi/simple paddlehub
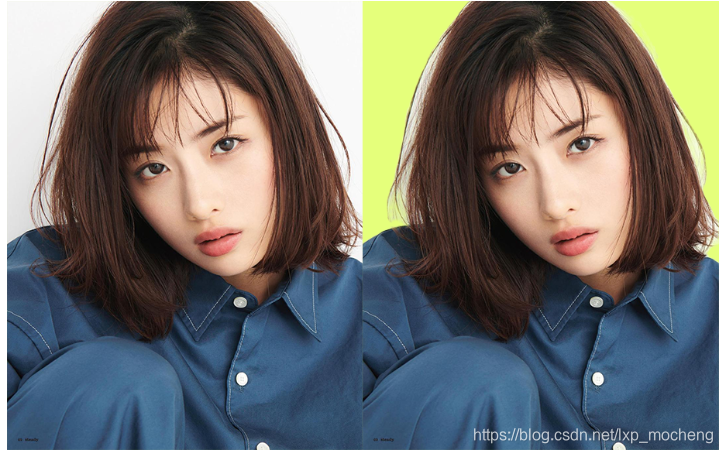
实现抠图
实现抠图的代码很简单,大概分为下面几个步骤:
- 导入模块
- 加载模型
- 获取文件列表
- 抠图
详细点的代码如下:
# 1、导入模块
import os
import paddlehub as hub

# 2、加载模型
humanseg = hub.Module(name='deeplabv3p_xception65_humanseg')

# 3、获取文件列表
# 图片文件的目录
path = 'D:/CodeField/Workplace/PythonWorkplace/PillowTest/11_yellow/img/'
# 获取目录下的文件
files = os.listdir(path)
# 用来装图片的
imgs = []
# 拼接图片路径
for i in files:
    imgs.append(path + i)
#抠图
results = humanseg.segmentation(data={'image':imgs})
运行完成后,我们可以在项目下看到humanseg_output目录,抠好的图片就会存放在该目录下。当然了,上面的代码我们在获取文件列表的操作还可以简化一下:
import os, paddlehub as hub
humanseg = hub.Module(name='deeplabv3p_xception65_humanseg')		# 加载模型
path = 'D:/CodeField/Workplace/PythonWorkplace/PillowTest/11_yellow/img/'	# 文件目录
files = [path + i for i in os.listdir(path)]	# 获取文件列表
results = humanseg.segmentation(data={'image':files})	# 抠图
这样我们就完成了5行代码批量抠图。
