springboot
springboot项目
spring boot 里有各种注释来完成各种功能,相较于SSM框架更方便
创建项目操作步骤
- 新建项目时选择spring

- 写入项目名,选择war包

- 依赖先只选择web

- 然后点击finish之后选择自动导包就完成了项目的创建了
正式项目前的测试案例
-
在项目里如图所示位置新建一个controller包和一个hellocontroller类
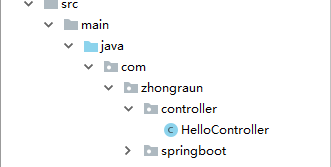
-
hellocontroller 里的代码如下:
package com.zhongraun.controller; import org.springframework.boot.SpringApplication; import org.springframework.boot.autoconfigure.EnableAutoConfiguration; import org.springframework.stereotype.Controller; import org.springframework.web.bind.annotation.RequestMapping; import org.springframework.web.bind.annotation.ResponseBody; import javax.swing.*; @Controller @EnableAutoConfiguration public class HelloController { @RequestMapping("hello.do") @ResponseBody public String hello(){ return "hello spring boot"; } public static void main(String[] args){ SpringApplication.run(HelloController.class,args); } } -
右键项目选择run,成功之后,手动打开8080接口如下:

-
或者也可以在zhongruan包下直接写一个App类,把启动项目的任务交给这个App,里面代码如下:
package com.zhongruan;

import org.springframework.boot.SpringApplication;
import org.springframework.boot.autoconfigure.SpringBootApplication;
import org.springframework.context.annotation.ComponentScan;

@SpringBootApplication
@ComponentScan(basePackages = "com.zhongruan.controller")
public class App {
    public static void main(String[] args){
        SpringApplication.run(App.class,args);
    }
}
正式项目
最后的项目是这个样子的:

- 各文件与我之前搭建SSM框架时基本一样,只是原来的配置文件现在只剩下application.properties了,而且静态文件现在是放在static包下,页面放在了templates包下。
- spring boot 就此完结。
