Android学习(小知识点)
一、欢迎使用界面
二、隐藏标题栏和状态栏+自定义标题栏
三、Butter+EditText模板
四、ScrollView布局使用
五、弹窗
六、menu创建
七、照片自适应
八、进入activity时关输入法
附加:
Android之RecyclerView(新手模板)
Android之SharedPreferences轻量级存储
Android之LitePal数量级存储
Android之图表MAPAndroidChart(模板)
AndroidX之CoordinatorLayout+AppBarLayout顶部折叠栏
Android之底部导航模版的实现和属性动画
Android之登录页的等待页面,AVI(手把手教你写)
Android之下拉刷新和下拉加载(简单的)
Android之欢迎界面上滑解锁
一、欢迎使用界面 点击我回到顶部目录
 new Thread(new Runnable() {
            @Override
            public void run() {
                try {
                    Thread.sleep(1500);
                    Intent intent = new Intent(StarActrvity.this,MainActivity.class);
                    startActivity(intent);
                    finish();
                } catch (InterruptedException e) {
                    e.printStackTrace();
                }
            }
        }).start();
二、隐藏标题栏和状态栏+自定义标题栏 点击我回到顶部目录
1,隐藏状态栏(放在onCreate()里面)
 getWindow().setFlags(WindowManager.LayoutParams.FLAG_FULLSCREEN,
                WindowManager.LayoutParams.FLAG_FULLSCREEN);
//其他用法
getWindow().getDecorView().setSystemUiVisibility(
	//隐藏共用
     View.SYSTEM_UI_FLAG_LAYOUT_STABLE
     //隐藏
     View.SYSTEM_UI_FLAG_FULLSCREEN
     //透明+悬浮
     View.SYSTEM_UI_FLAG_LAYOUT_FULLSCREEN
      //在Activity上面
      View.SYSTEM_UI_FLAG_LAYOUT_HIDE_NAVIGATION;
);
2,隐藏单个Activity标题栏(放在onCreate()里面)
if (getSupportActionBar() != null) getSupportActionBar().hide();
3,隐藏本项目所有标题栏
把styles.xml里面的
<style name="AppTheme" parent="Theme.AppCompat.Light.DarkActionBar">
换成:
<style name="AppTheme" parent="Theme.AppCompat.Light.NoActionBar">
4,自定义标题栏
 <androidx.appcompat.widget.Toolbar
        android:background="#991296db"
        android:layout_width="match_parent"
        android:layout_height="wrap_content">
        <ImageView
            android:onClick="exit"
            android:src="@drawable/exit"
            android:layout_width="40dp"
            android:layout_height="40dp" />
        <TextView
            android:layout_width="wrap_content"
            android:layout_height="wrap_content"
            android:layout_gravity="center"
            android:textSize="24sp"
            android:text="标题栏"/>
    </androidx.appcompat.widget.Toolbar>
三、Butter+EditText模板 点击我回到顶部目录
1,在drawable中新建XML文件 style.xml
<?xml version="1.0" encoding="utf-8"?>
<shape xmlns:android="http://schemas.android.com/apk/res/android"
    android:shape="rectangle" >
    <solid android:color="#60f0" />
    <!-- 设置按钮的四个角为弧形 -->
    <!-- android:radius 弧形的半径 -->
    <corners android:radius="15dip" />
    <!-- padding:Button里面的文字与Button边界的间隔 -->
    <padding
        android:bottom="10dp"
        android:left="10dp"
        android:right="10dp"
        android:top="10dp" />
</shape>
2,Button模板
android:layout_margin="6dp"
 android:background="#@drawable/style"
 android:text="按钮"
 android:textSize="20sp"
3,EditText模板
1,EdiText属性
android:layout_margin="4dp"
android:layout_width="match_parent"
android:layout_height="60dp"
android:background="@drawable/style"
android:textSize="20sp"
四、ScrollView布局使用 点击我回到顶部目录
1,该布局可以向下无线延伸,但是该布局里面只能且仅有1个LinearLayout布局
<ScrollView
    xmlns:android="http://schemas.android.com/apk/res/android"
    xmlns:app="http://schemas.android.com/apk/res-auto"
    xmlns:tools="http://schemas.android.com/tools"
    android:layout_width="match_parent"
    android:layout_height="match_parent"
    tools:context=".Second">		  		这里每个人的都不一样
    <LinearLayout							ScrollView里面只能有一个切必须是LinearLayout
        android:layout_width="match_parent"
        android:layout_height="match_parent">

       										元件或布局,写在此处。。。

    </LinearLayout>
</ScrollView>
五、弹窗 点击我回到顶部目录
1,文本
AlertDialog alertDialog1 = new AlertDialog.Builder(this)
        .setTitle("这是标题")//标题
        .setMessage("这是内容")//内容
        .setIcon(R.mipmap.ic_launcher)//图标
        .create();
alertDialog1.show();
2,文本+按钮
AlertDialog alertDialog2 = new AlertDialog.Builder(this)
        .setTitle("这是标题")
        .setMessage("有多个按钮")
        .setIcon(R.mipmap.ic_launcher)
        .setPositiveButton("确定", new DialogInterface.OnClickListener() {//添加"Yes"按钮
            @Override
            public void onClick(DialogInterface dialogInterface, int i) {
                Toast.makeText(AlertDialogActivity.this, "这是确定按钮", Toast.LENGTH_SHORT).show();
            }
        })

        .setNegativeButton("取消", new DialogInterface.OnClickListener() {//添加取消
            @Override
            public void onClick(DialogInterface dialogInterface, int i) {
                Toast.makeText(AlertDialogActivity.this, "这是取消按钮", Toast.LENGTH_SHORT).show();
            }
        })
        .setNeutralButton("普通按钮", new DialogInterface.OnClickListener() {//添加普通按钮
            @Override
            public void onClick(DialogInterface dialogInterface, int i) {
                Toast.makeText(AlertDialogActivity.this, "这是普通按钮按钮", Toast.LENGTH_SHORT).show();
            }
        })
        .create();
alertDialog2.show();
3,列表形式
final String[] items3 = new String[]{"苹果", "香蕉", "菠萝", "西瓜"};//创建item
AlertDialog alertDialog3 = new AlertDialog.Builder(this)
        .setTitle("选择您喜欢的水果")
        .setIcon(R.mipmap.ic_launcher)
        .setItems(items3, new DialogInterface.OnClickListener() {//添加列表
            @Override
            public void onClick(DialogInterface dialogInterface, int i) {
                Toast.makeText(AlertDialogActivity.this, "点的是:" + items3[i], Toast.LENGTH_SHORT).show();
            }
        })
        .create();
 alertDialog3.show();
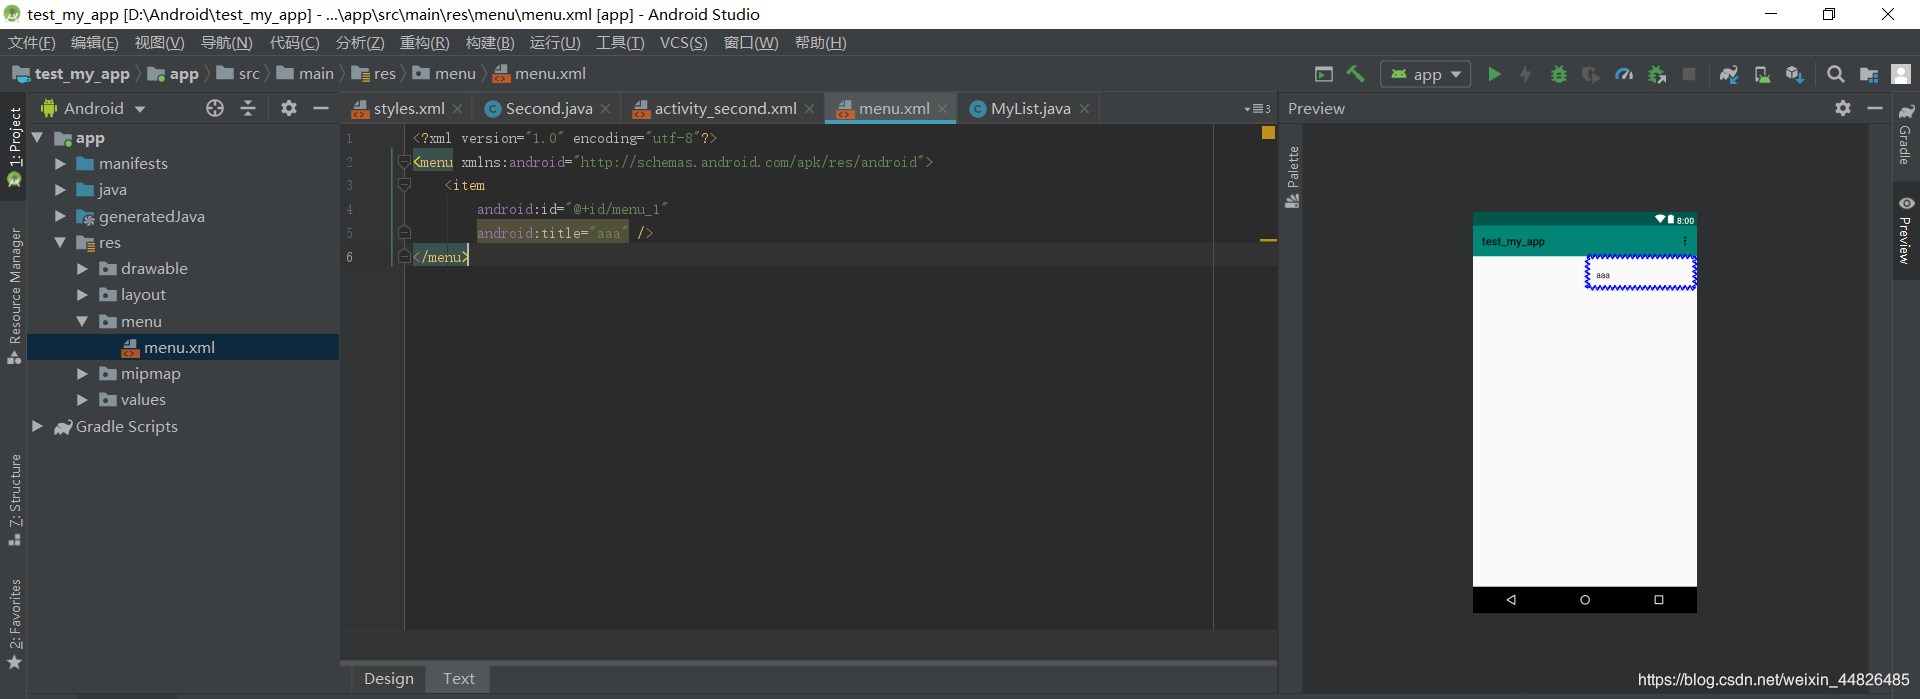
六、menu创建 点击我回到顶部目录

七、图片自适应 点击我回到顶部目录
 android:adjustViewBounds="true"
 图片属性加一个这个
 官网说是配合maxWidth和MaxHeigth使用,但是我没写,还是能用
八、进入activity时关输入法 点击我回到顶部目录
 //不自动弹出输入法
 getWindow().setSoftInputMode(WindowManager.LayoutParams.SOFT_INPUT_STATE_ALWAYS_HIDDEN);
