本次搭建流媒体使用的环境是centos 7.0+nginx;让我们一起开始奇妙的流媒体之旅吧!
1、下载nginx-rtmp-module:
nginx-rtmp-module的官方github地址:https://github.com/arut/nginx-rtmp-module
使用命令:
| 1 |
git clone https://github.com/arut/nginx-rtmp-module.git
|
将nginx-rtmp-module下载到linux中。
2、安装nginx:
nginx的官方网站为:http://nginx.org/en/download.html
| 1 2 3 4 5 |
wget http://nginx.org/download/nginx-1.8.1.tar.gz
tar -zxvf nginx-1.8.1.tar.gz
cd nginx-1.8.1
./configure --prefix=/usr/local/nginx --add-module=../nginx-rtmp-module --with-http_ssl_module
make && make install
|
注:这里的Nginx不需要修改路径名称。
本次默认安装目录为:/root, add-module为下载的nginx-rtmp-module文件路径。
安装时候可能会报错没有安装openssl,需要执行命令:
| 1 |
yum -y install openssl openssl-devel
|
3、修改nginx配置文件:
| 1 |
vi /usr/local/nginx/conf/nginx.conf
|
加入以下内容:
| 1 2 3 4 5 6 7 8 9 10 11 12 13 14 15 16 17 |
rtmp {
server {
listen 1935; #监听的端口
chunk_size 4000;
application hls { #rtmp推流请求路径
live on;
hls on;
hls_path /usr/share/nginx/html/hls;
hls_fragment 5s;
}
}
}
|
hls_path需要可读可写的权限。
修改http中的server模块:
| 1 2 3 4 5 6 7 8 9 10 11 12 13 14 15 16 17 18 19 20 21 |
server {
listen 81;
server_name localhost;
#charset koi8-r;
#access_log logs/host.access.log main;
location / {
root /usr/share/nginx/html;
index index.html index.htm;
}
#error_page 404 /404.html;
# redirect server error pages to the static page /50x.html
#
error_page 500 502 503 504 /50x.html;
location = /50x.html {
root html;
}
|
当然了,root可以跟据自己的需求来改的。然后启动nginx:
| 1 |
/usr/local/nginx/sbin/nginx -c /usr/local/nginx/conf/nginx.conf
|
关于更多rtmp的参数可以参考:https://github.com/arut/nginx-rtmp-module/wiki
如果本机看不到虚拟机正确的Nginx访问页面,需要按照如下方式处理一下:
| 1 2 3 |
[root@localhost html]# /sbin/iptables -I INPUT -p tcp --dport 81 -j ACCEPT
[root@localhost html]# /etc/init.d/iptables save
[root@localhost html]# /etc/init.d/iptables restart
|
你还可以修改服务器监听的端口和服务器名称:
| 1 2 3 4 5 6 7 8 9 10 11 12 13 14 15 16 17 18 19 20 21 22 23 24 25 26 27 28 29 30 31 32 33 34 35 36 37 38 39 40 41 42 43 44 45 |
server {
listen 1990;
server_name 172.16.20.10;
#charset koi8-r;
#access_log logs/host.access.log main;
location / {
root html;
index index.html index.htm;
}
#error_page 404 /404.html;
# redirect server error pages to the static page /50x.html
#
error_page 500 502 503 504 /50x.html;
location = /50x.html {
root html;
}
# proxy the PHP scripts to Apache listening on 127.0.0.1:80
#
#location ~ \.php$ {
# proxy_pass http://127.0.0.1;
#}
# pass the PHP scripts to FastCGI server listening on 127.0.0.1:9000
#
#location ~ \.php$ {
# root html;
# fastcgi_pass 127.0.0.1:9000;
# fastcgi_index index.php;
# fastcgi_param SCRIPT_FILENAME /scripts$fastcgi_script_name;
# include fastcgi_params;
#}
# deny access to .htaccess files, if Apache's document root
# concurs with nginx's one
#
#location ~ /\.ht {
# deny all;
#}
}
|
4、开始推流
做好以上的配置后,就可以开始推流了,我们可以使用obs(或者访问http://www.obsapp.net/)来推流。(截图同款请到http://www.pc6.com/mac/410309.html)
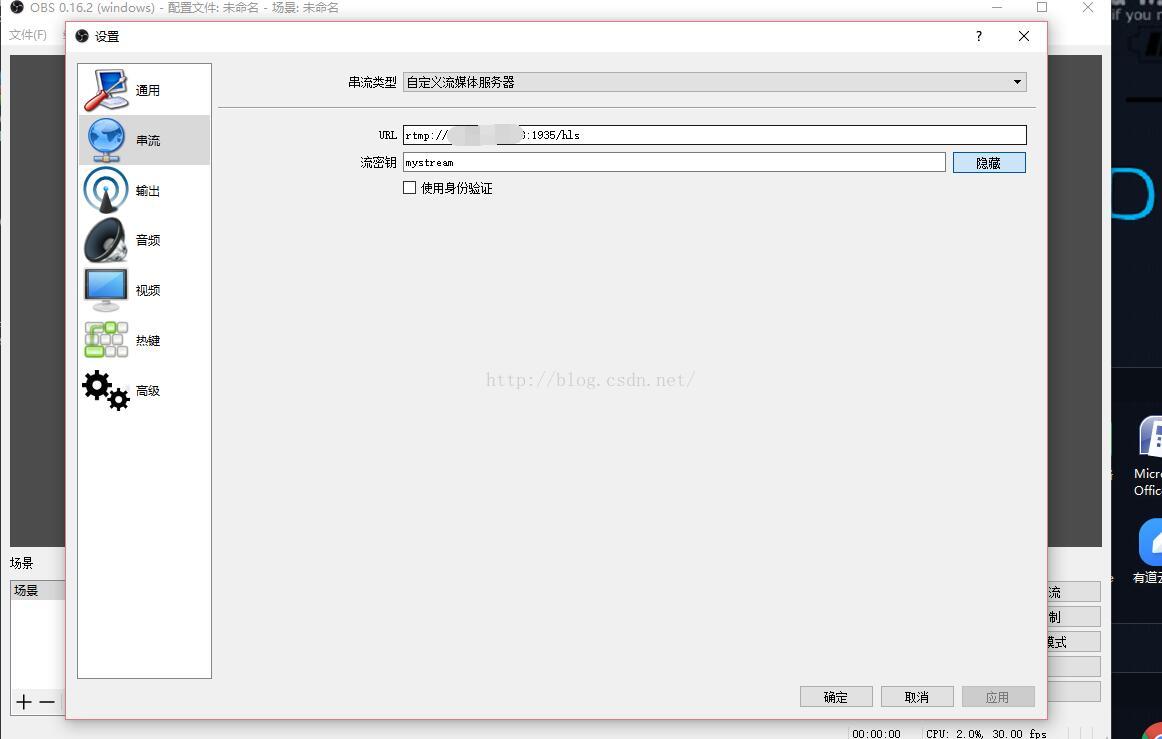
在设置->串流 中填写信息:URL为 rtmp://xxx:1935/hls,xxx为你的服务器的IP地址,hls是用来存放流媒体的。
秘钥可以随便填写一个,用来播放的时候识别播放哪个流媒体的,例如填写test等。
填写完毕后,点击开始串流,就说明我们的流媒体服务器搭建成功了。
5、观看直播(拉流)
观看直播就比较简单了,可以简单的使用h5的vedio标签就可以观看了。
可以访问http://xxx:81/hls/mystream.m3u8来观看直播,其中xxx为你的服务器IP地址,或者使用
| 1 2 3 4 |
<video>
<source src="http://xxx:81/hls/test.m3u8"/>
<p class="warning">Your browser does not support HTML5 video.</p>
</video>
|
同上, xxx写的是你服务器IP地址。
然后使用手机访问这个网站就能够观看直播了。延迟大概在20S左右。
(在IOS的safari浏览器中可以正常观看)
写在最后
为什么延迟 那么高呢?这是因为服务器将视频流切断成一个个小的以.ts结尾的文件。
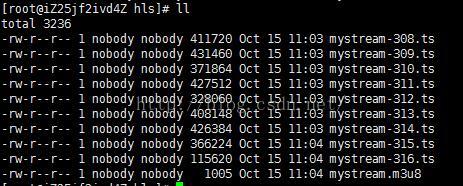 (hls文件夹内容。即推流到该文件夹了)
而我们访问的是.m3u8文件,这个文件内容是将一个个ts文件串联起来的,这就达到了一个播放的效果,所以看起来会有很大的延迟。
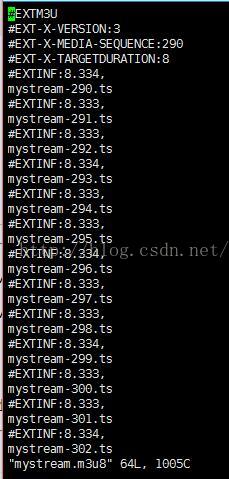 (m3u8文件内容)
如果降低延迟也不是没有方法,可以设置切片生成的大小以及访问的速度,但是这样大大增加了服务器的压力。
当然,我们也可以用rtmp拉流工具(VLC等)来看该直播,延迟大概在2-5S左右,拉流地址与推流地址一致。
纸上得来终觉浅,绝知此事要躬行。
