===============================================
2018/5/1_第1次修改 ccb_warlock
===============================================
部署完swarm(http://www.cnblogs.com/straycats/p/8978135.html)之后,寻找可以管理swarm的web系统方便管理,经过使用portainer可以满足对swarm的基本管理,而且该项目github上的收藏也较多。
一、前提
- 已经部署完docker、docker-compose、swarm,部署可以参考《部署docker Swarm.md》
- 默认部署的服务器IP:192.168.12.11
二、部署portainer管理swarm
2.1 创建目录
mkdir -p /opt/portainer
mkdir -p /data
2.2 安装portainer
2.2.1 命令方式
docker service create \
  --name portainer \
  --publish 9000:9000 \
  --replicas=1 \
  --constraint 'node.role == manager' \
  --mount type=bind,src=//var/run/docker.sock,dst=/var/run/docker.sock \
  --mount type=bind,src=//opt/portainer,dst=/data \
  portainer/portainer \
  -H unix:///var/run/docker.sock
  --restart-condition on-failure
2.2.2 stack方式
# 添加portainer-stack.yml
cd /root
vim portainer-stack.yml
# 增加下面的内容,wq保存
version: '3'
services:

  portainer:
    image: portainer/portainer
    volumes:
      - "/var/run/docker.sock:/var/run/docker.sock"
      - "/opt/portainer:/data"
    deploy:
      placement:
        constraints: [node.role == manager] # 控制管理界面部署在manager上
      replicas: 1
      restart_policy:
        condition: on-failure
      resources:
        limits:
          cpus: "0.1"
          memory: 50M
      labels: [svc=portainer]
    ports:
      - 9000:9000
# 创建portainer-stack
cd
docker stack deploy -c portainer-stack.yml portainer-stack
PS.如果需要移除该stack,则使用命令
docker stack rm portainer-stack
2.3 访问页面
浏览器访问 https://192.168.12.11:9000
填写8位以上密码,创建管理员用户。进入系统后可以再修改8位以内的密码。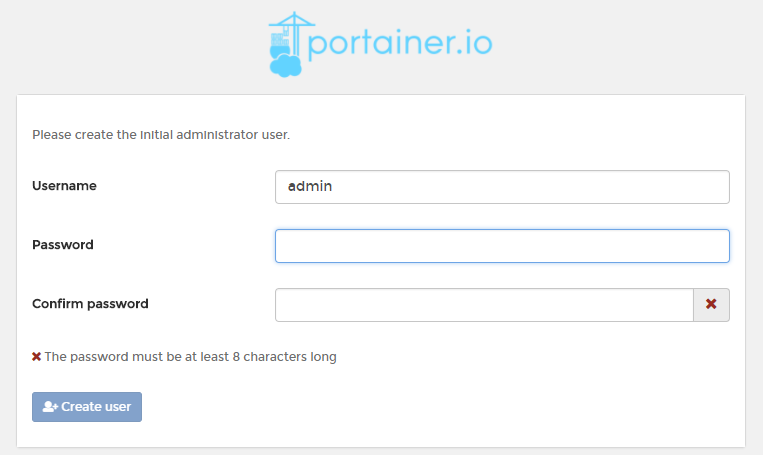
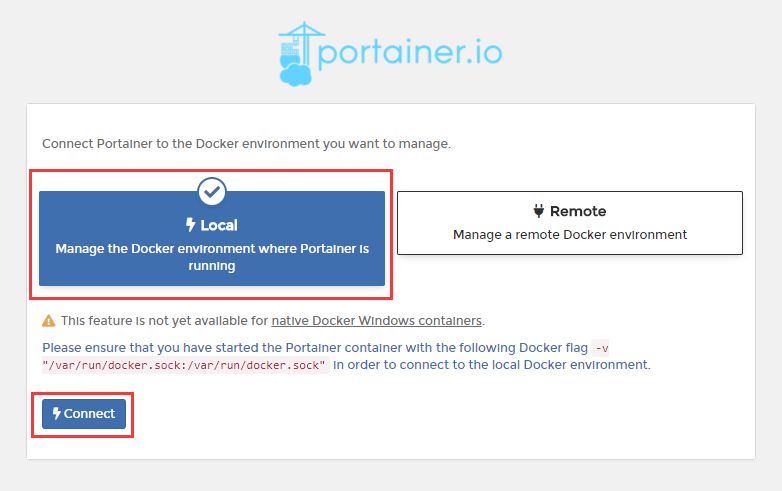
如果是使用stack方式portainer,还需要选择管理本地的docker环境。