一、前期准备
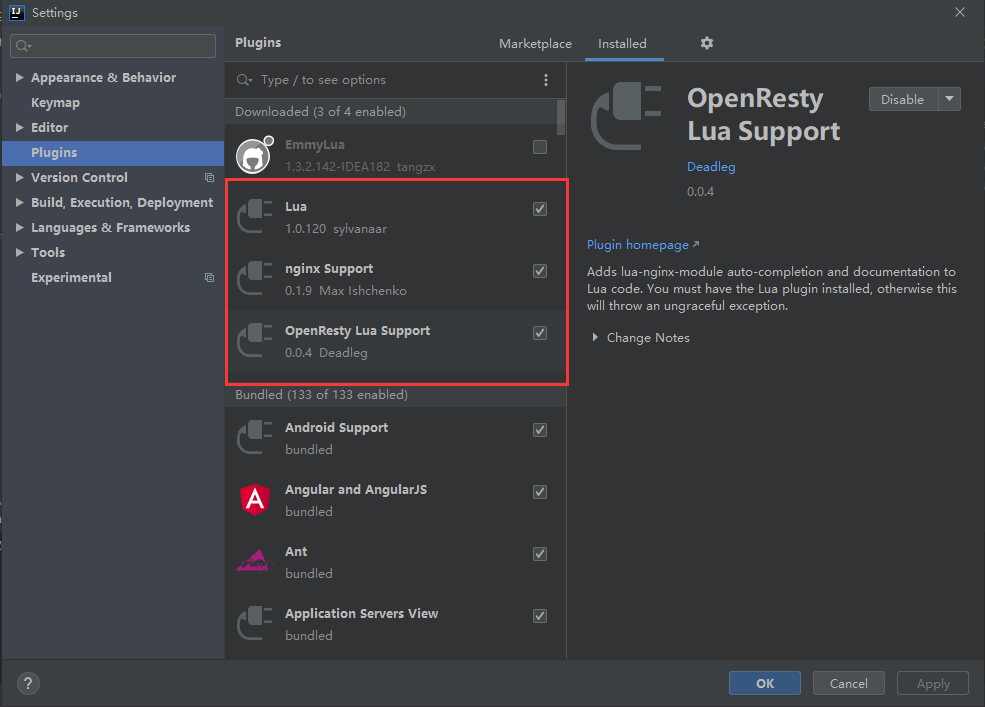
二、创建并配置项目
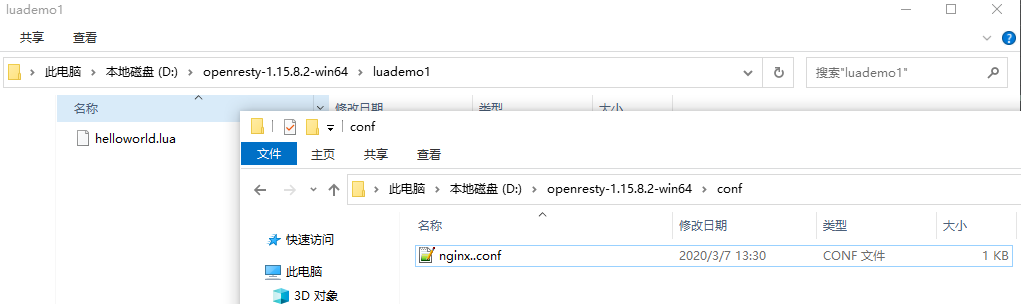
创建一个名为luademo1的
Lua项目

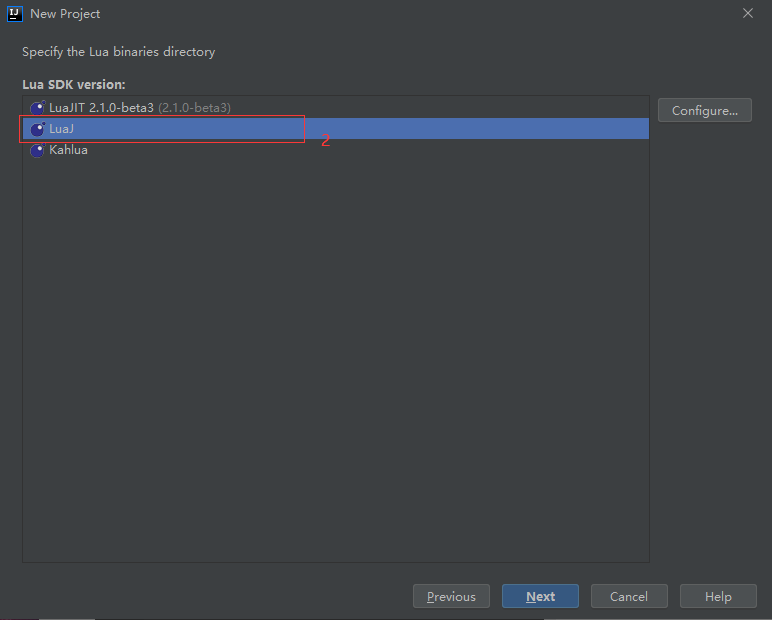

创建
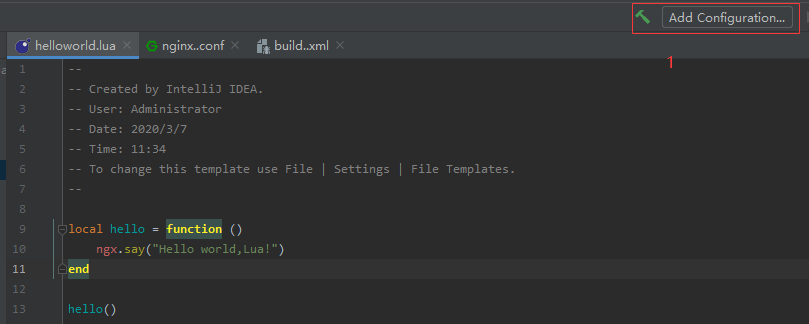
conf、src目录,并添加nginx.conf、build.xml和helloworld.lua文件
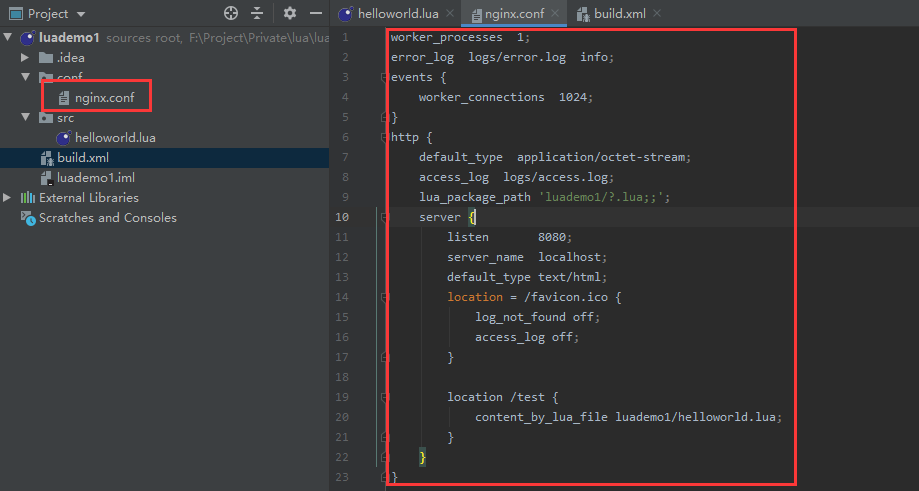
nginx.conf文件worker_processes 1; error_log logs/error.log info; events { worker_connections 1024; } http { default_type application/octet-stream; access_log logs/access.log; lua_package_path 'luademo1/?.lua;;'; server { listen 8080; server_name localhost; default_type text/html; location = /favicon.ico { log_not_found off; access_log off; } location /test { content_by_lua_file luademo1/helloworld.lua; } } }helloworld.lua文件local hello = function () ngx.say("Hello world,Lua!") end hello()build.xml文件<?xml version="1.0" encoding="UTF-8"?> <project name="luademo1" default="dist" basedir="."> <description> run pic-server </description> <!-- set global properties for this build --> <property name="openresty-home" location="D:\openresty-1.15.8.2-win64"/> <property name="conf" location="${basedir}/conf"/> <property name="src" location="${basedir}/src"/> <property name="target-conf" location="${openresty-home}/conf"/> <property name="target-src" location="${openresty-home}/${ant.project.name}"/> <echo>######开发版本的ant配置#####</echo> <target name="clean" depends=""> <echo>清理openresty目录${dist}下的conf,logs,janus,januslib</echo> <delete dir="${target-conf}"/> <delete dir="${target-src}"/> <delete> <fileset dir="${openresty-home}/logs" includes="*.log"> </fileset> </delete> </target> <target name="init" depends="clean"> <echo>创建安装目录</echo> <mkdir dir="${target-conf}"/> <mkdir dir="${target-src}"/> </target> <target name="dist" depends="init" description="generate the distribution" > <echo>复制安装文件</echo> <copy todir="${target-conf}"> <fileset dir="${conf}"></fileset> </copy> <copy todir="${target-src}"> <fileset dir="${src}"></fileset> </copy> </target> </project>其中
build.xml文件中的D:\openresty-1.15.8.2-win64一定要换成OpenResty的真实安装目录
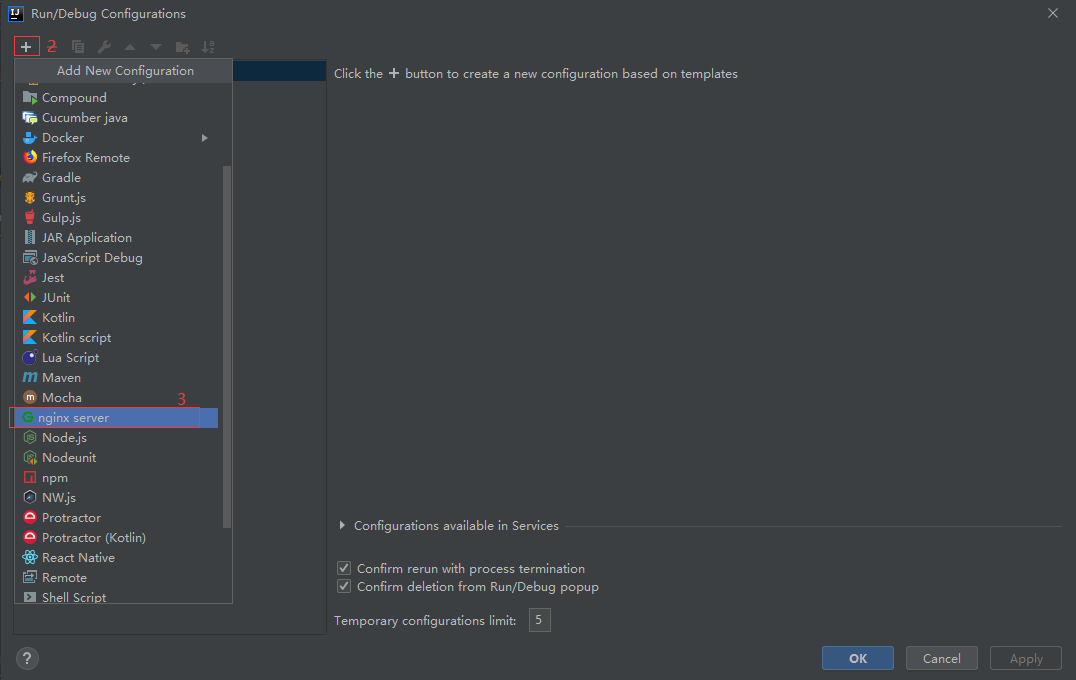
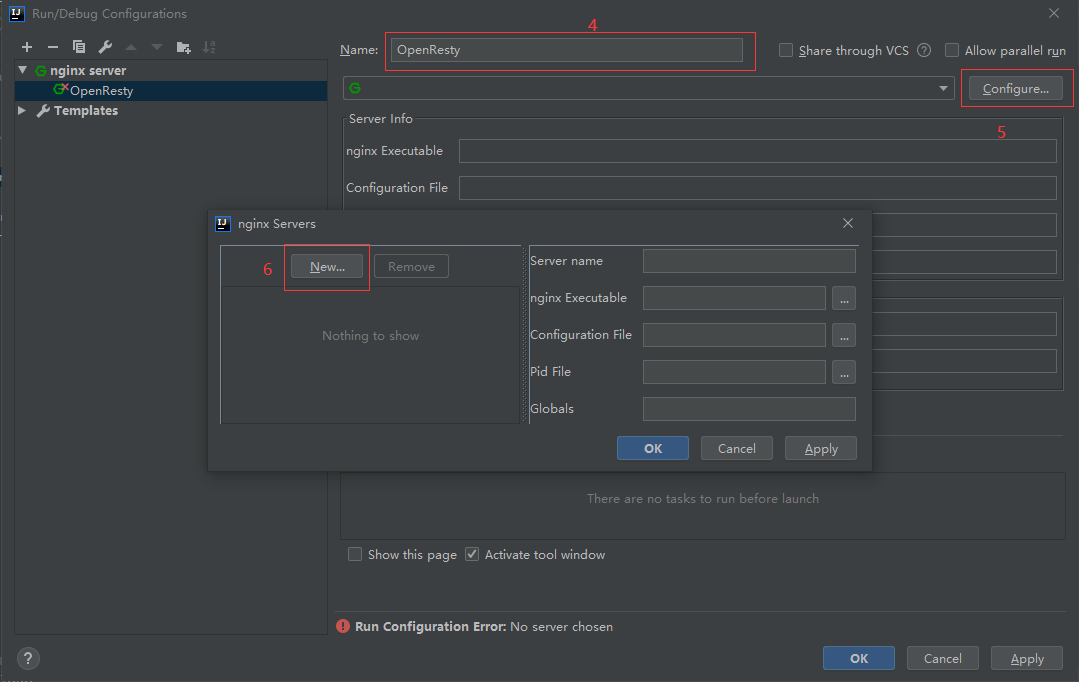
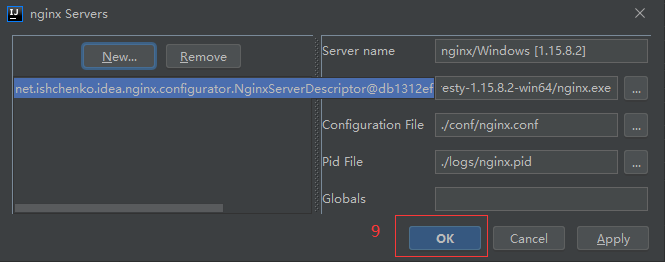
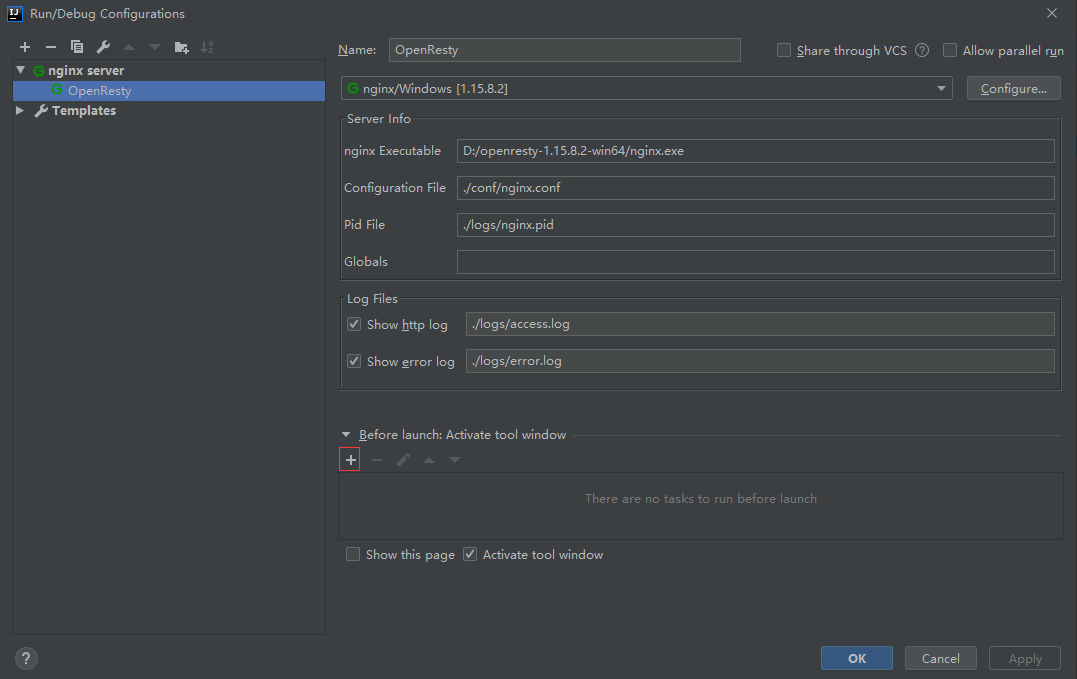
配置nginx server,用于在
IDEA中启动nginx


- 配置
Ant Build,用于将conf和src中的文件拷贝到OpenResty安装目录下的指定路径右键
build.xml文件,选中Add as Ant Build File

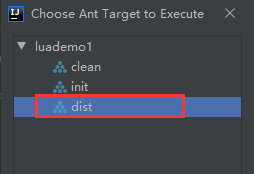
点击
Ant中的Run执行一下

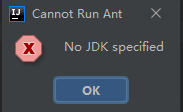
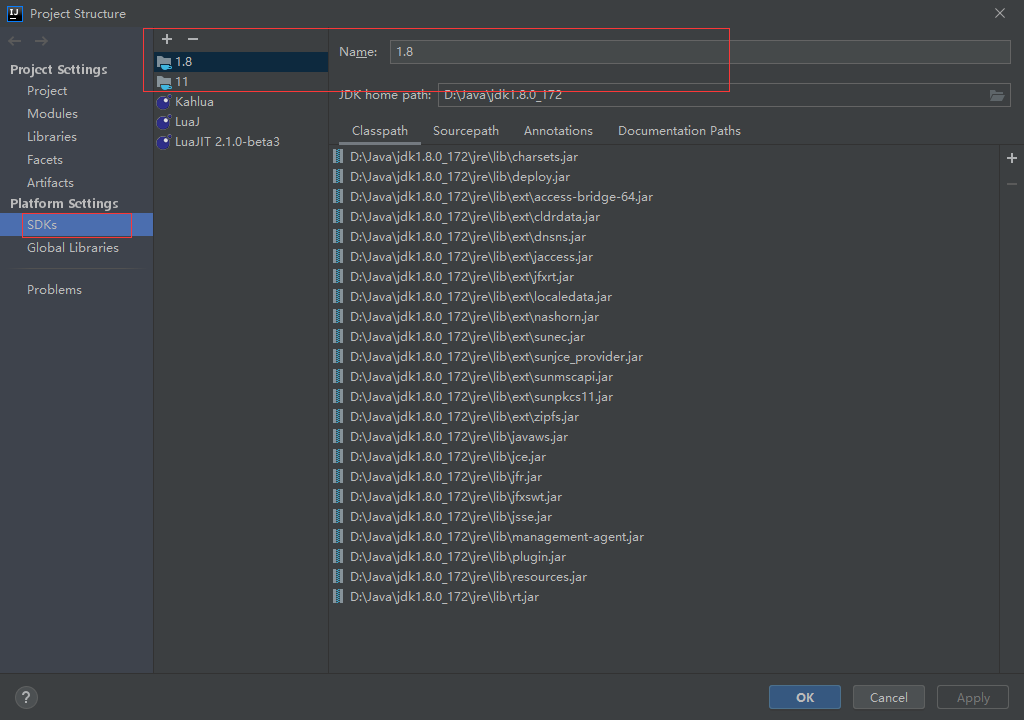
Ant依赖JDK环境,因此在项目中指定一下JDK版本,这里选址JDK1.8

再次运行
Ant,在OpenResty安装目录下看到文件已经拷贝过来了
- 设置启动
Nginx Server前先运行Ant执行文件拷贝

配置
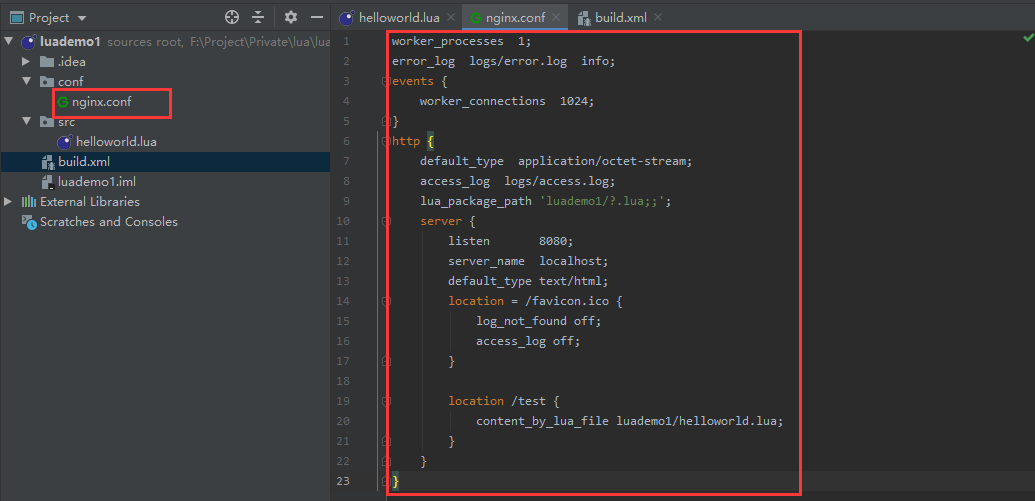
nginx.conf高亮,File->Settings->Editor->File Types,选中Nginx Config后添加nginx*.conf

配置前:
配置后:
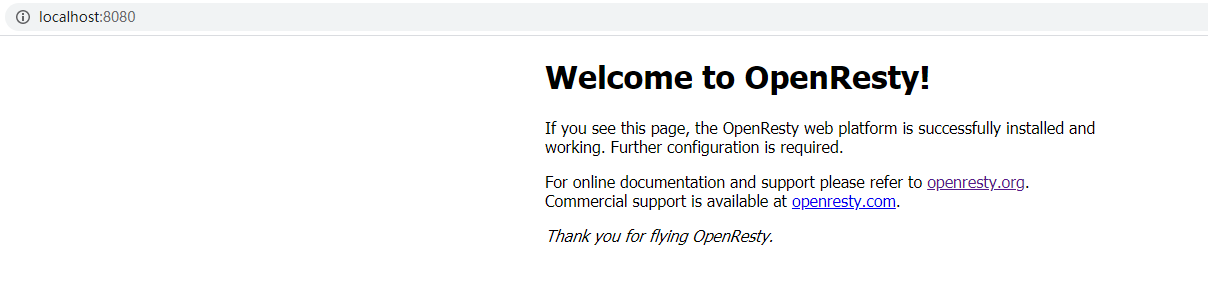
运行项目,在浏览器中分别访问"http://loclahost:8080"和"http://localhost:8080/test" 如果能正常显示
OpenResty的欢迎页和Hello World,Lua!则表示启动成功