写作时间:2020-03-06
Spring Cloud: Greenwich, Spring Boot: 2.1, JDK: 1.8, IDE: IntelliJ IDEA
说明
Spring Cloud Hystrix 是Spring Cloud Netflix 子项目的核心组件之一,具有服务容错及线程隔离等一系列服务保护功能,本文将对其用法进行详细介绍。
在微服务架构中,服务与服务之间通过远程调用的方式进行通信,一旦某个被调用的服务发生了故障,其依赖服务也会发生故障,此时就会发生故障的蔓延,最终导致系统瘫痪。Hystrix实现了断路器模式,当某个服务发生故障时,通过断路器的监控,给调用方返回一个错误响应,而不是长时间的等待,这样就不会使得调用方由于长时间得不到响应而占用线程,从而防止故障的蔓延。Hystrix具备服务降级、服务熔断、线程隔离、请求缓存、请求合并及服务监控等强大功能。
1. 拷贝Eureka Server和UserServiceClient工程
1.1 【易实战】Spring Cloud Greenwich Ribbon:负载均衡的服务调用的项目EurekaServer 和 项目UserServiceClient。
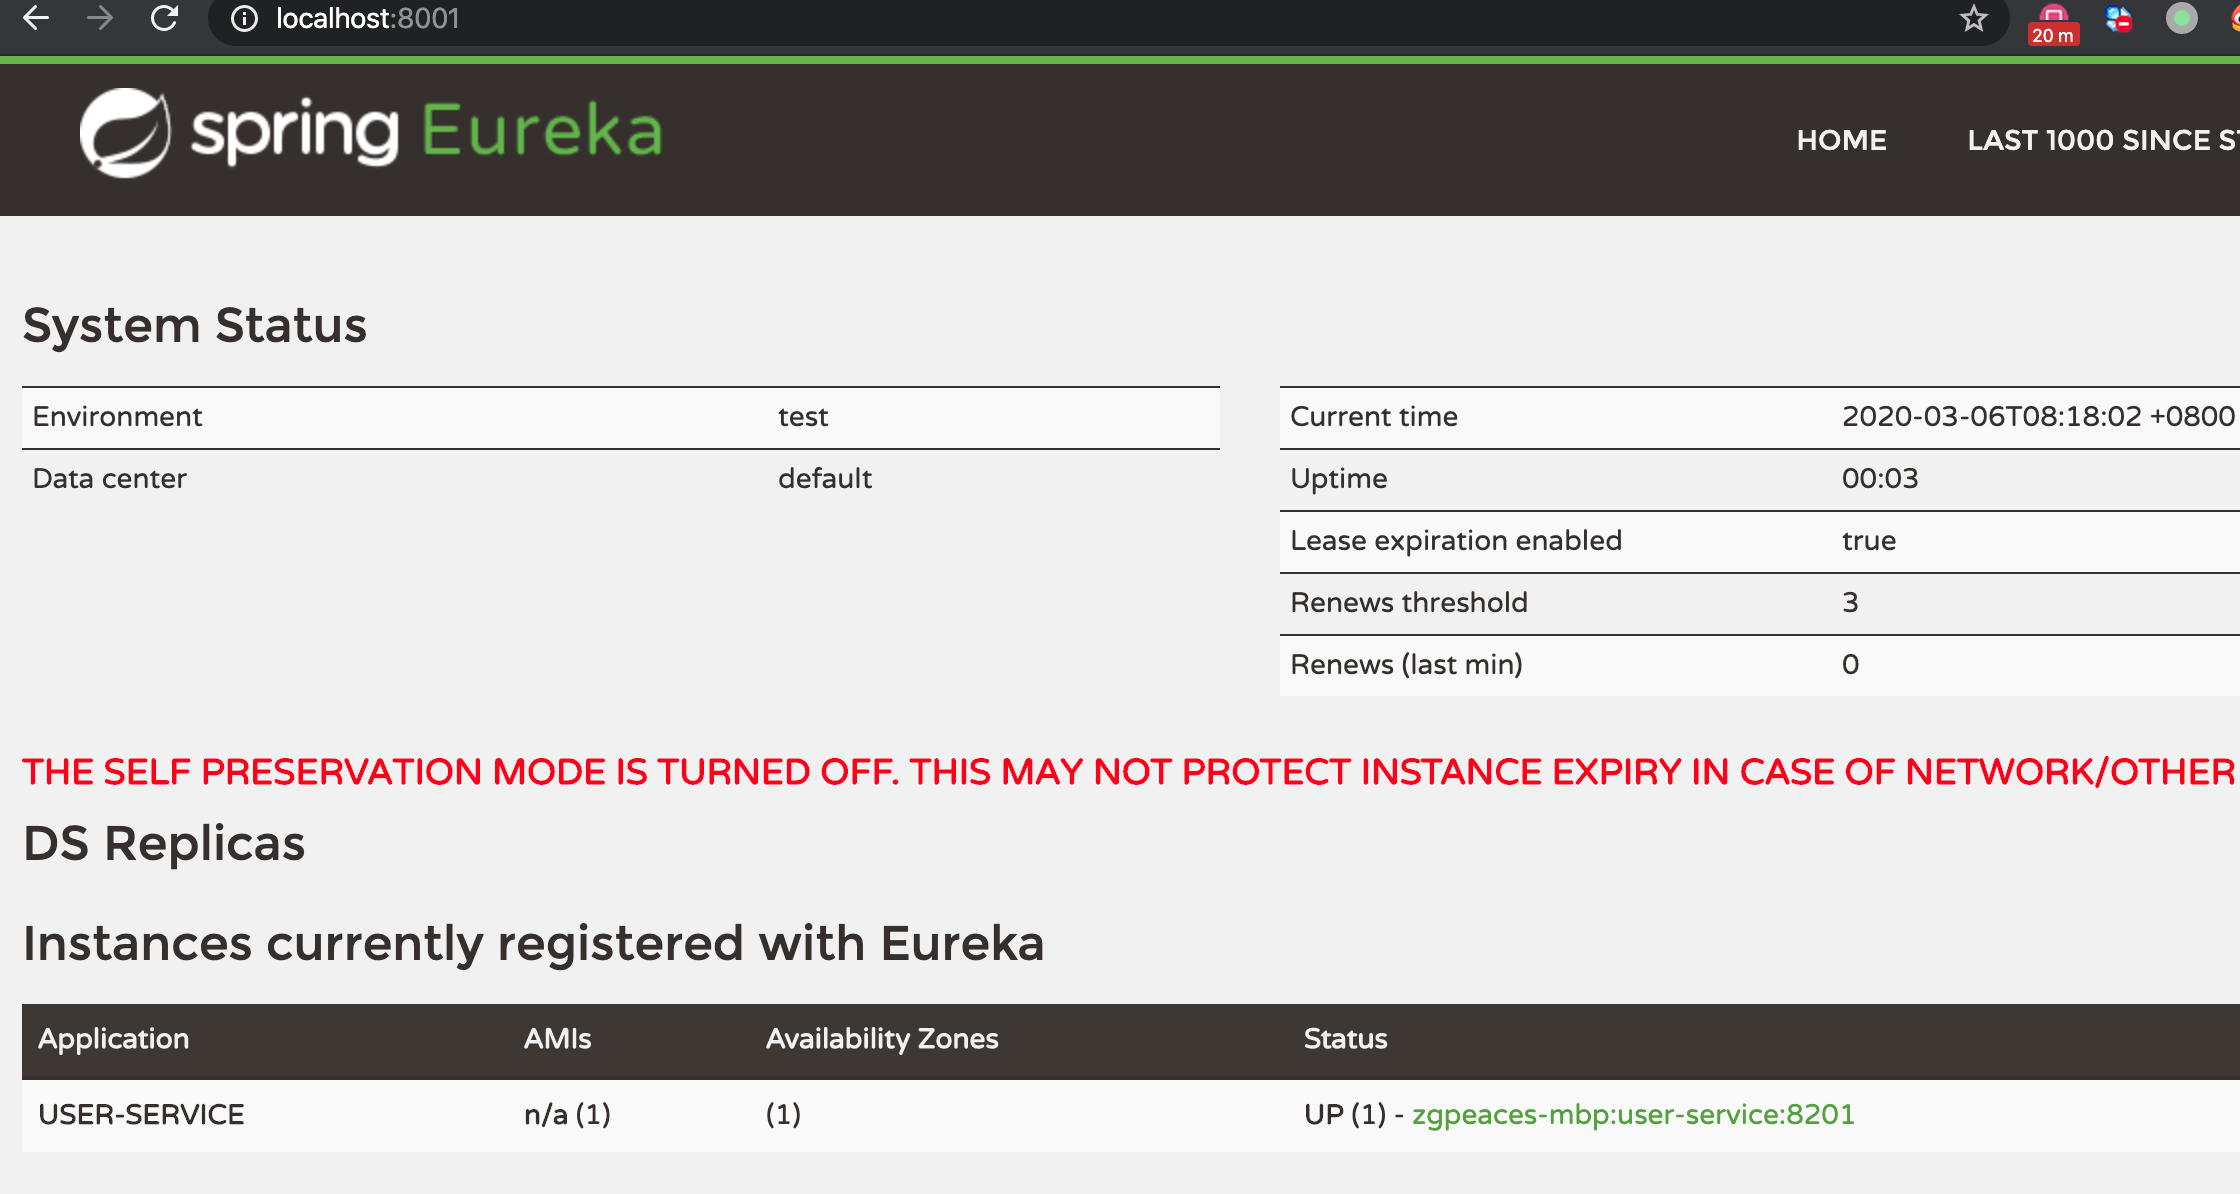
1.2 Run Dashboard 运行应用EurekaServerApplication和应用ClientApplication,完成后访问地址http://localhost:8001/可以看到Eureka注册中心的界面, 注册了客户端zgpeaces-mbp:user-service:8201.
1.3 访问客户端数据http://zgpeaces-mbp:8201/user/1

2. 创建一个HystrixService工程
创建一个hystrix-service模块来演示hystrix的常用功能。
2.1 在pom.xml中添加相关依赖
<dependency>
    <groupId>org.springframework.boot</groupId>
    <artifactId>spring-boot-starter-web</artifactId>
</dependency>
<dependency>
    <groupId>org.springframework.cloud</groupId>
    <artifactId>spring-cloud-starter-netflix-eureka-client</artifactId>
</dependency>
<dependency>
    <groupId>org.springframework.cloud</groupId>
    <artifactId>spring-cloud-starter-netflix-hystrix</artifactId>
</dependency>

<dependency>
    <groupId>org.projectlombok</groupId>
    <artifactId>lombok</artifactId>
    <optional>true</optional>
</dependency>
<dependency>
    <groupId>org.springframework.boot</groupId>
    <artifactId>spring-boot-starter-actuator</artifactId>
</dependency>
<dependency>
    <groupId>cn.hutool</groupId>
    <artifactId>hutool-all</artifactId>
    <version>4.6.3</version>
</dependency>
2.2 在application.yml进行配置: 主要是配置了端口、注册中心地址及user-service的调用路径。
server:
  port: 8401
spring:
  application:
    name: hystrix-service
eureka:
  client:
    register-with-eureka: true
    fetch-registry: true
    service-url:
      defaultZone: http://localhost:8001/eureka/
service-url:
  user-service: http://user-service
2.3 在启动类上添加@EnableCircuitBreaker来开启Hystrix的断路器功能
package com.zgpeace.cloud;

import org.springframework.boot.SpringApplication;
import org.springframework.boot.autoconfigure.SpringBootApplication;
import org.springframework.cloud.client.circuitbreaker.EnableCircuitBreaker;
import org.springframework.cloud.client.discovery.EnableDiscoveryClient;

@EnableCircuitBreaker
@EnableDiscoveryClient
@SpringBootApplication
public class HystrixApplication {

  public static void main(String[] args) {
    SpringApplication.run(HystrixApplication.class, args);
  }
}
2.4 创建配置类RibbonConfig,初始化RestTemplate并设置@LoadBalanced,否则请求不了客户端。
package com.zgpeace.cloud.config;

import org.springframework.boot.web.client.RestTemplateBuilder;
import org.springframework.cloud.client.loadbalancer.LoadBalanced;
import org.springframework.context.annotation.Bean;
import org.springframework.context.annotation.Configuration;
import org.springframework.web.client.RestTemplate;

@Configuration
public class RibbonConfig {

  @Bean
  @LoadBalanced
  public RestTemplate restTemplate(RestTemplateBuilder builder) {
    return builder.build();
  }
}
2.5 服务降级演示:在UserHystrixController中添加用于测试服务降级的接口:
@RequestMapping("/user")
@RestController
public class UserHystrixController {

  @Autowired
  private UserService userService;

  @GetMapping("/testFallback/{id}")
  public CommonResult testFallback(@PathVariable Long id) {
    return userService.getUser(id);
  }
}
2.6 从工程UserServiceClient中拷贝类User 和 CommonResult
2.7 在UserService中添加调用方法与服务降级方法,方法上需要添加@HystrixCommand注解:
添加接口UserService
public interface UserService {
  CommonResult getUser(Long id);
}
添加接口实现类UserServiceImpl
@Service
public class UserServiceImpl implements UserService {

  private Logger LOGGER = LoggerFactory.getLogger(UserServiceImpl.class);
  @Autowired
  private RestTemplate restTemplate;
  @Value("${service-url.user-service}")
  private String userServiceUrl;

  @HystrixCommand(fallbackMethod = "getDefaultUser")
  @Override
  public CommonResult getUser(Long id) {
    return restTemplate.getForObject(userServiceUrl + "/user/{1}", CommonResult.class, id);
  }

  public CommonResult getDefaultUser(@PathVariable Long id) {
    User defaultUser = new User(-1L, "defaultUser", "123456");
    return new CommonResult<>(defaultUser);
  }
}
2.8 Run Dashboard 运行应用eureka-server、user-service、hystrix-service服务.

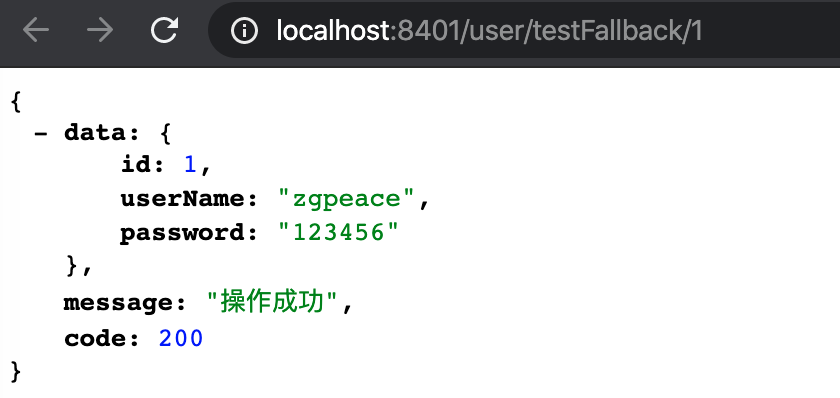
2.9 调用接口进行测试:http://localhost:8401/user/testFallback/1
2.10 关闭user-service服务重新测试该接口,发现已经发生了服务降级:

3. @HystrixCommand注解详解
@HystrixCommand中的常用参数
1.fallbackMethod:指定服务降级处理方法;
2.ignoreExceptions:忽略某些异常,不发生服务降级;
3.commandKey:命令名称,用于区分不同的命令;
4.groupKey:分组名称,Hystrix会根据不同的分组来统计命令的告警及仪表盘信息;
5.threadPoolKey:线程池名称,用于划分线程池。
4. 设置命令、分组及线程池名称
4.1 在UserHystrixController中添加测试接口:
  @GetMapping("/testCommand/{id}")
  public CommonResult testCommand(@PathVariable Long id) {
    return userService.getUserCommand(id);
  }
4.2 在UserServiceImpl中添加方式实现功能
@HystrixCommand(fallbackMethod = "getDefaultUser",
    commandKey = "getUserCommand",
    groupKey = "getUserGroup",
    threadPoolKey = "getUserThreadPool")
  @Override
  public CommonResult getUserCommand(Long id) {
    return restTemplate.getForObject(userServiceUrl + "/user/{1}", CommonResult.class, id);
  }
5. 使用ignoreExceptions忽略某些异常降级
5.1 在UserHystrixController中添加测试接口
  @GetMapping("/testException/{id}")
  public CommonResult testException(@PathVariable Long id) {
    return userService.getUserException(id);
  }
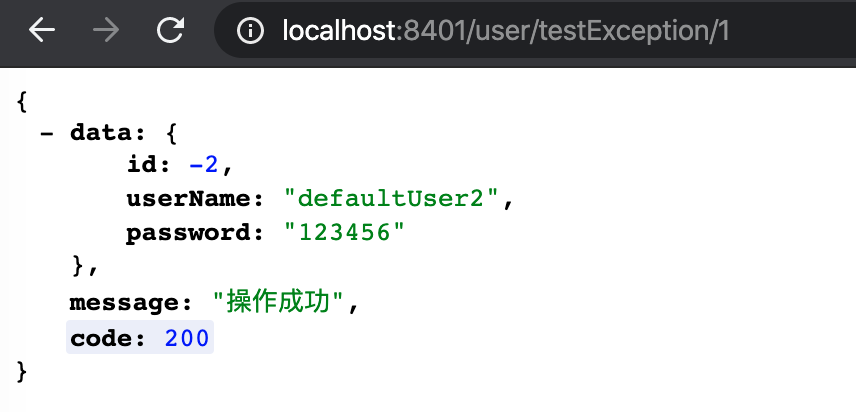
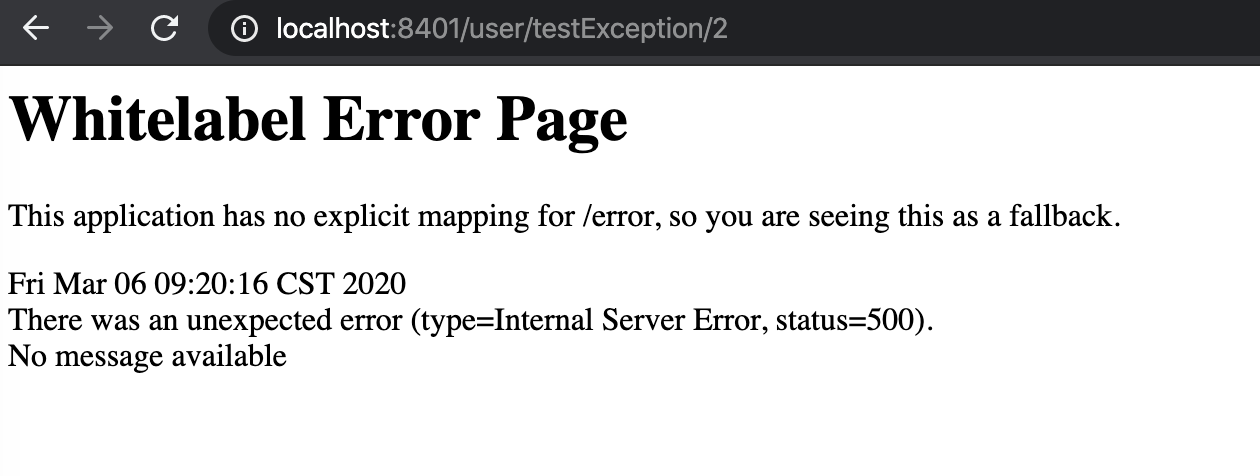
5.2 在UserServiceImpl中添加实现方法,这里忽略了NullPointerException,当id为1时抛出IndexOutOfBoundsException,id为2时抛出NullPointerException:
  @HystrixCommand(fallbackMethod = "getDefaultUser2",
    ignoreExceptions = {NullPointerException.class})
  @Override
  public CommonResult getUserException(Long id) {
    if (id == 1) {
      throw new IndexOutOfBoundsException();
    } else if (id == 2) {
      throw new NullPointerException();
    }
    return restTemplate.getForObject(userServiceUrl + "/user/{1}", CommonResult.class, id);
  }


  public CommonResult getDefaultUser2(Long id, Throwable e) {
    LOGGER.error("getDefaultUser2 id:{}, throwable class:{}", id, e.getClass());
    User defaultUser = new User(-2L, "defaultUser2", "123456");
    return new CommonResult(defaultUser);
  }
5.3 调用接口进行测试:http://localhost:8401/user/testException/1
5.4 调用接口进行测试:http://localhost:8401/user/testException/2
6. Hystrix的请求缓存
当系统并发量越来越大时,我们需要使用缓存来优化系统,达到减轻并发请求线程数,提供响应速度的效果。
6.1 相关注解
@CacheResult:开启缓存,默认所有参数作为缓存的key,cacheKeyMethod可以通过返回String类型的方法指定key;@CacheKey:指定缓存的key,可以指定参数或指定参数中的属性值为缓存key,cacheKeyMethod还可以通过返回String类型的方法指定;@CacheRemove:移除缓存,需要指定commandKey。
6.2 测试使用缓存:在UserHystrixController中添加使用缓存的测试接口,直接调用三次getUserCache方法:
  @GetMapping("/testCache/{id}")
  public CommonResult testCache(@PathVariable Long id) {
    userService.getUserCache(id);
    userService.getUserCache(id);
    userService.getUserCache(id);

    return new CommonResult("testCache operate success" ,200);
  }
6.3 在UserServiceImpl中添加具有缓存功能的getUserCache方法:
  @CacheResult(cacheKeyMethod = "getCacheKey")
  @HystrixCommand(fallbackMethod = "getDefaultUser",
    commandKey = "getUserCache")
  @Override
  public CommonResult getUserCache(Long id) {
    LOGGER.info("getUserCache id:{}", id);
    return restTemplate.getForObject(userServiceUrl + "/user/{1}", CommonResult.class, id);
  }

  public String getCacheKey(Long id) {
    LOGGER.info("enter method getChachKey id>>> {}", id);
    return String.valueOf(id);
  }
6.4 调用接口测试http://localhost:8401/user/testCache/1,这个接口中调用了三次getUserCache方法,但是只打印了一次日志,说明有两次走的是缓存:

6.5 测试移除缓存. 在UserHystrixController中添加移除缓存的测试接口,调用一次removeCache方法:
  @GetMapping("/testRemoveCache/{id}")
  public CommonResult testRemoveCache(@PathVariable Long id) {
    userService.getUserCache(id);
    userService.removeCache(id);
    userService.getUserCache(id);
    return new CommonResult("testRemoveCache operate success", 200);
  }
6.6 在UserServiceImpl中添加具有移除缓存功能的removeCache方法:
  @CacheRemove(commandKey = "getUserCache", cacheKeyMethod = "getCacheKey")
  @HystrixCommand
  @Override
  public CommonResult removeCache(Long id) {
    LOGGER.info("removeCache id:{}", id);
    return restTemplate.postForObject(userServiceUrl + "/user/delete/{1}", null, CommonResult.class, id);
  }
6.7 缓存使用过程中的问题.在缓存使用过程中,我们需要在每次使用缓存的请求前后对HystrixRequestContext进行初始化和关闭,否则会出现如下异常:
java.lang.IllegalStateException: Request caching is not available. Maybe you need to initialize the HystrixRequestContext?
	at com.netflix.hystrix.HystrixRequestCache.get(HystrixRequestCache.java:104) ~[hystrix-core-1.5.18.jar:1.5.18]
	at com.netflix.hystrix.AbstractCommand$7.call(AbstractCommand.java:478) ~[hystrix-core-1.5.18.jar:1.5.18]
	at com.netflix.hystrix.AbstractCommand$7.call(AbstractCommand.java:454) ~[hystrix-core-1.5.18.jar:1.5.18]
6.8 可以通过在Controller方法的前面初始化HystrixRequestContext,在后面关闭context
//init
HystrixRequestContext context = HystrixRequestContext.initializeContext();
// get cache logic ...

//close
context.close();
6.9 更好的方法是通过使用过滤器,在每个请求前后初始化和关闭HystrixRequestContext来解决该问题:
package com.zgpeace.cloud.filter;

import com.netflix.hystrix.strategy.concurrency.HystrixRequestContext;
import org.springframework.stereotype.Component;

import javax.servlet.*;
import javax.servlet.annotation.WebFilter;
import java.io.IOException;

@Component
@WebFilter(urlPatterns = "/*", asyncSupported = true)
public class HystrixRequestContextFilter implements Filter {
  @Override
  public void doFilter(ServletRequest servletRequest, ServletResponse servletResponse, FilterChain filterChain) throws IOException, ServletException {
    HystrixRequestContext context = HystrixRequestContext.initializeContext();
    try {
      filterChain.doFilter(servletRequest, servletResponse);
    } finally {
      context.close();
    }
  }
}
6.11 调用接口测试http://localhost:8401/user/testRemoveCache/1,可以发现有两次查询都走的是接口:

7. 请求合并
微服务系统中的服务间通信,需要通过远程调用来实现,随着调用次数越来越多,占用线程资源也会越来越多。
Hystrix中提供了@HystrixCollapser用于合并请求,从而达到减少通信消耗及线程数量的效果。
7.1 @HystrixCollapser的常用属性
batchMethod:用于设置请求合并的方法;collapserProperties:请求合并属性,用于控制实例属性,有很多;timerDelayInMilliseconds:collapserProperties中的属性,用于控制每隔多少时间合并一次请求;
7.2 功能演示.在UserHystrixController中添加testCollapser方法,这里我们先进行两次服务调用,再间隔200ms以后进行第三次服务调用:
  @GetMapping("/testCollapser")
  public CommonResult testCollapser() throws ExecutionException, InterruptedException {
    Future<User> future1 = userService.getUserFuture(1L);
    Future<User> future2 = userService.getUserFuture(2L);
    future1.get();
    future2.get();
    ThreadUtil.safeSleep(200);
    Future<User> future3 = userService.getUserFuture(3L);
    future3.get();

    return new CommonResult("testCollapser operate success", 200);
  }
7.3 使用@HystrixCollapser实现请求合并,所有对getUserFuture的的多次调用都会转化为对getUserByIds的单次调用:
  @HystrixCollapser(batchMethod = "getUserByIds", collapserProperties = {
      @HystrixProperty(name = "timerDelayInMilliseconds", value = "100")
  })
  @Override
  public Future<User> getUserFuture(Long id) {
    return new AsyncResult<User>() {
      @Override
      public User invoke() {
        CommonResult commonResult = restTemplate.getForObject(userServiceUrl + "/user/{1}", CommonResult.class, id);
        Map data = (Map)commonResult.getData();
        User user = BeanUtil.mapToBean(data, User.class, true);
        LOGGER.info("getUserById username:{}", user.getUserName());
        return user;
      }
    };
  }

  @HystrixCommand
  public List<User> getUserByIds(List<Long> ids) {
    LOGGER.info("getUserByIds:{}", ids);
    CommonResult commonResult = restTemplate.getForObject(userServiceUrl + "/user/getUserByIds?ids={1}", CommonResult.class, CollUtil.join(ids, ","));

    return (List<User>)commonResult.getData();
  }
7.4 访问接口测试http://localhost:8401/user/testCollapser,由于我们设置了100毫秒进行一次请求合并,前两次被合并,最后一次自己单独合并了。

8. Hystrix的常用配置
8.1 全局配置
hystrix:
  command: #用于控制HystrixCommand的行为
    default:
      execution:
        isolation:
          strategy: THREAD #控制HystrixCommand的隔离策略,THREAD->线程池隔离策略(默认),SEMAPHORE->信号量隔离策略
          thread:
            timeoutInMilliseconds: 1000 #配置HystrixCommand执行的超时时间,执行超过该时间会进行服务降级处理
            interruptOnTimeout: true #配置HystrixCommand执行超时的时候是否要中断
            interruptOnCancel: true #配置HystrixCommand执行被取消的时候是否要中断
          timeout:
            enabled: true #配置HystrixCommand的执行是否启用超时时间
          semaphore:
            maxConcurrentRequests: 10 #当使用信号量隔离策略时,用来控制并发量的大小,超过该并发量的请求会被拒绝
      fallback:
        enabled: true #用于控制是否启用服务降级
      circuitBreaker: #用于控制HystrixCircuitBreaker的行为
        enabled: true #用于控制断路器是否跟踪健康状况以及熔断请求
        requestVolumeThreshold: 20 #超过该请求数的请求会被拒绝
        forceOpen: false #强制打开断路器,拒绝所有请求
        forceClosed: false #强制关闭断路器,接收所有请求
      requestCache:
        enabled: true #用于控制是否开启请求缓存
  collapser: #用于控制HystrixCollapser的执行行为
    default:
      maxRequestsInBatch: 100 #控制一次合并请求合并的最大请求数
      timerDelayinMilliseconds: 10 #控制多少毫秒内的请求会被合并成一个
      requestCache:
        enabled: true #控制合并请求是否开启缓存
  threadpool: #用于控制HystrixCommand执行所在线程池的行为
    default:
      coreSize: 10 #线程池的核心线程数
      maximumSize: 10 #线程池的最大线程数,超过该线程数的请求会被拒绝
      maxQueueSize: -1 #用于设置线程池的最大队列大小,-1采用SynchronousQueue,其他正数采用LinkedBlockingQueue
      queueSizeRejectionThreshold: 5 #用于设置线程池队列的拒绝阀值,由于LinkedBlockingQueue不能动态改版大小,使用时需要用该参数来控制线程数
8.2 实例配置: 实例配置只需要将全局配置中的default换成与之对应的key即可。
hystrix:
  command:
    HystrixComandKey: #将default换成HystrixComrnandKey
      execution:
        isolation:
          strategy: THREAD
  collapser:
    HystrixCollapserKey: #将default换成HystrixCollapserKey
      maxRequestsInBatch: 100
  threadpool:
    HystrixThreadPoolKey: #将default换成HystrixThreadPoolKey
      coreSize: 10
8.3 配置文件中相关key的说明
HystrixComandKey对应@HystrixCommand中的commandKey属性;HystrixCollapserKey对应@HystrixCollapser注解中的collapserKey属性;HystrixThreadPoolKey对应@HystrixCommand中的threadPoolKey属性。
代码下载
https://github.com/zgpeace/SpringCloudGreenwich
参考
https://juejin.im/post/5d822d27e51d45621479ad92
