一.学习目标
-
了解Swagger的作用和概念
-
了解前后端分离
-
在SpringBoot中集成Swagger
二.Swagger简介
-
号称世界上最流行的API框架
-
RestFul API文档在线自动生成工具 => API文档与API定义同步更新
-
直接运行,可以在线测试API接口
-
支持多种语言:(Java,PHP......)
1.官网:https://swagger.io
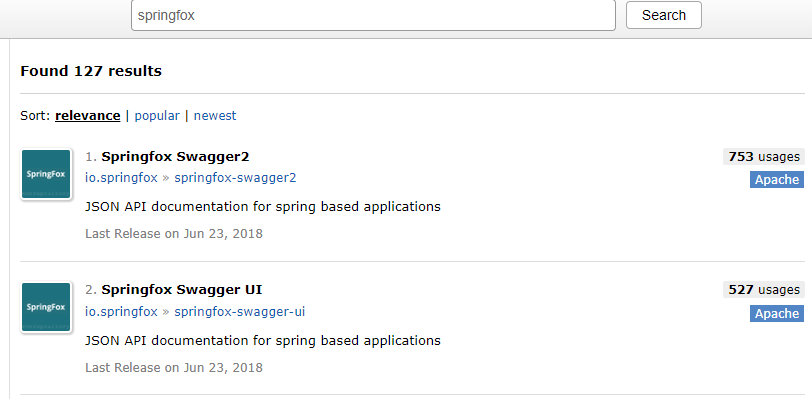
2.在项目中使用Swagger需要springfox
(1)springfox swagger2
(2)springfox swagger UI
三.SpringBoot集成Swagger
1.步骤:
-
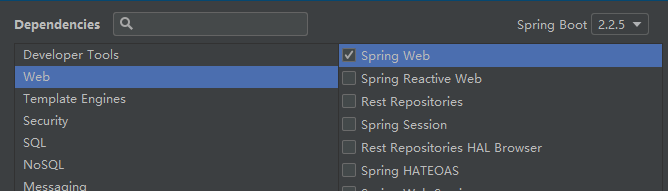
建立一个Springboot带Spring MVC的项目
-
导入两个依赖swagger2和swaggerUI
-
编写一个HelloController测试项目是否可以正常运行(略)
-
编写config配置Swagger
-
测试运行
2.新建SpringBoot的web项目
3.导入两个依赖swagger2和swaggerUI
<dependency>
    <groupId>io.springfox</groupId>
    <artifactId>springfox-swagger2</artifactId>
    <version>2.9.2</version>
</dependency>
<dependency>
    <groupId>io.springfox</groupId>
    <artifactId>springfox-swagger-ui</artifactId>
    <version>2.9.2</version>
</dependency>
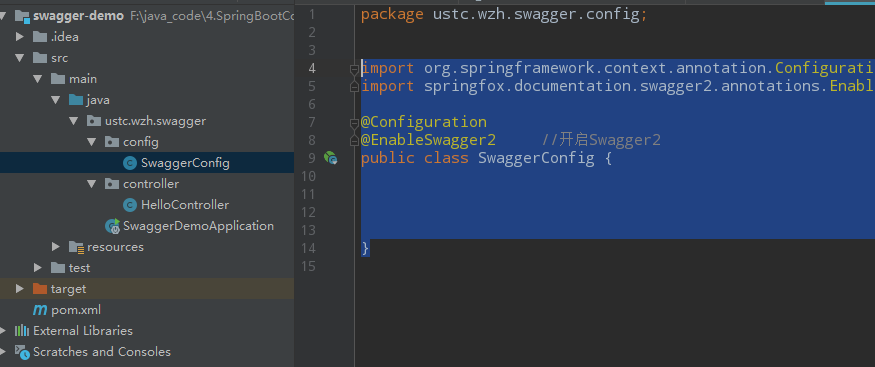
4.编写config配置Swagger
import org.springframework.context.annotation.Configuration;
import springfox.documentation.swagger2.annotations.EnableSwagger2;

@Configuration
@EnableSwagger2     //开启Swagger2
public class SwaggerConfig {

}
5.测试运行
-
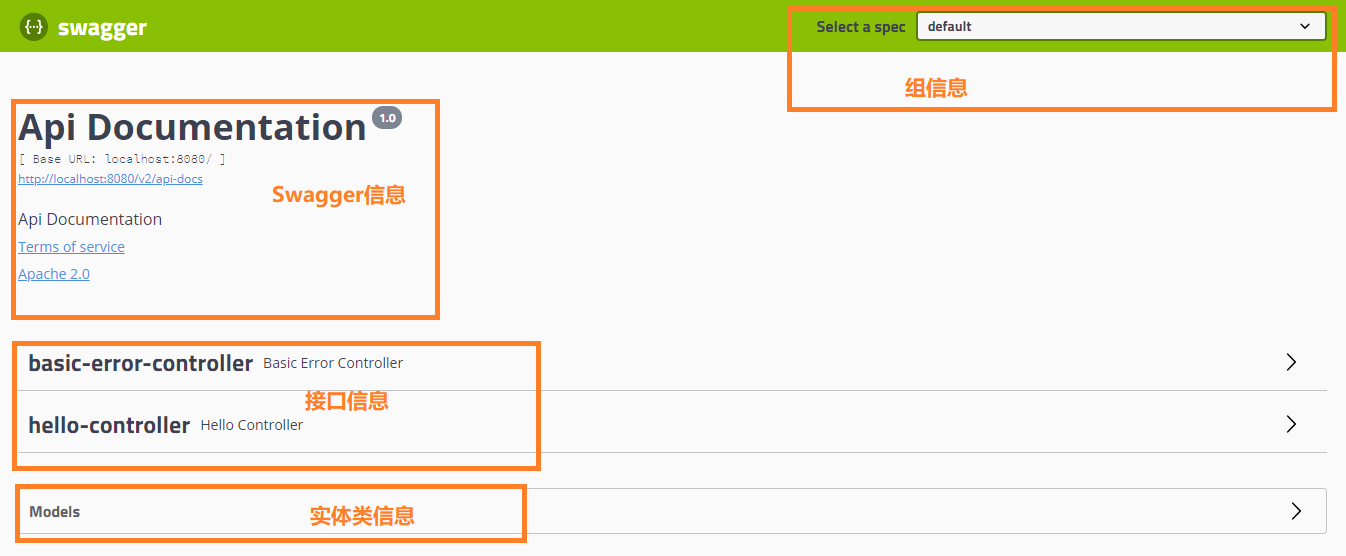
http://localhost:8080/swagger-ui.html
四.配置Swagger信息
import org.springframework.context.annotation.Bean;
import org.springframework.context.annotation.Configuration;
import springfox.documentation.service.ApiInfo;
import springfox.documentation.service.Contact;
import springfox.documentation.spi.DocumentationType;
import springfox.documentation.spring.web.plugins.Docket;
import springfox.documentation.swagger2.annotations.EnableSwagger2;
import java.util.ArrayList;
@Configuration
@EnableSwagger2 //开启Swagger2
public class SwaggerConfig {
//配置Swagger的Docker的bean实例
@Bean
public Docket docket() {
return new Docket(DocumentationType.SWAGGER_2)
.apiInfo(apiInfo());
}
//配置Swagger信息
private ApiInfo apiInfo() {
//作者信息
Contact contact = new Contact("wzh", "https://www.cnblogs.com/zhihaospace/", "[email protected]");
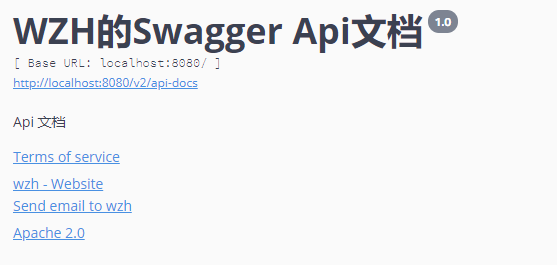
return new ApiInfo(
"WZH的Swagger Api文档",
"Api 文档",
"1.0",
"https://www.cnblogs.com/zhihaospace/",
contact,
"Apache 2.0",
"http://www.apache.org/licenses/LICENSE-2.0",
new ArrayList()
);
}
}
五.配置Swagger扫描接口
- enable:通过springboot配置文件来配置是否显示spring-ui.html页面,注意端口号
- apis:配置需要扫描的路径
- paths:配置过滤掉的路径
import org.springframework.context.annotation.Bean;
import org.springframework.context.annotation.Configuration;
import org.springframework.core.env.Environment;
import org.springframework.core.env.Profiles;
import springfox.documentation.builders.RequestHandlerSelectors;
import springfox.documentation.service.ApiInfo;
import springfox.documentation.service.Contact;
import springfox.documentation.spi.DocumentationType;
import springfox.documentation.spring.web.plugins.Docket;
import springfox.documentation.swagger2.annotations.EnableSwagger2;

import java.util.ArrayList;

@Configuration
@EnableSwagger2     //开启Swagger2
public class SwaggerConfig {

    //配置Swagger的Docker的bean实例
    @Bean
    public Docket docket(Environment environment) {


        //配置 在dev或test生产环境下可以显示swagger环境,release环境下看不到Swagger
        Profiles profiles = Profiles.of("dev","test");

        //通过environment.acceptsProfiles判断是否处在设定的环境中
        boolean flag = environment.acceptsProfiles(profiles);


        return new Docket(DocumentationType.SWAGGER_2)
                .apiInfo(apiInfo())
                //enable 配置是否启用Swagger,为false则swagger-ui页面不能在浏览器中访问
                .enable(flag)
                .select()
                /*
                * RequestHandlerSelectors 配置要扫描接口的方式
                * 参数:
                *   basePackage("ustc.wzh.swagger") 指定要扫描的包
                *   withClassAnnotation(RestController.class) 扫描类上的注解,参数是一个类注解的反射对象
                *   withMethodAnnotation(GetMapping.class) 扫描方法上的注解,参数是一个方法注解的反射对象
                *   any() 扫描全部
                *   none() 不扫描
                */
                .apis(RequestHandlerSelectors.basePackage("ustc.wzh.swagger"))
                /*
                * paths 过滤路径(就是不去扫描的路径)
                * any() 全部过滤
                * none() 不过滤
                * regex(/[a-z]/) 过滤到正则表达式代表的路径
                * ant("xxx") 指定路径过滤
                */
                //.paths(PathSelectors.ant("/wzh/**"))
                .build()
                ;
    }

    //配置Swagger信息
    private ApiInfo apiInfo() {

        //作者信息
        Contact contact = new Contact("wzh", "https://www.cnblogs.com/zhihaospace/", "[email protected]");

        return new ApiInfo(
                "WZH的Swagger Api文档",
                "Api 文档",
                "1.0",
                "https://www.cnblogs.com/zhihaospace/",
                contact,
                "Apache 2.0",
                "http://www.apache.org/licenses/LICENSE-2.0",
                new ArrayList()
        );
    }

}

六.配置API文档的分组