一、接口映射
通过接口方式来映射到指定SQL之后,那么就可以通过操作接口的方法来访问数据库了,这种方式更加符合Java面向接口编程的要求。
1.1 定义映射接口
在映射文件中所在包下定义一个接口类,该接口负责提供操作数据库的方法。
public interface ProductMapper {

	public Product select(int id);

}
虽然接口名可以是任意名字。但是一般使用“表名(首字母大写)+Mapper”的命名方式。、
1.2 把映射接口的名字作为映射文件的唯一标识
在映射文件mapper节点指定namespace属性,该属性的值为映射接口的完整路径。例如:
<mapper namespace="com.xxx.mybatisqs.mapper.ProductMapper">
	...
</mapper>
namespace属性可以作为该映射文件的唯一标识。通过namespace属性可以调用该映射文件中定义的sql命令。
1.3 配置映射接口
修改mybatis-config.xml配置文件,加入映射接口的配置。
<mappers>
	<mapper class="com.xxx.mybatisqs.mapper.ProductMapper"/>
</mappers>
1.4 测试
第一步:获取SqlSession对象;
第二步:调用SqlSession对象的getMapper方法获取映射接口的代理;
第三步:调用接口方法;
第四步:提交事务;
第五步:关闭sqlSession;

二、MyBatis零配置
MyBatis也支持使用注解方式配置SQL。而且在实际项目中,推荐使用注解配置方式。使用注解配置方式后,可以不再提供映射文件。
2.1 @Select和@ResultType
select注解用于指定要执行的sql语句。resultType注解用于指定映射的结果类型。
@Select("select product_id as id, product_name as name, product_price as price "
			+ "from product where product_id = #{id}")
@ResultType(Product.class)
public Product select(int id);
2.2 @Results和@Result
如果要自己指定实体的映射关系,可以使用@Results注解。
- @Results可以用来自定义查询结果的映射关系。
- @Result用于指定实体属性与表字段的对应关系。
例如:

@Select("select * from product where product_id = #{id}")
@Results(value={
	@Result(property="id", column="product_id"),
	@Result(property="name", column="product_name"),
	@Result(property="price", column="product_price"),
})
public Product select(int id);
2.3 @Insert和@SelectKey
@Insert("insert into product(product_name, product_price) values(#{name}, #{price})")
public void insert(Product product);
如果要返回插入数据的主键,可以使用@SelectKey注解。
@SelectKey的命令格式:
@SelectKey(before = true|false,
			keyProperty = "实体属性",
			keyColumn = "主键列",
			resultType = 映射结果的类型,
			statement="获取主键的sql"
例如:
@Insert("insert into product(product_name, product_price) values(#{name}, #{price})")
@SelectKey(
		before = false,
		keyProperty = "id",
		keyColumn = "product_id",
		resultType = Integer.class,
		statement = { "select last_insert_id()" })
public int insert(Product product);
2.4 @Update
@Update("update product set product_price = #{price} where product_id = #{id}")
public void update(Product product);
2.5 @Delete
@Delete("delete from product where product_id = #{id}")
public void delete(int id);
2.6 在注解中中定义动态sql
如果要在注解中实现动态sql,那么必须要把动态sql命令定义在script标签中。例如:
(1)根据产品名称动态添加查询条件。
@Select("<script>select * from product <if test=\"name !=null \">product_name like CONCAT('%', #{name}, '%')</if></script>")
public List<Product> findUserByName(String name);
(2)根据产品编号同时删除多个产品。
@Delete({
	"<script>delete from product where product_id in " +
        "<foreach collection=\"ids\" item = \"id\" open=\"(\" separator=\",\" close=\")\">" +
    	    "#{id}" +
        "</foreach>" +
    "</script>"
})
void deleteProducts(int[] ids);
三、配置映射关系
3.2 配置一对多关系
3.2.1 环境准备
例如:产品和产品类型。产品类型和产品就是典型的一对多关系。在数据库设计中,一对多的关系是通过在多的一方建立外键约束来实现的。
3.1.1.1 创建表
产品表:
create table product (
	id int primary key auto_increment comment '产品编号',
	name varchar(255) not null default '' comment '产品名称',
	price int not null default 0 comment '价格',
	cid int not null comment '类别编号'
);
产品类型表:
create table category (
	id int primary key auto_increment comment '产品类型编号',
	name varchar(255) not null default '' comment '类型名称'
);
建立外键:
alter table product
add constraint fk_product_category foreign key(cid) references category(id);
初始化数据:
insert into category(name)
values('家电');
insert into category(name)
values('文具');

insert into product(name, price, cid)
values('洗衣机', 3999, 1);
insert into product(name, price, cid)
values('电冰箱', 1999, 1);
insert into product(name, price, cid)
values('空调机', 2999, 1);
insert into product(name, price, cid)
values('铅笔', 1, 2);
insert into product(name, price, cid)
values('记事本', 10, 2);
3.1.1.2 定义实体
(1)产品实体
public class Product {
	private Integer id;
	private String name;
	private Integer price;
	private Category category;

	// 省略了setters和getters方法...

}
(2)产品类型实体:
/*
 * 产品类型
 */
public class Category {
	private Integer id;
	private String name;
	private Set<Product> products = new HashSet<Product>(0);

	// 省略了setters和getters方法...
3.1.1.3 定义别名
<!-- 配置别名 -->
<typeAliases>
	<typeAlias type="com.xxx.domain.Product" alias="productAlias"/>
	<typeAlias type="com.xxx.domain.Category" alias="categoryAlias"/>
</typeAliases>
3.2.2 在配置文件中配置一对多
配置一对多关系就是在一方(产品类别)的ResultMap中使用collection节点指定要执行关联查询的sql语句。
3.2.2.1 产品类型映射文件
<?xml version="1.0" encoding="UTF-8" ?>
<!DOCTYPE mapper  PUBLIC "-//mybatis.org//DTD Mapper 3.0//EN"
			"http://mybatis.org/dtd/mybatis-3-mapper.dtd">
<mapper namespace="com.xxx.mapper.CategoryMapper">

	<!-- 映射结果集 -->
	<resultMap id="categoryResultMap" type="categoryAlias">
		<id property="id" column="id"/>
		<id property="name" column="name"/>
		<!-- 配置一对多的关系
				property:集合的属性名
				ofType:集合元素的类型
				column:当前实体对应表的主键名
				select:指定关联查询的SQL语句
				fetchType: 指定是否延迟加载,lazy代表延迟加载,eager代表不延迟加载
		-->
		<collection property="products" ofType="productAlias" column="id"
			select="com.xxx.mapper.ProductMapper.selectProductByCategoryId"/>
	</resultMap>

	<!-- 根据ID查询产品类别 -->
	<select id="selectCategoryById" resultMap="categoryResultMap">
		select * from category where id = #{categoryId}
	</select>

</mapper>
因为在Category实体中包含products集合属性,该集合用于存储该类别下的产品。所以,在ResultMap中使用collection节点映射集合属性。
3.2.2.2 产品映射文件
<?xml version="1.0" encoding="UTF-8"?>
<!DOCTYPE mapper  PUBLIC "-//mybatis.org//DTD Mapper 3.0//EN"
			"http://mybatis.org/dtd/mybatis-3-mapper.dtd">
<mapper namespace="mybatisqs.demo01helloword.ProductMapper">

	<!-- 执行一对多查询的时候使用的select语句 -->
	<select id="selectProductByCategoryId" parameterType="int" resultType="productAlias">
		select * from product where cid = #{categoryId}
	</select>

</mapper>
3.2.2.3 定义映射接口
(1)CategoryMapper接口
/*
 * 该接口用来映射到CategoryMapper.xml文件
 *
 */
public interface CategoryMapper {

	/**
	 * 根据产品类别ID查询
	 * @param categoryId
	 * @return
	 */
	Category selectCategoryById(int categoryId);

}
(2)ProductMapper接口
/**
 * 查询指定类别的所有产品
 * @param categoryId 类别编号
 * @return
 */
List<Product> selectProductByCategoryId(int categoryId);
3.2.2.4 配置映射文件
修改mybatis-config.xml文件,配置映射文件。
<mappers>
	<mapper resource="com/xxx/mapper/ProductMapper.xml" />
	<mapper resource="com/xxx/mapper/CategoryMapper.xml" />
</mappers>
3.2.2.5 测试
public class Demo03 {

	private SqlSession session;

	// 执行单元测试前先执行该方法
	@Before
	public void init() {
		System.out.println("执行init...");
		session = MyBatisUtil.getSession();
	}

	// 执行完单元测试后执行该方法
	@After
	public void after() {
		System.out.println("执行after...");
		//提交事务
		session.commit();
		//关闭session
		session.close();
	}

	@Test
	public void testOneToManyQuery() {
		CategoryMapper categoryMapper = session.getMapper(CategoryMapper.class);
		Category category = categoryMapper.selectCategoryById(1);
		System.out.println(category);
	}

}
3.2.3 使用注解方式配置一对多
3.2.3.1 在映射接口上使用注解
(1)CategoryMapper文件
@Select("select * from category where id = #{categoryId}")
@Results({
     @Result(property="id", column="id"),
     @Result(property="name", column="name"),
     @Result(property="products", column="id", many=@Many(
     		select="mybatisqs.demo01helloword.ProductMapper.selectProductByCategoryId"))
 })
Category selectCategoryById(int categoryId);
(2)ProductMapper文件
@Select("select * from product where cid = #{cid}")
@Results(value={
	@Result(property="id", column="id"),
	@Result(property="name", column="name"),
	@Result(property="price", column="price")
})
List<Product> selectProductByCategoryId(int cid);
3.2.3.2 配置映射类
修改mybatis-config.xml文件,配置映射类。
<mappers>
	<mapper class="mybatisqs.demo01helloword.CategoryMapper"/>
	<mapper class="mybatisqs.demo01helloword.ProductMapper"/>
</mappers>
3.2.3.4 测试
略。
3.3 配置多对一关系
一个类型可以有多种产品,产品和类型之间就是多对一的关系。
3.3.1 在配置文件中配置多对一
配置多对一关系就是在多方(产品)的ResultMap节点中使用association节点指定关联实体(产品类型)的属性和表字段的对应关系。
3.3.1.1 产品映射文件
<resultMap id="productResultMap" type="productAlias">
	<id property="id" column="id" />
	<id property="name" column="name" />
	<id property="price" column="price" />
	<association property="category" javaType="categoryAlias">
		<result property="id" column="cid"/>
		<result property="name" column="cname"/>
	</association>
</resultMap>

<!-- 查询所有产品  -->
<select id="selectAllProducts" resultMap="productResultMap">
	select p.*, c.name as cname from product p, category c where p.cid = c.id;
</select>
上面的association也可以这样写:
<!--
	通过select语句查询产品关联的类别
		property:关联实体的属性名
		javaType:关联实体的属性类型
		column: 多方的外键名
		select:执行关联查询的SQL语句
 -->
<association property="category" javaType="categoryAlias" column="cid"
			select="com.xxx.mapper.CategoryMapper.selectCategoryById"/>
3.3.1.2 产品映射接口
public interface ProductMapper {

	List<Product> selectAllProducts();

}
3.3.1.3 测试
@Test
public void testManyToOneQuery() {
	ProductMapper productMapper = session.getMapper(ProductMapper.class);
	List<Product> products = productMapper.selectAllProducts();
	for (Product p : products) {
		System.out.println(p);
	}
}
3.3.2 使用注解方式配置多对一
3.3.2.1 在产品映射接口上使用注解
使用注解配置多对一关系,就是在@Result中指定one属性。
@Select("select * from product")
@Results(value={
	@Result(property="id", column="id"),
	@Result(property="name", column="name"),
	@Result(property="price", column="price"),
	@Result(property="category", column="cid",
		one=@One(select="mybatisqs.demo01helloword.CategoryMapper.selectCategoryById"))
})
List<Product> selectAllProducts();
3.3.2.2 测试
略。
3.4 配置多对多关系
3.4.1 环境准备
例如:学生和课程。学生和课程就是典型的多对多关系。在数据库设计中,多对多的关系是通过一个中间表来记录两边主键来实现的。
3.4.1.1 创建表
学生表:
create table student (
	id int primary key auto_increment comment '学生编号',
	name varchar(255) not null default '' comment '学生名字',
	gender tinyint(1) not null default 1 comment '学生性别,1代表男,2代表女',
	phone varchar(11) default '' comment '手机号码'
);
课程表:
create table course (
	id int primary key auto_increment comment '课程编号',
	name varchar(255) not null default '' comment '课程名称'
);
学生选修表:
create table student_course (
	stu_id int,
	course_id  int,
	primary key(stu_id, course_id)
);
初始化数据:
insert into student(name, gender, phone)
values('jacky', 1, '13522237843');
insert into student(name, gender, phone)
values('mickey', 1, '13622237843');
insert into student(name, gender, phone)
values('judy', 2, '13322237843');

insert into course(name)
values('外语');
insert into course(name)
values('计算机');

insert into student_course
values(1, 1);
insert into student_course
values(1, 2);
insert into student_course
values(2, 1);
insert into student_course
values(2, 2);
insert into student_course
values(3, 1);
3.4.1.2 定义实体
(1)学生实体
public class Student {
	private Integer id;
	private String name;
	private Boolean gender;
	private String phone;
	private Set<Course> courses = new HashSet<Course>(0);

	// 省略了setters和getters方法..
}
(2)课程实体
public class Course {
	private Integer id;
	private String name;
	private Set<Student> students = new HashSet<Student>(0);

	// 省略了setters和getters方法..
}
3.4.1.3 定义别名
<!-- 配置别名 -->
<typeAliases>
	<typeAlias type="com.xxx.domain.Student" alias="studentAlias"/>
	<typeAlias type="com.xxx.domain.Course" alias="courseAlias"/>
</typeAliases>
3.4.2 在配置文件中配置多对多关系
3.4.2.1 创建学生映射文件
<?xml version="1.0" encoding="UTF-8"?>
<!DOCTYPE mapper  PUBLIC "-//mybatis.org//DTD Mapper 3.0//EN"
			"http://mybatis.org/dtd/mybatis-3-mapper.dtd">
<mapper namespace="mybatisqs.demo02mangtomany.StudentMapper">

	<resultMap id="studentResultMap" type="studentAlias">
		<id property="id" column="id" />
		<id property="name" column="name" />
		<id property="gender" column="gender" />
		<id property="phone" column="phone" />
		<!-- 多表关联映射 -->
		<collection property="courses" ofType="courseAlias">
			<id property="id" column="cid"/>
			<result property="name" column="cname"/>
		</collection>
	</resultMap>

	<!-- 查询所有学生  -->
	<select id="selectAllStudents" resultMap="studentResultMap">
		select s.*, c.id as cid, c.name as cname from student s, course c, student_course sc
		where s.id = sc.stu_id and c.id = sc.course_id;
	</select>

</mapper>
3.4.2.2 创建映射接口
public interface StudentMapper {

	List<Student> selectAllStudents();

}
3.4.2.3 配置映射文件
修改mybatis-config.xml文件,配置映射文件。
<mappers>
	<mapper resource="mybatisqs/demo02mangtomany/StudentMapper.xml"/>
</mappers>
3.2.2.5 测试
public class Demo02 {
   private SqlSession session;

   // 执行单元测试前先执行该方法
   @Before
   public void init() {
   	System.out.println("执行init...");
   	session = MyBatisUtil.getSession();
   }

   // 执行完单元测试后执行该方法
   @After
   public void after() {
   	System.out.println("执行after...");
   	// 提交事务
   	session.commit();
   	// 关闭session
   	session.close();
   }

   @Test
   public void testManyToManyQuery() {
   	StudentMapper studentMapper = session.getMapper(StudentMapper.class);
   	List<Student> students = studentMapper.selectAllStudents();
   	for (Student student : students) {
   		System.out.println(student);
   	}
   }

}
同样道理,如果要查询课程信息以及该选修该课程的学生,也可以参考上面方式在课程映射文件中进行配置。这里不再进行累述。
3.4.3 使用注解配置多对多关系
3.4.3.1 在映射接口中使用注解
(1)StudentMapper文件
@Select("select * from student")
@Results({
    @Result(property="id", column="id"),
    @Result(property="name", column="name"),
    @Result(property="gender", column="gender"),
    @Result(property="phone", column="phone"),
    @Result(property="courses", column="id", many=@Many(
    		select="mybatisqs.demo02mangtomany.CourseMapper.selectStudentCourses"))
})
List<Student> selectAllStudents();
(2)CourseMapper文件
public interface CourseMapper {

@Select("select c.* from course c, student_course sc where c.id = sc.course_id and sc.stu_id = #{studentId}")
List<Course> selectStudentCourses(int studentId);

}
3.4.3.2 配置映射接口
修改mybatis-config.xml文件,配置映射接口。
<mappers>
	<mapper class="mybatisqs.demo02mangtomany.StudentMapper"/>
	<mapper class="mybatisqs.demo02mangtomany.CourseMapper"/>
</mappers>
3.4.3.3 测试
略。
四、整合Log4j
Log4J是一种基于Java的日志输出工具。如果要查看MyBatis的执行过程,就可以在MyBatis中整合Log4J。
在MyBatis中配置Log4J
第一步:把log4j的jar包拷贝到工程中;
在mybatis安装目录下有个lib目录,该目录存储了mybatis依赖的第三方工具包。

第二步:在工程src目录下新建一个文本文件,并命名为log4j.properties,然后把下面内容拷贝到文件中即可;
log4j.rootLogger=DEBUG, A1
log4j.appender.A1=org.apache.log4j.ConsoleAppender
log4j.appender.A1.layout=org.apache.log4j.PatternLayout
log4j.appender.A1.layout.ConversionPattern=%-4r %-5p [%t] %37c %3x - %m%n
完成上面步骤后,就可以通过log4j查看mybatis的执行过程。
五、延迟加载策略
5.1 概述
延迟加载也称为“按需加载”。在执行关联查询时候,mybatis不会把对象的关联实体查询出来,只有在实际使用到关联实体的时候,才会把关联实体查询出来。因此,延迟加载可以减少不必要的关联查询,提高数据库的查询效率。
一般来说,延迟加载在一对多或多对多关系中使用较多。
5.2 配置延迟加载
首先,把mybatis安装目录下的asm-7.0.jar和cglib-3.2.10.jar文件拷贝到项目中;

接着,按照下面方式配置延迟加载。
- 方式一:局部延迟加载。
局部延迟策略就是只对某个实体类启用延迟加载策略。可以在association和one节点中指定fetchType="lazy"属性即可。
<resultMap id="categoryResultMap" type="categoryAlias">
	<id property="id" column="id" />
	<id property="name" column="name" />
	<!-- 配置一对多的关系
		property:集合的属性名
		ofType:集合元素的类型
		column:当前实体对应表的主键名
		select:指定关联查询的SQL语句
		fetchType: 指定是否延迟加载,lazy代表延迟加载,eager代表不延迟加载 -->
	<collection property="products" ofType="productAlias" column="id"
		select="mybatisqs.demo01helloword.ProductMapper.selectProductByCategoryId"
		fetchType="lazy"/>
</resultMap>
如果是使用注解配置方式,可以在@Many注解中指定fetchType=FetchType.LAZY属性即可。例如:
@Select("select * from category where id = #{categoryId}")
@Results({
    @Result(property="id", column="id"),
    @Result(property="name", column="name"),
    @Result(property="products", column="id", many=@Many(
    		select="mybatisqs.demo01helloword.ProductMapper.selectProductByCategoryId"
    		, fetchType=FetchType.LAZY))
})
Category selectCategoryById(int categoryId);
- 方式二:全局延迟加载
启用全局延迟加载策略后,所有实体类都会启用生效。启用全局延迟策略需要在MyBatis核心配置文件中进行配置。
<settings>
	<setting name="lazyLoadingEnabled" value="true" />
	<setting name="aggressiveLazyLoading" value="false"/>
</settings>
六、MyBatis缓存机制
6.1 缓存概述
使用缓存的最大好处可以提供数据的查询速度,减轻数据压力,提高数据库性能。
不带缓存的数据库查询:
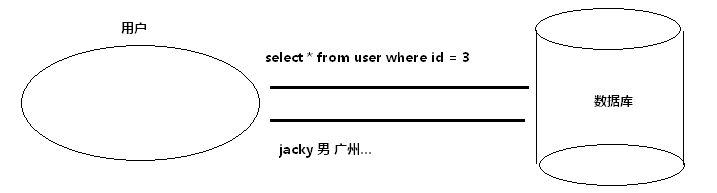
带缓存的数据库查询:

查询带缓存数据库的时候,每次查询都会先从缓存查询数据,如果缓存中找到,那么就直接把查询到的数据返回给用户即可。如果缓存中没有找到数据,那么就会从数据库中查找。如果数据库中找到就把数据返回给用户,并且把查询到的数据保存在缓存中。下一次用户查询的时候就可以直接从缓存中查询即可。
6.2 一级缓存
一级缓存也称为Session缓存。同一个Session中的数据会保存在Session中。只要Session不关闭,不管查询N次都会返回相同的结果。
@Test
public void testQueryBuffer() {
	ProductMapper productMapper = session.getMapper(ProductMapper.class);
	Product p1 = productMapper.selectProduct(1);
	Product p2 = productMapper.selectProduct(1);
	System.out.println("是同一个对象吗?" + (p1 == p2));
}
运行上面程序,控制台输出true。
MyBatis默认已经开启的一级缓存。如果不希望使用缓存,可以执行完查询后调用session的clearCache方法清除缓存信息。
session.clearCache();
另外,如果程序在DML操作后执行了commit操作,session缓存数据也会被清空。
6.3 二级缓存
6.3.1 概述
Mybatis里面,二级缓存就是文件级别的缓存。启用二级缓存后,即使Session关闭了,也不会对缓存数据有影响。
- MyBatis缓存的执行过程:
如果配置二级缓存,那么执行查询操作时候,mybatis会先从二级缓存中查询数据,如果二级缓存没有,再从一级缓存(session)中查找数据,如果一级缓存也没有,才会查询数据库。

二级缓存的技术:MemCached、OSCache、EhCache等等,下面以EhCache为例介绍在mybatis中使用二级缓存。
关于EhCache的详解介绍,可以参考官方网站:http://www.mybatis.org/ehcache-cache/
6.3.2 MyBatis整合ehcache
第一步:下载和导入ehcache的jar包;
下载地址:https://github.com/mybatis/ehcache-cache/releases

第二步:在工程src目录下新建一个xml格式文件,该文件的名字为ehcache.xml,然后把下面内容拷贝到文件中;
<?xml version="1.0" encoding="UTF-8"?>
<ehcache xmlns:xsi="http://www.w3.org/2001/XMLSchema-instance"
	xsi:noNamespaceSchemaLocation="http://ehcache.org/ehcache.xsd">
	<!--缓存目录  -->
	<diskStore path="d:/ehcache" />
	<!--
		属性说明:
			name: Cache的唯一标识
			maxElementsInMemory: 内存中最大缓存对象数
			maxElementsOnDisk: 磁盘中最大缓存对象数,若是0表示无穷大
			eternal: Element是否永久有效,一但设置了,timeout将不起作用
			overflowToDisk: 当内存中Element数量达到maxElementsInMemory时,Ehcache将会Element写到磁盘中
			timeToIdleSeconds: 设置Element在失效前允许的闲置时间。仅当element不是永久有效时使用
			timeToLiveSeconds: 设置Element在失效前允许存活时间。最大时间介于创建时间和失效时间之间。仅当element不是永久有效时使用
			diskExpiryThreadIntervalSeconds: 磁盘失效线程运行时间间隔,默认是120秒
			memoryStoreEvictionPolicy: 当达到maxElementsInMemory限制时,Ehcache将会根据指定的策略去清理内存。默认策略是LRU
	 -->
	<defaultCache
		name="defaultCache"
		maxElementsInMemory="1000"
		maxElementsOnDisk="10000000"
		eternal="true"
		overflowToDisk="true"
		timeToIdleSeconds="120"
		timeToLiveSeconds="120"
		diskExpiryThreadIntervalSeconds="120"
		memoryStoreEvictionPolicy="LRU">
	</defaultCache>
</ehcache>
第三步:在需要使用缓存的映射文件中加入cache节点。
<cache type="org.mybatis.caches.ehcache.EhcacheCache"/>
加入了cache后,该映射文件下的所有查询操作都会使用缓存。如果不需要启用缓存,可以在statement中指定useCache="false"属性即可。

值得注意的是,缓存结果的对象需要实现Serializable接口,也就是必须是可序列化的。
第四步:测试。
@Test
public void testCache() {
	StudentMapper studentMapper = session.getMapper(StudentMapper.class);
	Student s1 = studentMapper.selectStudentById(1);
	session.close();
	studentMapper = MyBatisUtil.getSession().getMapper(StudentMapper.class);
	Student s2 = studentMapper.selectStudentById(1);
	System.out.println("是同一个对象吗?" + (s1 == s2));
}
运行上面程序可以看到,控制台输出true,代表s1和s2是同一个对象。
值得注意的是,第一次查询后需要手动关闭session,这样才会写入缓存文件。
关于缓存更详细介绍,可以参考这篇文章 https://blog.51cto.com/zero01/2103911
七、MyBatis事务管理机制
MyBatis的事务管理分为两种形式:
- 使用JDBC事务管理机制,即使用java.sql.Connection对象完成事物的提交、回滚、关闭等操作;
- 使用MANAGED的事务管理机制。在这种机制下,MyBatis自己不会实现事务管理,而是让程序的容器来实现对事务的管理;
如何配置事务管理?
在MyBatis配置文件的enviorment节点中进行配置。例如:
<transactionManager type="jdbc"/>
enviorment节点用于配置数据库的相关信息,它的子节点transcationManager用于指定使用的事务管理机制。
一般来说,如果只是单独使用mybatis来构建本地程序,可以将事务管理设置为JDBC。但是,如果使用mybatis构建WEB应用,我们可以将事务管理设置为MANAGED,即MyBatis自己不管理事务,而是由容器负责管理事务。
