双击退出,Notitfcation 通知
双击退出
Notification通知
定义及用法
常用的方法:
setSmallIcon() 与 setLargeIcon()
发送一个最简单的通知(无交互)
自定义通知
进度条通知
通知分组
锁屏通知
安卓7.0直接回复通知
通知的样式
PendingIntent
说明
构造方法说明
PendingIntent 具有以下几种 flag:
发送一个带交互的通知
设置 Notification 的通知效果 (震动需要真机)
更新 Notification
取消 Notification
双击退出
实现的基本原理就是,当按下BACK键时,会被onKeyDown捕获,判断是BACK键,则执行exit方法。
判断用户两次按键的时间差是否在一个预期值之内,是的话直接直接退出,不是的话提示用户再按一次后退键退出。
 /**
     * 该方法用来捕捉手机键盘被按下的事件。
     * @param keyCode  该参数指的是被按下的键的键盘码,手机键盘中每个按钮都会有其对应的键盘码,
     *                 在应用程序都是通过键盘码才知道用户按下的是哪个键。
     * @param event    当用户按下按键时,系统会自动将事件封装成KeyEvent对象供应用程序使用。
     *                 按键事件KeyEvent 按键事件有多种常量类型,比如 KEYCODE_BACK
     * @return
     */

    @Override
    public boolean onKeyDown(int keyCode, KeyEvent event) {
        if (keyCode == KeyEvent.KEYCODE_BACK ){
            //判断用户两次按键的时间差是否在一个预期值之内,是的话直接直接退出,不是的话提示用户再按一次后退键退出。
            if(System.currentTimeMillis() - exitTime > 2000){
                Toast.makeText(this,"在点就退出",Toast.LENGTH_SHORT).show();
                exitTime = System.currentTimeMillis();
                //当返回true时,表示已经完整地处理了这个事件,并不希望其他的回调方法再次进行处理,而当返回false时,
                // 表示并没有完全处理完该事件,更希望其他回调方法继续对其进行处理,
                return true;
            }else{
                finish(); //结束当前activity
            }
        }
        return super.onKeyDown(keyCode, event);
    }
Notification通知
定义及用法
定义:是在系统的通知栏中呈现多样式持久性消息的类
1、在通知栏显示
2、消息持久性
3、种类多样性

用处:
显示客户端的推送消息(如有新版本发布、广告、推荐新闻等)
显示正在进行的事物(如音乐播放器、版本更新时候的下载进度等)
显示接收到短消息,即时消息等信息(如QQ、微信、新浪、短信)
常用的方法:


setSmallIcon() 与 setLargeIcon()
当 setSmallIcon() 与 setLargeIcon() 同时存在时, smallIcon 显示在通知的右下角, largeIcon 显示在左侧;当只设置 setSmallIcon() 时, smallIcon 显示在左侧。

发送一个最简单的通知(无交互)
package com.example.day003;

import android.app.Notification;
import android.app.NotificationManager;
import android.content.Context;
import android.support.v7.app.AppCompatActivity;
import android.os.Bundle;
import android.view.View;
import android.widget.Button;


/**
 * 任务栏通知
 * 风一样的男人
 */
public class NotificationActivity extends AppCompatActivity {
    private Button sendMessageId;
    @Override
    protected void onCreate(Bundle savedInstanceState) {
        super.onCreate(savedInstanceState);
        setContentView(R.layout.activity_notification);

        sendMessageId = findViewById(R.id.send_message_id);
        sendMessageId.setOnClickListener(new View.OnClickListener() {
            @Override
            public void onClick(View v) {
                //定义一个发送通知的方法
                sendNotification();
            }
        });
    }

    /**
     * 最简单的一个通知
     */
    private void sendNotification() {
        //创建构造者
        Notification.Builder builder = new Notification.Builder(this);
        //设置属性   setSamllIcon该属性必须设置
        builder.setSmallIcon(R.mipmap.ic_launcher); //必须设置
        builder.setContentTitle("我是标题"); //建议设置
        builder.setContentText("我是内容"); //建议设置

//        builder.setTicker("我是提示信息");
//        builder.setContentInfo("我是附加信息"); //7.0以后已经过期

        //创建对象.发送的就是这个对象
        Notification build = builder.build();
        //获取通知管理器,负责发通知、清除通知等
        NotificationManager notificationManager = (NotificationManager) getSystemService(Context.NOTIFICATION_SERVICE);
        //TODO :发送通知
        //参数一 id 通知的id(稍后介绍意义)   参数二 通知对象
        notificationManager.notify(1,build);
    }
}
自定义通知
其实就是加载一个布局. 加载布局用到了 RemoteViews 代码中有详细注释.
RemoteViews设置的布局文件并不支持所有的View,以下是RemoteViews所支持的View:
布局
FrameLayout,LinearLayout,RelativeLayout,GridLayout
组件
Button,ImageView,ImageButton,TextView,ProgressBar,ListView,GridView,StackView,ViewStub,AdapterViewFlipper,ViewFlipper,AnalogClock,Chronometer
package com.example.day003;

import android.app.Notification;
import android.app.NotificationManager;
import android.app.PendingIntent;
import android.content.Context;
import android.content.Intent;
import android.support.v7.app.AppCompatActivity;
import android.os.Bundle;
import android.view.View;
import android.widget.Button;
import android.widget.RemoteViews;

import java.math.RoundingMode;


/**
 * 任务栏通知
 * 风一样的男人
 */
public class NotificationActivity extends AppCompatActivity {
    private Button sendMessageId;
    @Override
    protected void onCreate(Bundle savedInstanceState) {
        super.onCreate(savedInstanceState);
        setContentView(R.layout.activity_notification);

        sendMessageId = findViewById(R.id.send_message_id);
        sendMessageId.setOnClickListener(new View.OnClickListener() {
            @Override
            public void onClick(View v) {
                //定义一个最简单通知的方法(无交互)
//                sendNotification();
                //定义一个有交互的通知的方法
//                sendActionNotification();
                //自定义一个通知
                userNotification();
            }
        });

    }

    /**
     * 自定义一个通知
     */
    private void userNotification() {
        Notification.Builder builder = new Notification.Builder(this);
        builder.setSmallIcon(R.mipmap.ic_launcher);
        builder.setContentText("内容");
        builder.setContentTitle("头部");
        /**
         * RemoteViews是可以在别的进程(系统进程)中显示的View,并且提供了一组跨进程更新它界面的操作
         * 两个参数,第一个布局所在包名
         * 第二个是布局Id
         * 布局文件是自己创建的,随便一个线性布局,加一个textView和ImageView即可
         */
        RemoteViews remoteViews = new RemoteViews(getPackageName(), R.layout.simple_layout);
        /**
         * 由于运行在不同的进程中,所以RemoteViews无法像正常的View一样更新UI。
         * RemoteViews提供了一系列的set方法,但是这些set方法只是View全部方法的子集。
         */

        //都是两个参数,第一个参数相当于findViewById,第二个是设置一个值.
        remoteViews.setTextViewText(R.id.rm_text_id,"十七岁的老冯");
        remoteViews.setImageViewResource(R.id.rm_image_id,R.mipmap.ic_launcher);

        //builder.setContent(remoteViews);//过期
         builder.setCustomContentView(remoteViews)
        Notification build = builder.build();

        NotificationManager notificationManager = (NotificationManager) getSystemService(Context.NOTIFICATION_SERVICE);
        notificationManager.notify(2,build);

    }
进度条通知
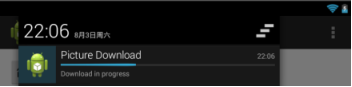
//进度条通知
    private void progress_notification() {
        final NotificationManager manager= (NotificationManager)
                getSystemService(Context.NOTIFICATION_SERVICE);
        //TODO 2:创建构造者
        final Notification.Builder builder = new Notification.Builder(this);
        //TODO 3:设置属性   setSamllIcon该属性必须设置
        builder.setSmallIcon(R.mipmap.ic_launcher);//设置小图标
        builder.setContentTitle("我是标题");

        //TODO 设置进度条
        //参数一 最大值 参数二:当前进度 参数三 是否模糊
        //    builder.setProgress(100,50,true);
        final Timer timer=new Timer();
        timer.schedule(new TimerTask() {
            int progress;
            @Override
            public void run() {
                //1.模拟下载过程
                builder.setContentText("正在下载,当前进度"+progress);
                builder.setProgress(100,progress,false);//确定的进度条
                progress+=10;
                manager.notify(6,builder.build());
                if(progress==100){
                    //2.安装过程
                    builder.setContentText("正在安装");
                    builder.setProgress(0,0,true);//安装模糊
                    manager.notify(6,builder.build());
                    try {
                        Thread.sleep(7000);//模拟安装过程
                    } catch (InterruptedException e) {
                        e.printStackTrace();
                    }
                    //3.安装完成
                    manager.cancel(6);//取消置顶的通知
                    timer.cancel();
                }
            }
        }, 0, 1000);
    }
通知分组
将App中的相同类型的消息可以合并.
 private void groupNotification() {
        NotificationManager manager = (NotificationManager) getSystemService(NOTIFICATION_SERVICE);
        Notification.Builder mBuilder0 = new Notification.Builder(this);
        Notification.Builder mBuilder1 = new Notification.Builder(this);
        Notification.Builder mBuilder2 = new Notification.Builder(this);
        Notification.Builder mBuilder3 = new Notification.Builder(this);

        //消息分组属性,group相同才能分到一组
        mBuilder0.setGroup("2");
        mBuilder0.setSmallIcon(R.mipmap.ic_launcher);
        //被设置setGroupSummary为true的消息会隐藏内容,其内容会显示另外分组成员信息.
        mBuilder0.setGroupSummary(true);
        mBuilder0.setContentText("11111111");
        mBuilder0.setContentTitle("222222222");

        mBuilder1.setGroup("2");
        mBuilder1.setSmallIcon(R.mipmap.ic_launcher);
//        mBuilder1.setGroupSummary(true);
        mBuilder1.setContentText("333333");
        mBuilder1.setContentTitle("44444444");


        mBuilder2.setGroup("2");
        mBuilder2.setSmallIcon(R.mipmap.ic_launcher);
//        mBuilder2.setGroupSummary(true);
        mBuilder2.setContentText("55555555555555555");
        mBuilder2.setContentTitle("66666666666");

        mBuilder3.setGroup("2");
        mBuilder3.setSmallIcon(R.mipmap.ic_launcher);
//        mBuilder3.setGroupSummary(true);
        mBuilder3.setContentText("77777");
        mBuilder3.setContentTitle("8888888");


        manager.notify(0,mBuilder0.build());
        manager.notify(1,mBuilder1.build());
        manager.notify(2,mBuilder2.build());
        manager.notify(3,mBuilder3.build());

    }
锁屏通知
Android 5.0(API level 21)开始,通知可以显示在锁屏上,通过设置选择是否允许敏感的通知内容显示在安全的锁屏上。
//builde的时候
//通过 setVisibility() 方法设置即可
.setVisibility(VISIBILITY_PUBLIC)
.build();
setVisibility() 方法共有三个选值:
1.VISIBILITY_PRIVATE : 显示基本信息,如通知的图标,但隐藏通知的全部内容;
2.VISIBILITY_PUBLIC : 显示通知的全部内容;
3.VISIBILITY_SECRET : 不显示任何内容,包括图标。
安卓7.0直接回复通知
    private void responseNotification2() {
//       其中RESULT_KEY是获取回复的内容,setLabel设置的值就是EditText的hint值
        RemoteInput remoteInput = new RemoteInput.Builder("KEY").setLabel("回复通知").build();
        Intent intent = new Intent(this, Main2Activity.class);
        PendingIntent pendingIntent = PendingIntent.getService(this,1,intent,PendingIntent.FLAG_CANCEL_CURRENT);

        NotificationCompat.Action action = new NotificationCompat.Action.Builder(R.mipmap.ic_launcher,"回复",pendingIntent).addRemoteInput(remoteInput).build();
//        其中这个Builder需要传递四个参数,第一个就是logo图片,第二个类似于标签我们要点击的。第三个就是要做的动作intent.最后把我们创建的remoteInput加入进来。

        NotificationCompat.Builder builder = new NotificationCompat.Builder(this,"1")
                .setSmallIcon(R.mipmap.ic_launcher)
                .setContentTitle("请问需要银行贷款吗?")
                .setContentText("您好,我是XX银行的XX经理, 请问你需要办理银行贷款吗?")
                .setColor(Color.CYAN)
                .setPriority(Notification.PRIORITY_MAX) // 设置优先级为Max,则为悬浮通知
                .addAction(action) // 设置回复action
                .setAutoCancel(true)
                .setWhen(System.currentTimeMillis())
                .setDefaults(Notification.DEFAULT_ALL) // 想要悬浮出来, 这里必须要设置
                .setCategory(Notification.CATEGORY_MESSAGE);

        NotificationManager nm = (NotificationManager) getSystemService(Context.NOTIFICATION_SERVICE);
//        NotificationManager nm = getSystemService(NotificationManager.class);
        Notification notification = builder.build();
        nm.notify(1,notification);


----------------------------------------------------
从这里开始,以下方法在service中其中,以后课程会讲到.

        Bundle resultsFromIntent = RemoteInput.getResultsFromIntent(intent);
        Log.i(TAG, "responseNotification2: "+resultsFromIntent);
        //根据key拿回复的内容
        Log.i(TAG, "responseNotification2: ddd");
        if (null!=resultsFromIntent){
            String resultString = resultsFromIntent.getString("KEY");
            //处理回复内容
            Log.i(TAG, "responseNotification2: ");
            reply(resultString);
        }
    }

    private void reply(final String resultString) {
        new Thread(new Runnable() {
            @Override
            public void run() {
                SystemClock.sleep(1000);
                Log.i(TAG, "run: "+Main2Activity.class.getSimpleName()+resultString);
                onReply();
            }
        }).start();
    }

    private void onReply() {
        final NotificationManager nm = getSystemService(NotificationManager.class);
        final Handler handler = new Handler(getMainLooper());
        handler.post(new Runnable() {
            @Override
            public void run() {
                // 更新通知为“回复成功”
                Notification notification = new NotificationCompat.Builder(NotificationActivity.this,"1")
                        .setSmallIcon(R.mipmap.ic_launcher)
                        .setContentText("回复成功")
                        .build();
                nm.notify(1, notification);
            }
        });

        // 最后将通知取消
        handler.postDelayed(new Runnable() {
            @Override
            public void run() {
                nm.cancel(1);
            }
        }, 2000);
    }
通知样式
大图通知 和 列表通知
 /**
     * 通知的样式
     */
    private void notificationStyle() {
        NotificationManager manager = (NotificationManager) getSystemService(NOTIFICATION_SERVICE);
        Notification.Builder builder = new Notification.Builder(this);
        builder.setSmallIcon(R.mipmap.ic_launcher);
        builder.setContentTitle("列表通知");
//        builder.setContentTitle("大图通知");

        //通知内容为大图片
        Notification.BigPictureStyle bigPictureStyle = new Notification.BigPictureStyle();
        bigPictureStyle.bigPicture(BitmapFactory.decodeResource(getResources(),R.mipmap.ic_launcher));

        //通知内容为列表显示
        Notification.InboxStyle inboxStyle = new Notification.InboxStyle();
        inboxStyle.addLine("李白");
        inboxStyle.addLine("猴子");
        inboxStyle.addLine("露娜");

//        builder.setStyle(bigPictureStyle);
        builder.setStyle(inboxStyle);
        //不能跨APP
        Intent intent = new Intent(this, MainActivity.class);
        //intent - PendingIntent
        PendingIntent intent1 = PendingIntent.getActivity(this, 10, intent, PendingIntent.FLAG_ONE_SHOT);
        builder.setFullScreenIntent(intent1, true);

        builder.setContentIntent(intent1);
        manager.notify(9, builder.build());
    }
PendingIntent
说明
PendingIntent 是一种特殊的 Intent ,字面意思可以解释为延迟的 Intent ,用于在某个事件结束后执行特定的 Action 。从上面带 Action 的通知也能验证这一点,当用户点击通知时,才会执行。
PendingIntent 是 Android 系统管理并持有的用于描述和获取原始数据的对象的标志(引用)。也就是说,即便创建该PendingIntent对象的进程被杀死了,这个PendingItent对象在其他进程中还是可用的。
日常使用中的短信、闹钟等都用到了 PendingIntent
构造方法说明
//获取一个用于启动 Activity 的 PendingIntent 对象
public static PendingIntent getActivity(Context context, int requestCode, Intent intent, int flags);

//获取一个用于启动 Service 的 PendingIntent 对象
public static PendingIntent getService(Context context, int requestCode, Intent intent, int flags);

//获取一个用于向 BroadcastReceiver 广播的 PendingIntent 对象
public static PendingIntent getBroadcast(Context context, int requestCode, Intent intent, int flags)
PendingIntent 具有以下几种 flag:
FLAG_CANCEL_CURRENT:
如果当前系统中已经存在一个相同的 PendingIntent 对象,那么就将先将已有的 PendingIntent 取消,然后重新生成一个 PendingIntent 对象。

FLAG_NO_CREATE:
如果当前系统中不存在相同的 PendingIntent 对象,系统将不会创建该 PendingIntent 对象而是直接返回 null 。

FLAG_ONE_SHOT:
该 PendingIntent 只作用一次。

FLAG_UPDATE_CURRENT:
如果系统中已存在该 PendingIntent 对象,那么系统将保留该 PendingIntent 对象,但是会使用新的 Intent 来更新之前 PendingIntent 中的 Intent 对象数据,例如更新 Intent 中的 Extras 。
发送一个带交互的通知
package com.example.day003;

import android.app.Notification;
import android.app.NotificationManager;
import android.app.PendingIntent;
import android.content.Context;
import android.content.Intent;
import android.support.v7.app.AppCompatActivity;
import android.os.Bundle;
import android.view.View;
import android.widget.Button;


/**
 * 任务栏通知
 * 风一样的男人
 */
public class NotificationActivity extends AppCompatActivity {
    private Button sendMessageId;
    @Override
    protected void onCreate(Bundle savedInstanceState) {
        super.onCreate(savedInstanceState);
        setContentView(R.layout.activity_notification);

        sendMessageId = findViewById(R.id.send_message_id);
        sendMessageId.setOnClickListener(new View.OnClickListener() {
            @Override
            public void onClick(View v) {
                //定义一个最简单通知的方法(无交互)
//                sendNotification();
                //定义一个有交互的通知的方法
                sendActionNotification();
            }
        });

    }

    /**
     * 可交互
     */
    private void sendActionNotification() {
        Intent intent = new Intent(this, Main2Activity.class);
        /**
         * 可简单一个延时的intent 当点击通知栏的信息时,才发送intent
         * 第一个参数是上下文
         * 第二个参数是 请求码,多个请求码不一样即可
         * 第三个参数是 intent
         * 第四个参数是 flags 可写0;
         */
        PendingIntent activity = PendingIntent.getActivity(this, 0, intent, PendingIntent.FLAG_UPDATE_CURRENT);
        Notification.Builder builder = new Notification.Builder(this);
        builder.setSmallIcon(R.mipmap.ic_launcher);
        builder.setContentTitle("我是标题");
        builder.setContentText("我是内容");

//        builder.setAutoCancel(true); //点击消息通知取消
        //设置意图对象
        builder.setContentIntent(activity);
        Notification notification = builder.build();

        //构造管理者
        NotificationManager notificationManager = (NotificationManager) getSystemService(Context.NOTIFICATION_SERVICE);
        notificationManager.notify(1,notification);

    }
}
设置 Notification 的通知效果 (震动需要真机)
Notification 有震动、响铃、呼吸灯三种响铃效果,可以通过 setDefaults(int defaults) 方法来设置。 Default 属性有以下四种,一旦设置了 Default 效果,自定义的效果就会失效.
 // 在builder的时候加上如下属性即可.
 builder.setDefaults(Notification.DEFAULT_ALL);
//设置系统默认提醒效果,一旦设置默认提醒效果,则自定义的提醒效果会全部失效。具体可看源码
//添加默认震动效果,需要申请震动权限
//<uses-permission android:name="android.permission.VIBRATE" />
Notification.DEFAULT_VIBRATE

//添加系统默认声音效果,设置此值后,调用setSound()设置自定义声音无效
Notification.DEFAULT_SOUND

//添加默认呼吸灯效果,使用时须与 Notification.FLAG_SHOW_LIGHTS 结合使用,否则无效
Notification.DEFAULT_LIGHTS

//添加上述三种默认提醒效果
Notification.DEFAULT_ALL
更新 Notification
更新通知很简单,只需要再次发送相同 ID 的通知即可,如果之前的通知还未被取消,则会直接更新该通知相关的属性;如果之前的通知已经被取消,则会重新创建一个新通知。
取消 Notification
取消通知有如下 5 种方式:
点击通知栏的清除按钮,会清除所有可清除的通知
设置了 setAutoCancel() 或 FLAG_AUTO_CANCEL 的通知,点击该通知时会清除它
通过 NotificationManager 调用 cancel(int id) 方法清除指定 ID 的通知
通过 NotificationManager 调用 cancel(String tag, int id) 方法清除指定 TAG 和 ID 的通知
通过 NotificationManager 调用 cancelAll() 方法清除所有该应用之前发送的通知
如果你是通过 NotificationManager.notify(String tag, int id, Notification notify) 方法创建的通知,那么只能通过 NotificationManager.cancel(String tag, int id) 方法才能清除对应的通知,调用NotificationManager.cancel(int id) 无效。
安卓8.0以上通知的写法
if(Build.VERSION.SDK_INT >= Build.VERSION_CODES.O){
            NotificationManager notificationManager = (NotificationManager) getSystemService(Context.NOTIFICATION_SERVICE);
            NotificationChannel no1 = new NotificationChannel("100", "通知1", NotificationManager.IMPORTANCE_HIGH);
            notificationManager.createNotificationChannel(no1);

            NotificationCompat.Builder builder = new NotificationCompat.Builder(this,"100");

            RemoteViews remoteViews = new RemoteViews(getPackageName(),R.layout.notify_layout);
            Intent intent = new Intent(this, MainActivity.class);
            PendingIntent activity = PendingIntent.getActivity(this, 0, intent, PendingIntent.FLAG_UPDATE_CURRENT);
            //不能在家这样的属性了,否则没有效果
//            remoteViews.setImageViewResource(R.id.start_id,R.mipmap.ic_launcher);
            remoteViews.setOnClickPendingIntent(R.id.start_id,activity);

            builder.setContentTitle("标题")
                    .setContentText("内容")
                    .setAutoCancel(true)
                    .setCustomContentView(remoteViews)
                    .setSmallIcon(R.mipmap.ic_launcher);

            Notification build = builder.build();
            notificationManager.notify(1,build);
        }
各个属性演示(进阶版,慢慢看)
/**
* 最普通的通知效果
*/
private void showNotifyOnlyText() {
   NotificationCompat.Builder builder = new NotificationCompat.Builder(this)
           .setSmallIcon(R.mipmap.ic_launcher)
           .setLargeIcon(mLargeIcon)
           .setContentTitle("我是只有文字效果的通知")
           .setContentText("我没有铃声、震动、呼吸灯,但我就是一个通知");
   mManager.notify(1, builder.build());
}

/**
* 展示有自定义铃声效果的通知
* 补充:使用系统自带的铃声效果:Uri.withAppendedPath(Audio.Media.INTERNAL_CONTENT_URI, "6");
*/
private void showNotifyWithRing() {
   NotificationCompat.Builder builder = new NotificationCompat.Builder(this)
           .setSmallIcon(R.mipmap.ic_launcher)
           .setContentTitle("我是伴有铃声效果的通知")
           .setContentText("美妙么?安静听~")
           //调用系统默认响铃,设置此属性后setSound()会无效
           //.setDefaults(Notification.DEFAULT_SOUND)
           //调用系统多媒体裤内的铃声
           //.setSound(Uri.withAppendedPath(MediaStore.Audio.Media.INTERNAL_CONTENT_URI,"2"));
           //调用自己提供的铃声,位于 /res/values/raw 目录下
           .setSound(Uri.parse("android.resource://com.littlejie.notification/" + R.raw.sound));
   //另一种设置铃声的方法
   //Notification notify = builder.build();
   //调用系统默认铃声
   //notify.defaults = Notification.DEFAULT_SOUND;
   //调用自己提供的铃声
   //notify.sound = Uri.parse("android.resource://com.littlejie.notification/"+R.raw.sound);
   //调用系统自带的铃声
   //notify.sound = Uri.withAppendedPath(MediaStore.Audio.Media.INTERNAL_CONTENT_URI,"2");
   //mManager.notify(2,notify);
   mManager.notify(2, builder.build());
}

/**
* 展示有震动效果的通知,需要在AndroidManifest.xml中申请震动权限
* <uses-permission android:name="android.permission.VIBRATE" />
* 补充:测试震动的时候,手机的模式一定要调成铃声+震动模式,否则你是感受不到震动的
*/
private void showNotifyWithVibrate() {
   //震动也有两种设置方法,与设置铃声一样,在此不再赘述
   long[] vibrate = new long[]{0, 500, 1000, 1500};
   NotificationCompat.Builder builder = new NotificationCompat.Builder(this)
           .setSmallIcon(R.mipmap.ic_launcher)
           .setContentTitle("我是伴有震动效果的通知")
           .setContentText("颤抖吧,凡人~")
           //使用系统默认的震动参数,会与自定义的冲突
           //.setDefaults(Notification.DEFAULT_VIBRATE)
           //自定义震动效果
           .setVibrate(vibrate);
   //另一种设置震动的方法
   //Notification notify = builder.build();
   //调用系统默认震动
   //notify.defaults = Notification.DEFAULT_VIBRATE;
   //调用自己设置的震动
   //notify.vibrate = vibrate;
   //mManager.notify(3,notify);
   mManager.notify(3, builder.build());
}

/**
* 显示带有呼吸灯效果的通知(####)
*/
private void showNotifyWithLights() {
   final NotificationCompat.Builder builder = new NotificationCompat.Builder(this)
           .setSmallIcon(R.mipmap.ic_launcher)
           .setContentTitle("我是带有呼吸灯效果的通知")
           .setContentText("一闪一闪亮晶晶~")
           //ledARGB 表示灯光颜色、 ledOnMS 亮持续时间、ledOffMS 暗的时间
           .setLights(0xFF0000, 3000, 3000);
   Notification notify = builder.build();
   //只有在设置了标志符Flags为Notification.FLAG_SHOW_LIGHTS的时候,才支持呼吸灯提醒。
   notify.flags = Notification.FLAG_SHOW_LIGHTS;
   //设置lights参数的另一种方式
   //notify.ledARGB = 0xFF0000;
   //notify.ledOnMS = 500;
   //notify.ledOffMS = 5000;
   //使用handler延迟发送通知,因为连接usb时,呼吸灯一直会亮着
   Handler handler = new Handler();
   handler.postDelayed(new Runnable() {
       @Override
       public void run() {
           mManager.notify(4, builder.build());
       }
   }, 10000);
}

/**
* 显示带有默认铃声、震动、呼吸灯效果的通知
* 如需实现自定义效果,请参考前面三个例子
*/
private void showNotifyWithMixed() {
   NotificationCompat.Builder builder = new NotificationCompat.Builder(this)
           .setSmallIcon(R.mipmap.ic_launcher)
           .setContentTitle("我是有铃声+震动+呼吸灯效果的通知")
           .setContentText("我是最棒的~")
           //等价于setDefaults(Notification.DEFAULT_SOUND | Notification.DEFAULT_LIGHTS | Notification.DEFAULT_VIBRATE);
           .setDefaults(Notification.DEFAULT_ALL);
   mManager.notify(5, builder.build());
}

/**
* 通知无限循环,直到用户取消或者打开通知栏(其实触摸就可以了),效果与FLAG_ONLY_ALERT_ONCE相反
* 注:这里没有给Notification设置PendingIntent,也就是说该通知无法响应,所以只能手动取消
*/
private void showInsistentNotify() {
   NotificationCompat.Builder builder = new NotificationCompat.Builder(this)
           .setSmallIcon(R.mipmap.ic_launcher)
           .setContentTitle("我是一个死循环,除非你取消或者响应")
           .setContentText("啦啦啦~")
           .setDefaults(Notification.DEFAULT_ALL);
   Notification notify = builder.build();
   notify.flags |= Notification.FLAG_INSISTENT;
   mManager.notify(6, notify);
}

/**
* 通知只执行一次,与默认的效果一样
*/
private void showAlertOnceNotify() {
   NotificationCompat.Builder builder = new NotificationCompat.Builder(this)
           .setSmallIcon(R.mipmap.ic_launcher)
           .setContentTitle("仔细看,我就执行一遍")
           .setContentText("好了,已经一遍了~")
           .setDefaults(Notification.DEFAULT_ALL);
   Notification notify = builder.build();
   notify.flags |= Notification.FLAG_ONLY_ALERT_ONCE;
   mManager.notify(7, notify);
}

/**
* 清除所有通知
*/
private void clearNotify() {
   mManager.cancelAll();
}
