Nginx+Lua+Redis实现广告缓存
1.1 Nginx
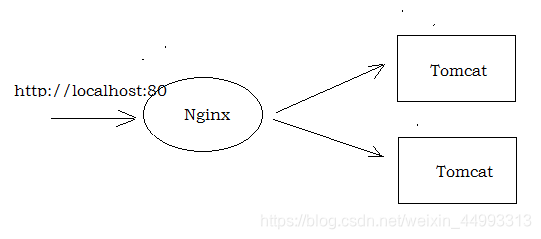
http服务器 : 可用 Nginx 来部署静态资源(html,css,js,img) ; ----> Tomcat的性能比Nginx要低;
反向代理服务器 : 也可以在项目中使用nginx来做代理服务器 , 代理后端的 tomcat 服务器;
负载均衡服务器 : 根据nginx内部的负载均衡策略, 来决定当前请求转发后端的哪个服务 ;
1.2 Openresty :ngx_openresty
介绍
Openresty 是基于Nginx的, 并且集成Lua脚本的一个高性能web服务器 ;

官网 : http://openresty.org/en/
1.3 广告缓存实现思路
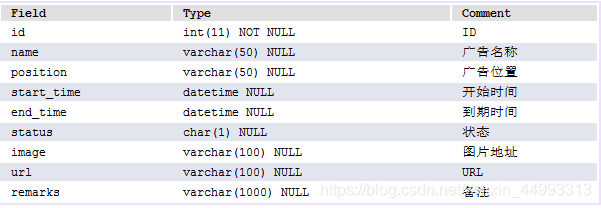
1). 表结构 tb_ad
2). 操作流程
A. 缓存预热
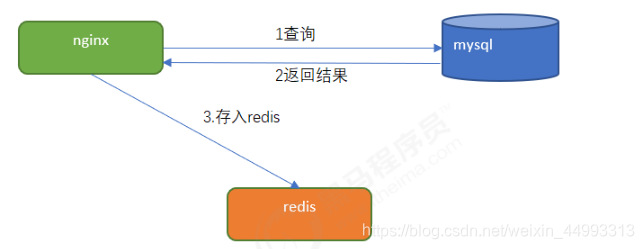
通过Nginx将MySQL数据库中的广告信息查询出来, 存入Redis ;
B. 二级缓存

有了二级缓存(Openresty本地缓存) , 就不用频繁的连接redis, 提高性能 ;
1.4 缓存预热
实现思路:
定义请求:用于查询数据库中的数据更新到redis中。
(1)连接mysql ,按照广告分类ID读取广告列表,转换为json字符串。
(2)连接redis,将广告列表json字符串存入redis
1). 编写一个lua脚本
位置 : /root/lua/ad_update.lua
ngx.header.content_type=“application/json;charset=utf8”
local cjson = require(“cjson”)
local mysql = require(“resty.mysql”)
local uri_args = ngx.req.get_uri_args()
local position = uri_args[“position”]
local db = mysql:new()
db:set_timeout(1000)
local props = {
host = “192.168.192.152”,
port = 3306,
database = “changgou_business”,
user = “root”,
password = “root”
}
local res = db:connect(props)
local select_sql = “select url,image from tb_ad where status =‘1’ and position=’”…position…"’ and start_time<= NOW() AND end_time>= NOW()"
res = db:query(select_sql)
db:close()
local redis = require(“resty.redis”)
local red = redis:new()
red:set_timeout(2000)
local ip =“192.168.192.152”
local port = 6379
red:connect(ip,port)
red:set(“ad_”…position,cjson.encode(res))
red:close()
ngx.say("{“flag”:true,“position”:""…position…""}")
查询mysql数据库, 将查询的广告数据, 同步到redis中 ;
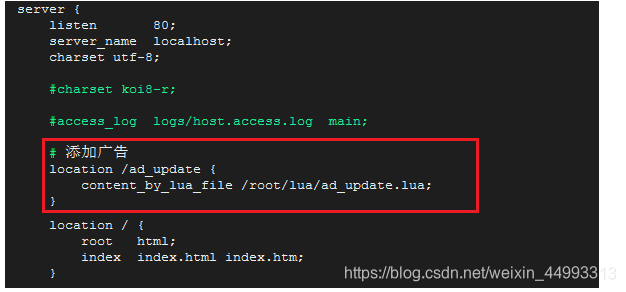
2). nginx中配置
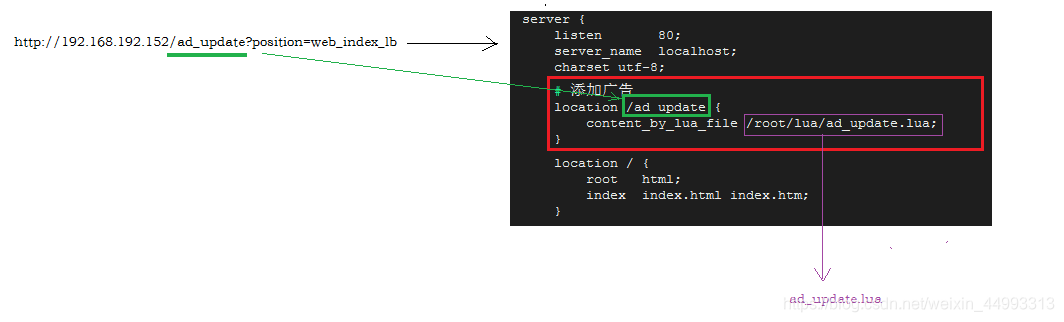
在nginx的虚拟主机 server 中增加以下配置 ; /usr/local/openresty/nginx/conf/nginx.conf
添加广告
location /ad_update {
content_by_lua_file /root/lua/ad_update.lua;
}
3). 测试
http://192.168.200.128/ad_update?position=web_index_lb
验证 :

流程
官方文档寻找方法
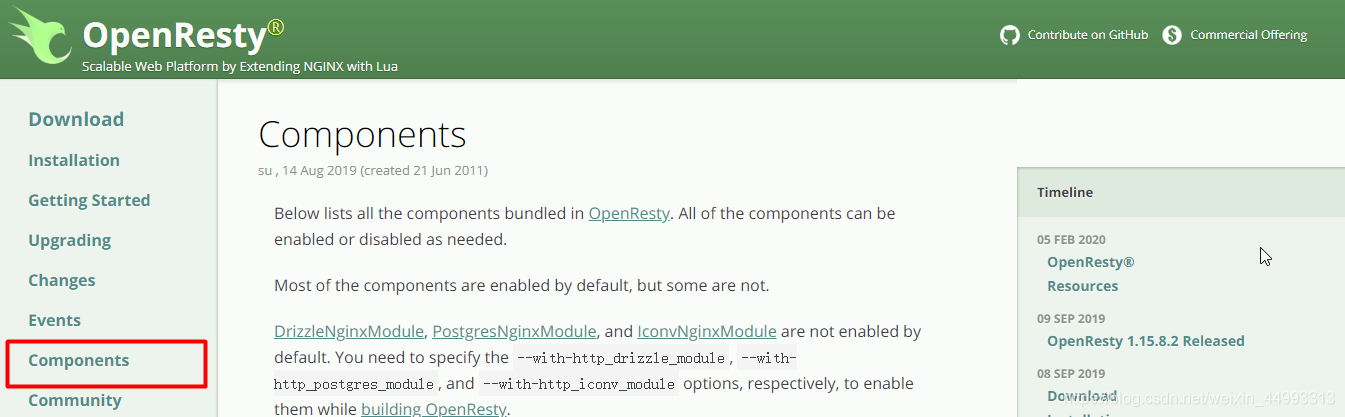
下拉找到具体的组件:
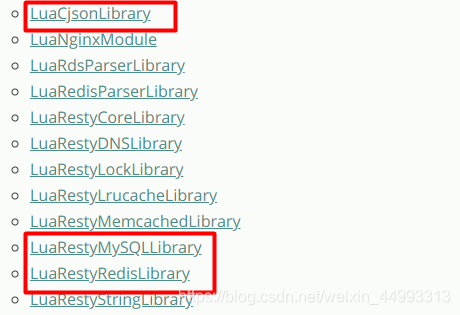
点击进入, 查看文档 :
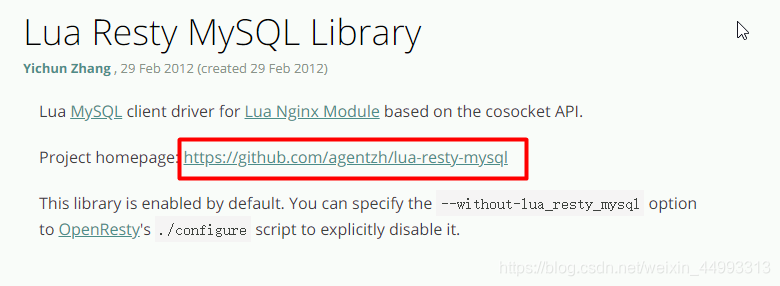
进入github:
就可以找到了 ;
1.5 缓存读取
1). 编写lua脚本
位置 : /root/lua/ad_read.lua
ngx.header.content_type=“application/json;charset=utf8”
local uri_args = ngx.req.get_uri_args();
local position = uri_args[“position”];
local redis = require(“resty.redis”);
local red = redis:new()
red:set_timeout(2000)
local ok, err = red:connect(“192.168.200.128”, 6379)
local rescontent=red:get(“ad_”…position)
ngx.say(rescontent)
red:close()
2). nginx中配置
读取广告
location /ad_read {
content_by_lua_file /root/lua/ad_read.lua;
}
3). 测试
http://192.168.192.152/ad_read?position=web_index_lb
1.6 Openresty本地缓存
作用 : 避免频繁连接redis, 而造成性能降低 ;
1). 修改/root/lua/ad_read.lua (先删除, 再添加新的)
逻辑 : 先查询本地缓存, 本地缓存没有数据, 查询redis , 再将redis查询结果缓存在本地缓存 ;
–设置响应头类型
ngx.header.content_type=“application/json;charset=utf8”
–获取请求中的参数position web_index_lb
local uri_args = ngx.req.get_uri_args();
local position = uri_args[“position”];
–获取本地缓存
local cache_ngx = ngx.shared.dis_cache;
–根据ID 获取本地缓存数据
local adCache = cache_ngx:get(‘ad_cache_’…position);
if adCache == “” or adCache == nil then
–引入redis库
local redis = require(“resty.redis”);
–创建redis对象
local red = redis:new()
–设置超时时间
red:set_timeout(2000)
–连接
local ok, err = red:connect(“192.168.192.152”, 6379)
–获取key的值
local rescontent=red:get(“ad_”…position)
–输出到返回响应中
ngx.say(rescontent)
–关闭连接
red:close()
--将redis中获取到的数据存入nginx本地缓存 ; 过期时间为10s
cache_ngx:set('ad_cache_'..position, rescontent, 10);
else
–nginx本地缓存中获取到数据直接输出
ngx.say(adCache)
end
2). 开启本地缓存 , 在nginx.conf中配置(配置在末尾)
#包含redis初始化模块
lua_shared_dict dis_cache 5m; #共享内存开启
注意: nginx.conf配置文件一旦修改, 就需要重新加载配置文件 ; nginx/sbin/nginx -s reload
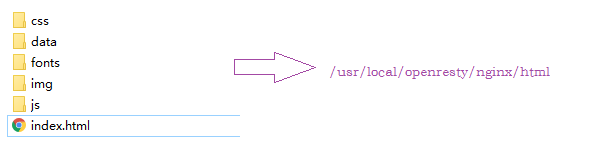
1.7 首页加载
需要将index.html首页及静态资源资源上传到服务 /usr/local/openresty/nginx/html:
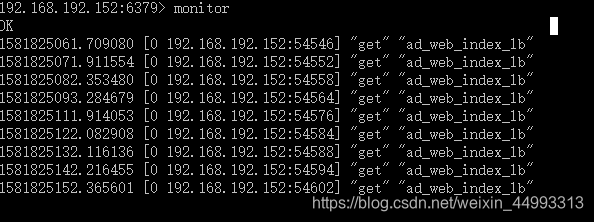
验证本地缓存的存在 :
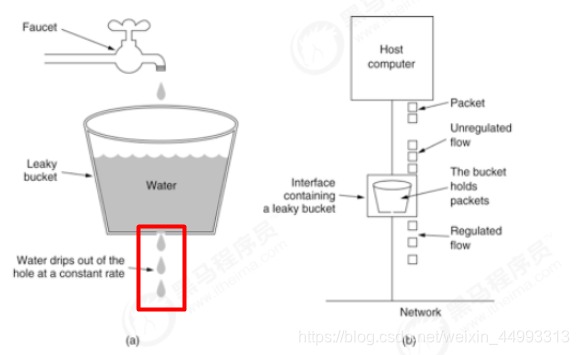
2. Nginx限流
Nginx的限流操作, 采用漏桶算法 ;
nginx配置文件nginx.conf中的配置 :
设置限流配置
limit_req_zone $binary_remote_addr zone=myRateLimit:10m rate=2r/s;
server {
listen 90;
server_name localhost;
charset utf-8;
location / {
limit_req zone=myRateLimit;
root html;
index index.html index.htm;
}
}
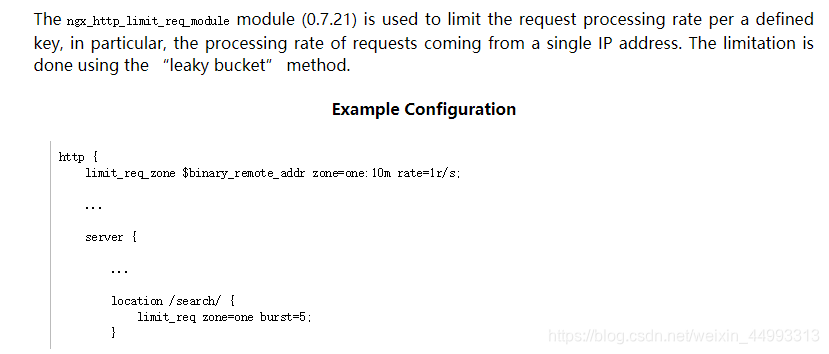
Nginx 官方文档:
Nginx限流突发流量控制:
server {
listen 90;
server_name localhost;
charset utf-8;
location / {
limit_req zone=myRateLimit burst=5 nodelay;
root html;
index index.html index.htm;
}
}
参考Nginx的官方文档: http://nginx.org/en/docs/http/ngx_http_limit_req_module.html